Advertisement
Quick Links
n
No load
speed
Max cutting depth
450
90'
Blade
diametcr
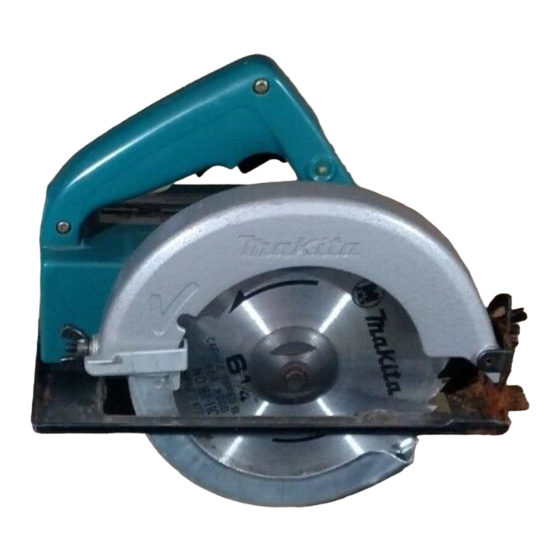
160 mm (6-1/4") MODEL
5600DW
With Fast Charger
Overall
Net
length
weight
INSTRUCTION MANUAL
SPEC IF I CAT1
0
N
S
160
m m
36
m m
5 5
m m
1,000
256
m m
3.5
kg
(6~1i4"1
I
i l 3 I 8 " i
I
12118"i
I
Rimin
I
1lO"i
I
17 7 lbsi
Battery cartridge 1000
1
Model
DClOOO
Fast charger
Dimensions
iL
x
W
x
HI
j N e t
weight
A C only
D C
211
mm
x
130
m m
x 88
m m
2 7
k q
I
16 lbsi
I
5 0 H r
6 0 H r
I
1 0 8 V
1
181/4 x 5 1 8
x 3 1 j 2 I
1 0 8 V
I
1 H i
*
Manufacturer reserves the right to change specifications without notice.
Note: Specifications may differ from country t o country.
Advertisement

Related Manuals for Makita 5600DW


Summary of Contents for Makita 5600DW
- Page 1 5600DW 160 mm (6-1/4") MODEL With Fast Charger INSTRUCTION MANUAL SPEC IF I CAT1 Max cutting depth Overall No load Blade length weight diametcr speed 1,000 (6~1i4"1 i l 3 I 8 " i 12118"i Rimin 1lO"i 17 7 lbsi...
-
Page 2: Important Safety Instructions
IMPORTANT SAFETY INSTRUCTIONS (For All Tools) WARNING: WHEN USING ELECTRIC TOOLS, BASIC SAFE- TY PRECAUTIONS SHOULD ALWAYS BE FOLLOWED TO REDUCE THE RISK OF FIRE, ELECTRIC SHOCK, AND PER- SONAL INJURY, INCLUDING THE FOLLOWING: READ ALL INSTRUCTIONS. KEEP WORK AREA CLEAN. Cluttered areas and benches invite injuries. CONSIDER WORK AREA ENVIRONMENT. - Page 3 KEYS REMOVE ADJUSTING AND WRENCHES. Form habit of checking t o see that keys and adjusting wrenches are removed from tool before turning it on. 15. AVOID UNINTENTIONAL STARTING. Don‘t carry plugged-in tool with finger when plugging in. on switch. Be sure switch is 16.
- Page 4 CAUTION To reduce risk of injury, charge only MAKITA type recharge- able batteries. Other types of batteries may burst causing personal injury and damage. Do not expose charger t o rain or snow.
-
Page 5: Additional Safety Rules
ADDITIONAL SAFETY RULES FOR CHARGER & BATTERY CARTRIDGE 1. Do not charge Battery Cartridge when temperature is BELOW 10°C (50°F) or ABOVE 40°C (104°F). 2. Do not attempt t o use a step-up transformer, an engine generator or DC power receptacle. Do not allow anything t o cover or clog the charger vents. - Page 6 Use Rip Fence. Always use a fence or straight edge guide when ripping. Guard Against Kickback. Kickback occurs when the saw stalls rapidly and is driven back towards the operator. Release switch immediately if blade binds or saw stalls. Keep blades sharp.
- Page 7 Place the wider portion of the saw base on that part of the workpiece which is solidly supported, not on the section that will fall off when the cut is made. examples, Fig. 4 illustrates the RIGHT way t o cut off the end of a board, and Fig.
-
Page 8: How To Use
HOW TO USE Installing removing battery cartridge *Use the Fast Charger DCIOOO to charge the Battery Cartridge 1000. The battery cartridge is housed within the circular saw. To remove the cartridge, turn the battery retainer in the arrow direction, grasp the cartridge caref u I I y and withdraw from the tool. - Page 9 Insert battery cartridge fully into the port Battery cartridge 1000 that it rests on the charger port floor. Check to see that the charging light comes on. When goes out, you may re- move the fully charged battery cartridge. After charging, unplug the charger from the power source.
- Page 10 The circular saw shaft accepts blades hole diameter of with 5/8". CAUTION : Use only the Makita socket wrench to secure the hex bolt on the blade. Adjusting cutting depth Loosen thB wing nut. Now the base may be moved up or down...
- Page 11 Bevel cutting 0Loosen the wing nut on the bevel scale plate on base front. Set for a desired angle (0 by tilting accordingly, - 45') then tighten the wing nut firmly. Fig. 12 CAUTION I t is extremely dangerous to cut with the saw when the wing nut has not been fully tightened.
-
Page 12: Maintenance
Always be sure that the tool is unplugged and the battery cartridge is removed before attempting to perform inspection or maintenance. To maintain product SAFETY and RELIABILITY, repairs, maintenance or adjustment should be performed by Makita Authorized or Factory Service Centers always using Makita replacement parts. - Page 13 ACCESSORIES CAUTION : These accessories or attachments are recommended for use with your Makita tool specified i n this use of manual. The any other accessories or attachments might present risk injury to persons. The accessories or attachments should be used only in the proper and intended manner,...
- Page 14 160 mm (6-1/4") CORDLESS CIRCULAR SAW Model 5600D Note: The switch and other part configuratlons may differ from country country.
- Page 15 8 5 E N 5fi00D MODEL $& ' , " I : , DESCRIPTION DESCRIPTION ' , " I : , MACHINE M A C E E Pan Head Screw M 5 r 5 5 1Wiftt Wri\hPrJ Hex Flange Head Bolt M S x l 7 IWith W a i h e r l MOW^ nouslrrrl Outer Flange...
- Page 16 MAKITA LIMITED ONE YEAR WARRANTY Warranty Policy Every Makita tool is thoroughly inspected and tested before leaving the factory. It is warranted t o be free of defects from workmanship and materials for the period of ONE YEAR from the date of original purchase.