Advertisement
Quick Links
Advertisement

Summary of Contents for Laney Linebacker LR5
- Page 2 2). Comply with Warnings: All warnings and instructions for these products should be adhered to. 3). Unpacking: On unpacking your product please check carefully for any signs of damage that may have occurred whilst in transit from the Laney factory to your dealer.
- Page 3 3). Déballage: Au déballage de votre produit vérifiez svp soigneusement tous les signes des dommages qui ont pu s'être produits tandis qu'en transit de l'usine de Laney à votre revendeur. Dans l'événement peu probable qu'il y a eu des dommages, réemballent svp votre unité dans son carton original et consultent votre revendeur.
- Page 4 3). Auspacken: Auf Auspacken Ihres Produktes überprüfen Sie bitte sorgfältig auf allen möglichen Zeichen des Schadens, die während bei dem Transport von der Laney Fabrik zu Ihrem Händler aufgetreten sein können. Im unwahrscheinlichen Ereignis, dass packen es Schaden gegeben hat, bitte Ihre Maßeinheit in seinem ursprünglichen Karton ein und konsultieren Ihren Händler.
- Page 5 3). Desempaque: Al desempaquetar su producto compruebe por favor cuidadosamente para saber si hay cualquier muestra del daño que pudo haber ocurrido mientras que en tránsito de la fábrica de Laney a su distribuidor autorizado. En el acontecimiento inverosímil que ha habido daño, reembala por favor su unidad en su cartón original y consulta a su distribuidor autorizado.
- Page 7 Power Supply, cables, etc. With its included Guitar Style strap, the amp is easily transported to wherever your sounds are needed the most. To enable you to get the most from your new Laney amp please read and retain this manual. Best wishes from all at Laney...
-
Page 8: Aux In Jack
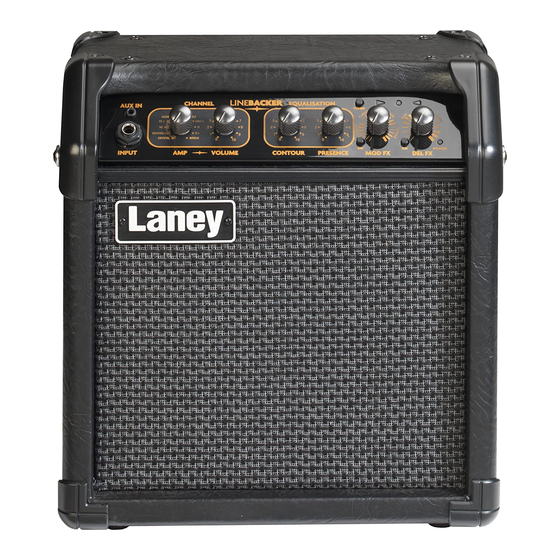
HEART+ HEART VOLT VOLT+ CRYSTAL CRYSTAL WRECK POWER AUX IN Jack TUNER & Button MOD FX on/off Button AMP/TUNER Selector Control MOD FX LED MOD FX Control-Chorus, Flanger, Phaser, Tremolo VOLUME Control TUNER LED CONTOUR Control DEL FX LED DEL FX on/off Button DEL FX Control-Delay, PRESENCE Control GUITAR INPUT Jack Socket... -
Page 9: Battery Compartment
POWER VOLUME PHONES/ Power To The Music DESIGNED AND ENGINEERED IN THE UK MADE IN CHINA. FABRIQUE EN CHINE. RECORD OUT WWW.LANEY.CO.UK BATTERY COMPARTMENT POWER ON LED PHONES/RECORD OUT Socket 12V DC Inlet Socket SECURITY SLOT POWER Switch MODEL & SERIAL No... - Page 10 DC Power Supply: Your LR5 comes supplied with a 12V DC Power Supply, this is easily fitted between the mains outlet and the amp. When using the amp with the power supply a few precautions should be followed: 1). Only use the DC Power supply that is supplied by the manufacturer. The use of other DC Power Supplies may cause damage or other problems.
- Page 11 If used incorrectly batteries may leak or explode and cause damage or injury, please take the following precautions. 1). Carefully follow the installation instructions for fitting new batteries, especially the polarity. 2). Avoid mixing new batteries with old or part used batteries. 3).
- Page 12 Now the power supply is connected or the batteries are fitted read on. POWER: This is the power ON/OFF switch. INPUT JACK: Connect your guitar here. Use only good quality cables to avoid poor sound quality. TUNER/AMP MODEL SELECTION: Choose from the various pre programmed amp models VOLUME CONTROL: Adjust the volume level of the instrument connected to the Input Jack.
- Page 13 MIC SOCKET & VOLUME CONTROL: Connect your microphone and adjust its volume. Use only dynamic microphones, electret & condenser mic’s will not work. HEADPHONE/RECORD OUT: A rear panel 6.35” stereo jack is provided for headphone use.
- Page 14 IN DEPTH 12V DC POWER SOCKET: Connect to your DC Power Supply. Make sure the voltage marked on the DC Power Supply matches the outlet voltage for your country! POWER: This is the main power ON/OFF switch. After switch on, all of the LED’s on the fascia light up momentarily, after a couple of seconds the LED’s indicate the previous settings used: i.e.
- Page 15 VOLUME CONTROL: Controls the volume of the instrument connected to the Input Jack. This control does not have any effect on any microphone connected to the amp. EQUALISATION CONTOUR/PRESENCE: As the name suggests this set of controls can have a great effect on your sound. Basically the Contour control is a mix of conventional Bass &...
- Page 16 MIC VOLUME: Controls the volume of the Mic connected to the Mic Input Socket. This control is independent from the instrument volume control on the fascia. MIC SOCKET: Connect a microphone here. Please note the following when a mic is connected to the amp: The location of the microphone relative to the amp could cause feedback as could the volume level being too high.
- Page 17 TUNER OPERATION: By pressing the Tuner Button the amplifier will Mute and the tuner function will be activated. The round LED will flash to indicate Tuner operation. The AMP selector should then be used to select each string in turn to be tuned. These are E,B,G,D,A,E and numbered 1-6 with 1 being the High “E”...
-
Page 18: Factory Reset
Amp Model Definitions Linebacker Tone Description Amp modelled Sounds Crystal Pure & Clean Clean channel of an LC amp - bright and full Crystal + Clean with Compression Clean channel of an LC amp - bright and full + a clean boost pedal to give more low end Clean &... - Page 19 It must be taken to an approved recycling centre according to the recommendations of the WEEE (Waste Electrical and Electronic Equipment) directive applicable in your country. In the interest of continued development, Laney reserves the right to amend product specification without prior notification.
- Page 20 Headphones N15039 SERIAL NO: Mixer Desk L Z B 1 2 3 4 Power To The Music WWW.LANEY.CO.UK Dynamic Mic Guitar...
- Page 23 NOTES...
- Page 24 ISSUE: 2.0...


