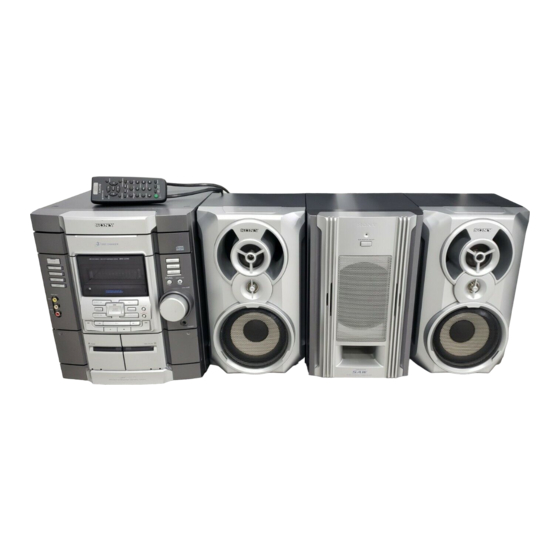
Sony MHC-GX40 Operating Instructions Manual
Hide thumbs
Also See for MHC-GX40:
- Manual (51 pages) ,
- Operating instructions manual (32 pages) ,
- Manual del instrucción (32 pages)
Table of Contents
Advertisement
S Ol_ISK.
,230.872,,_,,
Mini Hi.Fi
Component
System
Operating
Instructions
Owner's
Record
The model mid serial numbers
are located
on tile rear panel of the unit. Record the serial
number
in the space provided
below. Refer to them whenever
you call upon your Sony
dealer regarding
this product.
Model
No.
Serial No.
OmII_.AUOIO
_/'h_
__n_"
MHC-GX40/GX30/GX20
MHC-RG 110/RG33/RG22
MHC-RL3
© 2002 Sony Corporation
Advertisement
Table of Contents

Related Manuals for Sony MHC-GX40


Summary of Contents for Sony MHC-GX40
- Page 1 The model mid serial numbers are located on tile rear panel of the unit. Record the serial number in the space provided below. Refer to them whenever you call upon your Sony dealer regarding this product. Model Serial No. _/'h_ __n_"...
- Page 2 ENERGY STAR is a U.S. operating and maimenance As an ENERGY STAR _ Partner, (servicing) inslructions ill the Sony Coqloration has determined fitera_ure accompanying that this product meels the ENERGY appliance. STAR guidelines for energy et'tlciency. CAUTION The use of opdcal...
-
Page 3: Table Of Contents
Sound Adjustment Using the sub woofer ......20 Main unit ..........Adjusting the sound ......Sub woofer ..........Selecting the sound effect ....20 Remote Control ........Selecting the surround effect ....20 Getting Started Display Turning off the display Hooking up the system ...... - Page 4 Illustration number How to use this page Use this page to find the location of butlons and olher TUNER/BAND [] (13 15, 18) parts office system lha_ are mentioned in lhe text. Name of button/part Reference page I BUTTON DESCRIPTIONS I ALPHABETICAL ORDER I/(!)(power) [:(]...
- Page 5 (MHC-GX40 only) I ALPHABETICAL ORDER...
- Page 6 ALPHABETICAL ORDER BUTTON DESCRIPTIONS i,.i,> [_] CD []2_ (11, 12, 18) ON/OFF I_i{_ (20) CLEAR _] (12) PLAY MODE _2_ (11, 12, 17) I,,,i_l I]i] CLOCK/TIMER SELECT PRESET+_ _7] (13 II [i] (19, 23) REPEAT [_] (11) )"- [_1 CLOCK/TIMER SET [_/(!0, SLEEP _i_] (22)
-
Page 7: Sub Woofer
Perfbnn the lbllowing procedure to [] to hook up your system using the supplied cords and accessories. FM antenna loop antenna Sub woofer speaker* Front speaker (Right) Frontspeaker(Le_) * MHC-GX40 only Connect the front speakers. [] Connect the sub woofer speaker. (MHC-GX40 only) Connect the speaker cords to _l_e SPEAKER... -
Page 8: Hooking Up The System
Hooking up the system (continued) [] For models with a voltage selector, set VOLTAGE SELECTOR to the local power line voltage. [] Connect the FM/AM antennas. Depending on the model, the VOLTAGE Set up the AM loop antenna, then connect SELECTOR may dif{_r. - Page 9 Placing sub woofer (MHC-GX40 only) Since the human ear cannot detect the direction and position where the bass sound being reproduced by a woofer (below 150 ttz) comes fi_om, you can place the woofer wherever like in your room. To obtain a betier bass reproduction, we recommend you to place the...
- Page 10 1 Press I/5 to turn on the system. 1 Press _--OPEN/CLOSE. 2 Press CLOCK/TIMER SET on the The disc tray opens. remote. 2 Place a CD with the label side up on the 3 Press _ or I_H on the remote disc tray.
-
Page 11: Shuffle Play/Repeat Play
Other Operations DO this -- Normal Play/Shuffle Play/Repeat Stop play Press I. Play Pause Press I|. Press again to resume play. This system lets you pl_y the CD in dif{Erent Select a track During play or pause, press play modes. or 1<14. -
Page 12: Program Play
Program additional discs or tracks. To program Repeat steps Other discs 3 and 5 -- Program Play Other tracks on the 4 and 5 same disc You can make a program of up to 25 tracks Other tracks on other 3 to 5 from all the CDs in the order you want to play discs... - Page 13 Setting presets through automatic tuning can preset up to 20 FM stations 1 Press TUNER/BAND repeatedly to select "FM" or "AM". stations. can d_en tune in any of those stations simply by selecting the corresponding 2 Press and hold _ or IH_ (or TUNING - preset number.
-
Page 14: Presetting Radio Stations
Presetting radio stations (continued) Other Operations Do this Setting presets through Tulle in a station Follow tile procedure described in with a weak "Setting presets through manual manual tuning signal tuning". Set another Start over t_om step E After step 1 Press TUNER/BAND repeatedly station to an... -
Page 15: Manual Tuning
Listening to non-preset radio station You can listen to a radio station either by -- Manual Tuning selecting a preset station, or by manually tuning in lhe station. 1 Press TUNER/BAND repeatedly to select "FM" or "AM". Listening to a preset station 2 Press _ or _... -
Page 16: Rds
1 Press TAPE A/B repeatedly to select (MHC-RG110/RG33/RG22, MHC-RL3, deck A or B. European model only) 2 Press --_. What is the Radio Data System? 3 Insert e tape in deck A or B with the side you want to play/record facing Radio Data System (RDS) is a broadcasting forward. -
Page 17: Tape
Searching for the beginning of the current or the next track (AMS)* To go forward You can use TYPE I (normal) tape. Press _ during playback. 1 Load a tape. "TAPE A (or TAPE B) >>> +1" appears. To play both decks in succession, press back PLAY MODE on the remote repeatedly... - Page 18 -- CD Synchro Recording/Recording Manually You can record from a CD, tape (or colmected components) or radio. You can use TYPE I (normal) tapes. The recording level is adjusted automatically. Steps Recording from a CD Recording from a CD/tape/radio manually (CD Synchro Recording) Load a recordable tape into deck B.
- Page 19 6 Load a recordable tape into deck B. 7 Press I/_ to turn off the system. When lhe recording starts, the volume level is set to minimum. You can record a preset radio station from a specified time. Other Operations To timer-record, you must first preset the radio station (see "Preselting...
-
Page 20: Selecting The Sound Effect
To cancel the effect Press EFFECT ON/OFF (or ON/OFF on the remote). (MHC-GX40 only) Sound effect options You can use the sound of the sub woo[br to suit "SURR" appears if you select an ef_bct with the sound source. surround efthcts. Press ON/OFF on the sub woofer. -
Page 21: Power Saving Mode
-- Power Saving Mode Checking the remaining time Even if the system is oil; the system consumes Press DISPLAY repeatedly during play. power to display the clock and to stay Each time you press the but|on, lhe display responsive to commands from d_e remote. -
Page 22: Game Sync
-- Sleep Timer You can set the system to turn offafter -- Game Sync certain time, so thai you can fall asleep to music. You need to connect a video game machine (see "Hooking up video game machine" Press SLEEP on the remote. page 24). - Page 23 8 Press ENTER on the remote. The type of timer ("DAILY"), tbllowed the starl time, slop time, and lhe music -- Daily Timer source appear, then ll_e original display appears. You can wake up to music at a preset time. 9 Press I/_ to turn off the system.
- Page 24 To enhance your system, you can connect optional components. Refer to the operating instructions provided witb each component. Optional video game machine To the video input of a TV From the audio and video output of the video game machine _-------' 511111111I I1111122...
- Page 25 CLOCK/TIMER SET. and firmly. • Set tile timer correctly. Should any problem persist, consult your • Set the clock. nearest Sony dealer. The remote does not function. • There is an obstacle between tile remo_e and the General system.
-
Page 26: Problems And Remedies
2 Plug the power cord back in. The disc tray does not open and "LOCKED" appears. 3 Press I, GROOVE, and I/(_ at the same • Contact your Sony dealer or local authorized time. Sony service facilily. Press Ig@ to turn on the system. - Page 27 CD and leave the system turned on [br _boul an hour until the moisture evoporoles. • When you move the system, take ou_ any discs. If you have tory questions or problems concerning your stereo system, please consult your nearest Sony 27G13 dealer.
-
Page 28: Precautions
Precautions (continued) Before placing a cassette in the tape AUDIO POWER SPECIFICATIONS: deck (MHC-GX40/GX20 USA model only) "Fake up any slack in the tape. Otherwise the t_pe may POWER OUTPUT AND TOTAL get entangled in the parts of the t_pe deck and become damaged. - Page 29 60 _ 60 wa.s Frequency response !3,000 Hz @3 dB), (6 ohms at 1 kHz, DIN) using Sony TYPE 1 Continuous RMS power output (reference) cassette 75 _ 75 watts (6 ohms at Wow and flutter J 0.15% W.Peak (IEC)
-
Page 30: Specifications
Specifications (continued) General Power requirements North American models: 120 V AC, 60 ltz Canadian model: 230 V AC, 50/60 European models: Australian model: Front speaker SS-RG66A for MHC-GX30 240V Speaker system 3-way, 3-unit, 50/60 llz bass-reflex type Argentine models: 220 V AC, 50/60 ltz Mexican models: Speaker... - Page 31 Sony Corporation Printed in China...