Table of Contents
Advertisement
Advertisement
Table of Contents

Related Manuals for Zanussi ZKI 225


Summary of Contents for Zanussi ZKI 225
- Page 1 User Manual Washer- dryer ZKI 225...
-
Page 2: Table Of Contents
Thank you for selecting our appliance We wish you lots of enjoyment with your new appliance and we hope that you will consider our brand again when purchasing household appliances. Please read this user manual carefully and keep it throughout the product life cycle as a reference document. -
Page 3: Safety Information
Safety information In the interest of your safety and to ensure Always unplug the appliance and turn off the ● the correct use, before installing and first water supply after use, clean and using the appliance, read this user manual maintenance. -
Page 4: Child Safety
Never pull the power supply cable to remove ● the plug from the socket; always take hold of This appliance is designed for domestic use. ● the plug itself. It must not be used for purposes other than Never use the washer-dryer if the power ●... -
Page 5: Description Of The Appliance
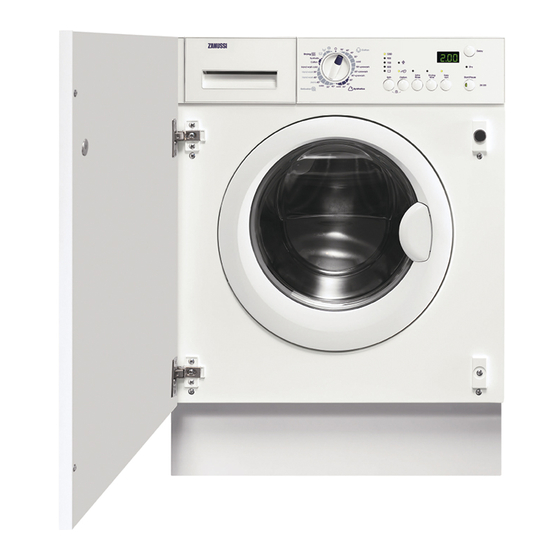
Description of the appliance Detergent dispenser drawer Control panel Door opening handle Rating plate Drain pump Adjustable feet Detergent dispenser drawer Prewash Wash Fabric Softener... -
Page 6: Control Panel - Functions
Control panel Information The control panel is illustrated above. It shows the programme selector dial as well as the different buttons, the pilot light(s) and the display. These are represented by relevant numbers which are explained in the table below. Symbols: = Rinses, = Drain,... - Page 7 Selecting this option the laundry is gently washed and ● Easy Iron button spun to avoid any creasing. In this way ironing is easier. Furthermore the machine will perform additional rinses. The display shows the following information: duration of ● the selected programme, selected drying time, delayed Display start, incorrect option selection, child safety lock, alarm...
- Page 8 Door pilot light (9) If there is water left in the tub, the light 9 remains lit. The door will be still locked and it After having pressed the button , the light will be necessary to empty out before illuminates and stays on.
-
Page 9: Programme Table
Programme table Programme/ Description of Type of laundry Options Temperature programme Main wash, Rinses, Spin Red. / Rinse Hold, Long spin at the max White cotton (heavily or Super Quick( COTTON speed - 1200 rpm normally soiled cotton 90° - 60 Economy, Easy Iron, items) Max load: 6 Kg... -
Page 10: Programme Table
Programme table Programme/ Description of Type of laundry Options Temperature programme Special programme for free time items as denim, Main wash, pants, shirts or jackets in JEANS Spin Red. / Rinse Hold, Rinses, long spin at Jeans and also jersey 1200 rpm Easy Iron 40°... -
Page 11: Washing Hints
Washing hints Sorting the laundry Maximum loads Recommended loads are indicated in the Follow the wash code symbols on each programme charts. General rules: garment label and the manufacturer’s washing Cotton, linen: drum full but not too tightly instructions. Sort the laundry as follows: whites, packed;... -
Page 12: Detergents And Additives
Oil based paint: moisten with benzine stain The choice of detergent will depend on the remover, lay the garment on a soft cloth and type of fabric (delicates, woollens, cottons, dab the stain; treat several times. etc.), the colour, washing temperature and degree of soiling. -
Page 13: Drying Hints
Degrees of water hardness Degrees Follow the product manufacturers’ instructions Level Characteristic German French on quantities to use. °dH °T.H. Use less detergent if: soft 0-15 you are washing a small load, ● the laundry is lightly soiled, medium 8-14 16-25 ●... -
Page 14: Before The First Use
Before the first use By pressing the buttons WARNING! simultaneously for about 6 seconds, the acoustic signal is deactivated (except for the Ensure that the electrical and water events of operating problems). connections comply with the installation By pressing these 2 buttons again, the the instructions. - Page 15 For the compatibility of the options with the pour it into the main wash compartment washing programmes, refer to the section and, if you wish to carry out a programme with «Programmes table». the prewash phase, pour it into the compartment marked Select the delayed start by pressing the If required, pour fabric softener into the...
- Page 16 selected, the message Err is displayed for a After this procedure, it will be necessary to set few seconds and the red light of this button the programme and the options again and then flashes for 3 times. to depress button Altering an option or a running programme At the end of the programme It is possible to change some option before the...
-
Page 17: Drying Only And Autodrying
Drying only and autodrying (NON-STOP programme) Drying only (except «O»).The door can be opened in a few minutes. The recommended load to dry in your washer- 6. Turn the selector dial to the «O» position to dryer is 3 kg for cottons and 2 kg for switch the machine off. -
Page 18: Drying Time Table
zero « ». (If you wish to open the door 6. Turn the selector dial to the «O» position before or during the anti-crease phase, to switch the machine off. Remove the laun- please follow the instructions given in the dry. -
Page 19: Care And Cleaning
Care and cleaning IMPORTANT! To aid cleaning, the top part of the additive compartment should be removed. You must DISCONNECT the appliance from Remove the drawer by pressing the catch the electricity supply, before you can carry out downwards and by pulling it out. Flush it out any cleaning or maintenance work. - Page 20 When no more water comes out, unscrew the Turn off the water tap. ● pump cover and remove it. Always keep a rag Unscrew the water nearby to dry up spillage of water when inlet hose. Clean the removing the cover. filter using a hard bristle brush.
-
Page 21: What To Do If
What to do if... IMPORTANT! Certain problems are due to lack of simple maintenance or oversights, which can be solved easily without calling out an engineer. Before contacting your local Service Centre, please carry out the checks listed below. During machine operation it is possible that the red pilot light of button flashes, a few acoustic signals sound and one of the following alarm codes appears on the display to indicate that the machine is not working:... - Page 22 Malfunction Possible Cause / Solution The end of the drain hose is too low. The machine fills then empties • Refer to relevant paragraph in «water drainage» immediately: section. The drain hose is squashed or kinked. • Check the drain hose connection. The drain pump is clogged.
- Page 23 Malfunction Possible Cause / Solution The programme is still running. • Wait the end of washing cycle. The door lock has not been released. The door will not open: • Wait until the pilot light has gone out. There is water in the drum. •...
-
Page 24: Technical Data
Malfunction Possible Cause / Solution The drying time has not been selected. • Select the drying time. The water tap is not turned on • Open the water tap. The drain filter is clogged The machine does not dry or does not •... -
Page 25: Consumption Values
Consumption values Programme Water Energy Programme duration consumption consumption (in litres) (in kWh) Cotton 90°C Cotton 60°C 1.02 Cotton 60°+ Economy selected Synthetics 60°C Delicates 40°C 0.55 0.45 Handwash 40° Wool 40° 0.45 temperature for each wash programme. Information ) The «Cotton» 60° + the option Economy selected with a load of 6 kg is the The consumption data shown on this chart is to reference programme for the data entered... - Page 26 4. Unscrew and remove the two large rear in the event of a breakdown. bolts B and the six smaller bolts C. Carefully level by screwing the adjustable feet in or out. 5. Remove the bracket D, refit the six smaller bolts C and slide out the relevant plastic Never place cardboard, wood or similar spacer E.
- Page 27 NOTE Installation should comply with local water authority and building regulations’ requirements. A minimum water pressure of 0.05 MPa (0.5 bar) is required for safe operation of the appliance.If you cannot make the cold water connection direct from the rising mains, you may be able to operate the appliance from your The drain hose may be extended to a cold water storage system.
- Page 28 In the interest of the environment Washer-dryers should be connected to the IMPORTANT! FOUL drainage system, the water will then be Information on the electrical connection is taken to a sewage works for treatment before given on the rating plate on the inner edge being discharged safely into a river.
-
Page 29: Installation Instruction
Building-in The distance (B) from upper edge of the door to the centre of the hole depends on the adja- This appliance has been designed to be built cent furniture's dimensions. into the kitchen furniture. The recess should The required dimensions are given in the pic- have the dimensions shown in picture A. - Page 30 Recommendations regarding the construc- The reason for placing the base in this posi- tion and fitting of a base when the installa- tion is to allow a small strip of beading to tion requires an integrated appliance to be be fitted in front of the appliance feet. raised Where the appliance has been raised by Fix the base firmly to...
-
Page 31: Environmental Concerns
Environmental concerns Packaging materials Ecological hints The materials marked with the symbol To save water, energy and to help protect the recyclable. environment, we recommend that you follow these tips: >PE<=polyethylene Normally soiled laundry may be washed >PS<=polystyrene ● without prewashing in order to save >PP<=polypropylene detergent, water and time (the environment This means that they can be recycled by... - Page 32 132 956 230 - 00 - 092009 Subject to change without notice...