Table of Contents
Advertisement
Advertisement
Table of Contents

Related Manuals for Pfaff perfomance 2058


Summary of Contents for Pfaff perfomance 2058
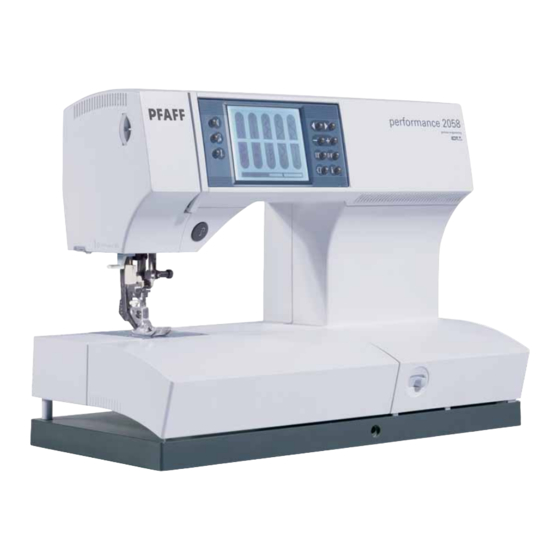
- Page 1 Owner’s manual The real passion for sewing!
-
Page 2: Important Safety Instructions
This household sewing machine is designed to comply with IEC/EN 60335-2-28 and UL1594 IMPORTANT SAFETY INSTRUCTIONS When using an electrical appliance, basic safety precautions should always be followed, including the following: Read all instructions before using this household sewing machine. DANGER - To reduce the risk of electric shock: •... - Page 3 Before you start, please spend some time reading these operating instructions. You will soon discover how easy it is to use your Pfaff performance 2058. Give free rein to your imagination and discover your own passion for sewing together with one of the greatest sewing machines in the world - performance 2058 from Pfaff.
-
Page 4: Table Of Contents
Table of content Introduction Operating your performance Overview of your machine Operating your machine Standard presser feet and accessories 1:10 Function buttons Stitch chart 1:12 Main menu 1:17 Selection menus Carrying case 1:17 Selecting a stitch Sewing with free arm 1:17 Sewing menu Accessory tray... - Page 5 Table of content Decorative sewing Maintenance Changing the needle plate General notes on decorative sewing Combined borders Cleaning Twin needle sewing Changing the lightbulb Sewing problems and their solutions Cross stitch Tapering Quilting Index Free-motion sewing Technical data 8:11 Package contents 8:11 Nostalgia/Heirloom 5:10...
- Page 6 Some fabrics have a lot of excess dye which can cause discoloration on other fabric but also on your sewing machine. This discoloring may be very difficult or impossible to remove. Fleece and denim fabric, especially red and blue, often contain a lot of excess dye.
- Page 7 Introduction...
-
Page 9: Overview Of Your Machine
Introduction Overview of your machine 20. Hole for second spool holder 1. Pattern restart button 2. Sew slow button 21. Thread cutter for bobbin winding 3. Needle up/down button 22. Bobbin winder 23. Bobbin door 4. Scroll buttons 24. Free arm 5. -
Page 10: Standard Presser Feet And Accessories
Standard presser feet and accessories Standard presser foot Zipper foot with IDT, with IDT, No. 0A No. 4 (attached on the machine upon delivery) Fancy stitch foot with Buttonhole foot, No. 5A IDT, No. 1A Fancy stitch foot, No. 2A Darning foot, No. - Page 11 Introduction Bulb remover/Needle plate changer Sensormatic buttonhole guide, No. 10 Edge guide 1. Bobbins 2. Spool cap medium (attached on the machine upon delivery) 3. Spool cap small 4. Spool cap large 5. Needle box 6. Felt pad 7. Stylus 8.
-
Page 12: Stitch Chart
Stitch chart Stitch Description Application Straight stitch with 19 needle For all straight stitch and topstitching jobs. Stitch length can be positions increased up to 6mm. 19 needle positions are available, for edge finishing or sewing in zippers. Stretch triple straight stitch For reinforced seams, particulary on stretch fabrics, e.g. - Page 13 Introduction Elastic blindhem stitch For securing hems invisibly and finishing the edge on stretch fabrics. Basting stitch For basting project pieces together. 19 needle positions are available. Lightning stretch stitch For joining light weight stretch fabrics and decorative embellishment. Closed overlock stitch For joining and overcasting stretch fabrics in one operation.
- Page 14 Cross stitch buttonhole Decorative buttonhole for jackets and for embellishing other garments. Eyelet buttonhole with Professional tailor’s buttonhole for denim jackets and trousers. pointed bartack Rounded buttonhole with Buttonhole for shirts, jackets and trousers. lengthwise tack Professional eyelet Buttonhole for denim jackets and trousers. Or as a decorative effect buttonhole for kitchen or shower curtains.
- Page 15 Introduction Antique quilting Cross stitches 100 101 102 103 104 105 106 107 108 109 110 111 113 114 115 116 117 118 119 Hem stitches 131 132 133 134 135 136 137 138 139 Antiqe hand embroidery stitches 141 142 143 144 145 146 147 148 Scallop edges 160 161 162...
- Page 16 Art stitches 240 241 242 243 244 245 246 247 248 249 250 253 254 255 256 257 258 259 260 261 262 263 264 265 266 268 269 270 271 272 273 274 275 276 277 278 279 Ornamental stitches 290 291 292 293 294 295 296 297 298 299 300...
-
Page 17: Carrying Case
Introduction Lift the lid to open. All stitches are displayed on the inside of the lid. Carrying case Use the hard carrying case to protect your machine when transporting it. The machine’s integrated handle can be accessed through a slot in the top back of the case. -
Page 18: Accessory Tray
Accessory tray Open the accessory tray by placing your left index finger on the ridged area to the left side of the lid and pull it towards you. Arranging the accessories The standard accessory feet are marked with numbers. Arrange the feet in the respective numbered compartments of the accessory tray. -
Page 19: Preparations
Preparations... -
Page 20: Voltage Switch
120 V. If you are unsure of the correct voltage for your country, please check with your authorized Pfaff dealer before plugging in your machine. Electrical connection Connect the lead cord between the socket of the sewing machine and the wall outlet. -
Page 21: Presser Foot Lift
Preparations Presser foot lift The presser foot is raised manually by swinging the presser foot lift up to the right. It is lowered by swinging it down to the left. See page 3:9 on how to raise and lower your presser foot automatically. Changing the presser foot Turn off the on/off switch Snap off the presser foot... -
Page 22: The Idt (Integrated Dual Feed)
The IDT (Integrated Dual Feed) For sewing any fabric precisely Pfaff provides the ideal solution: the Integrated Dual Feed, IDT system. As on industrial machines, the IDT feeds the fabric from the top and bottom at the same time at the same stitch length. The fabric is fed precisely. -
Page 23: Lowering The Feed Dogs
Preparations Lowering the feed dogs For certain sewing work such as free-motion quilting, embroidery or darning, the feed dogs must be lowered. On your sewing machine there are two different methods for lowering the feed dogs, one on the outside of the machine and one inside the bobbin door. For either method: Raise the presser foot before lowering the feed dogs. -
Page 24: Bobbin Winding
Place an empty blue bobbin on the bobbin winder aligning the small rectangular hole on the bottom side of the bobbin with the small white pin of the bobbin winder. The Pfaff logo is facing up. Push the bobbin to the right. - Page 25 Preparations Threading Place the thread into guide A from front to back and pull it counter- clockwise ABOVE the pre-tension disc B. Pull the thread under the thread guide C from back to front (see page 2:6). Wind the thread tail around the bobbin several times in a clockwise direction.
- Page 26 The Pfaff logo is facing up. Wind the thread tail clockwise several times around the bobbin. Turn on the machine.
-
Page 27: Inserting The Bobbin And Bobbin Case
Inserting the bobbin Insert the full bobbin (with the Pfaff logo facing towards the bobbin case) in the bobbin case. When doing so, pull the thread through slot A, then under tension spring B until it rests in the opening (see arrow). -
Page 28: Threading Your Machine
Threading your machine Turn off the on/off switch Raise the presser foot. Place the thread on the spool pin and fit a spool cap, either the same size or slightly larger than the spool, on top of the spool. Using both hands, pull the thread into thread guide A from the front. -
Page 29: Integrated Needle Threader
Preparations Integrated needle threader In order to make threading the needle easier and quicker, use the Pfaff Integrated needle threader. Lower the presser foot. Pull the threader lever straight down with the handle. Threader hook F swivels through the needle eye. Bring the thread around hook E and back across the front of the needle eye. -
Page 30: Bringing Up The Bobbin Thread
Bringing up the bobbin thread Raise the presser foot. While holding the end of the needle thread, press the foot control so the needle moves down and up one time. Pull the needle thread to draw up the bobbin thread. Close the bobbin door and pull the top and bobbin threads under the presser foot to the left. -
Page 31: Changing The Needle
Preparations Changing the needle Turn off the on/off switch To remove: Lower the presser foot and set the needle to its highest position. Loosen the needle screw and pull down on the needle to remove. To insert: The flat side of the needle must face to the rear. Keep the presser foot down and insert the needle, pushing it up as far as it will go. -
Page 32: Correct Thread Tension - How To Get It
Correct thread tension - How to get it Set the required amount of the needle thread tension using the markings on the tension dial. The normal thread tension for sewing is 4 - 5. For decorative stitches, darning or sewing buttonholes, the normal setting should be 3. The information system of your sewing machine gives you recommendations on the touch screen for the correct needle thread tension for each stitch (see ”Information in the sewing menu”... -
Page 33: Electronic Knee Lift
Preparations Electronic knee lift Your sewing machine comes with an electronic knee lift for regulating the presser foot height. It is useful when you need both of your hands to guide the fabric. 1. Push the knee lift, with the flat side facing up, into the hole on the front baseplate of your machine. - Page 35 Operating your performance 2058...
- Page 36 Operating your machine Your sewing machine is easily operated by using the touch screen and Check: If the screen is too dark or too the function buttons, located on the front of your machine. light, you need to adjust the contrast. See page 3:12 for instructions.
- Page 37 Operating your performance 2058 Note: The needle height can also change with a short tapping on the foot-control. 4. Scroll buttons These buttons have following functions: • In the selection menu: Scroll through stitches and sequences by column or page. •...
- Page 38 Main menu When you have turned on your machine and touched the welcome screen the main menu appears. From here you enter the selection menus to select stitches by category or create your own stitches and stitch sequences. When you touch any of the icons on the screen new windows are opened for each menu.
- Page 39 Operating your performance 2058 Decorative stitches This menu includes a selection of decorative stitches suitable for embellishing garments or items for the home. They are sub-divided into eight different categories for ease of selection. • Hemstitches. Stitches 130-139. • Antique hand embroidery stitches. Stitches 140-149. •...
- Page 40 Selecting a stitch There are several ways to select a stitch: Selection by category Touch ”Utility stitches” from the main menu. This category contains 18 stitches that are suitable for utility sewing. You can browse one page at a time with the scroll buttons (4) or by touching the scroll bar (A) on the screen.
- Page 41 Operating your performance 2058 Sewing menu The sewing menu is divided into three sections: 1. Status bar, where the activated sewing functions are shown. The status bar is always active and automatically updated when a function is activated or deactivated. 2.
- Page 42 For buttonhole and darning programs. In the darning programs (no. 74-75) the function is automatically activated. Use the reverse button (10) to determine the length of the first seam. The following seams will automatically be sewn in the same length. Finish buttonholes manually.
-
Page 43: More Options For Sewing
Operating your performance 2058 the ”man” icon again and a mark will appear. This means the buttonhole is saved and you can repeat the buttonhole in the same size automatically. Touch the ”man” icon once more to deactivate the function. Note: If you find that the buttonhole columns don’t look the same you can change the balance of the buttonhole. - Page 44 Twin needle safety. With this function, you reduce the width of your stitch in order to use a twin needle. To set the correct needle spacing of your twin needle, long touch the icon until a window appears. Set the needle spacing with the function field buttons (5) and confirm by touching the window.
-
Page 45: Context Menu
Operating your performance 2058 Context menu In the context menu you can alter the basic settings or functions for the sewing machine. Long touch the info button (9) to open the context menu. Press this button again to close the menu. The menu will also close when a dialogue window has been confirmed with ”ok”... - Page 46 Raise presser foot (Available from main, sewing, sequence and stitch creator menus) You can preset the presser foot to raise automatically to a certain position every time needle up/down is activated. ”Display window selection” is the standard setting. With this setting a selection window for the presser foot will appear every time you press the needle up/down button (3), see page 3:2.
- Page 47 Operating your performance 2058 Stitch parameters (Available from sewing menu) The stitch parameter function in your sewing machine lets you store your favorite settings for each stitch. You can adjust a stitch for a specific fabric or application or just save the stitch settings you like to use.
- Page 48 Touch ”ok” or ”esc” to confirm or reject. Machine test (Available from main menu) This function is for Pfaff certified service technicians only. Version (Available from main menu) The current software version number in your machine is shown here.
-
Page 49: Info System
Operating your performance 2058 Info system Your sewing machine has an info system function to help you using the machine. The function can be called up at any time by pressing the info button (9). The info system includes instructions on preparing the machine for sewing, information on using the sewing functions and recommendations regarding accessories and settings. - Page 50 Information in the more options window When you press the info button (9) in the more options window you get information about the different sewing functions. The following functions are described: • Tie-off • Free-motion sewing • Raise presser foot •...
-
Page 51: Utility Sewing
Utility Sewing... -
Page 52: Getting Started
Getting started To begin sewing on your new sewing machine, do a straight stitch first. When you turn on your machine a welcome text appears on the display. Tap the foot control and the straight stitch is automatically selected. Take a piece of fabric, fold it and place it under the presser foot. -
Page 53: Straight Stitch - No 1
Utility Sewing Straight stitch - No 1 Stitch no. 1 is the basic straight stitch in center needle position. The stitch length can be increased up to 6mm. Your sewing machine has 19 needle positions that can be adjusted by the needle position icon and function field buttons (5). -
Page 54: Topstitching - No 1
Topstitching - No 1 The straight stitch can be sewn in 19 different needle positions allowing you to guide the presser foot along the fabric edge for topstitching. The distance between the rows of topstitching is determined by the needle positions. Use the guide marks on the needle plate, or the edge guide to topstitch further from the fabric edge. -
Page 55: Blindhem Stitch - No 15
Utility Sewing Blindhem stitch - No 15 The blindhem stitch is used to make invisible hems on skirts, trousers and home dec projects. • Finish the edge of the hem. • Fold and press the hem allowance to the wrong side. •... -
Page 56: Overlock Stitches
Overlock stitches For elastic, knits and stretch fabrics, your sewing machine provides a selection of overlock stitches. These stitches join multiple layers of fabric and overcast them in one operation. These stitches can stretch and are more durable than standard stitches. Closed overlock stitch - No 31 When sewing fabrics that fray easily select stitch 31. -
Page 57: Buttonholes
Utility Sewing Buttonholes There are 12 buttonhole styles built-in to your sewing machine. Each buttonhole is especially adapted for a particular use and fabric type. Your sewing machine is equipped with the sensormatic buttonhole guide and sensor technology to ensure that every buttonhole is sized accurately. - Page 58 Buttonhole with gimp cord Buttonholes that are sewn with gimp cord under the satin stitch columns are more stable, durable and professional looking. Use pearl cotton or regular gimp thread. • Insert the sensormatic buttonhole guide. • Place the center of a length of gimp cord over the metal hook extending from the center back of the buttonhole foot.
- Page 59 Utility Sewing • Sew the right side of the buttonhole. • After the machine sews the first few stitches of the curved end pull the gimp cords out of the metal hook with a straight stitch pin. Warning: Do not lift the presser foot from the fabric surface! •...
-
Page 60: Sewing On Buttons - No 60
Tip: You can also use a sew on button foot available from your authorized Pfaff dealer as an optional accessory. Eyelets - No 59 To stitch eyelets on a belt or linen items, select stitch no. 59. -
Page 61: Automatic Darning - No 74 And 75
Utility Sewing Automatic darning - No 74 and 75 Stitches no. 74 and 75 is for strengthening damaged areas of fabric and repairing tears. • Stitch over the damaged area a little longer than your tear. • Press the reverse button (10); the machine finishes sewing the darning program and the darning length is saved. -
Page 62: Free-Motion Darning - No 1 And 3
Free-motion darning – No 1 and 3 • Remove the standard presser foot. Make sure the needle is at its highest position. Carefully loosen the screw (A) until the cross hole (B) is accessible. Squeeze the darning foot gently together and guide the pin of the foot into the cross hole of the presser foot holder as far as it will go. - Page 63 Decorative Sewing...
-
Page 64: General Notes On Decorative Sewing
General notes on decorative sewing To enhance your own home textiles or garments your sewing machine offers you a wide variety of fancy and decorative stitches. Create a greater variety of embellishments by combining different patterns, colors and sizes. Use specialty decorative threads to enhance the lovely stitching. -
Page 65: Twin Needle Sewing
Decorative Sewing Twin needle sewing Decorative effects can be achieved using a twin needle. The picture shows what beautiful borders can be created with just a little imagination! Twin needle sewing is particularly effective if you use decorative sewing threads in matching colors. •... -
Page 66: Tapering
Tapering The tapering program for the zigzag stitch allows you to create stitches with an attractive, three-dimensional appearance, which are very easy to sew. Tapering increases or decreases the width of the zigzag stitch during sewing to create symmetric or asymmetric tapers. In stitch no. -
Page 67: Quilting
The new seam length will now be programmed automatically. Antique Quilt Stitches With the Pfaff Antique quilt stitches (80-96) you can easily create a beautiful hand stitched look for your Crazy Patch quilting. Thread the needle with an invisible (monofilament) thread. Use a contrast or matching polyester or cotton thread in the bobbin. - Page 68 Stitch-in-the-Ditch One way to hold the quilt top, batting and back all together is using the ”Stitch-in-the-Ditch” method of quilting. Stitching-in-the-ditch means stitching in the seams in the quilt blocks. • Set your sewing machine with a straight stitch (no. 1), stitch length 2.5mm, center needle position and the IDT engaged.
- Page 69 Decorative Sewing Quilt Appliqués Appliqués add a special touch to your quilt. There are many different ways to stitch appliqués to a quilt. One way is to add the appliqué to the block before the quilt is put together. • Set your sewing machine for a satin stitch. Choose stitch no. 10, stitch length 0.4 - 0.5mm, stitch width 3 –...
- Page 70 – but travel in swivling stitches all over the quilt. Tip: Use the Free-motion guide grip to help move the quilt in a more consistent way. The Quilting table and Open-toe Free-Motion foot are extra accessories created to make your stippling easier. See your authorized Pfaff dealer to purchase.
-
Page 71: Free-Motion Sewing
Decorative Sewing Free-motion sewing With Free-motion sewing you can create the most fantastic work. It is possible to sew just as you would draw with a pencil, using the various types of threads that are on the market today and your sewing machine. -
Page 72: Nostalgia/Heirloom
Nostalgia/Heirloom Wing needle Sewing with a wing needle (a special needle with a wide, wing-like shaft) creates the look of hemstitching in woven natural fiber fabrics by creating “holes” where the needle goes in and out of the fabric. • Replace the standard needle with a wing needle. •... - Page 73 Stitch sequences...
-
Page 74: Stitch Sequences
Stitch sequences Your sewing machine stores stitch and alphabet sequences in the memories of the machine. The sequence is stored and remains in the memory until you overwrite or delete it. You can store up to 99 stitches or letters in each of the 50 M-memories. Open the stitch sequence menu There are two ways to enter the stitch sequence menu: 1. -
Page 75: Creating A New Stitch Sequence
Stitch sequences Creating a new stitch sequence In the stitch sequence menu you can see the selected stitch in the preview field (A). To insert the stitch to a sequence touch the icon m+. The stitch is added to the action field (B), to the right of the cursor (D). To delete a stitch from the action field touch m-. -
Page 76: Altering The Settings Of A Selected Stitch
Altering the settings of a selected stitch If the preview field (A) is active you can alter the settings of a single stitch before it is added to a sequence. Activate the preview field (A) by touching it. The functions that can be used when altering the settings are displayed on the screen. -
Page 77: Saving A Stitch Sequence
Stitch sequences Mirroring a stitch sequence Select the entire sequence by pressing the pattern restart button (1). When the entire sequence is selected it is possible to mirror the whole sequence horizontal or vertical by touching the mirroring icons. Saving a stitch sequence When you have created a new stitch sequence and exit the stitch sequence menu with the main menu button (6), your sewing machine asks if you want to save your sequence. -
Page 78: Alphabets
Alphabets Your sewing machine can sew entire sequences of letters and words using any of the alphabets in the machine. All alphabets include uppercase letters, special characters and numbers. The Block and the Script alphabets also include lower case letters. The alphabet sequences are created in the alphabet sequence menu and added to the stitch sequence menu. -
Page 79: Creating An Alphabet Sequence
Stitch sequences Creating an alphabet sequence Touch the ”Alphabets” icon in the main menu. The alphabet menu opens. Select one of the fonts by touching it. This opens the alphabet sequence menu where you can start typing in your alphabet sequence. The standard alphabet and upper case letters are selected by default. - Page 81 Stitch Creator...
-
Page 82: Stitch Creator
Stitch Creator With Stitch Creator you can customize and create your own stitches. You can add, erase, move and combine stitches directly on screen. Create a stitch of individually designed stitches or by using the 9mm stitches and alphabets. Your created stitch is stored and remains in the memory of the machine until you overwrite or delete it. - Page 83 Stitch Creator Functions in the stitch creator menu Eraser. Touch this icon to delete one or more selected stitch points. Stitch selection menu. Touch this icon to open the stitch selection menu. Here you can add stitches that are already stored in your machine including previously created stitches.
-
Page 84: Creating A New Stitch
Creating a new stitch When you open the stitch creator menu the workspace is empty. A dotted line indicates the middle of the workspace. Placing single stitch points Touch the new stitch point icon (A) to place the starting point. A square point indicates the current selected stitch point. -
Page 85: Editing A Stitch
Stitch Creator Touch s+ to add the stitch to Stitch Creator. The stitch appears individually on the workspace and is automatically selected. Touch the select stitch point icon to deselect the stitch. You can now edit every single stitch point of the stitch to make your own version of it or combine it with other stitches. -
Page 86: Saving A Stitch
Saving a stitch When you have created a new stitch and exit the stitch creator menu with the main menu button (6) your sewing machine asks you if you want to save your stitch. ”esc” closes without saving. The main menu opens. ”ok”... - Page 87 Maintenance...
-
Page 88: Changing The Needle Plate
Changing the needle plate Turn off the on/off switch Removal Raise the presser foot. Position the needle plate changer (bulb remover) as shown and press the needle plate up on the right, then on the left. It can now be easily removed. Replacing Place the needle plate against the rear edge of the cut-out then press down at the front until you hear it snap in place. -
Page 89: Changing The Lightbulb
Push the bulb upward in the holder as far as it will go and turn it half a rotation in a counter-clockwise direction. Remove the bulb changer from the bulb. New lightbulbs can be purchased from your authorized Pfaff dealer. -
Page 90: Sewing Problems And Their Solutions
Sewing problems and their solutions Problem/Cause Remedy The machine skips stitches The needle is not properly inserted. Push needle fully up. Flat side facing the back. Wrong needle is in use. Use needle system 130/705 H. Needle is bent or blunt. Insert a new needle. - Page 91 If problems remain, contact an authorized Pfaff dealer. Have your sewing machine serviced regularly by your authorized Pfaff dealer. When leaving the machine, even for only a short time, switch off. This is very important if there are any children nearby.
-
Page 92: Index
Index Buttonholes 1:13–1:14, 3:5, 4:7–4:9 Inserting the sensormatic buttonhole guide programming 3:8-3:9 tips with gimp cord Accessories 1:10 Buttonhole foot 1:10, 4:7–4:9 Accessory tray 1:18 attaching Action field Buttons Arranging the accessories 1:18 sewing on 4:10 Alphabets 3:5, 6:6–6:7 Button sewing program 1:14 Alphabet sequence Alphabet sequence menu... - Page 93 Index Decorative bartack 1:14 Free-motion guide grip Decorative buttonhole with triangle tack 1:14 Free-motion sewing 3:9, 4:12, 5:9 Decorative sewing 5:2-5:10 Free-motion stippling Decorative stitches 1:15-1:16, 3:5 Function buttons 3:2–3:3 Delete all 3:14 Function field Delete all created stitches 3:14 Function field buttons Delete all parameters 3:14...
- Page 94 Ornamental stitches 1:16, 3:5 Overlock stitches 1:13, 3:4, 4:6 Overview of your machine Language 3:11 Leaves and flowers 1:15, 3:5 1:17 Light-knit fabric patching stitch 1:13 Lightning stretch stitch 1:13 Package contents 8:10 Lightbulb Patchwork program Linen buttonhole 1:13 Pattern length Lowering the feed dogs Pattern restart Presser feet...
- Page 95 Index Rounded buttonhole with pointed bartack 1:14 Stitch length Round ends buttonhole 1:14 Stitch parameters 3:13 Stitch point mirroring moving placing Stitch sequences 3:5, 6:2–6:8 Satin stitches 1:15, 3:5 Add a stitch to a sequence Scallop edges 1:15, 3:5 Adding sewing functions Scroll buttons Altering the settings Seam ripper...
- Page 96 Tie-off Top stitching Touch screen Cleaning Calibration 3:12 Contrast 3:12 Triple stretch stitch 1:12 Twin needle safety 3:10 Twin needle sewing Tying the Quilt Utility sewing 4:2-4:12 Utility stitches 1:12–1:13, 3:4, 4:3–4:5 Version 3:14 Voltage switch Welcome screen 3:12 Wing Needle 5:10 Z-Zigzag stitch 1:12...
-
Page 97: Technical Data
Lead cord Accessories Instruction manual Intellectual property PFAFF, PERFORMANCE and IDT (image) are registered trademarks or trademarks of VSM Group AB. Please note that on disposal, this product must be safely recycled in accordance with relevant National legislation relating to electrical/electronic products. - Page 98 The real passion for sewing! VSM Group AB • SE-561 84 Huskvarna • SWEDEN www.pfaff.com...