
Related Manuals for Pfaff creative 1371


Summary of Contents for Pfaff creative 1371
- Page 2 Be sure to use only a 15-watt light bulb in the sewing lamp. d) The drive belt must never be adjusted by anyone but an authorized Pfaff agent.
- Page 3 —...
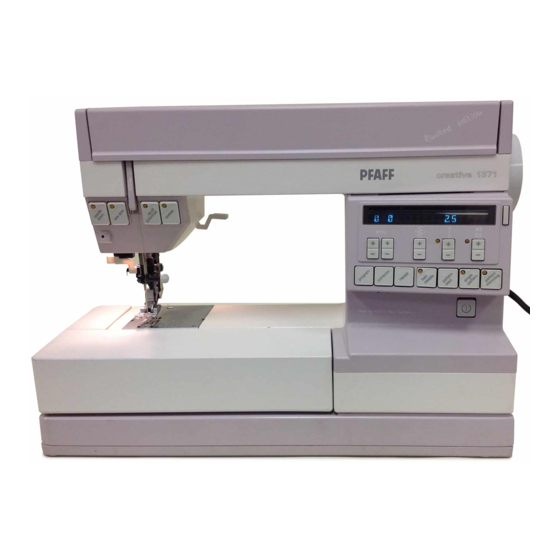
- Page 5 Parts of your sewing machine 100 Carrying handle 101 Hinged top cover 102 Hand wheel 103 Stop motion knob 104 Display 105 Balancing-out & pattern length key 106 Stitch length & pattern length key 107 Stitch width key 108 Master switch 109 Detachable work support with accessory box and compartment 110 Needle plate...
- Page 6 Dear We are sorry for the inconvenience, but in the rush to publish the Pfaff Creative 1371 Limited Edition Instruction Book, errors were overlooked. Please make the following changes in your Instruction Book: Page 1 8.TE/OFF BUTTONHOLE If you wish to tie oft a seam at the beginning, touch key 117 until it is lit.
- Page 7 Dear Consumer: We are sorry for the inconvenience, but in the rush to publish the Pfaff Creative 1371 Limited Edition Instruction Book, errors were overlooked. Please make the following changes in your Instruction Book: Page 1 &JIEIOFF BUTTONHOLE If you wish to tie off a seam at the beginning, touch key 117 until it is lit.
- Page 9 Pull the power cord out of the foot control. I______ _____ Plug the foot control lead into the machine socket and place the foot control on the floor.
- Page 11 —...
- Page 12 ill.>...
- Page 13 Jinding through the neede: witch on master switch. rigage dual feed. aise the sewing foot with the needle in its p position. Place a bobbin on spindle 4. Disengage the sewing mechanism. raw the needle thread under the ewing foot, up and through guide 138 .ee ill).
- Page 14 Inserting the bobbin: insert bobbin so that thread unwinds towards the back (A). Draw the thread into slot B and into eye C. Checking the bobbin thread tension: With a brief, sharp upward movement of your hand the bobbin must gradually slip downwards.
- Page 15 nsertrng the bobbin case • Switch master switch 108. Raise latch A and push the bobbin case onto stud B as far as it will go, making sure cutout C points upwards. on pin: Placing spool of thread Place the small or mediumsize unwinding disc D in front of small spools, and the large disc E in front of large spools.
- Page 16 Upper threading: • Switch off master switch 108 With the needle in its top position, raise the sewing foot. Draw the thread into slot A. from below into slot B and take-up lever 137 (see arrows), then back into slot B and into the right thread guide on the needle holder.
- Page 17 Swing threader forewards against needle. Place thread into hook E from below. Swing threader backwards, release thread at same time and allow threader to move upwards, then pull the thread fully through the needle eye.
- Page 19 Swing work support 109 back against the free arm. • Switch off master switch 108. Place fabric under sewing foot. To insert extra-thi ck fabric plies raise le ver 119 higher. • Switch on master switch 108. Lower presser bar lifter 119. (A indicates the darning position ).
- Page 22 This prevents shifting of the material plies during sewing. Before engagin g or disengag ing the dual feed always the sewing foot. To engage: Lower dual feed 144 until it snaps in place. To disengag e: push dual feed lightly downwa rds, pull t towards the rear and allow it to move upwards .
- Page 23 Operating keys of the electronic system. These are described on the following pages.
- Page 24 Eectronc bobbin thread monitor: E’ectronic top speed seecton: When you press “sew slow” key 115, the Bobbin thread monitor light 113 starts to indicator light goes on and the machine flash when the bobbin thread is running out. It goes off when a full bobbin is sews at half its speed.
- Page 28 Balancing out or adjusting the reverse stitch length 1. The baIancingout key is used to adapt the stitch density in the buttonhole seam as well as the length of this seam (program 13). With this key set at the stitch —...
- Page 29 Memorizing program Verification of a program combination combinations: in the display The programs memorized can be verified one after the other in the dis Compiling combinations out of play by pushing key 125 repeatedly. programs 00 to 49 and with letters and When you depress the foot control the numbers.
- Page 31 ‘-...
- Page 32 Straight-stitch sewing: — Program 00 is straight-stitch sewing with the needle in its central position. Set the desired stitch length by key 106. Program 01 is straight stitching with the needle in its left position. With key 107 the needle position can be varied in 13 steps from left to right.
- Page 35 Detachable work support and accessories: The work support can be lifted out (A). Open its lid and take out accessory box C. Underneath the box is an accessory compartment B. Illustration D shows how to arrange sewing feet, needles and bobbins in the accessory box.
- Page 36 Changing sewing foot: • Switch off master switch 108. Hold sewing foot at front and push down to disengage foot. Fittrng sewing foot: Lower lifting lever and locate foot so that pins A enter grooves B. for su ring accessories. E is the sewing foot screw.
- Page 39 —---—— —-—— -——— -—---— —---—— —-—— --—- —-----— —----- —-——---—-—...
- Page 40 Fault finding Cause: Remedy: 1. Machine skips stitches Needle not inserted correctly. Push needle up as far as it will go, its flat shank side facing toward the back. Wrong needle used. Insert system 130/705 H needle. Needle bent or blunt. Insert new needle.
- Page 42 ndex Appliqué work Fabrics 7’ Assembly and serging seams Fagotting stitch for corsetry Attaching lace Fringe seams Balancing the density of buttonhole seams Gathering with the shirring foot Balancing out letters and numbers Basting Binding edges Hemstitching Blind stitch Honeycomb stitch 91—9: Buttonholes 99—101...
- Page 45 Congratulations! Your new PFAFF Creative makes you the owner of one of the world’s finest sewing machines. It is a high-quality machine possessing a large number of outstanding features which other sewing machines do not have. From the vast range of...
- Page 47 normal seweg toot] — [____ —— Machine settings recommended The box above every description of the sewing jobs illustrated on the following pages contains the machine setting recommended and the sew ing foot best suited for the respective sewing job. The individual symbols atand for: prog eg.
- Page 49 Ornamental borders You can give free rein to your creativity by com bining various patterns. The ornamental borders illustrated on this page and described below are intended as a stimulus to your imagination. • For sewing ornamental borders we recom mend using the fancy-stitch sewing foot No.
- Page 50 ‘...
- Page 51 Border 1 prog 2935 First workstep, centre motif • Select program 35 Sew the programmed stitch pattern. Second workstep, heart motif • Select program 29 Sew the programmed stitch pattern, stitching the straight-stitch seam along the centre motif. Border 2 prog- :izLL.J 04 30...
- Page 52 — th• —...
- Page 53 prog 10 42 —3+ Thread: embroidering/darning thread Clear-lined block letters or monograms made by combining different ornamental platterns can be sewn without any difficulty. Trace the monogram on paper first, then transfer it to the fabric. Having done so, follow the outlines with the programmed stitch pattern chosen.
- Page 57 With the cross-stitch program you can sew many beautiful borders, monograms and other embroi dery motifs. Border 1 36 36i Enter the following programs in the computer by pressing the “program entry key: • 4x36 • 1 x 36i pattern mirroring •...
- Page 58 Border 1 prog 3636i Enter the following programs in the computer pressing the “program entry” key: • 1x36 • 3 x 36i pattern mirroring • Sew the pattern along the traced line. At th end of the pattern, turn the material and se p’...
- Page 61 ‘3...
- Page 63 Fringe seams Butterfly Two worksteps are required for this: First workstep (wings) prog Fringe foot Stitch width: 1.5 mm Stitch length: 0.5 mm Fringe foot: (special accessory) First workstep (wings) First sew a fringe seam as a trial, using a piec. of scrap material.
- Page 66 it is...
- Page 67 Hemstitching As the i ustrations show, hem-stitching can be ur : in different ways, both as an edge reinforcemi and as a fancy effect on table linen or cloth: articles. Hemstitching with wing needle prog 37 38 —3+ Thread: embroidering/darning thread Needle: wing needle For this work, four threads are drawn, five threa •...
- Page 68 — • •:. •...
- Page 69 ‘...
- Page 70 Cording toot Needle: Double needle Lift the needle plate off and pass the gimp thread through the round hole A”. After that re-insert the needle plate. Notch “B” is the entry groove (Fig. 1). Place the roll of gimp thread in front of the machine (see Fig.
- Page 71 Shell edging Stitch length: 1.5 mm Pattern mirror Key: SheA edging provides nice trimming, especially soft materials. Fold over the fabric edge on sheer, along the line which is to be decorated. Duri sewing, the bliridstitches draw in the fabric ed( at regular intervals, thus producing a shell-edt effect.
- Page 73 ¶9, ‘9 >, ‘I ‘ ,j_, -‘, ‘I 7< <4’ — < ¶- 0’ 1< 60 B...
- Page 76 1’ —...
- Page 77 • The Creative computer has one MEM-memc • 12 programs (from 00 to 49) can be entere the MEM-memory one after the other. When the machine is switched off the p grams stored are cancelled. • When the capacity of the memory is used no additional programs are accepted.
- Page 79 Lengthening patterns at the same stitch density The length of a decorative-stitch pattern progrs med can be varied, while the stitch den remains the same, when the indicator light to left of key 105 lights up. The pattern can be van in length from 2.0 to 90 mm.
- Page 81 With your PFAFF Creative you can stitch the ni hers from 0 to 9 and the letters of the aiphal These are used to enhance garments or m linen goods and outerwear. You can even cc pose texts and write them on the fabric.
- Page 82 -- -_...
- Page 83 • Spacings are programmed the same way with dot quick selection (see page 69). Sewing hyphens (or dashes) Example: PFAFF-CREATIVE • Press right “programming” key 121— until hyphen in the desired length appears in if display (Fig. 2). • Press “program entry” key 143 (Figs. 2+: •...
- Page 84 Writing texts Begin by marking the begrnning of the text on the fabnc, After sewing, cut the threads between letters and numbers and in the spacings (Fig. 1). If you want to verify the text, press program cycle” key 125. The text will then appear in the dis play (see page 65).
- Page 85 Balancing out letters and numbers Letters or words shift occasionally, depending c the fabric used. This can be corrected with tl ‘0 balancing’ key (Fig. 1). Words and texts can only be corrected togethe prog The letter or number entered last is correcte towards plus or minus with key 105, and the co L_ZL rection entered by pressing program entry”...
- Page 87 Woollen fabrics: well balanced stitch length ai tension. Batiste light needle thread tension and mediu stitch length. Velvet silk velour: baste the seam line twic and sew in grain direction with a stitch length 2.5 to 3 mm. velvet! Be careful when pressing try out on piece of waste fabric and do not press down o the iron.
- Page 88 Pfaff offer the only househo ld sewing machine in the world with built in dual feed. By this means, the material is not only fed from below, but also from above simultan eously. During processi ng of long fabric panels, such as curtains and side curtains, etc., there is no shifting of the material plies.
- Page 89 —...
- Page 90 _______ __ _______ _______ ‘--...
- Page 94 ____ — •...
- Page 95 Top-stitch seams Buttonhole thread as needle thread [prog 5—6 Needle: 100/120 Needle thread: buttonhole thread Bobbin thread: sewing thread Stitch length: longest stitch Top-stitch seams produce nice ornamental effect: For this, selection of a suitable thread is importan To obtain particularly prominent seams, we recorr mend using buttonhole thread.
- Page 96 —...
- Page 97 Lap-seam felling Imitation lap seam sewn with the ordinary sewing fc prog O35 O Place the two pieces of fabric one on top of the ot, with their right sides facing, and sew them together abc ‘ one centimetre from the edge, Neaten the raw edge. Fo the seam allowance over to one side and press, Th top-stitch on the right side of the fabric, using the edge the sewing foot as a guide (Fig.
- Page 99 Shirring with e’astic thread prog 15 17 Cording foot (special accessory) First mark the starting line for the shirred sean on the underside of the fabric. Insert the need at the seam beginning point and place an elast thread around the needle. Insert the elastic three in the groove of the sewing foot in use.
- Page 100 (special accessor y) prog Shirring foot Stitch length: 3—4 mm How to insert the shirring toot shirring with its pin in A’ pin “8” in (Fig. 2). How to gather Both outer fabric and the material to be shirred are sewn together with the shirring foot in one work- step.
- Page 102 — —...
- Page 103 —...
- Page 104 Seams which are not ironed open can be sewn together and serged in one workstep. The Pfaff Creative 1371 offers a selection of diffe rent elastic assembly and serging seams from which you can easily select the corresponding seam for all stretchable materials.
- Page 105 • —...
- Page 106 ‘:t ‘ -a--...
- Page 107 _______ Honeyco mb stitch prog Honeycomb stitch is especially suitable as a mean of securing hems on stretchable lining materiak the hem double up to the hem edge and ovet Fold cast with honeycomb stitch (Fig. 1). Securing hems with the twin needle (T-shirt seam) Needle: double needle, 4 mm distance...
- Page 109 ______ prog Fold ready-made bias binding lengthwise anc shape-press. Push the folded binding over the fabri( edge and baste it in place, if required. Then se it on with straight stitches (Fig. 1). Binder (special accessory) Sewing foot: Program: Stitch length: 2.5 mm, (Fig.
- Page 110 iii’ ‘,e,ini ii...
- Page 111 Darning with straight stitch prog 2—3 — Feed dog: lowered Presser bar lifter: in darning position Sewing-cotton: embroidering and darning thread Darning position (Fig. 1): Lower presser bar hfter ‘A”, at the same time push ing it back slighty until it enters notch “B” at th’ bottom of its slot Attach the darning foot (Fig.
- Page 112 wool Darning with prog_E Feed dog: lowered Presser bar lifter: in darning position (see page 96) Sewing thread: Embroidery and darning thread, wool Draw the wool thread through the needle hole of the darning foot and into the thread guide (Fig. 1). Place the wool thread under the darning foot.
- Page 113 prog Sew as many elastic-s titch seams over the dai aged spot as may be required to cover it col pletely. Overlap the seams slightly (Fig. 1). Stitch length: Need/e position : down The new piece of fabric is pinned on the face sid and the fabric edge over-sew n with the selecte stitch.
- Page 114 Sew the first lengthwise seam at the required length (Fig. 1 a). After that the Pfaff Creative sews the first bar and the reverse seam. It must be sewn at the same length as the first lengthwise seam (Fig.
- Page 117 Si’ it will...
- Page 118 Zippers for ladies’ slacks Og -i({ Key: Needle down • Snap the zipper foot in at the right. Iron the fly edge. Baste the closed zipper under neath the pressed right-han d fly edge so that its teeth are still visible. Pin facing strip ‘A’ to the under side and stitch it down at the same time as you sew on the zipper.
- Page 119 130/705H-SUK jersey fabrics, Quiana and Simplex. ball point 70, 110 — Stretch-fabric needle developed Medium 130/705 H-PS especially for Pfaff. Particularly suitable ball point 75, 90 for delicate stretch and knitted fabrics. Wide-meshed corsetry, Lycra, Simplex Heavy 130/705H-SKF and Lastex.
- Page 120 — — — — -— ——...
- Page 121 PFAFF-HANDELSGESELLSCHAFT für Hausha[tnâhmaschinen mbH. Subec to ateratons desgn. Printed in West-Germany West Germany 7500 rIsruhe 41 HR 487 Nr. 30031 engl.