Advertisement
Available languages
Available languages
Quick Links
ood
Use & Care / Installation Manual
cocina
Manual de use y cuidado /instalaci6n
Models
Modelos
233.51344590
(3o" wide
_ Bisque)
233.51345590
(3o" wide _
White)
233.51348590
(3o" wide
_ Almond)
233.53244591
(24" wide _ Bisque)
233.53245591
(24" wide _ White)
233.53248591
(24"
wide _ Almond)
233.53344591
(30" wide _ Bisque)
233.53345591
(30" wide _ White)
233.53348591
(30" wide _Almond)
233.53349591
(30" wide _ Black)
0
u
O
99043201C
Sears, Roebuck and Co,, Hoffman Estates, UL60179 U,S,A,
www,sears,com
Advertisement

Related Manuals for Kenmore 233.51345590


Summary of Contents for Kenmore 233.51345590
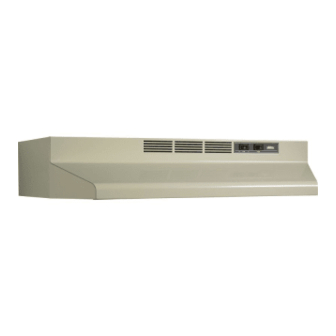
- Page 1 Use & Care / Installation Manual cocina Manual de use y cuidado /instalaci6n Models 233.51344590 (3o" wide 233.53244591 _ Bisque) (24" wide _ Bisque) Modelos 233.51345590 (3o" wide _ White) 233.53245591 (24" wide _ White) 233.51348590 (3o" wide 233.53248591 (24" _ Almond) wide _ Almond) 233.53344591...
- Page 2 SECTION ..............PAGE if within 1 year from the date of installation, any part of this range hood fails to function properly due to a defect in mate- Warranty ................rial or workmanship, Sears will repair the part or furnish and Safety Instructions ...............
- Page 3 WARNING: To reduce the risk of electric shock, disconnect from power supply before cleaning. LIGHT ABuminum mesh filter Clean frequently using hot water and a mild detergent or in your dishwasher. The aluminum mesh filter should be washed approximately every month depending on the amount of us- age.
- Page 4 Light Bumb (75 W Maximum) Aluminum Grease Fimter (1 per hood) (Ducted hoods only) Purchase locally. (1 per hood) OPTmONAL PARTS (purchaseseparately) Cmean Cooking Filter (Non-ducted hoods only) Spmashpmate (1 per hood) Sears Part Nos. 58120 30" Black/Bisque 58128 30" White/Almond 58129 30"...
- Page 5 Kenmore range h oods a redesigned toperform efficiently when attached tolong runs ofduct.Asa point o freference, thishood wiII f unction atapproximately 80% ofitsrated airflowwhen 200equivalent feetof7"round d uctwork isattached. Use thischart tocalculate theequivalent duct l ength o fyoursystem. Broan Model 428 64n= Round 3¼-in, ×...
- Page 6 ROOF CAP tf hood is to be installed Non-Ducted: 3_A" X 10" DUCT e Skip to Step 2, below. 1. Determine whether hood will discharge vertically or hori- zontally. SOFFIT Run ductwork between the hood location and a roof cap HOUSE WIRING or wall cap.
- Page 7 1. Remove _ from nose ofhood. SHiPPiNG TAPE 2. Remove Wiring Cover from inside the hood. Set cover and mounting screw aside. COVER 3" TOP RECTANGULAR DUCT KNOCKOUT (Remove for 3¼" x 10" vertical discharge) 3. Remove appropriate Duct Knockout from top or back of hood.
-
Page 8: Ducted Installations
DUCTED iNSTALLATiONS ONLY 4. Attach 31A'' x 10" Damper/Duct Connector over knockout opening. Make sure damper Pivot is nearest to B/Back Edge of hood. Remove any shipping tape from damper flap. 3¼" x 10" DAMPER/DUCT CONNECTOR PIVOT 5, Remove either top or back Wirinq Knockout and instaII approved Electricam Cabme Cmamp, WiRiNG... - Page 9 HOUSE WIRING WARNING: To reduce the risk of electric shock, (120 VAC) make sure power is switched off at the service panel Lock or tag service panel to prevent power from being switched on accidentally. iiiiiiiiii_ iiiiiiiiiiiiiii 1= Connect House Wiring (120 VAC) to hood= Use a piece of Cardboard to protect the cooktop, if necessary= A Cord Kit is available...
- Page 10 1. Hang hood from (4) Mountin_ (from parts bag). Slide hood towards wall until mounting screws engaged in narrow end of (4) _. Tighten mounting screws securely. CAUTION: Do not push on filter or fan blade! Pushing on the filter or fan bmade may cause them to interfere with ether hood parts+ KEYHOLE...
- Page 11 MODEL 5324 5334 5134 5134 PART NO, PART NOD DESCRIPTION 98006621 98006621 Outlet Box Cover 99150478 99150478 8-18 x 3/8 Phillips Truss Sheet Metal Screw* (2 Required) 97005675 97008678 Bulb Holder with Wires 99110437 99110437 Light Lens 97011217 97011217 Screw/Nut Kit (Includes 2 - #10-16 x ,500 Screws and 2 - #10- 16 Sheet Metal Nuts)
- Page 12 SECCJON ..............PAGINA Si dontro do 1 afio do la fecha do la instalaci6n, cualquJer parto de esta campana do cocina doja do funcionar on forma apropiada dobido a dofocto en el matorial o mano de obra, Soars reparar4 la pioza afoctada o provoer_, o instalar4 una pioza nuova sin cargo.
- Page 13 ADVERTENCIA: Para reducir eJ riesgo de una descarga eJ_ctrica, desconecte el suministro et_ctrico antes de timpiar ta unidad. MGHT Fimtros de maria de amuminio Limpie frecuentemente los filtros con agua caliente y un detergente suave. Los filtros se pueden Iavar en lavaplatos. Ventilador debe Iavar...
- Page 14 (M_ximo 75 W) Fimtro de grasa de aluminio Bombilla de luz (1 por campana) ($61o campanas con conducto Compre Iocalmente= (1 per campana) PIEZAS OPTATmVAS (compra separada) Filtro Iimpio para cocina ($61o campanas sin conducto) (1 per campana) Placa posterior Piezas Sears Nos= 58120 30"...
- Page 15 Las campanas decocina K enmore fueron d isehadas para sudesempe_o eficiente cuando s eIas sujeta a largos recorridos de conducto. Como punto de referencia, esta campana funcionara a aproximadamente el 80% de su fiujo de aire nominal cuando se le sujeta 61 m (200 pies) equivalentes de conducto redondo de 17=8 cm (7")= Utilice esta cuadro para calcular el largo equivalente de conducto de su sistema=...
- Page 16 TAPA DE TECHO CONECTOR DE 8,25cm X 25.4cm Siee instatara macampana en un sisterna sin cenductee: (S 1/4" X tO") e Continue con el paso 2, abaje. Determine si la descarga de Ia campana seth. vertical o horizontal. Tienda Ios conductos entre el lugar deride se instalarb, la CABLEADO ELECTRICO campana y el tap6n de techo o el tap6n de pared.
- Page 17 1. Retirar la cinta adhesiva de embarque de la punta de la CHNTA oampana. ADHESHVA 2. Quite la tapa demcabmeado del interior de Hacampana. Coloque la tapa y el torniHo de montaje a un lade. TAPA DEL CABLEADO SOLO PARA mNSTALACmONES AGUJERO CHEGO SUPERIOR DEL CONDUCTO CONDUCTO...
-
Page 18: Parte Superior
SOLO PARA mNSTALACmONES BORDE DE LA CON CONDUCTO _ PARTE SUPERIOR/ POSTERIOR 4. Coloque et conectador det re qulador de tiro/conducto de 8.3 × 25°4 crn (3W' x 10") sobre la abertura agujero ciego. AsegOrese de que e! pivote de! regulador de tiro quede Io mas cerca posibb del borde superior/ posterior de la campana. - Page 19 CABLEADO DE LA CASA ADVERTENCIA: Para reducir el riesgo (120 VCA) descargas electricas, aseg(_rese de apagar el interruptor de aHrnentaciSn el_ctrica en e! panel de servicio. BJoquee o _otuJe eJ paneJ de servicio para evitar que aiguien conecte @iiii_ accidentaJmente la energ{a electrica.
- Page 20 1.Cuelgue iacampana de!os(4)torniffos de rnontaje (que se encuentran en la bolsa de piezas). Desiice la campana hacia [a pared hasta que los tomiiios de montaje queden conectados en el extreme angosto de los (4) orificios tipo bocalmave. Apriete fi]amente los torniHos de montaje. PRECAUCION: iNo presione e[ fi[tro o [a paJeta de[ ventilador! El empujar...
- Page 21 5324 MODELO iCLAVE 5334 5134 5134 PIEZA NO. P_EZA NO. DESCRJPCI6N 98006621 98006621 Tapa de la caja de enchufe 99150478 99150478 Tornillo met_lico Phillips para chapa met_lica de enrejado de 8-18 x 3/8" (se necesitan 2) 97005675 97008678 Soporte de bombilla con cables 99110437 99110437...
- Page 24 Your Home For repair-in your home-of aJJmajor brand appliances ....lawn and garden equipment, or heating and cooling systems, no matter who made it, no matter who soJd it! For,the replacement parts, accessories and owner s manuals that you need to do-it-yourself. For Sears professional installation of home appliances and items like garage door openers and water heaters.