Table of Contents
Advertisement
Advertisement
Table of Contents

Related Manuals for Horizon Fitness E54HR


Summary of Contents for Horizon Fitness E54HR
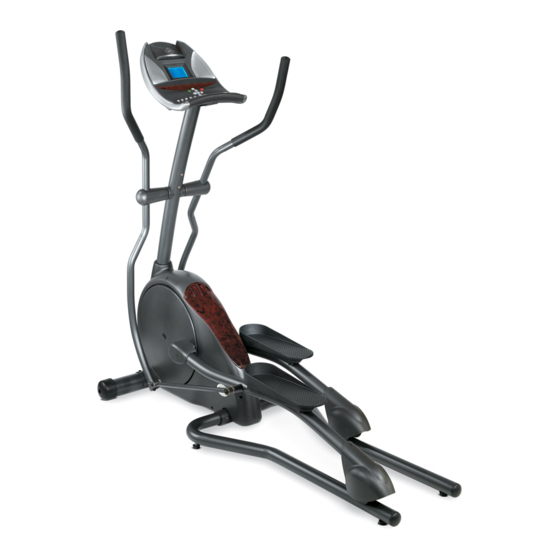
- Page 1 Designed for life, TM HZSERIES E54HR Elliptical U ser's Guide...
-
Page 2: Table Of Contents
Table of Contents IMPORTANT PRECAUTIONS ........... BEFORE YOU BEGIN ............ASSEMBLY (E51-E54HR models) ..........ELLIPTICAL OPERATION & ADJUSTMENT ........CONSOLE FEATURES & DISPLAY ..........PROGRAM PROFILES ............PROGRAM CHARTS ............USING YOUR RACE PROGRAM ..........USING YOUR THR ZONE PROGRAMS 1 &... -
Page 3: Important Precautions
Service should be performed only by an authorized Horizon Fitness service provider. ° Never operate this elliptical trainer if it has a damaged cord or plug, if it is not working properly, if it has been damaged, or immersed in water. - Page 4 OTHER SAFETY TIPS FOR YOUR ELLIPTICAL TRAINER CAUTION! ° If you experience chest pains, nausea, dizziness or shortness of breath, stop exercising immediately and consult your physician before continuing. • Do not turn pedal arms by hand. • Do not wear clothing that might catch on any part of the elliptical trainer.
- Page 5 CAUTION" BEFORE BEGINNING ANY EXERCISE PROGRAM, ALWAYS CONSULT YOUR PHYSICIAN. IF YOU EXPERIENCE CHEST PAINS, NAUSEA, DIZZINESS OR SHORTNESS OF BREATH, STOP EXERCIS- ING AND CONSULT YOUR PHYSICIAN BEFORE CONTINUING. IMPORTANT: PLEASE READ BEFORE USE! ASSEMBLY CAUTION! There are several areas during the assembly process of a elliptical trainer that special attention must...
- Page 6 Before proceeding, find your elliptical trainer's serial number and model name located under the console mast boot and enter it in the space provided below: SERIAL NUMBER AND MODEL NAME LOCATION: ENTER YOUR SERIAL NUMBER IN BOX BELOW: Refer to this number when calling for service, and also enter this serial...
-
Page 7: Beforeyoubegin
BeforeYouBegin CONGRATULATIONS! on choosing your elliptical trainer. You've taken an important step in developing and sustaining an exercise program! Your elliptical trainer is a tremendously effective tool for achieving your personal fitness goals. Regular use of your elliptical trainer can improve the quality of your life in so many ways, Here are just a few of the health benefits of aerobic exercise:... -
Page 8: Assembly (E51-E54Hr Models)
Assembly UNPACKING Unpack the product where you will be using it. Place the product on a level flat surface. It is recom- mended that you place a protective covering on your floor. Note. It is recommended that you apply grease to the threads of each bolt as you assemble the product, to prevent loosening and noise. - Page 9 E51/E52 HARDWARE © ® F) 13mm Nut D) 8mm Set Screw E) 17mm Quantity: Quantity: Quantity: A) 20mm Bolt Quantity: H) 15mm Screw G) 20mm Screw S) 12ram Bolt Quantity: Quantity: Quantity: 5 B) 70mm Bolt Quantity: L) 5mm Allen M) 4mm Allen Wrench/Phillips Wrench...
- Page 10 E51/E52 ASSEMBLY STEPS STEP 1: STEP 2: STEP 3: ATTACH FRONT TUBE. ATTACH LEFT & RIGHT GUIDE ATTACH CONSOLE MAST AND RAILS. CONSOLE MAST BOOT. Note: Make sure not to tighten Note: Make sure to loosen the bolts until all assembly steps have water bottle screws in order to fit been completely assembled and aligned.
- Page 11 E53 HARDWARE ® C) 12mm Bolt E) 8mm Set Screw D) 15mm Bolt Quantity: 3 Quantity: 4 A) 20mm Bolt Quantity: 6 © Quantity: 2 G) 13mm I) 15mm Screw Quantity. 3 Quantity: 4 H) 20mm Screw F) 17ram Nut Quantity.
- Page 12 E53 ASSEMBLY STEPS "" STEP 1: STEP 2: STEP 3: ATTACH FRONT TUBE. ATTACH LEFT 8, RIGHT GUIDE ATTACH CONSOLE MAST AND RAILS. CONSOLE MAST BOOT. Note: Make sure not to tighten Note: Make sure to loosen the bolts until all assembly steps have water bottle screws in order to fit been completely assembled and aligned,...
- Page 13 E54HR HARDWARE ® C) 12ram Bolt E) 8mm Set Screw D) 15mm Bolt Quantity: 3 Quantity. 4 F) 17mm A) 20ram Bolt Quantity: 6 Qauntity= 2 Quantity: 2 © G) 13mm Nut I) 15mm Screw J) Arc Washer Quantity: 3 Quantity.
- Page 14 E54HR ASSEMBLY STEPS STEP 1: STEP 2: STEP 3: ATTACH FRONT TUBE. ATTACH LEFT & RIGHT GUIDE ATTACH CONSOLE MAST AND RAILS. CONSOLE MAST BOOT. Note: Make sure not to tighten Note: Make sure to loosen the bolts until all assembly steps have water bottle screws in order to fit been completely assembled and aligned,...
-
Page 15: Elliptical Operation & Adjustment
E//iptica/Operation & Adjustment POWER Your programmable elliptical trainer (E52, E53 & E54HR) is powered by a power supply. The power supply must be plugged into the power jack, which is located in the front of the machine near the front foot tube. E51 is powered by two AA batteries. (batteries included) LEVELING... - Page 16 MOVING Your elliptical trainer has a pair of transport wheels built into the front of the frame. Carefully pick up the guide rails and roll the elliptical to the desired position.
- Page 17 CAUTION! Our elliptical trainers are well built and heavy, weighing up to 2001bs.[ Use care and additional help if necessary when moving. FOOT POSITIONING Your elliptical trainer has a variety of foot positions to offer a variance in your workout routine and to strengthen and train a wider range of leg muscles.
-
Page 18: Console Features & Display
Console Features & Display E51 QUICK START UP Simply begin exercising. The console will automatically begin counting up and tracking your informa- tion. RESET Press and hold the select button on the console. MPH/KM CONVERSION The speed readout on the console automatically defaults to mph when installing the batteries. - Page 19 SELECTING OPTIONAL FEEDBACK Press the 'SELECT' button on the console to scroll through and view your speed, time, distance, odometer, calories, and pulse. STARTING YOUR WORKOUT Start pedaling, the console will automaticlly begin counting down. SCAN FUNCTION During a workout, you can view alternate information such as speed, distance,...
- Page 20 TIME Shown as Minutes:Seconds. View the time remaining or the time elapsed in your workout. DISTANCE Shown as Miles. View the accumulated distance during your workout. SPEED Shown as your speed in miles per hour. ODOMETER Shows your accumulated distance for all your previous workouts. It will continue to track this distance...
- Page 21 E52 AND E53 CIUICK START UP Simply press the 'Start" button to begin exercising. The program will automatically default to the Manual program unless another program is selected. RESET Press and hold the Stop button to reset the elliptical trainer.
- Page 22 E54HR QUICK START UP Simply press the 'Start" button to begin exercising. The program will automatically default to the Manual program unless another program is selected. CD/MP3 Player Holder RESET Press and hold the Stop button to reset the console. LOCATING THE SPEAKER INPUT JACK Compatible with CD/MP3, AMiFM and cassette,...
- Page 23 TIME B[][] [][][] [][][] Shown as Minutes:Seconds. View the time remaining or the time elapsed [][] [][] your workout. [][] [][] [][] [][][] [][][] [][]_ TIME DISTANCE Ii[][] [][][] [][][] Shown as Miles. View the accumulated distance during your workout. [][] III [] lU _...
- Page 24 RESISTANCE Ill[][] During a workout, the amount of resistance can be adjusted by pressing the lira m [] III I! plus 'Up' or 'Down' buttons or the quick resistance keys on the console. The []mm resistance levels vary from level 1 to 20 quick speed keys (level 1 being the RESISTANCE easiest and level 20 being the most difficult).
- Page 25 CHOOSING A PROGRAM With the program text scrolling, press the arrow keys to scroll through the different programs. Press enter to choose your desired program. Once you choose your program, you will see the resistance level scrolling across the screen. CHOOSING A LEVEL With the level text scrolling, press the arrow keys to scroll through the different...
-
Page 26: Program Profiles
Program Pro files P1 MANUAL (All Models) Customized workouts, allowing the user to adjust resistance level to the user's preference. P2 INTERVALS (E52, E53, E54HR models) Improves your strength, speed, and endurance by raising and lowering the resistance levels through- out your workout to involve both your heart and muscles. -
Page 27: Program Charts
Program Charts P2 INTERVALS Time-based goal with 10 difficulty levels to choose from. seconds. Peak segments last 30 seconds, valley segments last 90 Warm-up and cool-down last 5:00 minutes each and are included in program times. ments Pro qn m sefl Cool Down Resistance Warm Up... - Page 28 P3 ROLLING Time-based goal with 10 difficulty levels to choose from. All segments last 10 seconds. Warm-up and cool-down last 5:00 minutes each and are included in program times. merits Progr; _ sec Resistance Warm Up Cool Down iiiii;iiiiliii_iiiiiiiiiiiiilil Level 2 i;ii_iiiiiiiii_iii!i!_i!,iiii !i iii iiii l!iiiiiiil _iii!!i!lii_i;i!iiiii...
- Page 29 P4 WEIGHT LOSS Time-based goal with 10 difficulty levels to choose from. All segments last 10 seconds. Warm-up and cool-down last 5:00 minutes each and are included in program times. rnents Pro qr_ lrn sec CoolDown _0 .._o...
- Page 30 P5 TOUR Distance-based program with 10 different difficulty levels to choose from. Proqra n seqments Resistance Cool Down Totaldistanm iiiiiiilil_!!ii'ii'_i_i/iii!ii iiiiii:i_ii_!_ii;!iiiiiiiiiiiii_ Level 2 Resistance distance 5718 !376 I}_:i iiiii !ii!!i iiiiiii:413ii_i Resistance Level 6192 distance i401 Resistance Level distance i 415 6096 I _ ::i iiiiii:ili!_iiii!! ii[!i_ii...
-
Page 31: Using Your Race Program
USING YOUR RACE PROGRAM Your Race Program is designed to add motivation to a workout by allowing you to compete against a selected pacer. To use your Race Program, follow these instructions: 1. Choose the Race program by either pressing the 'Up' or 'Down' buttons. Press 'Enter'. -
Page 32: Using Your Thr Zone Programs 1 & 2
USING YOUR THR ZONE 1 & 2 PROGRAMS The THR zone program is designed to keep the user at an optimum exercise level, while adjusting resistance levels to keep the user at a target heart rate. To choose the THR zone program, follow these instructions. -
Page 33: Using Your Custom User Programs 1 & 2
USING YOUR CUSTOM USER 1 & 2 PROGRAMS Your Custom User 1 & 2 programs are designed to allow you to create your own programming, with the ability to save your program settings for future workouts. To use your Custom User 1 &... -
Page 34: Troubleshooting & Maintenance Procedures
Troubleshooting & Maintenance Procedures Your elliptical trainer is designed to be reliable and maintenance free. However, if you do experience problems with your elliptical, please reference the troubleshooting guide listed below. TROUBLESHOOTING PROBLEM: There is no display on the console. $©LUT_©IN: Check all power cord and wire connections (Check batteries E51 model only). - Page 35 If the above troubleshooting section does not remedy the problem, discontinue use and turn the power off, DO NOT RETURN TO THE STORE, PLEASE CONTACT THE HORIZON FITNESS CUSTOMER ASSISTANCE CENTER TOLUFREE @ 1-800-244-4192 Mon.-Fri., 8 a.m.-5 p.m. CST (excluding holidays). www.horizonfitness.com...
-
Page 36: Common Product Questions
Common Product Q uestions ARE THE SOUNDS MY ELLIPTICAL TRAINER MAKES NORMAL? Our elliptical trainers are some of the quietest available because they use belt drives and friction free magnetic resistance. We use the highest grade bearings and belts to minimize noise. - Page 37 HOW DO I CLEAN MY HORIZON FITNESS ELLIPTICAL TRAINER? Clean with soap and water cleaners only. Never use solvents on plastic parts. Cleanliness...
-
Page 38: Conditioning Guidelines
Conditioning G uidelines IMPORTANT Always consult your physician before beginning an exercise program. HOW OFTEN? The American Heart Association recommends that you exercise at least 3 to 4 days per week to main- tain cardiovascular fitness. If you have other goals such as weight or fat loss, you will achieve your goal faster with more frequent exercise. -
Page 39: Monitoringyourheartrate
MonitoringYourHeartRate HEART RATE HANDLEBAR Place the palm of your hands directly on the heart rate handlebars. Both hands must grip the bars for your heart rate to register. When griping the handlebars, do not grip tightly. Holding the grips tightly may elevate your blood pressure. -
Page 40: Heartratechart
HeartRateChart TARGET HEART RATE ZONE Your 'Target Heart Rate Zone' is a percentage of your maximum heart rate. Target Zones will vary for each individual, depending on age, current level of conditioning, and personal fitness goals. The American Heart Association recommends working-out at a 'Target Heart Rate Zone' of between 60%... -
Page 41: Warm Up/Cool Down
Warm Up& Cool D own THE IMPORTANCE OF WARM UP AND COOL DOWN WARM UP The first 2 to 5 minutes of a workout should be devoted to warming up. The warm-up will limber your muscles and prepare them for more strenuous exercise. -
Page 42: Developinga Fitness Program
Developing AFitness Program STRETCH FIRST Before using your Horizon Fitness product, it is best to take a few minutes doing a few gentle stretch- ing exercises. Stretching prior to exercise will improve flexibility and reduce chances of exercise relat- ed injury. Ease into each of these stretches with a slow gentle motion. -
Page 43: Achieving Yourfitness Goals
Achieving YourFitness Goals An important step in developing a long term fitness program is to determine your goals. Is your pri- mary goal for exercising on your elliptical trainer to lose weight? Improve muscle? Burn Stress? Prepare for the spring racing schedule? Knowing what your goals are will help you develop a more successful exercise program. - Page 44 KEEPING AN EXERCISE DIARY Photocopy the weekly and monthly log sheets on the following pages to make your personal exercise log book. As time goes by you'll be able to look back with pride at the work you've done. As your fit- ness improves, you can look back and see how far you've come.
-
Page 45: Weekly Log Sheets
Weekly LogSheet WEEK # WEEKLY GOAL: DATE DISTANCE CALORIES TIME COMMENTS TUES THUR WEEKLY TOTALS WEEK # WEEKLY GOAL: DATE DmSTANCE CALORIES TiME COMMENTS TUES THUR WEEKLY TOTALS WEEK # WEEKLY GOAL: DATE DISTANCE CALORIES TIME COMMENTS TUES THUR WEEKLY TOTALS... -
Page 46: Monthly Log Sheets
Monthly LogSheet MONTH MONTHLY GOAL: WEEK # DISTANCE CALORIES TIME MONTHLY TOTALS MONTH MONTHLY GOAL • WEEK # DISTANCE CALORIES TIME MONTHLY TOTALS MONTH MONTHLY GOAL: WEEK # DISTANCE CALORIES TIME MONTHLY TOTALS... -
Page 47: Limited Warranty
Horizon Fitness, its affiliates, subsidiaries and authorized distributors of Horizon Fitness products within the U.S. and Canada. WARRANTY REGISTRATION Your warranty card must be completed and sent to Horizon Fitness or register online at www.horizon- fitness.corn, before a warranty claim can be processed. - Page 48 O_lZO Designed for life: _ HORIZONFITNESSI 800 BURTONBOULEVARD I DEFOREST, WI 53532 Phone 1-800-244-4192 Fax 1-608-842-1660 www.horizonfit ness.com HZ Series. Rev. 1.5...