SIIG PCI 1P Quick Installation Manual
Hide thumbs
Also See for PCI 1P:
- Quick installation manual (12 pages) ,
- Quick installation manual (12 pages)
Advertisement
Quick Links
Introducing the Parallel PCI 1P
The Parallel PCI 1P high-speed parallel card provides
one additional parallel port to your system. Depending
on the model purchased, this board will fit into either
Full or Low Profile chassis.
Features and Benefits
•
Conforms to PCI v2.2 Plug and Play
•
Supports 32-/64-bit, 3.3V/5V PCI and PCI-X slots
•
Full support for Windows-based software
•
Reduces CPU load and improves system
performance dramatically
•
Supports EPP/ECP, BPP (bi-directional), SPP
(standard) parallel port modes
System Requirements
•
Pentium
32-/64-bit PCI or PCI-X slot
•
Windows
(32-/64-bit) / Server 2003 & 2008 (32-/64-bit) /
2000 / NT 4.0 / ME / 98SE / 98 / 95
Package Contents
•
Parallel PCI 1P board
•
Low profile bracket (for Dual Profile PCI-1P only)
•
Driver CD
•
Quick installation guide
04-0358D
Parallel
Quick Installation Guide
or equivalent computer with an available
®
7 (32-/64-bit) / Vista (32-/64-bit) / XP
®
PCI
1P
1
Advertisement

Related Manuals for SIIG PCI 1P


Summary of Contents for SIIG PCI 1P
-
Page 1: Quick Installation Guide
Parallel Quick Installation Guide Introducing the Parallel PCI 1P The Parallel PCI 1P high-speed parallel card provides one additional parallel port to your system. Depending on the model purchased, this board will fit into either Full or Low Profile chassis. Features and Benefits •... -
Page 2: Hardware Installation
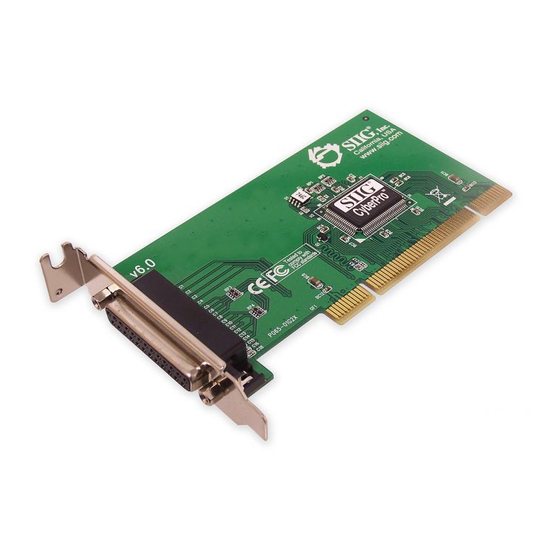
Layout Depending on the model purchased, the bracket mounted on your board may vary from the image displayed. Full profile bracket Parallel Port Figure 1. Layout Hardware Installation General instructions for installing the card are provided below. Since the design of computer cases and motherboards vary, refer to your computer’s reference manual for further information, if needed. -
Page 3: Driver Installation
Remove your computer cover. Remove the slot bracket from an available PCI slot. To install the card, carefully align the card's bus connector with the selected PCI slot on the motherboard. Push the board down firmly, but gently, until it is well seated. Replace the slot bracket holding screw to secure the card. - Page 4 ™ Windows Vista (32-/64-bit) Install the board and boot up Windows. At the Found New Hardware window, insert the driver CD, click Locate and install driver software (recommended), then click Continue. Click Don't search online. Click Next, then click Close to complete the installation.
- Page 5 Click Continue Anyway, then click Finish. Restart Windows to complete the installation. Windows Server 2008 (32-bit) Install the board and boot up Windows. At the Found New Hardware Wizard, click Locate and install driver software (recommended). Insert the driver CD. Click Don't search online.
- Page 6 To Verify Windows 7 / Vista / XP / Server 2003 & 2008 Installation Check in Device Manager to verify installation. For Windows 7: Right click Computer, click Manage, then click Device Manager. For Windows Vista: Right click Computer, click Manage, click Continue, then click Device Manager.
- Page 7 To Verify Windows 2000 Installation Right click My Computer, click Manage, then click Device Manager. Click on the + (plus sign) in front of Ports (COM & LPT), and a SIIG CyberPro 1P PCI board should be displayed. Windows ME At the Add New Hardware Wizard, select Specify the location of the driver (Advanced), click Next.
- Page 8 Windows 95 At the Update Device Driver Wizard, click Next. Insert the driver CD, and click Other Locations. Type in D:\9x, click OK, then Finish. (Change D: to match your CD-ROM drive letter) From the Insert Disk window, click OK. When the Copying Files dialog box appears, type in D:\9x, then click OK.
- Page 9 To Verify Windows NT 4.0 Installation Click Start, Programs, Administrative Tools, then Windows NT Diagnostics. Click Resources tab, SIIGpar should be displayed.
- Page 10 Blank Page...
-
Page 11: Technical Support And Warranty
Technical Support and Warranty QUESTIONS? SIIG’s Online Support has answers! Simply visit our web site at www.siig.com and click Support. Our online support database is updated daily with new drivers and solutions. Answers to your questions could be just a few clicks away. You can also submit questions online and a technical support analysts will promptly respond. - Page 12 About SIIG, Inc. Founded in 1985, SIIG, Inc. is a leading computer upgrade manufacturer of I/O connectivity products, including PCIe, PCI & ISA serial and parallel ports, USB, Serial ATA & UltraATA controllers, FireWire (1394a/b), networking, sound cards, and other accessories. SIIG is the premier one-stop source of upgrades.