Table of Contents
Advertisement
Advertisement
Table of Contents

Related Manuals for Frigidaire GLEH1642FS2


Summary of Contents for Frigidaire GLEH1642FS2
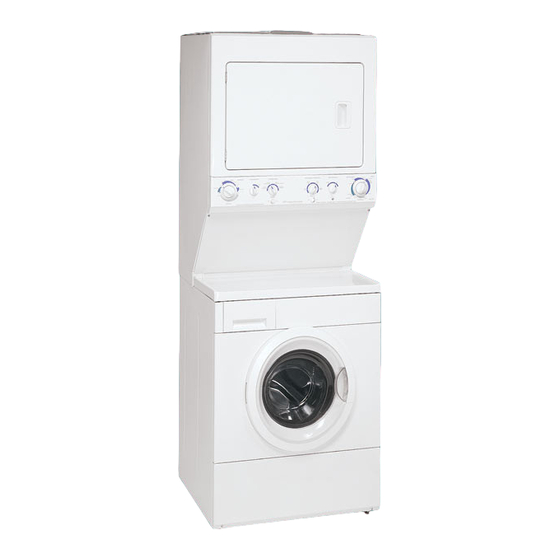
- Page 1 G I E A UAL UA IO P/N 134889000A (0807) www.frigidaire.com...
-
Page 2: Product Registration
Contents Product Registration Product Registration ............Thank you for choosing this laundry center. This owner's guide will explain proper operation and care. Important Safety Instructions ........Washing Procedures ..........Record Your Model and Serial Numbers Stain Removal ............Record below the model and serial numbers found on the Common Washing Problems .......... - Page 3 6AS LAUNDRY CENTERS: Do not use or Grounding Do Not under any circums tan cos cu t, type wall mix liquid chlorine bleach remove, or bypass with other household receptacle the grounding prong chemicals such as toilet from this plug cleaners, rust removers, acid or products...
-
Page 4: Washing Procedures
Important Safety Instructions (Con 't) -De not install or store the laundry center where it will be exposed to the weather. • ALWAYS discennectthe laundry center from the electrical supply before attempting any service or cleaning. Failure to do so can result in electrical shock or injury. - Page 5 detergent, bleach fabric softener to automatic dispenser following these steps: DETERGENT OPENING AND CLOSING THE DISPENSERDRAWER Add measured detergent tothe detergent compartment • Slowly open the dispenser drawer by first sliding the of the dispenser drawer. safety latch to the right, then pulling the drawer out until it stops.
-
Page 6: Stain Removal
Washing Procedures continued) Setcycleselectorknobandwashercontrolsaccordingtotype, size, and soil level of each load. (See Operating Instructions card for your specific model controls.) Start the washer. Close the washer door and pull out the cycle selector knob. For your safety, the door will automatically lock during the entire wash cycle. The Door Lock indicator light will remain lit until the cycle ends. - Page 7 For successful stain removal: • Remove stains promptly. • Determine the kind of stain, then follow the recommended treatment in the stain removal chart below. • To pretreat stains, usea prewash product, liquid detergent, ora paste made from granular detergent and water. •...
- Page 8 Common Washing Problems Many washing problems involve poor soil and stain removal, residues of lint and scum, and fabric damage. Forsatisfactory washing results, follow these suggestions provided by The Soap and Detergent Association. PROBLEM POSSIBLE CAUSES SOLUTIONS PREVENTIVE MEASURES Blue stains •...
-
Page 9: Drying Procedures
Drying Procedures • Follow the guidelines below for preparing the load for drying. Readthe Dryer Operating Instructions for operating your specific model. Always read and follow fabric care labels and laundry product labels. To reduce the risk of fire, electrical shock, or injury to persons, read Important Safety Instructions before operating this dryer. - Page 10 Features Cycle Signa/ Control (some models) When the Cycle Signal Control is ON, a signal will sound at the end of each cycle and during the Press Saver setting (some models). The volume is adjustable on some models. Drum Light (some models) A drum light will come on whenever the door is opened to illuminate the dryer drum during loading and unloading.
-
Page 11: Care And Cleaning
Care and Cleaning reduce risk of fire or serious injury to persons or property, complywith the basic warnings listed in ImportantSafetylnstructions and those listed below. • Before cleaning the washer or dryer interior, unplug the electrical power cord to avoid electrical shock hazards. •... - Page 12 Care and Cleaning Inside theDryer Clean the dryer lint screen after every load. Lint build-up in the screen restricts • air flow, which causes longer drying times. The screen is located at the bottom of the door opening. Remove by pulling straight up. Removethe lint and replace the screen.
-
Page 13: Service Checklist
Winterizing Instructions If the laundry center isstored in an area where freezing can occur or moved in freezing temperatures, follow these winterizing instructions to prevent damage to the laundry center: Follow Winterizing Turn off water supply faucets. Instructions for cold Disconnect hoses from water supply and drain water from hoses. - Page 14 OCCURRENCE POSSIBLE CAUSE / SOLUTION • Electrical power cord may not be plugged in or connection may be loose. Make sure plug fits tightly in wall outlet. OPERA TIN G House fuse blown, circuit breaker tripped, or a power outage has occurred. Reset Washer does not start.
- Page 15 OCCURRENCE SOLUTION POSSIBLE CAUSE DRYER Dryer does not start. Electrical power cord is not securely Make sure the plug fits tightly in wall outlet. plugged in or plug may be loose. House fuse blown or circuit breaker Reset circuit breaker or replace fuse. tripped.
- Page 16 Your appliance is covered by a one year limited warranty. For one year from your original date of purchase, Electrolux will pay all costs for repairing or replacing any parts of this appliance that prove to be defective in materials or workmanship when such appliance is installed,...