Olympus TG-810 Instruction Manual
Hide thumbs
Also See for TG-810:
- Basic manual (180 pages) ,
- Specifications (4 pages) ,
- Maintaining water resistance (2 pages)
Table of Contents
Advertisement
Quick Links
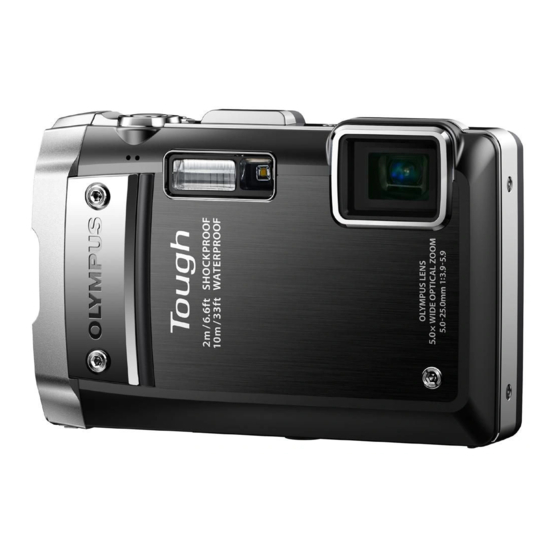
DIGITAL CAMERA
"rG-810
"rG-805
Instruction
• Thank you for purchasing an Otympus dlgitat camera. Before you start to use your new camera
please reaa mese
instructions carefully to enjoy optimum performance and a longer service life. Keep th s manual in a safe place for
future reference.
• We recommend that you take test shots to get accustomed to your camera before taking important photographs.
i In the interest of continually improving products, Olympus reserves the right to update or modify information
contained in this manual.
• The screen and camera illustrations shown in this manual we'e produced during the development stages and may
differ from the actual product. Unless otherwise specified, the explanation about these iltust_'ations is t_rovided _or
TG-810.
Advertisement
Table of Contents

Related Manuals for Olympus TG-810


Summary of Contents for Olympus TG-810
- Page 1 • We recommend that you take test shots to get accustomed to your camera before taking important photographs. i In the interest of continually improving products, Olympus reserves the right to update or modify information contained in this manual.
- Page 2 Aii ! i i _i _iiiiii ii iiiiiiiiiiiiiiiiiiiiiiiiii ¸¸ _ Digital camera Strap Lithium USB cable AV c able U SB-AC adapter (F-2AC) OLYMPUS Setup ion Battery (CB-USB8) (CB-AV3) CD-ROM (LI-50B) Other accessories not shown: Warranty card Contents may vary depending on p urchase location.
- Page 3 Camera Settings Shutter button (p. 21, 63) ....Mo',;e _'eco_'_ L;_;iiJn" (_." _ 2"4" ... [] button (switching between shooting and playback) (p. 21, 23, 50) menu guide) (p. 27) ......... _ button (camera guide/ MENU button (p. 6)
-
Page 4: Joystick
....Operation_guide ............................. The symbols /k V <_D displayed for image selections Joystick and settings indicate that the joystick shown on the right /k (up) / is to be used. INFO (changing information display) (p. 23, 26) <] (left) D (right) Operation guides displayed at the bottom of the screen indicate that the MENU button, (_ button, or zoom buttons... - Page 5 There may be menus that are unavailable depending on other related settings or the _N mode (p. 29). Function menu Press <] during shooting to display the function menu. The function menu is used to choose the shooting mode and provides access to frequently used shooting settings. Selected option Shooting To select the shooting...
- Page 6 Setup menu Press the MENU button during shooting or playback to display the setup menu. The setup menu provides access to a variety of camera settings, including options not listed in the function menu, display options, and the time end date.
- Page 7 Menu index Menus for Shooting Functions ......................"_ Shooting mode tSO ........p.37 Rec View ......p.42 _8) Drive ......... p. 38 Pic Orientation ....p.42 P (Program Auto) ..... p. 20 Icon Guide ......p.43 IAUT0 (iAUTO) ....p. 29 ._) _ (Shooting menu 1)
- Page 8 Menus for Playback, Editing, and Printing Functions (Playback) Slideshow ..... p. 45 Photo Surfing ....p. 45 Edit ....... p. 46 Erase ......p. 48 Print Order ....p. 48 (_ (Protect) ....p. 48 (Rotate) ....p. 48 Menus for Other Camera Settings ?'rl (settings ic?t (Monitor) ....
- Page 9 of Parts Cameraunff ......................................1 Battery/card/connector cover lock ....p. 14 2 LOCK knob ....p. 14 3 HDMI micro connector ........p. 53 4 Multi-connector ....p. 15, 17, 53, 59 5 Battery/card/connector cover .... p. 14, 15, 17, 53, 73 6 Battery lock knob ..
- Page 10 1 ON/OFF button ..p. 18, 20 2 GPS antenna* 3 Monitor ..p. 11,20, 52, 63 4 Movie record button..p. 5 [] button (switching between shooting and playback) ......p. 21,23, 6 O button (camera guide/menu guide) ........p. 27 7 MENU button ....
- Page 11 ..Monitor Shooting mode display 1 Battery check ..p. 18, 64 18 Shadow Adjustment 2 Location information *_...p. 58 Technology ....p. 41 3 Shooting mode ..p. 20, 29 19 Compression (still images) 4 Flash ......p. 35 ......
- Page 12 Playback mode display • Standard display Movie Still image • Advanced display 14 15 1 Battery check ..p. 18, 64 10Elapsed time/total recording 19 Image size ..p. 40, 71, 72 20 File number 2 3D image ...... p. 27 time (movies) ....
- Page 13 Positioning information screen displays (TG-810 only) 1 Latitude Electronic compass 2 Longitude Landmark information 3 Barometric pressure position Altitude/Water depth Landmark transition 5 Current date and time cursor 6 Update status 10 Landmark name To display screen Press and hold /k down until the screen is displayed. The screen can also be displayed by pressing the _ button while the power is off.
-
Page 14: Cover Lock
i_paring the Camera Inserting battery Battery/card/connector cover When removing the battery or card, be sure to turn off the camera before opening or closing the battery/ card/connector cover. _[_ When using the camera, firmly close the battery/card/ Battery/card/ connector cover lock and LOCK knob. connector cover lock... - Page 15 Windows • A "Setup" dialog will be displayed. Windows Vista/Windows • An Autorun dialog will be displayed. Click "OLYMPUS Setup" to display the "Setup" dialog. If the "Setup" dialog is not displayed, select "My Computer" (Windows XP) or "Computer" (Windows Vista/Windows 7) from the start menu.
- Page 16 • Check the system requirements before beginning installation. Insert the supplied CD in a CD-ROM drive. • Click the "OLYMPUS Viewer 2" or "OLYMPUS ib" • Double-click the CD (OLYMPUS Setup) icon on button and follow the on-screen instructions to the desktop. install the software.
- Page 17 Example: USB-AC adapter with an AC OLYMPUS Viewer cable Operating Mac OS X v10.4.11-v10.6 System Processor Intel Core Solo/Duo 1.5 GHz or better 1 GB or more (2 GB or more Multi-connector recommended) Free Hard 1 GB or more Drive Space...
- Page 18 • The date and time setting screen is displayed when _For details on the battery and the USB-AC adapter, the date and time are not set. see "Battery and USB-AC adapter" (p. 68). The battery can be charged while the camera is connected to the computer.
- Page 19 Use <]D to select the [ft] time zone and then press the (o_ button. Write-protect switch • Use /XV to turn daylight saving time ([Summer]) on or off. ÷ Insert the card straight until it clicks into place. Do not touch the contact area directly. The menus can be used to change the selected time zone.
- Page 20 _oting, Playback, and Erasing Shooting with the optimum aperture Current shooting mode display value and shutter speed (P mode) ..........In this mode, automatic shooting settings are activated while also allowing changes to a wide range of other shooting menu functions, such as exposure compensation, white balance, etc.
-
Page 21: Af Target Mark
_hooting movies ................. Press the shutter button halfway down to focus on the subject. Press the movie record button to start • When the camera focuses on the subject, the exposure is locked (shutter speed and aperture recording. value are displayed), and the AF target mark Continuous recording length changes to green. - Page 22 Using the ........................[On] selected for [Digital Zoom]: Pressing the zoom buttons adjusts the shooting range. Digital zoom range Pressing the wide (W) button Zoom bar Other Image zoomed andL'_/ cropped _ Digital zoom range u If [image Size] is less than the full resolution, after reaching the maximum optical zoom, the camera will automatically resize and crop the image to the selected [Image Size[, then enter the digital zoom range if [Digital...
- Page 23 Viewing irnages Press /X (INFO). • The displayed shooting information changes in the order shown below each time the button is Press the [] button. pressed. "Shooting mode display" (p. 11) Number of frames/ Total number of images Normal No information Detailed Playback image...
-
Page 24: Volume
To play sound recordings Pausing and Press the _) button to pause To play sound recorded with an image, select the image restarting playback. During pause, fast and press the C) button. A [] icon appears on images playback forward or reverse, press the _) with which sound has been recorded. - Page 25 Erasing images during playback Press the zoom buttons. Display the image you want to erase and press V (_). Press AV to select [Erase], and press the w@ @T (°3 button. For erasing multiple images at the same time, see "Erasing images [Erase]"...
- Page 26 To select image in index view Playing #ack panoram_ images ........ Use /k V<_[> to select an image, and press the (_) Panorama images that were combined together using button to display the selected image in single-image view. [Auto] or [Manual] can be scrolled for viewing. To scroll an image in close-up view...
- Page 27 Playback direction: Press the (_ button to pause To start a slideshow, press the MENU button. playback. Then press /k V <_D to scroll the image in the To stop the slideshow, press the MENU or _) button. direction of the pressed button. 3D images are composed of JPEG files and MP files.
- Page 28 iiii_i_i_i_ii_:_:_iii_i_ii.iii_i_iiiii`i_`Y_`i_`_iiiiiiiiiiiiiiiiiiiiiiiiiiiiiiiii_`@_iiii_i_{i_{ii_ii_ii_ii_ii_ii Search by Functions or operating methods can purpose be searched. Search for a A solution can be searched when solution having problems during operation. Search by Search from shooting/playback situation scene. Information is shown about Learn about the recommended functions and basic camera operating methods for the camera.
- Page 29 _ing Shooting Modes To change the shooting mode Using the best mode for the shooting The shootingmode(P, IAUTO, SCN, MA61C, I_ 3D) _cene (SCN mode) ............can bechangedusing the functionmenu. "Usingthe Menu"(p. 5) Set the shooting mode to SCN. The defaultsettingsof the functionare highlightedin Shooting with automatic settings...
- Page 30 modes, the optimum shooting settings are To cancet, press the _) button again to clear the AF lock mark. pre-programmed for specific shooting scenes. For this reason, settings may not be changed in some modes. To take pictures of your pet's face, select...
- Page 31 Use <_D to select the desired effect and then Creating panoramic images (l_I mode) press the (°3 button to set. Set the shooting mode to #=:L Icon indicating MA6t¢ mode that is set Press V to go to the submenu. Use <]D to select the desired mode and then...
- Page 32 When set to [Auto] or [Manual], [Image Size] To exit the panorama function without saving an (p. 40) is fixed to [1_]. image, press the MENU button. _t't The focus, exposure, zoom position (p. 22), and white _,_ If the shutter does not automatically release, try balance (p.
- Page 33 q_ Press the shutter button to take the next shot. Repeat Step (2) until the number of desired frames is taken, end then press the _) button or MENU button To combine only two pictures, press the _) button when finished. before taking the third frame.
- Page 34 Depending on the subject or the situation (if the distance between the camera and subject is too short), the image may not look 3D. The 3D viewing angle varies depending on the subject, etc. Taking pictures with [Auto] Press the shutter button to shoot the first frame. 2_ Overlap the subject with the image that is faintly displayed in the monitor.
-
Page 35: Macro
Shooting Functions 'Using tile Menu" (p. 5) [Remote Control] and [Slave] are not displayed when [Remote Flesh] (p. 44) is set to [Off]. Using flash ........Shooting clo_eups (Macro shooting) The flash functions can be selected to best match the This function enables the camera to focus and shoot shooting conditions. -
Page 36: Self-Timer
When the zoom is at the widest (W) position. ,2 When the zoom is at the most telephoto (T) position. ,3 The zoom is automatically fixed. When your pet (cat or dog) turns its _bT0 Auto head towards the camera, its face is ,4 ISO sensitivity (p. -
Page 37: White Balance
Selecting the lSO sensitivity ......Adjusting to a natural color scheme (White balan_e) Select the ISO setting option in the shooting For more natural coloring, choose a white balance option function menu. suited to the scene. Select the white balance option in the shooting function... -
Page 38: Drive
Llsing the L£D illuminator S_quentia! shooting (Drive) In a dark location, the LED illuminator can be used as an Pictures are taken sequentially while the shutter button is held down. auxiliary light to see things or compose shots. Select the drive option in the shooting Set [LED Illuminator] (p. -
Page 39: Reset
Menus for Shooting Functions The default settings of the function are highlighted in. Restoring the shooting functions to the default settings [Reset] ..I_1 (Shooting me_tJ ....................Restores the following menu functions to the default settings. Shooting mode (p. 29) Flash (p. -
Page 40: Image Size
Selecting the image quafity for still images [Image Size/Compression] ..I_ (shooting _e_U ..................Suitable for printing pictures over A3 (11 x17 in.). 8M (3264x2448) Suitable for printing pictures up to A3 (11 ×17 in.). 5M (2560x1920) Suitable for printing pictures atA4 (8.5xll in.). -
Page 41: Af Mode]
Brightening subject against To focus a moving subject backlight [Shadow A djust] continuously Tracking) i" Hold the camera to align the AF target mark on the subject and press the _) button. (2_ When the camera recognizes the subject, the AF iiiiliii_iiiiiii_il _ii_i!_iiiii_i!_ii!_iiH1i_i_iii_`_`i_`iiiiiiiiiiiiiiiiiiiiiiiiiiiii_`i_`_`_`_iii_iiii_`_`_`i target mark automatically tracks the subject movement... -
Page 42: Digital Zoom
Shooting at higher magnifications than There may be a noise coming from inside the camera optical zoom [Digital Zoom] when the shutter button is pressed with [Image Stabilizer] (stilt images) set to [On]....@_ Images may not be stabilized if camera shake is too severe. -
Page 43: Icon Guide
iiiliili_!li_iliiiilii,.iiiiil,l,illiiiiiiiiiiiiiiiiiiii!, _ _l!illiililililililililillil Imprinting date of recording [Date Stamp] Information about the vertical/ horizontal orientation of the camera during shooting is not recorded with images. Images shot with the camera in a vertical position are not rotated during playback. Do not imprint the date. Stamp new photographs with the Information about the vertical/ horizontal orientation of the camera... -
Page 44: Remote Flash
You can take pictures with a wireless flash when using setting as the wireless flash. a flash compatible with the Olympus Wireless RC Flash Select the flash mode. System. This enables multi-flash photography using multiple flash units compatible with this system. -
Page 45: Slideshow
Menus for Playback, Editing, and Printing Functions Searching for images and playing back The default settings of the function are highlighted in the related images [Photo Surfing] Data must be created with the ib (PC software) before ..Photo ..using some functions. -
Page 46: Edit
Using the ib (PC software) and importing data back to the camera Refer to the ib (PC software) help guide for details on how to use the ib (PC software). The ib (PC software) may not work properly on the pictures edited by other application software. -
Page 47: Shooting Menu
Depending on the picture, the editing may not be effective. [Clear Skin], [Sparkle Eye] and [Dramatic Eye] The retouching process may lower the image are applied together. resolution. Makes skin look smooth Clear Skin SoftJAvg/Hard and translucent. Select Retouching eyes in flash shooting the correction effect... -
Page 48: Print Reservations (Dpof)" (P
Erasing images [Erase] To erase all images [All Erase] ....'q" Use AV to select [All Erase], and press the _ button.......... _ Use a V to select [Yes], and press the (_) button. Saving print settings to the image data All images in the internal memory or [Print... -
Page 49: Memory Format Format
Menus for Other Camera Settings The default settings of the function are highlighted in. Erasing data completely Using an Eye-Fi card (commercially [Memory Format]/[Format] available) [Eye-Fi] ..yT1 (Set!lt]gs MemQ_y Fo_ma_Fo[ma_ Ey_Fi ....Before formatting, check that no important data is left in the internal memory or card. -
Page 50: Usb Connection
Selecting a method connecting Turning camera with camera to other devices button Power [USB Connection] .._rl (s_!t!ng_ ..The camera is not turned on. To turn When the camera is connected to on the camera, press the ON/OFF Auto another device, the settings selection button. -
Page 51: Sound Settings
Selecting camera sound its volume [Sound Settings] .._t2!_ttings 2) _e_t!ngs ................Sound Type ii2/3 Selects the camera sounds (operation sounds, shutter sound, and warning sound). Volume 0/1/2/ i4/5 Selects the image playback volume. Volume O 1 2/ /4/5 Se ects the operat on vo ume of camera buttons. -
Page 52: Pixel Mapping
Adjusting image Adjusting brightness of the monitor processing function [Pixel Mapping] [I..C_, l] ..t'$2 (Settings 2) _ Pixe! Mapping 2) _ !,_ ................ @}} This function has already been adjusted at factory shipping, and no adjustment is needed right To adjust monitor brightness... - Page 53 To play back camera images on a TV • Connection via AV cable _1" Use the camera to select the same video signal system as the one of connected TV ([NTSC]/[PAL]). Connect the TV and camera. video input jack (yellow) and audio input jack (white).
-
Page 54: Power Save
e D (CB-HD1) _=_===========_ Turn on the TV, and change "INPUT" to "VIDEO (an input jack connected to the camera)." For details on changing the input source of the TV, refer to the TV's instruction manual. 4" Turn on the camera, and use _D to select the image for playback. -
Page 55: Data Repair
Setting the date and time [0] The time in the home ..Ylr3(Settings ....................time zone (the time zone selected for 1_ in submenu "Date,time,time zone,and language"(p. 18). Home/ Alternate The time in the travel To select the date display order destination time zone (the 'i' Press D aftersettingMinute,anduse AV to select... -
Page 56: Manometer
Displaying current altitude/water Operating camera tapping depth (atmospheric/hydraufic pressure) body [Tap Control] [Manometer] ........_r,_set_it_gs Mat_meter ............... The readings may have a margin of error depending Cancels [Tap Control]. on meteorological conditions. Use the readings only for your reference. [Tap Control] is activated. -
Page 57: Led Illuminator
Operating during playback mode Check the operation of the camera by tapping on the When switched to playback mode by tapping the top of camera after making the settings. the camera body twice, the operations below can be used. Display next image."... -
Page 58: Gps Settings
Recording shooting location time information images shot [GPS Settings] (TG-810 only) ..t"r3 (_e_tings 3) _ GR_ Se_tings ....GPS (Global Positioning System) is a system that locates current positions (latitude and longitude) by receiving signals from satellites. This camera ties in the location information with data and map data, and makes it possible to record the shooting direction and landmark information on the images. - Page 59 Direct printing (PictBridg_ _)............. By connecting the camera to a PictBridge-compatible printer, you can print images directly without using a computer. To find out if your printer supports PictBridge, refer to the printeCs instruction manual. "_ PictBridge is a standard for connecting digital cameras and printers of different makers and printing out pictures directly.
- Page 60 Changing the printer's settings printing [Custom Print] ................The image is printed with a border Off/On, _ around it ([Oft]). The image is printed to fill the entire Follow Steps 1 and 2 for [Easy Print] (p. 59). paper ([On]). Press the (°3 button.
- Page 61 To crop an image [-ld'] 'i" Use the zoom buttons to select the size of the cropping frame, use Av<_D to move the frame, and then press the _) button. Cropping frame To cancel printing i" Press the MENU button while [Do Not Remove USB Cable] is displayed.
- Page 62 Use AV to select [_E_,L], and press the (_ button. Display the setup menu. Follow Steps 5 and 6 in [Z1]. "Setup menu" (p. 6) From the playback menu r;l, select [Print Order] and then press the (o_ button. Follow Steps 1 and 2 in [_],] (p. 62). Use AV to select [,[1], and press the (°3 button.
- Page 63 Tips If the camera does not work as intended, or if an error • With prolonged camera use, the intemal temperature message is displayed on the screen, and you are unsure may increase, resulting in automatic shutdown. If this of what to do, refer to the information below to fix the occurs, remove the battery from the camera and wait until the camera has sufficiently cooled.
-
Page 64: Power On
Error message _#_ When one of the messages below is displayed on the Problem with selected image monitor, check the corrective action. Use photo retouch software, etc. to The Image Cannot edit the image on a computer. Be Edited Battery problem Card problem Charge the battery. - Page 65 Shooting tips When you are unsure of how to take a picture that you Object with no vertical lines .1 envision, refer to the information below. It is also effective to compose the shot by holding the camera vertically to focus, and then returning to the "Focusing on the subject"...
-
Page 66: Shadow Adjust
• Shooting movies using [IS Movie Mode] (p. 42) • Select [_"_.Sport] in the scene mode (p. 30) The [_'_ Sport] mode uses a fast shutter speed and can reduce the blur incurred by a moving subject. "Taking pictures with colors at the same shade as •... - Page 67 "Making batteries last longer" • Avoid of the following operations when actually taking pictures because they deplete battery power • Repeatedly pressing the shutter button halfway. • Repeatedly using zoom. • Set [Power Save] (p. 54) to [On] • Set [GPS Settings] 58) to [Oft]...
- Page 68 Battery USB-AC adapter ........• This camera uses one Olympus lithium ion battery Exterior (LI-50B). No other type of batteries can be used. • Wipegently with a soft cloth. If the camerais verydirty, Caution: soak the cloth in mild soapy water and wring well. Wipe...
- Page 69 240 V AC (50/60Hz) around the world. However, SD/SDHC/SDXC memory cards and Eye-Fi cards (for depending on the country or area you are in, the AC compatibility card details, visit the Olympus website.) wall outlet may be shaped differently and the charger ,S-,;pTM and USB-AC adapter may require a plug adapter to match the wall outlet.
-
Page 70: Current Memory
Using a new card Readout/recording process of the card • Cards must be formatted with this camera before During shooting, the current memory indicator lights first use or after being used with other cameras or up red while the camera is writing data. Never open computers. - Page 71 Number of storable pictures (still images)/Continuous recording length (movies) in the internal memory SD/SDHC/SDXC memory cards The figures in the following tables are quoted only as a rough guideline. The actual number of storable pictures or continuous recording lengths will differ according to the shooting conditions and memory cards used. The figures in the table below are the number of the storable pictures when using the internal memory formatted.
- Page 72 Olympus' testing conditions, please refer Shock resistance: The anti-shock feature warrants .2 the to the Olympus website for your local area. operation of the camera against accidental impact incurred from everyday use of your digital compact camera.
- Page 73 • After the camera is used under seawater, immerse the camera in For the Olympus distributors or service stations where the a bucket containing fresh water for about 10 minutes (with the waterproof packing can be replaced, visit Olympus website...
- Page 74 "as is," and you agree to use it impossible for the system to locate your position or it may it at your own risk. OLYMPUS IMAGING CORPORATION result {n an error. and its licensors (and their licensors and suppliers) make no •...
- Page 75 Countries and regions where landmarks Entire Agreement These terms and conditions constitute the entire agreement can be displayed and recorded between OLYMPUS IMAGING CORPORATION (and its licensors, including their licensors and suppliers) and you pertaining to the subject matter hereof,...
- Page 76 Republic of Iceland ICELAND Kingdom of Morocco MOROCCO ITALY Republic of Italy Republic of Angola ANGOLA MALTA Republic of Malta Republic of Ghana GHANA SAN MARINO Republic of San Marino Republic of Mozambique MOZAMBIQUE VATICAN CITY STATE State of the City of Vatican Republic of Namibia NAMIBIA...
- Page 77 Countries and regions with no landmark 'co r_ information Republic of Cote d'lvoire COTE D'IVOIRE (IVORY COAST) Republic of Equatorial Guinea EQUATORIAL GUINEA Antigua and Barbuda ANTIGUAAND BARBUDA Republic of Guinea GUINEA Belize BELIZE Republic of Guinea - Bissau GUINEA-BISSAU Grenada GRENADA Republic...
- Page 78 Types of lands marks Republic of Maldives MALDtVES Natural landmarks Natural topography Ports and harbors Republic of Nepal NEPAL New Caledonia NEW CALEDONIA Prefectural government offices Saint Helena SAINT HELENA Government Town halls and city halls Mayotte MAYOTTE _ublic offices Town and village offices Embassies...
- Page 79 Copyright. Based on data reserved. _rovfded under license from PSMAAustralia Limited (_wwv. ¢) 1993-2010 NAVTEQ All rights ¢) 2010 NAVTEQ. All rights reserved. psma com.au). In addition, the product incorporates data which Australia is ¢) 2010 Tebtra Corporation © Her Majesty the Queen in Right of Canada, ©...
- Page 80 For your safety, and to avoid damaging • Stop using the camera immediately if you notice any unusual product, use only accessories recommended by Olympus odors, noise, or smoke around Water and Moisture For precautions on products with • Never remove...
-
Page 81: Technology
DANGER • To protect the high-precision technology contained in this • The camera uses a lithium ion battery specified by Olympus. product, never leave the camera in the places listed below, Charge the battery with the specified USB-AC adapter matter if in use or storage: charger. - Page 82 Legal Other Notices • In the following kinds of places, the compass may not point {n the correct direction • Olympus makes no representations or warranties regarding • indoors any damages, or benefit expected by using this unit lawfully, •...
- Page 83 Industry Canada Standard RSS -310. • Consult your dealer or an experienced radio/TV technician for help Only the OLYMPUS-supplied USB cable should be used to connect the camera to USB enabled personal computers (PC) Any unauthorized changes or modifications to this equipment...
- Page 84 (See "WHAT TO DO WHEN SERVICE IS NEEDED"). EXCEPT FOR THE LIMITED WARRANTY SET FORTH Olympus, at its sob discretion, will repair, replace, or adjust the ABOVE, OLYMPUS MAKES NO AND DISCLAIMS ALL OTHER defective Product, provided that Olympus investigation and factory...
- Page 85 WHAT TO DO WHEN SERVICE IS NEEDED The customer must transfer any image or other data saved For customers in the EU: Hereby. Olympus a Product to another image or data storage medium and/or Imaging Corp and Olympus Europa Holding...
- Page 86 Olympus or an in a safe place. Olympus authorized service station. Please refer to the list on the web site: http://vwwv.olympus c. Any defect or damage that occurs due to transport, a fall, corn for the authorized international...
- Page 87 Olympus's option replaced, free of and in particular any loss or damage caused...
- Page 88 PDF file stored within the accompanying CD-ROM or at indirect damages (incbding but not limited to damages for loss http://w,,w,,olympus co jplen/supporfimsgldigicamera/downloadlnotice/ of business profits, business interruption and loss of business notice cfm...
- Page 89 HDMI micro connector Automatic calendar system 2000 up to 2099 Water resistance Type Equivalent to IEC Standard publication 529 IPX8 (under OLYMPUS test conditions), available in 10 m water Meaninq Camera can normally be used under water at a _ressure.
- Page 90 Low temperature operation of the Olympus lithium ion battery is guaranteed to 0°C (32°F). However, the Olympus lithium ion battery has been tested for use with this product in temperatures up to -10°C (14°F). Olympus lithium ion battery LI-50B •...
- Page 91 OLYMPUS KOREA CO., LTD. "{OF,Olympus Tower A, 114-9, Samsung-dong, Gangnam-gu, Seoul, Korea. 135-090 http://www.olympus.co.kr Tel. 1544-3200 OLYMPUS (MALAYS|A) SDN. BHD. 10-6, Menara 1 MK, Kompleks '1 Mont Kiara', No.l, Jalan Kiara, Mont Kiara, 50480 Kuala Lumpur, Malaysia. Tel:+603 6203 3882/Fax:+603...
- Page 92 OLYMPUS http://www.elympus.cem/ OLYMPUS IMAGING CORP. Shinjuku Monolith, 3-1 Nishi-Shinjuku 2-chome, Shinjuku-ku, Tokyo, Japan OLYMPUS IMAGING AMERICA INC. 3500 Corporate Parkway, P.O. Box 6t0, Center Valley, PA 18034-0610, U.S.A. TeL 484-896-5000 Technical Support (USA) phone customer support is available from 9 am to 9 pm...
- Page 93 • We recommend that you take test shots to get accustomed to your camera before taking important photographs. i In the interest of continually improving products, Olympus reserves the right to update or modify information contained in this manual.
- Page 94 Aii ! i i _i _iiiiii ii iiiiiiiiiiiiiiiiiiiiiiiiii ¸¸ _ Digital camera Strap Lithium USB cable AV c able U SB-AC adapter (F-2AC) OLYMPUS Setup ion Battery (CB-USB8) (CB-AV3) CD-ROM (LI-50B) Other accessories not shown: Warranty card Contents may vary depending on p urchase location.
-
Page 95: Shutter Button (P
Camera Settings Shutter button (p. 21, 63) ....Mo',;e _'eco_'_ L;_;iiJn" (_." _ 2"4" ... [] button (switching between shooting and playback) (p. 21, 23, 50) menu guide) (p. 27) ......... _ button (camera guide/ MENU button (p. 6) - Page 96 ....Operation_guide ............................. The symbols /k V <_D displayed for image selections Joystick and settings indicate that the joystick shown on the right /k (up) / is to be used. INFO (changing information display) (p. 23, 26) <] (left) D (right) Operation guides displayed at the bottom of the screen indicate that the MENU button, (_ button, or zoom buttons...
- Page 97 There may be menus that are unavailable depending on other related settings or the _N mode (p. 29). Function menu Press <] during shooting to display the function menu. The function menu is used to choose the shooting mode and provides access to frequently used shooting settings. Selected option Shooting To select the shooting...
- Page 98 Setup menu Press the MENU button during shooting or playback to display the setup menu. The setup menu provides access to a variety of camera settings, including options not listed in the function menu, display options, and the time end date.
-
Page 99: P (Program Auto)
Menu index Menus for Shooting Functions ......................"_ Shooting mode tSO ........p.37 Rec View ......p.42 _8) Drive ......... p. 38 Pic Orientation ....p.42 P (Program Auto) ..... p. 20 Icon Guide ......p.43 IAUT0 (iAUTO) ....p. 29 ._) _ (Shooting menu 1) -
Page 100: Rl (Settings
Menus for Playback, Editing, and Printing Functions (Playback) Slideshow ..... p. 45 Photo Surfing ....p. 45 Edit ....... p. 46 Erase ......p. 48 Print Order ....p. 48 (_ (Protect) ....p. 48 (Rotate) ....p. 48 Menus for Other Camera Settings ?'rl (settings ic?t (Monitor) .... -
Page 101: P. 14, 15, 17, 53, 73 6 Battery Lock Knob
of Parts Cameraunff ......................................1 Battery/card/connector cover lock ....p. 14 2 LOCK knob ....p. 14 3 HDMI micro connector ........p. 53 4 Multi-connector ....p. 15, 17, 53, 59 5 Battery/card/connector cover .... p. 14, 15, 17, 53, 73 6 Battery lock knob .. -
Page 102: On/Off Button ........ P
1 ON/OFF button ..p. 18, 20 2 GPS antenna* 3 Monitor ..p. 11,20, 52, 63 4 Movie record button..p. 5 [] button (switching between shooting and playback) ......p. 21,23, 6 O button (camera guide/menu guide) ........p. 27 7 MENU button .... -
Page 103: Battery Check
..Monitor Shooting mode display 1 Battery check ..p. 18, 64 18 Shadow Adjustment 2 Location information *_...p. 58 Technology ....p. 41 3 Shooting mode ..p. 20, 29 19 Compression (still images) 4 Flash ......p. 35 ...... -
Page 104: Shadow Adjustment Technology
Playback mode display • Standard display Movie Still image • Advanced display 14 15 1 Battery check ..p. 18, 64 10Elapsed time/total recording 19 Image size ..p. 40, 71, 72 20 File number 2 3D image ...... p. 27 time (movies) .... - Page 105 Positioning information screen displays (TG-810 only) 1 Latitude Electronic compass 2 Longitude Landmark information 3 Barometric pressure position Altitude/Water depth Landmark transition 5 Current date and time cursor 6 Update status 10 Landmark name To display screen Press and hold /k down until the screen is displayed. The screen can also be displayed by pressing the _ button while the power is off.
- Page 106 i_paring the Camera Inserting battery Battery/card/connector cover When removing the battery or card, be sure to turn off the camera before opening or closing the battery/ card/connector cover. _[_ When using the camera, firmly close the battery/card/ Battery/card/ connector cover lock and LOCK knob. connector cover lock...
- Page 107 Windows • A "Setup" dialog will be displayed. Windows Vista/Windows • An Autorun dialog will be displayed. Click "OLYMPUS Setup" to display the "Setup" dialog. If the "Setup" dialog is not displayed, select "My Computer" (Windows XP) or "Computer" (Windows Vista/Windows 7) from the start menu.
- Page 108 • Check the system requirements before beginning installation. Insert the supplied CD in a CD-ROM drive. • Click the "OLYMPUS Viewer 2" or "OLYMPUS ib" • Double-click the CD (OLYMPUS Setup) icon on button and follow the on-screen instructions to the desktop. install the software.
- Page 109 Example: USB-AC adapter with an AC OLYMPUS Viewer cable Operating Mac OS X v10.4.11-v10.6 System Processor Intel Core Solo/Duo 1.5 GHz or better 1 GB or more (2 GB or more Multi-connector recommended) Free Hard 1 GB or more Drive Space...
- Page 110 • The date and time setting screen is displayed when _For details on the battery and the USB-AC adapter, the date and time are not set. see "Battery and USB-AC adapter" (p. 68). The battery can be charged while the camera is connected to the computer.
- Page 111 Use <]D to select the [ft] time zone and then press the (o_ button. Write-protect switch • Use /XV to turn daylight saving time ([Summer]) on or off. ÷ Insert the card straight until it clicks into place. Do not touch the contact area directly. The menus can be used to change the selected time zone.
- Page 112 _oting, Playback, and Erasing Shooting with the optimum aperture Current shooting mode display value and shutter speed (P mode) ..........In this mode, automatic shooting settings are activated while also allowing changes to a wide range of other shooting menu functions, such as exposure compensation, white balance, etc.
- Page 113 _hooting movies ................. Press the shutter button halfway down to focus on the subject. Press the movie record button to start • When the camera focuses on the subject, the exposure is locked (shutter speed and aperture recording. value are displayed), and the AF target mark Continuous recording length changes to green.
- Page 114 Using the ........................[On] selected for [Digital Zoom]: Pressing the zoom buttons adjusts the shooting range. Digital zoom range Pressing the wide (W) button Zoom bar Other Image zoomed andL'_/ cropped _ Digital zoom range u If [image Size] is less than the full resolution, after reaching the maximum optical zoom, the camera will automatically resize and crop the image to the selected [Image Size[, then enter the digital zoom range if [Digital...
- Page 115 Viewing irnages Press /X (INFO). • The displayed shooting information changes in the order shown below each time the button is Press the [] button. pressed. "Shooting mode display" (p. 11) Number of frames/ Total number of images Normal No information Detailed Playback image...
- Page 116 To play sound recordings Pausing and Press the _) button to pause To play sound recorded with an image, select the image restarting playback. During pause, fast and press the C) button. A [] icon appears on images playback forward or reverse, press the _) with which sound has been recorded.
- Page 117 Erasing images during playback Press the zoom buttons. Display the image you want to erase and press V (_). Press AV to select [Erase], and press the w@ @T (°3 button. For erasing multiple images at the same time, see "Erasing images [Erase]"...
- Page 118 To select image in index view Playing #ack panoram_ images ........ Use /k V<_[> to select an image, and press the (_) Panorama images that were combined together using button to display the selected image in single-image view. [Auto] or [Manual] can be scrolled for viewing. To scroll an image in close-up view...
- Page 119 Playback direction: Press the (_ button to pause To start a slideshow, press the MENU button. playback. Then press /k V <_D to scroll the image in the To stop the slideshow, press the MENU or _) button. direction of the pressed button. 3D images are composed of JPEG files and MP files.
- Page 120 iiii_i_i_i_ii_:_:_iii_i_ii.iii_i_iiiii`i_`Y_`i_`_iiiiiiiiiiiiiiiiiiiiiiiiiiiiiiiii_`@_iiii_i_{i_{ii_ii_ii_ii_ii_ii Search by Functions or operating methods can purpose be searched. Search for a A solution can be searched when solution having problems during operation. Search by Search from shooting/playback situation scene. Information is shown about Learn about the recommended functions and basic camera operating methods for the camera.
- Page 121 _ing Shooting Modes To change the shooting mode Using the best mode for the shooting The shootingmode(P, IAUTO, SCN, MA61C, I_ 3D) _cene (SCN mode) ............can bechangedusing the functionmenu. "Usingthe Menu"(p. 5) Set the shooting mode to SCN. The defaultsettingsof the functionare highlightedin Shooting with automatic settings...
- Page 122 modes, the optimum shooting settings are To cancet, press the _) button again to clear the AF lock mark. pre-programmed for specific shooting scenes. For this reason, settings may not be changed in some modes. To take pictures of your pet's face, select...
- Page 123 Use <_D to select the desired effect and then Creating panoramic images (l_I mode) press the (°3 button to set. Set the shooting mode to #=:L Icon indicating MA6t¢ mode that is set Press V to go to the submenu. Use <]D to select the desired mode and then...
- Page 124 When set to [Auto] or [Manual], [Image Size] To exit the panorama function without saving an (p. 40) is fixed to [1_]. image, press the MENU button. _t't The focus, exposure, zoom position (p. 22), and white _,_ If the shutter does not automatically release, try balance (p.
- Page 125 q_ Press the shutter button to take the next shot. Repeat Step (2) until the number of desired frames is taken, end then press the _) button or MENU button To combine only two pictures, press the _) button when finished. before taking the third frame.
- Page 126 Depending on the subject or the situation (if the distance between the camera and subject is too short), the image may not look 3D. The 3D viewing angle varies depending on the subject, etc. Taking pictures with [Auto] Press the shutter button to shoot the first frame. 2_ Overlap the subject with the image that is faintly displayed in the monitor.
- Page 127 Shooting Functions 'Using tile Menu" (p. 5) [Remote Control] and [Slave] are not displayed when [Remote Flesh] (p. 44) is set to [Off]. Using flash ........Shooting clo_eups (Macro shooting) The flash functions can be selected to best match the This function enables the camera to focus and shoot shooting conditions.
- Page 128 When the zoom is at the widest (W) position. ,2 When the zoom is at the most telephoto (T) position. ,3 The zoom is automatically fixed. When your pet (cat or dog) turns its _bT0 Auto head towards the camera, its face is ,4 ISO sensitivity (p.
- Page 129 Selecting the lSO sensitivity ......Adjusting to a natural color scheme (White balan_e) Select the ISO setting option in the shooting For more natural coloring, choose a white balance option function menu. suited to the scene. Select the white balance option in the shooting function...
- Page 130 Llsing the L£D illuminator S_quentia! shooting (Drive) In a dark location, the LED illuminator can be used as an Pictures are taken sequentially while the shutter button is held down. auxiliary light to see things or compose shots. Select the drive option in the shooting Set [LED Illuminator] (p.
- Page 131 Menus for Shooting Functions The default settings of the function are highlighted in. Restoring the shooting functions to the default settings [Reset] ..I_1 (Shooting me_tJ ....................Restores the following menu functions to the default settings. Shooting mode (p. 29) Flash (p.
- Page 132 Selecting the image quafity for still images [Image Size/Compression] ..I_ (shooting _e_U ..................Suitable for printing pictures over A3 (11 x17 in.). 8M (3264x2448) Suitable for printing pictures up to A3 (11 ×17 in.). 5M (2560x1920) Suitable for printing pictures atA4 (8.5xll in.).
- Page 133 Brightening subject against To focus a moving subject backlight [Shadow Adjust] continuously Tracking) i" Hold the camera to align the AF target mark on the subject and press the _) button. (2_ When the camera recognizes the subject, the AF iiiiliii_iiiiiii_il _ii_i!_iiiii_i!_ii!_iiH1i_i_iii_`_`i_`iiiiiiiiiiiiiiiiiiiiiiiiiiiii_`i_`_`_`_iii_iiii_`_`_`i target mark automatically tracks the subject movement...
- Page 134 Shooting at higher magnifications than There may be a noise coming from inside the camera optical zoom [Digital Zoom] when the shutter button is pressed with [Image Stabilizer] (stilt images) set to [On]....@_ Images may not be stabilized if camera shake is too severe.
- Page 135 iiiliili_!li_iliiiilii,.iiiiil,l,illiiiiiiiiiiiiiiiiiiii!, _ _l!illiililililililililillil Imprinting date of recording [Date Stamp] Information about the vertical/ horizontal orientation of the camera during shooting is not recorded with images. Images shot with the camera in a vertical position are not rotated during playback. Do not imprint the date. Stamp new photographs with the Information about the vertical/ horizontal orientation of the camera...
- Page 136 You can take pictures with a wireless flash when using setting as the wireless flash. a flash compatible with the Olympus Wireless RC Flash Select the flash mode. System. This enables multi-flash photography using multiple flash units compatible with this system.
- Page 137 Menus for Playback, Editing, and Printing Functions Searching for images and playing back The default settings of the function are highlighted in the related images [Photo Surfing] Data must be created with the ib (PC software) before ..Photo ..using some functions.
- Page 138 Using the ib (PC software) and importing data back to the camera Refer to the ib (PC software) help guide for details on how to use the ib (PC software). The ib (PC software) may not work properly on the pictures edited by other application software.
- Page 139 Depending on the picture, the editing may not be effective. [Clear Skin], [Sparkle Eye] and [Dramatic Eye] The retouching process may lower the image are applied together. resolution. Makes skin look smooth Clear Skin SoftJAvg/Hard and translucent. Select Retouching eyes in flash shooting the correction effect...
- Page 140 Erasing images [Erase] To erase all images [All Erase] ....'q" Use AV to select [All Erase], and press the _ button.......... _ Use a V to select [Yes], and press the (_) button. Saving print settings to the image data All images in the internal memory or [Print...
- Page 141 Menus for Other Camera Settings The default settings of the function are highlighted in. Erasing data completely Using an Eye-Fi card (commercially [Memory Format]/[Format] available) [Eye-Fi] ..yT1 (Set!lt]gs MemQ_y Fo_ma_Fo[ma_ Ey_Fi ....Before formatting, check that no important data is left in the internal memory or card.
- Page 142 Selecting a method connecting Turning camera with camera to other devices button Power [USB Connection] .._rl (s_!t!ng_ ..The camera is not turned on. To turn When the camera is connected to on the camera, press the ON/OFF Auto another device, the settings selection button.
- Page 143 Selecting camera sound its volume [Sound Settings] .._t2!_ttings 2) _e_t!ngs ................Sound Type ii2/3 Selects the camera sounds (operation sounds, shutter sound, and warning sound). Volume 0/1/2/ i4/5 Selects the image playback volume. Volume O 1 2/ /4/5 Se ects the operat on vo ume of camera buttons.
- Page 144 Adjusting image Adjusting brightness of the monitor processing function [Pixel Mapping] [I..C_, l] ..t'$2 (Settings 2) _ Pixe! Mapping 2) _ !,_ ................ @}} This function has already been adjusted at factory shipping, and no adjustment is needed right To adjust monitor brightness...
- Page 145 To play back camera images on a TV • Connection via AV cable _1" Use the camera to select the same video signal system as the one of connected TV ([NTSC]/[PAL]). Connect the TV and camera. video input jack (yellow) and audio input jack (white).
- Page 146 e D (CB-HD1) _=_===========_ Turn on the TV, and change "INPUT" to "VIDEO (an input jack connected to the camera)." For details on changing the input source of the TV, refer to the TV's instruction manual. 4" Turn on the camera, and use _D to select the image for playback.
- Page 147 Setting the date and time [0] The time in the home ..Ylr3(Settings ....................time zone (the time zone selected for 1_ in submenu "Date,time,time zone,and language"(p. 18). Home/ Alternate The time in the travel To select the date display order destination time zone (the 'i' Press D aftersettingMinute,anduse AV to select...
- Page 148 Displaying current altitude/water Operating camera tapping depth (atmospheric/hydraufic pressure) body [Tap Control] [Manometer] ........_r,_set_it_gs Mat_meter ............... The readings may have a margin of error depending Cancels [Tap Control]. on meteorological conditions. Use the readings only for your reference. [Tap Control] is activated.
- Page 149 Operating during playback mode Check the operation of the camera by tapping on the When switched to playback mode by tapping the top of camera after making the settings. the camera body twice, the operations below can be used. Display next image."...
- Page 150 Recording shooting location time information images shot [GPS Settings] (TG-810 only) ..t"r3 (_e_tings 3) _ GR_ Se_tings ....GPS (Global Positioning System) is a system that locates current positions (latitude and longitude) by receiving signals from satellites. This camera ties in the location information with data and map data, and makes it possible to record the shooting direction and landmark information on the images.
- Page 151 Direct printing (PictBridg_ _)............. By connecting the camera to a PictBridge-compatible printer, you can print images directly without using a computer. To find out if your printer supports PictBridge, refer to the printeCs instruction manual. "_ PictBridge is a standard for connecting digital cameras and printers of different makers and printing out pictures directly.
- Page 152 Changing the printer's settings printing [Custom Print] ................The image is printed with a border Off/On, _ around it ([Oft]). The image is printed to fill the entire Follow Steps 1 and 2 for [Easy Print] (p. 59). paper ([On]). Press the (°3 button.
- Page 153 To crop an image [-ld'] 'i" Use the zoom buttons to select the size of the cropping frame, use Av<_D to move the frame, and then press the _) button. Cropping frame To cancel printing i" Press the MENU button while [Do Not Remove USB Cable] is displayed.
- Page 154 Use AV to select [_E_,L], and press the (_ button. Display the setup menu. Follow Steps 5 and 6 in [Z1]. "Setup menu" (p. 6) From the playback menu r;l, select [Print Order] and then press the (o_ button. Follow Steps 1 and 2 in [_],] (p. 62). Use AV to select [,[1], and press the (°3 button.
- Page 155 Tips If the camera does not work as intended, or if an error • With prolonged camera use, the intemal temperature message is displayed on the screen, and you are unsure may increase, resulting in automatic shutdown. If this of what to do, refer to the information below to fix the occurs, remove the battery from the camera and wait until the camera has sufficiently cooled.
- Page 156 Error message _#_ When one of the messages below is displayed on the Problem with selected image monitor, check the corrective action. Use photo retouch software, etc. to The Image Cannot edit the image on a computer. Be Edited Battery problem Card problem Charge the battery.
- Page 157 Shooting tips When you are unsure of how to take a picture that you Object with no vertical lines .1 envision, refer to the information below. It is also effective to compose the shot by holding the camera vertically to focus, and then returning to the "Focusing on the subject"...
- Page 158 • Shooting movies using [IS Movie Mode] (p. 42) • Select [_"_.Sport] in the scene mode (p. 30) The [_'_ Sport] mode uses a fast shutter speed and can reduce the blur incurred by a moving subject. "Taking pictures with colors at the same shade as •...
- Page 159 "Making batteries last longer" • Avoid of the following operations when actually taking pictures because they deplete battery power • Repeatedly pressing the shutter button halfway. • Repeatedly using zoom. • Set [Power Save] (p. 54) to [On] • Set [GPS Settings] 58) to [Oft]...
- Page 160 Battery USB-AC adapter ........• This camera uses one Olympus lithium ion battery Exterior (LI-50B). No other type of batteries can be used. • Wipegently with a soft cloth. If the camerais verydirty, Caution: soak the cloth in mild soapy water and wring well. Wipe...
- Page 161 240 V AC (50/60Hz) around the world. However, SD/SDHC/SDXC memory cards and Eye-Fi cards (for depending on the country or area you are in, the AC compatibility card details, visit the Olympus website.) wall outlet may be shaped differently and the charger ,S-,;pTM and USB-AC adapter may require a plug adapter to match the wall outlet.
- Page 162 Using a new card Readout/recording process of the card • Cards must be formatted with this camera before During shooting, the current memory indicator lights first use or after being used with other cameras or up red while the camera is writing data. Never open computers.
- Page 163 Number of storable pictures (still images)/Continuous recording length (movies) in the internal memory SD/SDHC/SDXC memory cards The figures in the following tables are quoted only as a rough guideline. The actual number of storable pictures or continuous recording lengths will differ according to the shooting conditions and memory cards used. The figures in the table below are the number of the storable pictures when using the internal memory formatted.
- Page 164 Olympus' testing conditions, please refer Shock resistance: The anti-shock feature warrants .2 the to the Olympus website for your local area. operation of the camera against accidental impact incurred from everyday use of your digital compact camera.
- Page 165 • After the camera is used under seawater, immerse the camera in For the Olympus distributors or service stations where the a bucket containing fresh water for about 10 minutes (with the waterproof packing can be replaced, visit Olympus website...
- Page 166 "as is," and you agree to use it impossible for the system to locate your position or it may it at your own risk. OLYMPUS IMAGING CORPORATION result {n an error. and its licensors (and their licensors and suppliers) make no •...
- Page 167 Countries and regions where landmarks Entire Agreement These terms and conditions constitute the entire agreement can be displayed and recorded between OLYMPUS IMAGING CORPORATION (and its licensors, including their licensors and suppliers) and you pertaining to the subject matter hereof,...
- Page 168 Republic of Iceland ICELAND Kingdom of Morocco MOROCCO ITALY Republic of Italy Republic of Angola ANGOLA MALTA Republic of Malta Republic of Ghana GHANA SAN MARINO Republic of San Marino Republic of Mozambique MOZAMBIQUE VATICAN CITY STATE State of the City of Vatican Republic of Namibia NAMIBIA...
- Page 169 Countries and regions with no landmark 'co r_ information Republic of Cote d'lvoire COTE D'IVOIRE (IVORY COAST) Republic of Equatorial Guinea EQUATORIAL GUINEA Antigua and Barbuda ANTIGUAAND BARBUDA Republic of Guinea GUINEA Belize BELIZE Republic of Guinea - Bissau GUINEA-BISSAU Grenada GRENADA Republic...
- Page 170 Types of lands marks Republic of Maldives MALDtVES Natural landmarks Natural topography Ports and harbors Republic of Nepal NEPAL New Caledonia NEW CALEDONIA Prefectural government offices Saint Helena SAINT HELENA Government Town halls and city halls Mayotte MAYOTTE _ublic offices Town and village offices Embassies...
- Page 171 Copyright. Based on data reserved. _rovfded under license from PSMAAustralia Limited (_wwv. ¢) 1993-2010 NAVTEQ All rights ¢) 2010 NAVTEQ. All rights reserved. psma com.au). In addition, the product incorporates data which Australia is ¢) 2010 Tebtra Corporation © Her Majesty the Queen in Right of Canada, ©...
- Page 172 For your safety, and to avoid damaging • Stop using the camera immediately if you notice any unusual product, use only accessories recommended by Olympus odors, noise, or smoke around Water and Moisture For precautions on products with • Never remove...
- Page 173 DANGER • To protect the high-precision technology contained in this • The camera uses a lithium ion battery specified by Olympus. product, never leave the camera in the places listed below, Charge the battery with the specified USB-AC adapter matter if in use or storage: charger.
- Page 174 Legal Other Notices • In the following kinds of places, the compass may not point {n the correct direction • Olympus makes no representations or warranties regarding • indoors any damages, or benefit expected by using this unit lawfully, •...
- Page 175 Industry Canada Standard RSS -310. • Consult your dealer or an experienced radio/TV technician for help Only the OLYMPUS-supplied USB cable should be used to connect the camera to USB enabled personal computers (PC) Any unauthorized changes or modifications to this equipment...
- Page 176 (See "WHAT TO DO WHEN SERVICE IS NEEDED"). EXCEPT FOR THE LIMITED WARRANTY SET FORTH Olympus, at its sob discretion, will repair, replace, or adjust the ABOVE, OLYMPUS MAKES NO AND DISCLAIMS ALL OTHER defective Product, provided that Olympus investigation and factory...
- Page 177 WHAT TO DO WHEN SERVICE IS NEEDED The customer must transfer any image or other data saved For customers in the EU: Hereby. Olympus a Product to another image or data storage medium and/or Imaging Corp and Olympus Europa Holding...
- Page 178 Olympus or an in a safe place. Olympus authorized service station. Please refer to the list on the web site: http://vwwv.olympus c. Any defect or damage that occurs due to transport, a fall, corn for the authorized international...
- Page 179 Olympus's option replaced, free of and in particular any loss or damage caused...
- Page 180 PDF file stored within the accompanying CD-ROM or at indirect damages (incbding but not limited to damages for loss http://w,,w,,olympus co jplen/supporfimsgldigicamera/downloadlnotice/ of business profits, business interruption and loss of business notice cfm...
- Page 181 HDMI micro connector Automatic calendar system 2000 up to 2099 Water resistance Type Equivalent to IEC Standard publication 529 IPX8 (under OLYMPUS test conditions), available in 10 m water Meaninq Camera can normally be used under water at a _ressure.
- Page 182 Low temperature operation of the Olympus lithium ion battery is guaranteed to 0°C (32°F). However, the Olympus lithium ion battery has been tested for use with this product in temperatures up to -10°C (14°F). Olympus lithium ion battery LI-50B •...
- Page 183 OLYMPUS KOREA CO., LTD. "{OF,Olympus Tower A, 114-9, Samsung-dong, Gangnam-gu, Seoul, Korea. 135-090 http://www.olympus.co.kr Tel. 1544-3200 OLYMPUS (MALAYS|A) SDN. BHD. 10-6, Menara 1 MK, Kompleks '1 Mont Kiara', No.l, Jalan Kiara, Mont Kiara, 50480 Kuala Lumpur, Malaysia. Tel:+603 6203 3882/Fax:+603...
- Page 184 OLYMPUS http://www.elympus.cem/ OLYMPUS IMAGING CORP. Shinjuku Monolith, 3-1 Nishi-Shinjuku 2-chome, Shinjuku-ku, Tokyo, Japan OLYMPUS IMAGING AMERICA INC. 3500 Corporate Parkway, P.O. Box 6t0, Center Valley, PA 18034-0610, U.S.A. TeL 484-896-5000 Technical Support (USA) phone customer support is available from 9 am to 9 pm...