Table of Contents
Advertisement
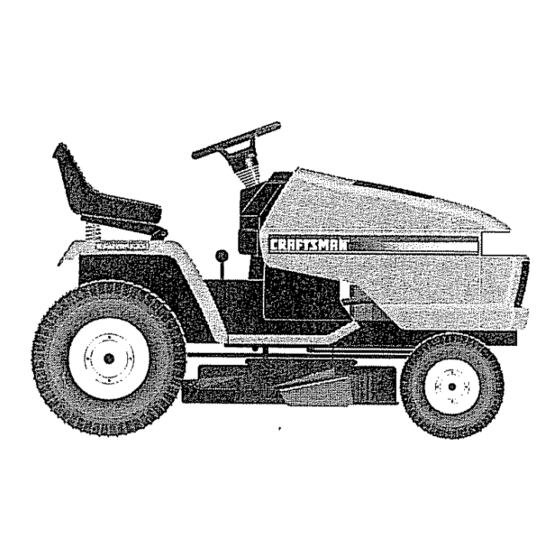
Owner's Manual
PI! ..... M nMj
22.0 HP
ELECTRIC
START
50" MOWER
6 SPEED
GARD
TRACTOR
Model No.
;_17.273090
, Safety
, Assembly
, Operation
, Maintenance
, Repair Parts
This product
has a low emission
engine
which
operates
differently
from previously
built engines.
Before
you start the en-
gine, read and understand
this Owner's
Manual.
,'AUTION:
_ead and follow all Safety
_ules and Instructions before
_perating this equipment.
For answers to your questions
about this product,
Call:
1-800-659-5917
Sears
Craftsman
Help Line
5 am-
5 pm, Mon-
Sat
;EARS, ROEBUCKAND
CO,, HOFFMAN
ESTATES,
IL 60179
isit our Craftsman website:www sears,corn/craftsman
Advertisement
Table of Contents

Related Manuals for Craftsman 917.273090


Summary of Contents for Craftsman 917.273090
- Page 1 For answers to your questions about this product, Call: _ead and follow all Safety 1-800-659-5917 _ules and Instructions before _perating this equipment. Sears Craftsman Help Line 5 am- 5 pm, Mon- ;EARS, ROEBUCKAND CO,, HOFFMAN ESTATES, IL 60179 isit our Craftsman website:www sears,corn/craftsman...
- Page 2 Sears will replace the battery at no charg.e. Warranty service is available free of charge by taking your Craftsman riding equipment to your nearest Sears Service Center: Imhome warranty service is available but a trip charge will apply.
- Page 3 IMPORTANT': This cutting machine is capable of amputating hands and feet and throwing objects. Failure to observe the following safety instructions could result in serious injury or death I. GENERAL OPERATION II. SLOPE OPERATION , Read, understand, and follow all Slopes are a major factor related to loss-of- instructions in the manual...
- Page 4 Never run a machine inside a closed III. CHILDREN ° area Tragic accidents can occur if the operator Keep nuts and bolts, especially blade ° is not alert to the presence of children. attachment bolts, tight arrd keep Children are often attracted to the equipment in good...
- Page 5 , Use slow speed_ Choose a low gear so ,_CAUTION: Tow only the attachments that you will not have to stop or shift that are recommended by and comply while on the slope. with specifications of the manufacturer , Avoid starting or stopping on a slope your tractor.
- Page 6 MAINTENANCE AGREEMENT PRODUCT SPECIFICATIONS A Repair Agreement is available on this GASOLINE 35 GALLONS product Contact your nearest Sears CAPACITY UNLEADED store for details. AND TYPE: REGULAR CUSTOMER RESPONSIBILITIES OILTYPE SAE 10W30 • Read and observe the safety rules. API-SF/SG/SH): (ABOVE 32°F) o Follow a regular schedule...
- Page 7 Steering Wheel Steering Sleeve Steering Extension Wheel Insert Steering Sleeve Seat (1) Washer (1) Shoulder @ 17/32 x 1-3/16 x 12 Gauge Bolt 5/16-18 _(1) Knob Mower (4) Retainer Springs (single loop) (3) Retainer Springs (double loop) Gauge Wheels (2) Sho_:der _._ (2)Whee,s (2) Centeflock Nuts (2) Washers 3/8 x 3/4 x 14 Ga...
- Page 8 Your new tractor has been assembled at the factory with exception of those parts left unassembled for shipping purposes. To ensure safe and proper operation of your tractor all parts and hardware you assemble must be tightened securely. Use the correct tools as necessary to insure proper tightness,...
- Page 9 INSTALL SEAT TO DRIVE TRACTOR OFF SKID (See Operation section location Adjust seat before tightening adjustment knob. function of controls) Remove adjustment knob and flat ,_WARNING: Before starting, read, washer securing seat to cardboard understand and follow all instructions packing and set aside for assembly the Operation section...
- Page 10 CHECK TIRE PRESSURE 5. Slide right side of mower back and install link in top hole of R.H, front mower The tires on your tractor were overinflated at bracket. Retain with single loop retainer the factory for shipping purposes. Correct tire spring as shown pressure is important for best cutting 6.
- Page 11 CHECKLIST Before you operate and enjoy your new ractor, we wish to assure that you receive :he best performance and satisfaction _rom this quality producL _lease review the following checklist: All assembly instructions have been completed_ / No remaining loose parts in carton / Battery is properly prepared...
- Page 12 These symbols may appear on your tractor or in literature supplied with the product. Learn and understand their meaning, E::3& FAST SLOW REVERSE FORWARD BATTERY CAUTION OR WARNING OVER TEMP OIL PRESSURE LIGHTS ON ENGINE ON ENGINE OFF LIGHT UNLOCKED MOWER LIFT CHOKE MOWER HEIGHT...
- Page 13 KNOWYOUR TRACTOR READ THIS OWNER'S MANUAL AND SAFETY RULES BEFORE OPERATING YOUR TRACTOR Compare the illustrations with your tractor to familiarize yourself with the locations various controls and adjustments Save this manual for future reference Ignition Switch Switch Position Ammeter Clutch Switch Throttle Control Lift Lever...
- Page 14 The operation of any tractor can result in foreign objects thrown into the eyes, which can result in severe eye damage Always wear safety glasses or eye shields while operating your tractor or performing adjustments or repairs. We recommend a wide vision safety mask over spectacles or standard safety glasses...
- Page 15 ]he cuttingheight range is approximately 3. Start mower blades by engaging 1-1/2"to 4-1/2" The heightsaremea- attachment clutch control suredfromthe groundto the bladetip TO STOP MOWER BLADES Nith the engine not running These disengage attachment clutch control. leights are approximate and may vary ,_CAUTION: Do net operate the mower...
- Page 16 TOWING CARTS AND OTHER ATTACH- ,_WARNING: Experience indicates that MENTS alcohol blended fuels (called gasohol using ethanol or methanol) can attract Tow only the attachments that are moisture which leads to separation recommended by and comply with formation of acids during storage. Acidic specifications of the manufacturer...
- Page 17 , The attachments and ground drive can ,, Drive so that clippings are discharged onto the area that has been cut Have now be used If the engine does not the cut area to the right of the tractor. accept the load, restart the engine This will result in a more even distribu- allow it to warm up for one minute...
- Page 18 F,LL =D AT=e ____ AS YOU COMPLETE REGULAR SERV,CE ERV'OE OATES Check Brake Operalion Check Tire Pressure Check Operalor Presence Inlerlock Systems 6 #° Check for Loose Fasleners Q##7 Sharpen/Replace Mower etades e##*4 Lubrication Chad Check Batlery Level Clean eatlery and Terminals Check Transaxle Cooling...
- Page 19 °RACTOR IMPORTANT: To ensure proper assembly, center hole in blade must align with star qways observe safety rules when on mandrel assembly _erforming any maintenance Reassemble hex bolt, lock washer 3RAKE OPERATION and flat washer in exact order as f tractor requires more than six (6) feet shown...
- Page 20 ENGINE BATTERY LUBRICATION Your tractor has a battery charging system which is sufficient for normal use. How- Only use high quality detergent oil rated ever, periodic charging of the battery with with API service classification SF, SG, or an automotive charger will extend its life,...
- Page 21 DLEAN AIR SCREEN Cartridge _,ir screen must be kept free of dirt and Foam Pre-Cleaner .'haff to prevent engine damage from Cartridge "_.. 3verheating. Clean with a wire brush or Plate ;ompressed air to remove dirt and Rubber _tubborn dried gum fibers Seal 3LEAN AIR INTAKE/COOLING...
- Page 22 _CAUTION: BEFORE PERFORMING ANY SERVICE OR ADJUSTMENTS: 1 Depress clutch/brake pedal fully and set parking brake 2_ Place gearshift lever in neutral (N) position. 3. Place attachment clutch in "DISENGAGED" position. 4. Turn ignition key "OFF" and remove key 5. Make sure the blades and all moving parts have completely stopped.
- Page 23 To lower one side of mower, loosen lift BOTH FRONT LINKS MUST BE EQUAL IN LENGTH link adjustment nut on that side. JOTE: Each full turn of adjustment viii change mower height about 3/16'L Recheck measurements after adjust- ing. _ottom Edge of Bottom Edge of Aower to Ground Mower to Ground...
- Page 24 Mower Blade Screws Electric Drive Belt Center Mandrel Idler Spr" Clutch Mandrel_,_--._ M_ndsel RH Mandrel Ileys Iley Primary Idler Arm BeooodaryX-.S Bolt in Idler Arm _ /(('k_._.._ sp,,o0 .Housing Mandrel l aok#¢ `,d rTi/ Mower Drive Belt Pulley Belt TO ADJUST ATTACHMENT CLUTCH Keepers...
- Page 25 _-.Roadtesttractorfor properstopping IMPORTANT: Check Brake Adjustment distanceas statedabove. Readjust i f Clutching Flat Idler Clutchin_ necessary.If stoppingdistanceis still greaterthan six (6) feetin highest g ear, Engine Above '.eeper furthermaintenance is necessary. Pulley V-Idler Contactyournearest authorized servicecenter/department Belt WithParkingBrake"Engaged" Keeper Transaxle / Belt Engin_ Twists Belt...
- Page 26 TO ATTACH JUMPER CABLES - Adjustment Sleeves 1. Connect each end of the RED cable to the POSITIVE (+) terminal of each battery, taking care not to short against chassis Connect one end of the BLACK cable to the NEGATIVE (-) terminal of fully charged battery_...
- Page 27 Unsnap headlight wire connector Keps Stand in front of tractor Grasp hood at sides, tilt toward engine and lift off of tractor 4. To replace, reverse above procedure (Red) Cable "erminal ._uard gative (Black) Headlight Wire Cable Connector °O REPLACE HEADLIGHT BULB Hood...
- Page 28 TO ADJUST CHOKE CONTROL 2. With engine off turn idle fuel adjusting needle in (clockwise) closing it finger The choke control has been preset at the tight and then turn out (counterclock- factory and adjustment should not be wise) 1 turn. necessary check adjustment as de-...
- Page 29 experiance indicates that alcohol Immediately prepare your tractor blended fuels (called gasohol or using storage at the end of the season or if the ethanol or methanol) can attract moisture tractor will not be used for 30 days or which leads to separation and formation more,...
- Page 30 TROUBLESHOOTINGCHART PROBLEM CAUSE CORRECTION Will not start 1. Out of fuel. , Fill fuel tank. See "TO START ENGINE" Engine not "CHOKED" properly. in Operation section. 3, Wait several minutes Engine flooded before attempting to start. 4_ Bad spark plug. Replace spark plug.
- Page 31 FROUBLESHOOTING CHART CORRECTION PROBLEM CAUSE 1. Set in "Higher Cut" position/ Loss of power Cutting too much grass/too fast, reduce speed. Throttle in "CHOKE" Adjust throttle control, position Clean underside of mower Build-up of grass, leaves and trash under mower, housing Clean/replace air filter...
- Page 32 TROUBLESHOOTING CHART PROBLEM CAUSE CORRECTION Mower blades will 1. Obstruction in clutch 1_ Remove obstruction. not rotate mechanism Worn/damaged mower Replace mower drive belt. drive belt. Frozen idler pulley. Replace idler pulley, 4_ Frozen blade mandrel. 4,. Replace blade mandrel. 1, Place throttle control Poor grass...