Table of Contents

Related Manuals for Weslo CardioStride 3.0


Summary of Contents for Weslo CardioStride 3.0
- Page 1 Model No. 831.21901.0 Serial No. User's Manual Write the serial number in the space above for future reference. Serial Decal • Assembly • Operation • Maintenance • Part List and Drawing Sears, Roebuck and Co. Hoffman Estates, IL 60179 lirn_ ®v_,O_W www.iFit.com _"...
-
Page 2: Warning Decal Placement
Ins instrucciones y las advertencias antes del use use. Keep children away, Manteng a a !os n!_os a!ejados: WESLO is a registered trademark of ICON IP, Inc. -
Page 3: Important Precautions
iMPORTANT PRECAUTIONS WARNING: To reduce the risk ofserious injury, read a .important precautions instructions in this manual and all warnings on your treadmill before using your treadmill. Sears assumes no responsibility for personal injury or property damage sustained by or through the use of this product. - Page 4 18. Never drop or insert any object into any 21. Do not place hands or feet under the tread- mill while it is in use. opening on the treadmill. 19. Servicing other than the procedures in this 22. The roller guards must be 1/8 inch from manual should be performed by an autho- the rear roller (see the drawing on page 5).
-
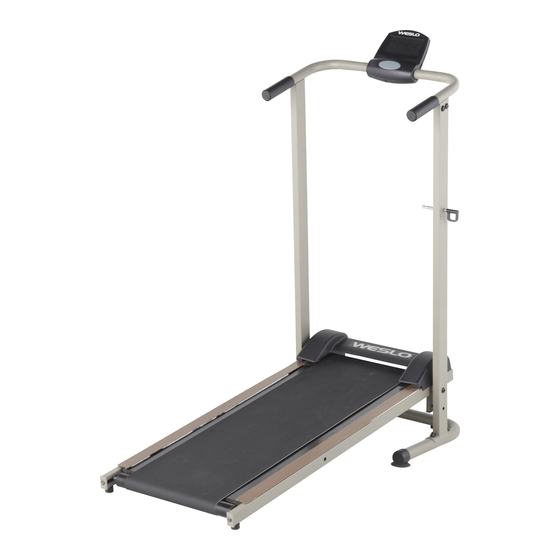
Page 5: Before You Begin
BEFORE YOU BEGIN Thank you for selecting the new WESLO _'CARDIO reading this manual, please see the back cover of this STRIDE 3.0 treadmill. The CARDIO STRIDE 3.0 manual. To help us assist you, note the product model treadmill offers a selection of features designed to number and serial number before contacting us. -
Page 6: Part Identification
PART iDENTiFiCATiON CHART Use the drawings below to identify small parts used for assembly. The number in parentheses below each draw- ing is the key number of the part, from the PART LIST near the end of this manual. The number following the key number is the quantity used for assembly. -
Page 7: Assembly
This is normal. If video, go to http://productvideo.co/ there is an oily substance on the treadmill, wipe it off with a soft cloth and a mild, non-abrasive assembly/kmart/weslo cleaner. or use your mobile phone or smartphone to read the QR code at the •... - Page 8 Raise the Left Upright (11) and the Right Upright (10) to the position shown. Attach the Hood (13) to the front of the Frame (14) with two M5 x 10mm Screws (4). Hold the front of the Frame (14) between the Left Upright (11) and the Right Upright (10).
- Page 9 Align the hole on the Frame (14) with the hole in the Right Upright (10). Insert the Pin (15) into the holes in the Upright and the Frame. Make sure that the Pin is fully inserted. Then, attach a Spring Clip (20) on the end of the Pin.
- Page 10 The Console (23) requires two "AAA" batteries. Alkaline batteries are recommended. Do not use old and new bat- teries together or alkaline, standard, and rechargeable batteries together. Press the indicated tab on the Battery Cover (24), and remove the Battery Cover. Insert two batteries into the two battery clips;...
-
Page 11: Step-By-Step Console Operation
TREADMILL OPERATION STEP-BY-STEP CONSOLE OPERATION Follow the steps below to operate the console. Before the console can be operated, batteries must Turn on the power. be installed (see assembly step 7 on page 10). If there is a thin sheet of plastic on the console, remove the To turn on the power, press the console button or plastic. - Page 12 LUBRiCATiNG THE WALKING PLATFORM Before the treadmill is used, the walking platform should be lubricated. Open the included lubricant Apply lubricant packet. Reach under one side of the walking belt as far here ", as you can, and apply half of the lubricant to the walk- ing platform.
-
Page 13: How To Fold The Treadmill
HOW TO FOLD THE TREADMILL FOLDING THE TREADMILL FOR STORAGE LOWERING THE TREADMILL FOR USE When the treadmill is not in use, it can be folded to Hold the treadmill securely with your left hand as the compact storage position. CAUTION: You must shown in drawing 2. -
Page 14: Troubleshooting
TROUBLESHOOTING Most treadmill problems can be solved by following the steps below. Find the symptom that applies, and follow the steps listed, if further assistance is needed, please see the back cover of this manual. 1. SYMPTOM: THE CONSOLE DOES NOT 3. -
Page 15: Exercise Guidelines
EXERCISE GUiDELiNES Aerobic Exercise-- If your goal is to strengthen your cardiovascular system, you must perform aerobic exercise, which is activity that requires large amounts of oxygen for prolonged periods of time. For aerobic exercise, adjust the intensity of your exercise until your heart rate is near the highest number in your training zone. -
Page 16: Day Full Warranty
Your Home For repair--in your home--of all major brand appliances, lawn and garden equipment, or heating and cooling systems, no matter made it, no matter sold iiiiiiiiiiiiiiiii For the replacement parts, accessories, and user's manuals that you need to do-it-yourself. iiiiiiiiiiiiiiiii iiiiiiiiiiiiiiiii For Sears professional...