Table of Contents
Advertisement
Available languages
Available languages
MANUAL
CRRI:TSMRH
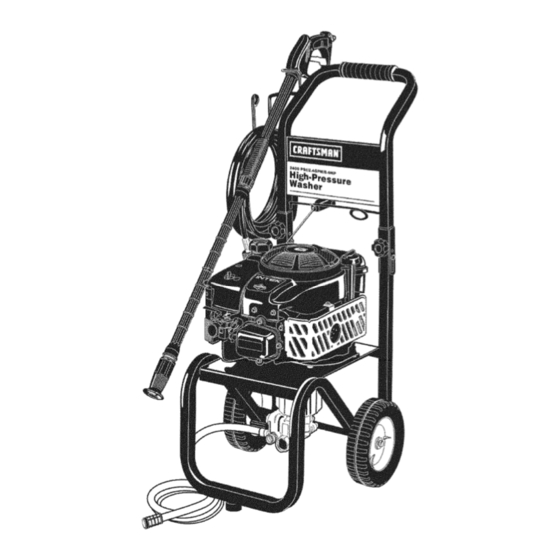
6.0 Horsepower
24q
2.4
High Pressure Washer
Model No:
919.769010
WARNING:
Before
using
this
product,
read this manual
and
follow
all
Safety
Rules
and
Operating
instructions.
• Safety
• Assembly
= Operation
• Maintenance
• Parts List
• Espa_ol
Sears,
Roebuck
and
Co.,
Hoffman
Estates,
IL 60179
U.S.A.
MGP-769010
7/20/01
Advertisement
Table of Contents

Related Manuals for Craftsman 919.769010


Summary of Contents for Craftsman 919.769010
- Page 1 MANUAL CRRI:TSMRH 6.0 Horsepower High Pressure Washer Model No: 919.769010 • Safety • Assembly WARNING: Before using this = Operation product, read this manual • Maintenance follow Safety Rules Operating instructions. • Parts List • Espa_ol Sears, Roebuck Co., Hoffman Estates, IL 60179 U.S.A.
- Page 2 ON CRAFTSMAN HiGH PRESSURE WASHER For one year from the date of purchase, when this Craftsman High Pressure Washer is maintained and operated according to the instructions in the owner's manual, Sears will repair, free of charge, any defect in material and workmanship.
- Page 3 This manual contains information that is important for you to know and understand. This information relates to protecting YOUR SAFETY and PREVENTING EQUIPMENT PROBLEMS. To help you recognize this information, we use the symbols below. Please read the manual and pay attention to these sections. indicates an imminently hazardous indicates a potentially hazardous situation which, if not avoided, will...
- Page 4 HAZARD WHAT CAN HAPPEN HOW TO PREVENT Unsafe operation of your pressure washer • Become familiar with the operation and con- could lead to serious injury or death to you or trols of the pressure washer. others. RiSK OF UNSAFE •...
- Page 5 HAZARD WHAT CAN HAPPEN HOW TO PREVENT iT • Fuel or oil can leak or spill and could If pressure washer is equipped with a fuel result in fire or breathing hazard, serious shut-off valve, turn the valve to the off position injury or death can result.
- Page 6 Mount the rubber isolator to the frame. To Tools Required for Assembly mount isolator place threaded end of bolt through Adjustable wrench the washer. Allen wrench Next with washer on bolt place threaded end of bolt through the larger hole in bottom of the rubber isolator.
- Page 7 Place assembled gun and wand on pressure Place pull cord into the wire bracket holder.Pull the washer holder. cord under the wire bracket to the right of the wire loop. Lift the pull cord handle up and slide the cord to the left, sliding the cord into the wire loop. Next slide handle behind the wire bracket to the left of the wire loop.
- Page 8 Before Starting The Engine _Read Owner's Manual. Do not To operate the engine you will need to do the following. attempt to operate equipment until you have read Owners Manual for Safety, Operation, Note: Your pressure washer pump is a sealed pump, and Maintenance Instructions.
- Page 9 Useclean, f resh,regular unleaded g asoline w itha Squeeze trigger on pressure washer wand to minimum of 85octane. D onotmixoilwithgasoline. relieve air pressure caused by turning on the water. If unleaded f uelis unavailable leaded fuelmaybeused. Water will spew out of the gun in a thin stream. iMPORTANT: It is important to prevent g umdeposits This will make it easier to start the engine.
-
Page 10: How To Use
How To Use Your Pressure Washer Using Soaps/Chemicals On the end of your spray gun is a nozzle that you can IMPORTANT." Use soaps and chemicals that are slide forward and backward and that you can also designed specifically for use with pressure washers. twist from side to side. - Page 11 CUSTOMER RESPONSiBiLiTiES TABLE Before Every 25 hours Every 50 hours Every 100 each use or yearly or yearly hours or yearly MAINTENANCE TASK PRESSURE WASHER checWclean inlet screen check high pressure hose check soap and chemical hose and filter check gun and wand for leaks purge pump of air and contaminants ENGINE check oil level...
- Page 12 Pressure Washer Maintenance Changing Engine Oil Check and Clean inlet Screen: Examine inlet screen Change oil while engine is still warm. Preferably on pump inlet fitting. Clean if clogged; replace if torn. drain oil from top of engine as illustrated below. Drain oil with air cleaner side up.
- Page 13 NOTE: Do not use petroleum solvents, e.g., kerosene, Clean Pre=Cleaner and Air Cleaner Cartridge which will cause the cartridge to deteriorate. Do not Your engine is equipped with an oval dual element air use pressurized air to clean cartridge. Pressurized air cleaner: the two elements include a foam pre-cleaner can damage the cartridge.
- Page 14 3. Pull trigger on gun handle to relieve any water Direct water supply into nozzle end to back flush loosened particles for 30 seconds. pressure. 4. Disconnect the wand from the gun. 5. Remove nozzle from the the end of the wand with the 2mm Allen wrench provided.
- Page 15 PROBLEM CORRECTION CAUSE No fuel. Add Fuel. Engine will not start (see Engine Manual Pressure builds up after two pulls Squeeze gun trigger to relieve pressure. on the recoil starter or after initial further engine trouble- use. shooting) Not primed or choked. Push primer bulb 3 times or choke engine.
- Page 16 PROBLEM CAUSE CORRECTION No or low pressure (after Worn seal or packing. Have replaced by AWSC. period of normal use.) Worn or obstructed valves. Have replaced by AWSC. Worn unloader piston. Have replaced by AWSC. Worn or broken o-ring. Check and replace. Water leaking at gun/wand connection Loose hose connection.
-
Page 17: Parts List
F074 H140 Hose, Chemical Washer Flat-Engine to Pump 16505 Thermal Relief Valve 17774 Lance, Multi-Reg 16467 Hose 17569 Decal Craftsman F064 Screw- Hex 5/16"- 18 x 1LG F469 Lock Nut 5/16" ACCESSORIES 17712 Screw HHC, 5/16" (Notlncluded with Pressure Washer) - Page 18 CRAFTSMAN 2400 PSI HIGH PRESSUIRE WASHER 919.769010 PUMP BREAKDOWN MODEL PK16482 CRAFTSMAN 2400 PSI MAQUINA LAVADORA DE ALTA PRESION 919.769010 BOMBA PARTES # PK16482 C _ 2797...
- Page 19 CRAFTSMAN 2400 PSi HiGH PRESSUIRE WASHER 919.769010 PUMP BREAKDOWN MODEL PKt6482 CRAFTSMAN 2400 PSi MAQUINA LAVADORA DE ALTA PRESION 919.769010 BOMBA PARTES # PKt6482 PART PART DESCRIPTION QTY, DESCRIPTION QTY. AR-1322520 Knob AR-1200690 O-Ring AR-1980300 AR-1270130 Detergent Injector AR-1980470 Grub Screw...
- Page 20 CRAFTSMAN 2400 PSi HiGH PRESSUIRE WASHER 919.769010 BRIGGS ENGINE MODEL #120602-01350-E2 PART PART PART DESCRIPTION DESCRIPTION DESCRIPTION 94744 Screw-He}(. 262679 Tappet-Valve 692670 Cylinder Assembly 51._.A692658 Gasket-intake 66538 Boot-Spark Plug 399269 Bushing 122.,_o_592799 Spacer-Carburetor _299819 Seal-Oil 230192 Pin-Locating 225325 Plate-Cylinder Head...
- Page 21 CRAFTSMAN 2400 PSi HiGH PRESSUIRE WASHER 919.7690t0 BRIGGS ENGIN E MODEL #120602-01350=E2 s92@ 404 _) 616 _ 116A_ REF. PART REF. PART REF. PART DESCRIPTION DESCRIPTION DESCRIPTION 893291 Crankshaft 499631 Ring Set 116A _289966 Seal-O-Ring 222698 Key-Flywheel (Standard) 94388 Key-Timing...
- Page 22 CRAFTSMAN 2400 PSi HiGH PRESSUIRE WASHER 919.769010 BRIGGS ENGINE MODEL #120602-01350-E2 REF. PART REF. PART REF. PART DESCRIPTION DESCRIPTION DESCRIPTION 94220 Screw-He×. 499619 Sump-Engine 493737 Governor/Oil Slinger _272198 Gasket-Crankcase Note -- 499749 Gear-Cam 94612 Screw-He×. 94880 Plug-Oil Drain ,_399781 Seal-Oil...
- Page 23 CRAFTSMAN 2400 PSi HiGH PRESSUIRE WASHER 919.7690t0 BRiGGS ENGINE MODEL #120602-01350-E2 6370 987@ s92| _LLJ 355 @ REF. PART REF. PART REF. PART DESCRIPTION DESCRiPTiON DESCRIPTION 51._,,A692668 Gasket-Intake 693866 Shaft-Choke ® Plug-Welch 94098 Screw-Round Head 163,_,A692667 Gasket-Air Cleaner (Sold in Kit Only)
- Page 24 CRAFTSMAN 2400 PSi HiGH PRESSUIRE WASHER 919.769010 BRIGGS ENGINE MODEL #120602=01350-E2 REF. PART REF. PART REF. PART DESCRIPTION DESCRIPTION DESCRIPTmON 281299 Grommet 693863 Base-A/C Primer 51._*_G92668 Gasket-Intake 693808 Screw-Hex. 491588 Filter-Air 122,,_,,,_692799 Spacer-Carburetor 163_e_692667 Gasket-Air Cleaner 693867 Cover-Control 281340 Cover-Air...
- Page 25 CRAFTSMAN 2400 PSi HiGH PRESSUIRE WASHER 919.7690t0 BRiGGS ENGINE MODEL #120602-01350-E2 78 _ 1005 3°3 1036 LABEL KIT-EMISSION REF. PART PART PART DESCRIPTION DESCRIPTION DESCRIPTION 692693 Flywheel 802574 Armature-Magneto 225121 Cup-Flywheel 94731 Screw-Hex, 493880 Terminal-Cable 224511 Guard-Flywheel 94904 Screw-Hex. 602675...
- Page 26 CRAFTSMAN 2400 PSi HiGH PRESSUIRE WASHER 919.769010 BRIGGS ENGINE MODEL #120602-01350-E2 346 _" sTo@ PART PART REF. PART DESCRIPTION DESCRIPTION DESCRIPTION 298049 Line-Fuel 891140 Screw-Hex. 836A 84874 Screw-Hex. 398540 Screw-Shoulder 883 _zt_273348 Gasket-Exhaust 93053 Clamp-Hose 94511 Screw-Shoulder 280512 Spacer-Fuel Tank...
- Page 27 CRAFTSMAN 2400 PSi HiGH PRESSUIRE WASHER 919.769010 BRIGGS ENGINE MODEL #120602-01350-E2 346 _' 6700 PART REF. PART PART DESCRIPTION DESCRIPTION DESCRIPTION 891148 Screw-Hex. 836A 94874 Screw-Hex. 298049 Line-Fuel 398540 Screw-Shoulder 883 _A273348 Gasket-Exhaust 93053 Clamp-Hose 94511 Screw-Shoulder 280512 Spacer-Fuel Tank...
- Page 28 CRAFTSMAN 2400 PSi HiGH PRESSUIRE WASHER 919.769010 BRIGGS ENGINE MODEL #120602-01350-E2 459_ 689 O REF. PART PART PART DESCRIPTION DESCRIPTION DESCRIPTION 94943 Screw-Shoumder 497440 Housing-Rewind 281434 Grip-Starter Rope Starter 94904 Screw-Hex. 497880 Starter-Rewind 94908 Nut-Hex. 263074 Pulley-Starter 263073 Spring-Friction 280399...
- Page 29 CRAFTSMAN 2400 PSi HiGH PRESSUIRE WASHER 919.7690t0 BRiGGS ENGINE MODEL #120602-01350-E2 121 CARBURETOR 977 CARBURETOR GASKET 137 _ 637 @ 98z@ PART PART PART DESCRIPTION DESCRIPTION DESCRIPTION 637 o_693867 Seal- Choke Shaft _299819 Seal-Oil Plug-Welch 868 -_-&498592 Seal-Valve 7 _A273240...
- Page 30 Briggs & Stratton Corporation (B&S), the California Air Resources Board (CARB} and the United States Environmental Protection Agency (U.S. EPA) Emission Control System Warranty Statement Owner's Defect Warranty Rights and Obligations) EMISSION CONTROL WARRANTY COVERAGE IS APPLICABLE TO CERTIFIEDMODEL YEAR 1997 AND LATERENGINES TO CERTIFIEDENGINES PURCHASED IN CALIFORNIA IN 1995 WHICH ARE PURCHASED AND USED ELSEWHERE IN THE AND THEREAFTER,WHICH ARE USED IN CALIFORNIA,AND...
- Page 31 About your engine warranty: Parts which are scored or broken because an engine Briggs & Stratton welcomes warranty repair and apologizes to you for being inconvenienced. Any Authorized Service was operated with insufficient or contaminated Dealer may perform warranty repairs. Most warranty repairs lubricating oil, or an incorrect grade of lubricating oil are handled routinely, but sometimes requests for warranty...
- Page 32 DE DOS ANOS DEL MOTOR CRAFTSMAN Pot dos anos a partir de la fecha de compra, y siempre que este motor Craftsman se mantenga y opere de acuerdo a las instrucciones en el Manual del Operador, Sears reparara cualquier defecto de material o fabricaci6n sin costo alguno.
- Page 33 Este manual contiene informaci6n que es importante para que usted sepa y comprenda. Esta informaci6n se relaciona con la protecci6n de SU SEGURIDAD y la PREVENCION DE PROBLEMAS AL EQUIPO. Para ayudarle a identificar esta informaci6n, utilizamos los simbolos indicados mas abajo. Sirvase leer el manual y prestar atenci6n a los mismos Indica una situaci6n de inminente Indica una situaci6n riesgo, la cual, si no es evitada,...
- Page 34 RIESGO &QU¢: PUEDE OCURRIR? &COMO PREVENIRLO? La operaci6n insegura de su lavadora a presi6n puede Familiarfcese con la operaci6n y controles de la ocasionar lesiones serias o la muer[e a usted u otras lavadora a presi6n. personas. RIESGO DE OPERACION Mantenga la zona de operaciones libre de...
- Page 35 RIESGO &QUE PUEDE OCURRIR? &COIVIO PREVENIRLO? El derramamiento de combustible o aceite puede = Si la lavadora a presi6n ester equipada con una valvula de corLe de combustible, gire la misma hasta su posici6n de originar un incendio o el riesgo de su inhalaci6n, ello puede determinar una lesi6n seria o la muerte.
- Page 36 3. Instalar el tope amortiguador de caucho en el bastidor colocando Herramientas Requeridas para el Ensamblaje extremo roscado del pemo dentro de la arandela. Luego, con la arandela en el perno, pasar el extremo roscado del perno por el tope amortiguador. Llave regulable para tuercas Colocar la parte roscada del tope amortiguador...
- Page 37 Colocar la pistola ensamblada con el tubo aplicador en Colocar la cuerda de arranque en el soporte tipo el soporte de la lavadora a presi6n. argolla. Pasar la cuerda por debajo del soporte a la derecha de la argolla.Elevar el mango de la cuerda de arranque y deslizar la cuerda hacia la izquierda para que entre en la argolla.
- Page 38 Antes de Arrancar el Motor _Leer el Manual del propietario. Hacer Io siguiente para hacer que el motor funcione: No intentar operar este equipo hasta haber Iddo las instrucciones de Seguridad, NOTA: La bomba de la lavadora a presi6n es una Operaci6n y Mantenimiento.
- Page 39 Usar gasolina regular sin plomo que este fresca y limpia de Presioneel gatillo de la barra rociadora de la lavadora a presi6n mfnimo 85 octanos. No mezclar el aceite con la gasolina. Si para aliviar la presi6n del aire originada pot activar el paso del no se dispone de gasolina sin plomo, se puede usar gasolina agua.
- Page 40 Como usar la Lavadora a Presi6n de Detergentes y Quimicos IMPORTANTE: Usar detergentes y productos qu[micos que En el extremo de la pistola aplicadora hay una boquilla que esten disehados especificamente para usar en lavadoras a se puede deslizar hacia adelante y hacia atras y que tambien presi6n.
- Page 41 RESPONSABILiDADES DEL PROPIETARIO Cada 100 Antes de Cada 25 Horas Cada 50 Horas Horas Cada Uso o Cada A6o o Cada A6o o Cada A_o TAREA DE MANTENIMIENTO LAVADORA A PRESION Inspeccionar/limpiar la malla de entrada. Inspeccionar la manguera para alta presi6n. Inspeccionar la manguera de succi6n de detergente/quimico y filtro.
- Page 42 Mantenimiento de la Lavadora a Presi6n Mantenimiento del Motor • Cambiar el aceite cuando el motor todavia este caliente. Inspeccionar y Cambiar la Malla de Entrada: Examinar la De preferencia, drenar el aceite pot la parte superior del malla en el acople de entrada de la bomba. Limpiar si motor como se muestra mas adelante.
- Page 43 Limpieza del prelimpiador y del cartucho para la NOTA: No usar solventes derivados de petr61eo, tales como kerosene, porque deterioraran el cartucho del filtro. No usar limpieza del aire. aire presurizado para limpiar el filtro. El aire presurizado Su motor esta equipado con un elemento dual para la puede dafiar el cartucho del filtro.
- Page 44 Apretar el gatillo de la pistola aplicadora para aliviar toda Eliminar los residuos pasando agua al reverso pot el tubo la presi6n de agua acumulada. durante unos 30 segundos. Desconectar el tubo aplicador de la pistola. Sacar la boquilla del extremo del tubo aplicador con la Ilave Allen de 2mm provista con la unidad.
- Page 45 CAUSA PROBLEMA CORRECCION 1. Sin combustible. El motor no arranca (vea el 1. Agregue combustible. Manual del motor para 2. Acumula presi6n despu_s de tirar dos 2. Apriete el gatillo de la pistola para aliviar la presi6n. informarse acerca veces de la cuerda del arrancador o despu_s del primer use.
- Page 46 PROBLEMA CAUSA CORRECCION 1. Sello gastado o atascado. 1. Reemplacelas por AWSC. Nada o baja presJ6n (despu6s de un periodo normal de uso) 2. VAIvulas gastadas u obstrufdas. 2. Reemplacelas por AWSC. 3. Pist6n de descarga gastado 3. Reemplacelas por AWSC. Agua goteando en la conexJ6n 1.
- Page 47 Briggs &Stratton Corporation (B&S), the California Resources Board (CARB) (Concejo de Recurses del Aire de California), y Ja United States EnvironmentaJ Protection Agency (U.S. EPA) (Agencia de Protecci6n del Medioarnbiente de los Estados Unides} Declaraci6n garantia para el sistema de control per la ernisi6n de gases (Garantia dereches y obligaciones que asisten al propietarie) IJ, COBERTURA DE LA GARANT(A PARA EL SISTEMA DE CONTROL...
- Page 48 Acerca delagarantia desumotor: Briggs &Stratton secomplace enanunciar lagarantia de Carburadores con p_rdidas, conductos de combustibles reparaci6n ysedisculpa ante usted p or i mportunar. Cualquier tapados, valvulas pegadas, u otro da_o causado por la concesionario con servicio autorizado puede efectuar las utilizaci6n de combustible contaminado o viejo.
- Page 49 49- SP...
- Page 50 50- SP...
- Page 51 51- SP...
- Page 52 For repair of major brand appliances in your own home... no matter who made it, no matter who sold it! 1-800-4-P_Y-HO_IE SMAnytime, day or night (1 =800=469=4663) www,sears.corll3 To bring in products such as vacuums, lawn equipment and electronics for repair, call for the location of your nearest Sears Parts & Repair Center. 1-800-488-1222 Anytime, day or night...