Table of Contents
Advertisement
Quick Links
INSTRUCTION MANUAL
FOR
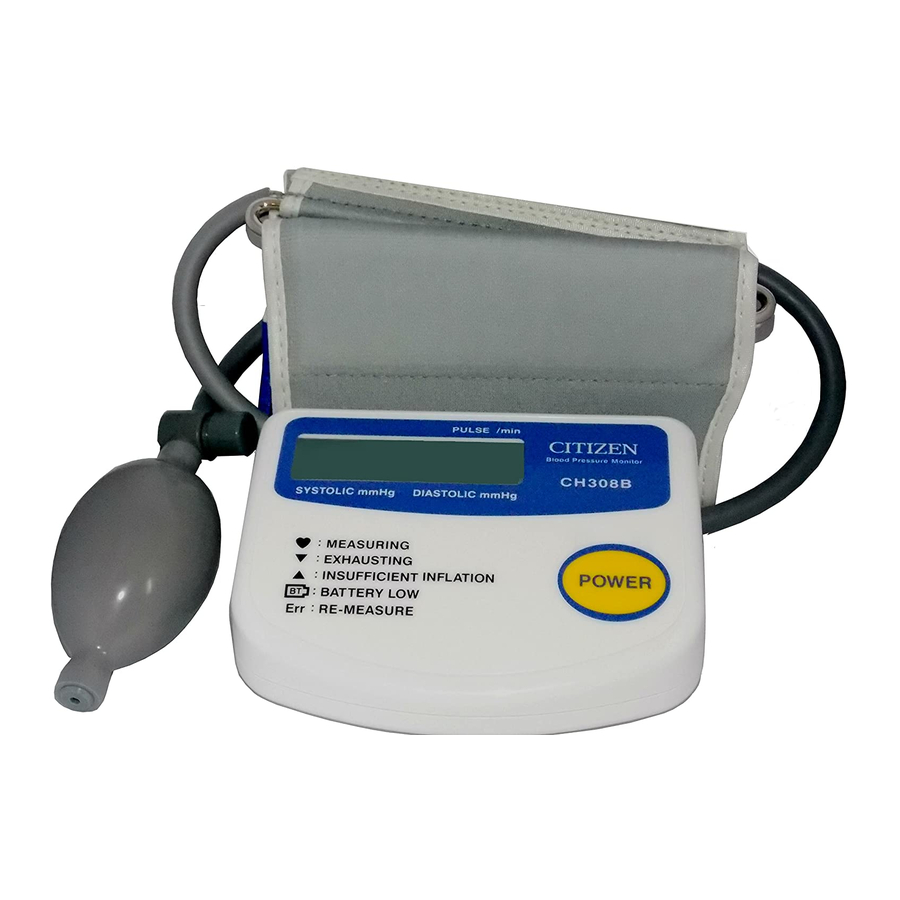
DIGITAL BLOOD PRESSURE MONITOR
REF CH-308B
IDENTIFICATION OF PARTS
Exhaust button
Pumpin bulb
Air connector
Pumping bulb tube
Systolic blood pressure display section
Diastolic blood pressure/Pulse display section
Cuff
Air connector
POWER switch
Battery cover
Cuff tube
- Eng 1 -
Advertisement
Table of Contents

Summary of Contents for Citizen CH-308B
-
Page 1: Identification Of Parts
INSTRUCTION MANUAL DIGITAL BLOOD PRESSURE MONITOR REF CH-308B IDENTIFICATION OF PARTS Exhaust button Pumpin bulb Air connector Pumping bulb tube Systolic blood pressure display section Diastolic blood pressure/Pulse display section Cuff Air connector POWER switch Battery cover Cuff tube - Eng 1 -... -
Page 2: Specifications
SPECIFICATIONS Model Number CH-3O8B Measuring Principle Oscillometric Method Measurement Localization Left Upper Arm Cuff Soft cuff Aim Circumference Range 22.0 to 32.0 cm Measurement Range Pressure 0 - 280 mmHg 40 - 200 Pulse I Min Pulse ±3 mmHg Accuracy Pressure ±5% of reading Pulse... -
Page 3: General Remarks
CLEANING METHOD OF CUFF After cleaning the cuff with a neutral detergent, lightly rinse it with machine will cause air leakage. Also, be careful not to get water water and let it dry in the air. Hard rubbing or washing in a washing into the air hose. -
Page 4: Precaution For Use And Maintenance
For proper measurement of blood pressure • When you feel like relieving yourself, you should do so before measuring blood pressure. • Take a deep breath five or six time and then relax before measur- • Measure blood pressure where the room temperature is about ing blood pressure. - Page 5 • NEVER wipe the meter with thinner or benzene, as they may Manufacturer: damage it. Name: Premier Precision Ltd. • Dispose batteries according to local regulations. Address: Block E, G-H, 6 floor, • This product is designed for use over an extended period of time; Phase 2, Yip Fat Factory Building, however, it is generally recommended that it be inspected every 73-75 Hoi Yuen Road,...
-
Page 6: Turn Power On
MEASUREMENTS PULSE / min 3.1 Turn Power On Push the cuff tube and Pumping bulb tube over the air connectors. Pumping bulb tube SYSTOLIC mmHg DIASTOLIC mmHg After all display marks are disappeared, the last measured systolic and diastolic blood pressure values are displayed. (Value of Pulse is not memorized nor displayed). - Page 7 3.2 Attaching of Arm Cuff and Posture During • In no case the metal ring of cuff should be situated on the inside of the upper arm. Measurement Unfasten and open the cuff as shown in the figure. • Please make sure that the cuff is fastened tightly. Note that un- even cuff winding will prevent proper measurements.
- Page 8 PULSE / min 3.3 Pressurize the cuff PULSE / min SYSTOLIC mmHg DIASTOLIC mmHg When the diastolic pressure valve is detected, the measurement is SYSTOLIC mmHg DIASTOLIC mmHg completed and buzzer beep. Pressurize the cuff by pumping bulb until you have a reading of Systolic pressure is displayed on the left and diastolic pressure on approximately 30 to 40 mmHg higher than your regular systolic the right side of the display.
-
Page 9: Battery Replacement
3.4 Press the exhaust button 3.8 Battery Replacement PULSE / min Battery cover Battery SYSTOLIC mmHg DIASTOLIC mmHg Press the exhaust button valve to completely release the air in the cuff. 3.5 Power off Press the “POWER” switch to turn off, 3.6 Subsequent measurement If the battery becomes weak, the “... -
Page 10: Description Of Display Marks
DESCRIPTION OF DISPLAY MARKS DISPLAY MARK CONDITION/CAUSE CORRECTIVE ACTION PULSE / min Raise the set pressure value by higher The cuff was not inflated to more than 30-40 mmHg level. above your systolic pressure. SYSTOLIC mmHg DIASTOLIC mmHg PULSE / min The cuff was inflated to more than 280 mmHg.


