Table of Contents
Advertisement
Copyright
This guide is copyrighted with all rights reserved. No portion of this guide may be copied or reproduced by
any means without the prior written consent of Brady Worldwide, Inc.
While every precaution has been taken in the preparation of this document, Brady assumes no liability to
any party for any loss or damage caused by errors or omissions or by statements resulting from negligence,
accident, or any other cause. Brady further assumes no liability arising out of the application or use of any
product or system described, herein; nor any liability for incidental or consequential damages arising from
the use of this document. Brady disclaims all warranties of merchantability of fitness for a particular
purpose.
Trademarks
TM
Wraptor
and LabelMark
Inc.
Microsoft and Windows are registered trademarks of Microsoft Corporation.
Brady reserves the right to make changes without further notice to any product or system described herein to
improve reliability, function, or design.
© 2006 Brady Worldwide, Inc. All Rights Reserved
Revision D, 8/2006
Wraptor Utility Menu and Control Menu software version: 1.30
Brady Worldwide, Inc.
6555 West Good Hope Road
P.O. Box 2131
Milwaukee, WI 53201
Main Switchboard:
FAX:
Sales/Customer Service:
TM
(hereafter "Wraptor" and "LabelMark") are trademarks of Brady Worldwide,
(800) 541-1686
(414) 358-6600
(800) 292-2289
(800) 537- 8791
Advertisement
Table of Contents

Related Manuals for Brady Wraptor


Summary of Contents for Brady Wraptor
- Page 1 Brady further assumes no liability arising out of the application or use of any product or system described, herein; nor any liability for incidental or consequential damages arising from the use of this document.
- Page 2 Brady’s satisfaction to have been defective at the time Brady sold it. This warranty does not extend to any persons obtaining the product from the buyer.
-
Page 3: Technical Support
Technical Support Choose one of the following options to contact system support provided by Brady Corporation: U.S. Phone: (800) 643-8766, Monday – Friday 6:30 a.m. – 6:30 p.m. CST Fax: (414) 358-6767 E-Mail: tech_support@bradycorp.com Assistance is available 24 hours per day / 7 days per week. Go to www.bradyid.com... -
Page 4: Table Of Contents
Table of Contents Chapter 1 Introduction.......................1 1.1 I ......................1 NTRODUCING THE RAPTOR 1.2 R ...........................1 EGISTRATION 1.3 A ’ ........................1 BOUT THE UIDE 1.4 T ......................2 ECHNICAL PECIFICATIONS 1.4.1 Physical Dimensions............................2 1.4.2 Environmental Ranges..........................2 1.4.3 Materials Storage Specifications .........................2 1.4.4 Electrical Specifications ..........................2 1.4.5 Power Cord Specifications ..........................2 1.4.6 System Requirements ...........................3 Chapter 2 Safety..........................4... - Page 5 6.3.2 Transfer Files FROM Printer ........................54 6.3.3 Manage Printer Files..........................55 6.3.4 Upgrade Printer Files..........................56 Chapter 7 Maintenance ......................57 7.1 C ............................57 LEANING 7.1.1 Before You Begin ............................57 7.1.2 Cleaning the Wrapper Surface ........................58 7.1.3 Cleaning the Printhead..........................59 7.1.4 Cleaning the Rollers ..........................60 7.1.5 Cleaning the V-Roller ..........................61 7.1.6 Cleaning the Sensors ..........................61 7.1.7 Cleaning the Fan Filter ..........................63...
- Page 6 Table of Figures Figure 1. Hazardous Moving Parts Label—Front of Unit ..................5 Figure 2. Hazardous Moving Parts Label—Inside Cover ..................5 Figure 3. External Parts—Front ..........................6 Figure 4. External Parts—Back..........................7 Figure 5. Wraptor Installation Menu........................11 Figure 6. Wraptor Control Panel..........................20 Figure 7. Material Path Parts...........................21 Figure 8.
-
Page 7: Chapter 1 Introduction
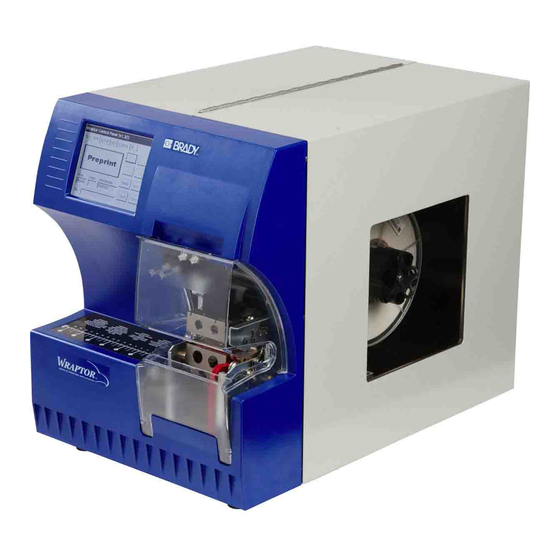
The Wraptor is a semi-automatic computerized system that integrates the print-and-apply processes used for labeling wire and cable. You design labels on your computer using Brady’s LabelMark software, included with your unit. You then transfer the labels to the Wraptor for printing and wrapping on a variety of wires and cables. -
Page 8: Technical Specifications
1.4 Technical Specifications The Wraptor has the following specifications: 300 dots per inch (11.8 dots per mm) print resolution 1.75 inches per second (44.45 mm per second) print speed The following wrap speeds: 4 seconds (apply only) 4.5 seconds (wrap and apply) Accommodates wires between 0.060”... -
Page 9: System Requirements
The table below shows the specifications for the power cord to be used in various countries: In this country: Use this power cord: Sweden, Denmark, Norway, Finland, Specifications plug: CEE-7 Holland, Switzerland, Austria, connector: IEC 320 Germany, Italy, Belgium, France, conductor size: 3 x 1.00 mm Spain, Portugal, Hungary description: H05VVF3G1.0... -
Page 10: Chapter 2 Safety
Chapter 2 Safety This section contains safety information necessary for the safe operation of the Wraptor. Be sure to read this section prior to setting up or operating the unit. Always be sure to adhere to the safety standards regulating your operating environment. Also adhere to the following safety rules included in or in addition to your specific standards: WARNING: Do not wear loose clothing—such as long sleeves or scarves—that could become caught in the unit. -
Page 11: Electrical Safety
2.2 Electrical Safety CAUTION: Connect the three-conductor plug to an North American standard 120 VAC outlet. Make sure the outlet is grounded. WARNING: Turn off power and unplug unit before performing any service or maintenance on the Wraptor. 2.3 Warning Labels The following warning label appears on the front of the unit: Figure 1. -
Page 12: Chapter 3 Component Locations
Chapter 3 Component Locations This section provides the locations and descriptions of the components that make up the Wraptor. 3.1 External Parts The following figure shows the external parts located on the front of the Wraptor. Figure 3. External Parts—Front 1. -
Page 13: Figure 4. External Parts-Back
The following figure shows the external parts located on the back of the Wraptor. Figure 4. External Parts—Back 1. Exhaust Fans—The exhaust fans run continually when the Wraptor is powered on to keep operating components cool. 2. Ethernet Connection— Allows you to connect the Wraptor to a Local Area Network (LAN). 3. -
Page 14: Chapter 4 Installation And Preparation
Chapter 4 Installation and Preparation 4.1 Initial Setup This section provides information on installing and preparing the Wraptor for initial use. Follow these steps before creating and printing labels: 4.1.1 Unpack and Set Up the Wraptor Unit Step 1. Unpack WARNING: The Wraptor weighs 80 lbs. - Page 15 Step 2. Remove protective foam inserts 1. Remove protective foam insert from the wrapper. Remove foam Remove foam from spindle from wrapper 2. Open the side door, and remove protective foam covering from the material spindle. 3. Remove foam insert from underneath the right side of the printer frame. To do this: Remove the material roll from the spindle.
-
Page 16: Load Software On The Computer And Connect Wraptor
4. Remove the stabilizer block from underneath shuttle (slide) base plate. To do this: Remove the ribbon from the feed spool. See Load the Printer Ribbon on page 27 of this guide for instructions. Bolt/Washer Stabilizer Block Remove the stabilizer block bolt and washer. Remove the stabilizer (white) block from underneath shuttle (slide) base plate. -
Page 17: Figure 5. Wraptor Installation Menu
Step 2. Insert the Wraptor CD Insert the enclosed Wraptor Utilities CD-ROM into your computer’s CD Drive. The Wraptor Installation Menu appears: Figure 5. Wraptor Installation Menu NOTE: If the CD does not start automatically: Click Start Run, then type D:\CDSETUP.exe and click OK (where D: is your CD-ROM drive). - Page 18 3. Select the port (Serial, USB or FILE) you want to install from the list of Available ports: NOTE: If you will access the Wraptor via a Local Area Network (Ethernet/TCPIP), select FILE as the printer port. 4. If you selected as the port type: A USB port or FILE, click OK.
- Page 19 Step 5. Install the USB Driver and Configure for USB Operation This step describes how to install the USB driver and configure the computer and Wraptor to communicate via a USB cable (for Windows XP and Windows 2000). If you are not using a USB cable, skip this step.
- Page 20 4. The Wizard will search for the driver files on the CD. Click Continue Anyway. 5. Click Finish. 6. On the Wraptor Control Panel: Select the CONFIG tab. Select USB as the Connection Type. The Wraptor is ready to print and wrap via the USB connection. Wraptor™...
- Page 21 For Windows 2000: 1. Plug the provided USB cable into the computer and the Wraptor unit. 2. Turn the printer on. The Found New Hardware Wizard will appear. Click Next. 3. Select Search for a suitable driver for my device. Click Next. Wraptor™...
- Page 22 4. Check the CD-ROM drives box. Click Next. 5. Click Next. Wraptor™ User’s Guide...
- Page 23 6. Click Finish. 7. On the Wraptor Control Panel: Select the CONFIG tab. Select USB as the Connection Type. The Wraptor is ready to print and wrap via the USB connection. Step 6. Configure for Serial Operation This step describes how to configure the computer and Wraptor to communicate via a serial cable. If you are not using a serial cable, skip this step.
- Page 24 Step 7. Configure for Ethernet (TCPIP) Operation This step describes how to configure the computer and Wraptor to communicate via an Ethernet (TCPIP) connection. If you are not using a local area network, skip this step. NOTE: You must complete the Install the Wraptor Printer Driver procedure on page 11 before configuring the printer driver for Ethernet (TCPIP) operation.
- Page 25 8. Enter the Printer Name or IP Address and click Next. NOTE: The Port Name fills in automatically. IP Address Option Printer Name Option 9. Select the Standard Device Type option and Generic Network Card from the list and click Next.
-
Page 26: Power Up The Wraptor
10. Click Finish and then click Close twice to exit the Printer Ports and Wraptor Properties dialog boxes. 11. On the Wraptor Control Panel: Select the CONFIG tab and select TCP as the Connection Type If you entered a fixed IP address in the printer driver (step 8): Select the IP tab Select the Specify IP Address option Select the Enter IP Number…... -
Page 27: Load Label Material
4.2 Load Label Material Follow the steps below to load label material in the Wraptor unit. Use the material path shown below as your guide: The following figure shows the Wraptor’s material path. The material path is the route a roll of labels takes through the printer. -
Page 28: Figure 8. Wraptor With Side Door Open
Step 1. Initiate Label Load in Control Panel From the Wraptor Control Panel, select SETUP LOAD LABELS. NOTE: The print/wrap assembly automatically slides back for easy access during the material loading process. Step 2. Open the Wraptor Unit Lift the side door of the Wraptor unit. Figure 8. - Page 29 Step 4. Remove Previously Used Material If material is currently loaded, remove it. Open the label take-up spool handle. Open the nip rollers. Use a scissors to cut the label material between the liner and remaining labels. You may leave about 8” of liner on the roll for future threading. Remove the used liner from unit and discard.
- Page 30 Step 5. Put Label Material on Spool Place the label roll on the spool Turn flange counter-clockwise to rotate the label roll so the touch memory cell is securely positioned in the reader clip 1. Flange 2. Reader Clip Step 6. Thread Labels Thread the label: Over the first guide roller...
- Page 31 Step 8. Adjust Guide Rollers Be sure labels are up against the far side of the rollers. Position guide rings snug to the label liner. Step 9. Close Nip Rollers Pull out and snap closed. Wraptor™ User’s Guide...
- Page 32 Step 10. Tighten With Key Turn spool key clockwise to remove slack. Step 11. Feed a label Press the Feed Label button on the Wraptor Control Panel until a label dispenses. IMPORTANT: Be sure to remove the dispensed label. Failure to do so will jam the print mechanism.
-
Page 33: Load The Printer Ribbon
4.3 Load the Printer Ribbon Follow the steps below to load a ribbon in the Wraptor unit. Use the ribbon path shown below as your guide: Figure 9. Ribbon Path Parts 1. Feed Spool 2. Guide Roller 3. Guide Bar 4. -
Page 34: Figure 10. Wraptor With Side Door Open
Step 1. Initiate Ribbon Load in Control Panel From the Wraptor Control Panel, select SETUP LOAD RIBBON. Step 2. Open the Wraptor Unit Lift the side door of the Wraptor unit. Figure 10. Wraptor with Side Door Open Follow the steps below to load the ribbon. NOTE: Ribbon threading instructions are also located on the inside of the side door. - Page 35 Step 4. Thread Ribbon Place the ribbon roll on the feed spool. Thread the ribbon under the guide roller and over the guide bar and printhead. Feed ribbon under the clip as shown below until approximately ¼" of ribbon is past the clip.
-
Page 36: Chapter 5 General Operation
The Wraptor works in conjunction with your computer and software applications included with the unit. The process flow is as follows: On your computer: 1. Design labels on your computer using Brady’s LabelMark software. 2. Print your completed labels to the Wraptor printer with the Print command. On the Wraptor printer: 1. -
Page 37: Wrap Quality
5.1.1 Wrap Quality Please heed the following tips as not doing so may effect the quality of your wrap: ♦ Make sure to hold the wires tight and straight during wrapping. Kinked or curved wire may cause spiraling or bubbling. ♦... -
Page 38: Print Details
5.1.2 Print details When you “print” your labels to the Wraptor, the computer creates a print file: Print files are saved with the LabelMark file name and a PRN extension. The PRN file contains all the information necessary to print your labels. PRN files can be stored in the Wraptor’s internal memory, on your computer’s hard drive or on the Wraptor’s CompactFlash Memory Card. -
Page 39: The Wraptor Control Panel
5.3 The Wraptor Control Panel You control the Wraptor through the touch screen Control Panel. When you turn the Wraptor unit on, the touch screen initializes itself and the Wraptor Control Panel appears: Figure 11. Wraptor Control Panel on the Touch Screen The Control Panel has six tabs with printer-related commands: File, Run, Setup, Adj, Config and IP. -
Page 40: Figure 13. Label Mismatch Warning Message
Button Description Up, Down, Use to highlight a print file in the list. Page Up, Page Down Open Use to launch the highlighted file and begin printing/wrapping labels. The open command reads the print file and displays its first label in the Run tab. Preprint Use for pre-printed labels –... -
Page 41: Run Tab Commands
5.3.2 Run Tab Commands The Run tab menu allows you to set the label to be wrapped (see Figure 14). This menu displays the current label, allows you to move to a different label and provides status information about the printing/wrapping process. -
Page 42: Figure 15. Goto
Figure 15. Goto… Dialog Use the Goto…option to jump to a specific label number within the current label file. Use the touch screen buttons to select the label number, then press OK to go to the specified label. NOTE: The Goto… option is only available if there is more than one label in a file. - Page 43 Note: The Code Reader 2 scanner using a PS2 configuration is recommended for this feature. The Code Reader 2 is available from Brady. Set up the scanner for at least a 30ms inter-character delay. This will ensure that the Wraptor receives all characters transmitted by the barcode scanner.
-
Page 44: Setup Tab Commands
5.3.3 Setup Tab Commands The Setup tab menu allows you to load labels and ribbons and to clear jams. Figure 17. Setup Tab Menu The following table describes the Setup tab command buttons: Button Description Wraptor Dialog Load Labels Shuttles the print/wrapper mechanism back, tilts the print head open and displays the Load Labels dialog. -
Page 45: Adj Tab Commands
Shuttles the print/wrapper mechanism Load back, tilts the print head open and Ribbon displays the Load Ribbon dialog. To load the ribbon: • Physically load the ribbon in the Wraptor unit as described in Load the Printer Ribbon section. • Press the Online button to prepare the Wraptor to print. -
Page 46: Figure 19. Advanced Settings Menu
The following table describes the Adj tab commands: Setting Description Print Density Adjusts the print darkness. Allowable adjustment range is -30 to +30. Moves the starting position of all text on a label Left Margin left or right. Top Margin Moves the starting position of all text on a label up and down. -
Page 47: Figure 20. System Information
Button Description Default Changes the Feed to Wire distance back to the factory setting (i.e. zero). Changes the units of measure. Units Sets Units to inches. English Metric Sets Units to millimeters. Cycles Displays total number of print/wrap cycles on the printer. -
Page 48: Config Tab Commands
Figure 21. Config Tab Menu Connection Type You can connect your computer (running Brady’s LabelMark software and the Wraptor printer driver) to the Wraptor unit in one of three ways: Serial cable, USB cable or Ethernet (TCPIP) connection. The Connection Type determines the way the computer transfers files to the Wraptor printer. -
Page 49: Figure 22. Auto Open & Print Queue Options
Figure 22. Auto Open & Print Queue Options The following table describes the Auto Open & Print Queue check box commands: Check Box Description Automatically opens the print job when the Auto open Wraptor receives it. print job when received Enable print Allows the addition of multiple print jobs to the queue... -
Page 50: Ip Tab Commands
NOTE: Remote control uses the serial port to communicate with the Wraptor. Therefore, the Connection Type cannot be Serial when remote control is in use. NOTE: In-line operation of Wraptor by way of the Schleuniger Control Mode is only available from Schleuniger. Contact Schleuniger for more details at www.schleuniger.com. File Location Wraptor supports two file locations: Memory Card and Internal Memory. - Page 51 Wraptor supports two types of TCP connections: ♦ DHCP (or dynamic) addressing. DHCP addressing is simpler and requires less information to configure. ♦ Fixed IP addressing. The following table (next page) lists the information required for DHCP and Fixed IP addressing schemes: Wraptor™...
- Page 52 Settings DHCP Fixed IP Printer Name Desc Port Obtain DHCP Specify IP Address DNS Number Menu WINS Server 1 WINS Server 2 DNS Server 1 (1)(2) DNS Server 2 IP Number Menu IP Address Subnet Mask Gateway Address (1) Typically networks use either WINS or DNS servers. (2) The second WINS/DNS server is used as a redundant backup and may not be used at some locations.
-
Page 53: Figure 24. Touch Screen Keyboard Dialog
Figure 24. Touch Screen Keyboard Dialog Description of Settings Name: The computer will use this name to locate the printer on the network. The name must be unique if multiple Wraptor printers are in use on the network. Change the name by pressing the Enter… button to the right of the Name field. -
Page 54: Figure 27. Ip Number Keypad
♦ The DNS Number dialog (Figure 25) appears. ♦ To enter an IP address: Touch the field you want to enter the IP address for. Press the Enter button to display the keypad (Figure 26). Use the < and > keys to move from field to field with the IP address. Use the numbers to change the address. -
Page 55: The Wraptor Utility Menu
5.4 The Wraptor Utility Menu The Wraptor Utility Menu allows you to display the Wraptor Control Panel, calibrate the touch screen, change the language and upgrade the system. Figure 29. Wraptor Utility Menu 5.4.1 Run Command The Run command displays the Wraptor Control Panel. 5.4.2 Calibrate Touch Screen Command The Calibrate Touch Screen command allows you to recalibrate the touch screen. -
Page 56: Set Language Command
5.4.3 Set Language Command Figure 31. Set Language Utility The Set Language command changes the language for the printer. Press Up or Down to select the desired language and press OK. NOTE: If you select a different language, you must restart the printer so the Utility Menu can reload with the new language. -
Page 57: Chapter 6 The File Management Utility
Chapter 6 The File Management Utility This section provides instructions on using the File Management Utility (FMU). The FMU is an application included with the Wraptor that allows you to transfer label files between your computer, the Wraptor and the Wraptor’s CompactFlash Memory Card. 6.1 Launching the File Management Utility Click the File Management Utility icon on your desktop to launch the application. -
Page 58: File Management Utility Options
Upgrade Printer Files lets you transfer updated Wraptor software to an CompactFlash Memory Card. NOTE: If you print to FILE, print files are stored with a PRN extension in C:\Program Files\Brady\LabelMark 3\Files. Wraptor™ User’s Guide... -
Page 59: Transfer Files To Printer
6.3.1 Transfer Files TO Printer Transfer Files TO Printer allows you to send files from your computer to the Wraptor’s internal memory or to an CompactFlash Memory Card in the Wraptor unit. To transfer files to the printer, complete the following steps: 1. -
Page 60: Transfer Files From Printer
6.3.2 Transfer Files FROM Printer Transfer Files FROM Printer allows you to send files from the Wraptor’s internal memory or CompactFlash Memory Card to your computer. To transfer files from the printer, complete the following steps: 1. Select Transfer Files FROM Printer. 2. -
Page 61: Manage Printer Files
6.3.3 Manage Printer Files Manage Printer Files allows you to work with the files in the Wraptor’s internal memory or CompactFlash Memory Card. For example, you can move files from internal memory to the CompactFlash Memory Card for storage. Or, you can copy files from the CompactFlash Memory Card to internal memory for printing. To manage printer files, complete the following steps: 1. -
Page 62: Upgrade Printer Files
♦ A prompt appears asking if you want to obtain the updated software from the update web site or from a Brady-provided upgrade CD-ROM. ♦ The system then transfers the updated software to the CompactFlash Memory Card on the Wraptor unit. -
Page 63: Chapter 7 Maintenance
Chapter 7 Maintenance The Wraptor requires periodic maintenance to ensure trouble-free operation. The system uses the Cycle count to determine when maintenance is required. A maintenance reminder dialog is displayed when the cycle interval is reached. 7.1 Cleaning Perform the following cleaning routine when prompted to do so or at least every 5,000 labels to keep the Wraptor running at optimal performance. -
Page 64: Cleaning The Wrapper Surface
7.1.2 Cleaning the Wrapper Surface 1. Follow the steps in Before You Begin on page 57 of this guide. 2. Open the front (clear) door on the Wraptor. 3. Dip a cotton swab in the isopropyl alcohol. 4. Using the moistened swab, clean the wrapper surface. Make sure the wrapper is free of dust, debris and label adhesive build-up. -
Page 65: Cleaning The Printhead
7.1.3 Cleaning the Printhead 1. Follow the steps in Before You Begin on page 57 of this guide. 2. Open the side door on the Wraptor. 3. Dip a cotton swab in the isopropyl alcohol. 4. Using the moistened swab, thoroughly clean the top surface of the printhead. 5. -
Page 66: Cleaning The Rollers
7.1.4 Cleaning the Rollers Follow these steps to clean the rollers: 1. Follow the steps in Before You Begin on page 57 of this guide. 2. Open the side door on the Wraptor. 3. Dip a cotton swab in the isopropyl alcohol. 4. -
Page 67: Cleaning The V-Roller
7.1.5 Cleaning the V-Roller 1. Follow the steps in Before You Begin on page 57 of this guide. 2. Open the front (clear) door. 3. Dip a cotton swab in the isopropyl alcohol. 4. Using the moistened swab, clean all label adhesive from the serrated v-roller inside the wrapper with a clean swab. -
Page 68: Figure 40. Wrapper And Shuttle Home Sensors
5. Continue to clean the other sensors as needed. Figure 40. Wrapper and Shuttle Home Sensors The wrapper home sensor is located inside the front door to the right of the wrapper. You will need to rotate the wrapper so that it’s opening is near the sensor. The shuttle home sensor is located in front of the printer mechanism. -
Page 69: Cleaning The Fan Filter
Figure 41. Tilt and Ribbon Out Sensors The tilt sensor is located behind the printer mechanism on the upper right-hand side. The ribbon out sensor is located behind the ribbon path. The ribbon sensor should rarely, if ever, require cleaning. 6. -
Page 70: Lubrication
7.2 Lubrication Some Wraptor parts will need occasional lubrication in order to keep the unit running smoothly. It is recommended that you check the following items for proper lubrication every 6 months to one year. NOTE: Do not over-lubricate any of the parts. Make sure to wipe off any excess oil or grease. -
Page 71: Clean And Re-Grease The Wrapper Hub
7.2.2 Clean and Re-grease the Wrapper Hub 1. Press the Load Labels button on the Setup tab menu. This shuttles the printer to the “shuttle-back” position. 2. Power off and unplug the Wraptor. WARNING: You must power off and unplug the Wraptor prior to performing any cleaning or maintenance! 3. -
Page 72: Replace Wrapper Foam V-Block
7.3 Replace Wrapper Foam V-Block The Wrapper Foam V-Block is a replacement part that you can order. See Accessories on page 72. To replace the Wrapper Foam V-Block: 1. Press the Load Labels button on the Setup tab menu. This shuttles the printer to the “shuttle-back” position. - Page 73 5. Using a 7/64” Allen wrench, remove the screw that is located above the printhead assembly stamping. Save the screw for installation of the new assembly. Screw—located Printhead mounting above the pivot shaft—washer printhead and screw are located assembly on the opposite side. 6.
-
Page 74: Chapter 8 Error Messages
Resolution: Stop and restart the program. Default settings will be automatically re-initialized. Cannot save Wraptor settings to the Cause: Persistent storage manager not working. registry. Resolution: Contact Brady Technical Support. Check Labels Cause: Out of labels. Resolution: Make sure guide rollers are adjusted properly. - Page 75 Cause: The printer firmware generates this message. Resolution: The most likely cause is lost data. Try printing the file again. If problem persists contact Brady Technical Support. Print Head is too hot Cause: Print head is too hot. Resolution: Open the print head and allow it to cool down.
- Page 76 Error Message Possible Cause/Resolution The file %s cannot be opened. Cause: If Wraptor is set to use an CompactFlash Memory Card, the file was not found. Resolution: CompactFlash Memory Card may have been removed prior to opening a file. Re-insert CompactFlash Memory Card and try again.
- Page 77 This is an invalid print file. Cause: Print file is corrupt or wrong version. Resolution: Reprint the label file from the computer. Call Brady Technical Support if this does not resolve the problem. Wrapper mechanism is not in home Cause: Wrapper mechanism is not in home position.
-
Page 78: Chapter 9 Accessories Parts List
Chapter 9 Accessories Parts List Following is a list of parts and accessories that can be ordered for the Wraptor: 9.1 Consumable material Product ID Label Part Width Height Y381713 Wraptor Self-Lam .5” .75” Y381714 Wraptor Self-Lam 1” 1” Y381715 Wraptor Self-Lam 1”...