M-Audio Ozonic User Manual
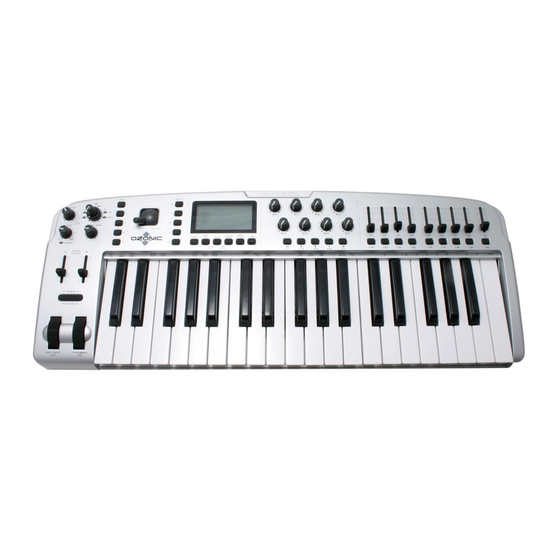
37-key audio midi interface and controller
Hide thumbs
Also See for Ozonic:
- User manual (38 pages) ,
- Quick start manual (40 pages) ,
- Quick start manual (4 pages)
Table of Contents
Advertisement
Advertisement
Table of Contents

Related Manuals for M-Audio Ozonic


Summary of Contents for M-Audio Ozonic
- Page 1 OZONIC 37-Key Audio/MIDI Interface and Controller...
- Page 2 first, then turn the FireWire device power switch on, and turn the computer system on last. M-Audio is being proactive in investigating any issues that may adversely affect our customers. Please consult the Knowledge Base in the Support section at www.m-audio.com for updates on this important issue.
- Page 3 The Ozonic has 40 assignable MIDI controllers that include a joystick, 8 knobs, 9 sliders, Pitch Bend and Modulation wheels, and 14 assignable buttons (including Transport buttons). The keyboard also has an assignable Aftertouch control. There are also 6 real-time function buttons that include Zone and Group controls and10 memory access buttons that can access the 20 on-board memories.
-
Page 4: Top Panel Diagram
< OS X 10.3.4 or greater w/ 512 MB RAM (CPU may be higher for laptops) * M-Audio suggests you also check the minimum system requirements for your software, as they may be greater than the above. ** G3/G4 accelerator cards not supported. - Page 5 While driver signing makes installation and operation more streamlined, it is not a necessity for a device to function properly with the operating system. Currently, M-Audio’s FireWire drivers are not digitally signed. However, M-Audio is committed to providing the best possible drivers for our products and we constantly evaluate and test our drivers to ensure that they work properly.
- Page 6 Verify that you have no other programs running (especially anti-virus programs, which may interfere with the installation), andv then click “Next” to begin the installation. After you’ve read the license agreement, please click the “I accept...” circle if you agree to the terms. Then click “Next” to continue. Click “Install”...
- Page 7 14. Click “Finish” to complete the installation. Your Ozonic is now ready to use. 15. You will see the M-Audio Ozonic control panel icon in your system tray (lower right corner of your desktop). Click on the icon to open...
- Page 8 Double-click the M-Audio Ozonic Installer.dmg file. An icon labeled “Ozonic” will appear on your desktop. Double-click on the Ozonic icon. The file named M-Audio Ozonic Installer.mpkg will appear. Double-click on the installer file. The introduction screen will now appear. Click “Continue” to proceed.
- Page 9 Ozonic on. Once you have completed this, turn the computer back on. 14. Once the operating system has loaded, go to “System Preferences” in the Apple Menu. Select the “Sound” preference panel, and click the “Output” tab. Select “M-Audio Ozonic” to choose the Ozonic as your default output device.
-
Page 10: Connection Diagram
In Windows – A tiny icon in the shape of a knob will be placed in the system tray, generally located at the bottom of your Windows desktop. Double click this icon to open the Control Panel. On the Mac – The Ozonic Control Panel can be found in System Preferences. In OS X, go to Apple Menu > System Preferences > M-Audio FireWire. - Page 11 Global Menus The following Control Panel features are available on all pages of the Control Panel: < Mixer Settings – The reset button returns the Control Panel settings to their default values. The Default Values for the Ozonic Control Panel are listed at the end of this section.
- Page 12 < Hardware Inputs – The mixer page also provides software level control for direct monitoring of Ozonic’s analog inputs. These pairs are labeled 1/2 in and 3/4 in. The software routing of the hardware inputs is the same process as for the software returns. Press 1/2 or 3/4 or both to select routing options. When you press one of the software buttons it will light, meaning that the audio signal is being routed to that pair of outputs.
- Page 13 This page contains information on your hardware and current driver software versions. This information may be helpful if you ever have to update the driver software or need to call for technical support. Clicking the M-AUDIO logo in the lower right hand corner will link you directly to our website if you are currently online.
- Page 14 The following sections address a number of real-life situations that you may encounter while using your Ozonic. These brief tutorials should help guide you. Also check the M-Audio website from time to time for additional tutorials or FAQs. Setting Up Your Recording Levels <...
- Page 15 As mentioned earlier, with ASIO direct monitoring, the audio software will take control over the Ozonic mixer’s input channels. With manual direct monitoring, you must control the Ozonic mixer’s input channels manually. Here’s how: Open your audio software and the Ozonic Control Panel. In the Ozonic Control Panel, click the mixer tab.
- Page 16 If you are using a MIDI sound module or connecting to another piece of MIDI equipment, you will need to make sure that both your Ozonic keyboard and the receiving unit are set to the same MIDI channel. The Global MIDI Channel affects the keyboard, Program, and Bank Changes, plus whatever controllers have been set to respond to the global setting.
- Page 17 < Sustain and Expression Pedals Ozonic will use any polarity foot switch (not included) that is plugged into the Sustain input on the back of the keyboard. Ozonic will automatically detect the correct polarity on power up. If you want to reverse the polarity, just make sure the pedal is depressed when you switch on your Ozonic.
- Page 18 You can also organize and store your presets and any programmed memories on your computer using the Enigma software. This software is available as a free download at www.m-audio.com. All you have to do is register your M-Audio product. < Sending a Snap Shot Press the BANK A/B and STORE buttons together to send a SNAP SHOT of the current controller assignments.
- Page 19 < Assigning MIDI CC’s After you have selected the controller you wish to edit, you can change the assigned MIDI CC number in the following way: Press the EDIT button, then the CTRL ASGN key. The LCD will indicate the currently assigned MIDI CC number. The “CC” symbol will also flash.
- Page 20 To disengage MIDI Out from Host mode: Press the EDIT button. Press the MIDI OUT key. The ‘MIDI plug’ symbol will disappear from the LCD display. Advanced Programming Functions < Zones The Zone feature can be used to create up to three keyboards in one by splitting the keyboard into sections. Using Zone Edit mode, each of the three possible Zones can be assigned an upper and lower key limit to specify which section of the keyboard should be assigned to a specific Zone.
- Page 21 Programming the Controllers < Introduction to Programming Options Each of the Ozonic’s controllers can send MIDI CC, RPN/NRPN, GM 1&2, and SysEx messages. They can also be assigned to individual MIDI channels. MIDI CC (continuous controller) numbers are part of the standard MIDI specifications and are typically used to control the real-time changing of parameters in musical equipment.
- Page 22 < The Buttons and Pedal: MIDI CC Description Data 1 Data 2 Data 3 0-119 Standard MIDI CC’s Toggle Value 2 Value 2 120-127 Channel Mode Messages Toggle Value 2 Value 2 Pitch Bend Range Sensitivity Value Channel Fine Tune Tuning Amount Channel Coarse Tune Tuning Amount...
- Page 23 When you press the CTRL ASGN key and a Group A controller is selected, the MIDI message you assign to the Group A controller will apply to all the Zones that are active at that time. This means the MIDI CC you have assigned to the Group A controller will be transmitted on all the channels the selected Zones were assigned to.
- Page 24 < Setting Toggle Values for the Buttons The 14 assignable buttons and the pedal can be assigned to toggle between two values. Press the EDIT button, followed by the DATA 2 (MIN) key. Type in “15” using the numerical data entry keys. Press the ENTER key to confirm.
- Page 25 Many data sheets for synths make use of NRPN messages and will give the MSB and LSB values that should be entered for DATA 3 and DATA 2 (See Appendix F). Some manuals may only give the hex values, but Ozonic requires the decimal value be entered. Convert hexadecimal values to decimal values using the Windows calculator;...
-
Page 26: Midi Messages Explained
MIDI Messages Explained < Program & Bank Changes The original GM MIDI specification allowed for only 128 voices, numbered from 0-127. It is possible to access a different voice by sending a Program Change. In order to expand on the GM set of voices, Bank Changes were devised. Each bank contains 128 patches that can be accessed using a Program Change. - Page 27 – the drivers will install as if there is not a problem. < To fix this problem: Go to http://www.m-audio.com and locate the above question. You will find a link to an exe file that will solve this problem for you.
- Page 28 Contact M-Audio M-AUDIO U.S. M-AUDIO Deutschland (Germany) 5795 Martin Road, Irwindale, CA 91706-6211, U.S.A. Kuhallmand 34, D-74613 Ohringen, Germany Sales Information: 626-633-9050 Sales Information: 49 7941 98 7000 Sales Information (email): info@m-audio.com Sales Information (email): info@m-audio.de Technical Support: 49 7941 98 70030...
- Page 29 Appendices Appendix A - MIDI Implementation Chart Function Transmitted Received Remarks Basic :Default 1-16 Channel: Changed 1-16 :Default --------- Mode :Messages :Altered ********* Note 0-127 Number: True Voice ********* Velocity: Note ON : Note OFF After : Keys Touch :Ch’s Pitch Bend Control 0-119...
- Page 30 Appendix B - Assignable MIDI CC’s on Ozonic B1 - The Fader and rotary Controllers: MIDI CC Description Data Lsb (Press Twice) Data Msb (Press Twice) 0-119 Standard MIDI CC’s 120-127 Channel Mode Messages Pitch Bend Sensitivity Channel Fine Tune Channel Coarse Tune Channel Pressure RPN Coarse...
- Page 31 B2 - The Buttons and Pedal: Program MIDI CC Description Data Lsb (Press Twice) Data Msb (Press Twice) (Press Twice) 0-119 Standard MIDI CC’s Toggle value 2 Toggle value 1 120-127 Channel Mode Messages Toggle value 2 Toggle value 1 Pitch Bend Range Sensitivity value Channel Fine Tune...
- Page 32 Appendix C - Hexadecimal Conversion Chart Hexadecimal to Decimal Conversion Chart Hexadecimal Decimal Hexadecimal Decimal Hexadecimal Decimal Value Value Value Value Value Value...
- Page 33 Appendix D - Useful MIDI data General MIDI Instruments Piano Bass Reed Synth Effects 0 Acoustic Grand Piano 32 Acoustic Bass 64 Soprano Sax 96 SFX Rain 1 Bright Acoustic Piano 33 Fingered Bass 65 Alto Sax 97 SFX Soundtrack 2 Electric grand Piano 34 Electric Picked Bass 66 Tenor Sax...
- Page 34 Appendix E - Standard MIDI Controller numbers (MIDI CC's) Bank Select Gen Purpose 3 LSB Reg Param LSB Modulation Gen Purpose 4 LSB Reg Param MSB Breath Control Controller 52 Controller 102 Controller 3 Controller 53 Controller 103 Foot Control Controller 54 Controller 104 Porta Time...
- Page 35 Appendix F - Roland GS and Yamaha XG NRPN Support to Roland JV/XP NRPN NRPN Data Data CC99 CC98 CC06 CC38 00-7F n/a (-64 - 0 - +63) Vibrato Rate (relative change) 00-7F n/a (-64 - 0 - +63) Vibrato Depth (relative change) 00-7F n/a (-64 - 0 - +63) Vibrato Delay (relative change) 00-7F...
-
Page 36: Warranty Terms
Warranty Terms M-Audio warrants products to be free from defects in materials and workmanship, under normal use and provided that the product is owned by the original, registered user. Visit www.m-audio.com/warranty for terms and limitations applying to your specific product. - Page 38 041025_OZONIC_UG_02...