Table of Contents
Advertisement
Advertisement
Table of Contents

Related Manuals for Honda HS622


Summary of Contents for Honda HS622
- Page 2 The engine exhaust from this product contains chemicals known to the State of California to cause cancer, birth defects or other reproductive harm.
- Page 3 Honda Motor Co., Ltd. reserves the right to make changes at any time without notice and without incurring any obligation. No part of this publication...
-
Page 4: Table Of Contents
CONTENTS SAFETY ..................................SAFETY LABEL LOCATIONS ................SAFETY INFORMATION COMPONENT IDENTIFICATION..............CONTROLS ....................Engine Switch ..................Fuel Valve ....................Choke Lever ....................Starter Grip ....................Lever ..................Throttle Shift Lever ....................Chute Guide ................... Drive Clutch Lever ................Auger Clutch Lever ................ -
Page 5: Safety
SAFETY SAFETY LABEL LOCATIONS These labels warn of potential hazards that can cause serious injury. Read them carefully. If a label comes off or becomes hard to read, contact your Honda Snowblower dealer for a replacement. -
Page 6: Safety Information
Always make a pre-operation check (pages 14 thru 18 ) before you start the engine. prevent an accident or equipment damage. Honda snowblowers are designed to give safe and dependable service if operated according to instructions. Read and understand this Owner’s Manual before operating the snowblower. - Page 7 Adjust the snow discharge chute to avoid hitting the operator, bystanders, windows, and other objects with ejected snow. Stay clear of the snow discharge chute while the engine is running. Children and pets must be kept away from the area of operation to avoid injury from flying debris and contact with the snowblower.
- Page 8 Gasoline is extremely flammable and is explosive under certain conditions. Do not smoke or allow flames or sparks where the snowblower refueled or where gasoline is stored. Allow the engine to cool down before refueling. Refuel in a well-ventilated area with the engine stopped. Do not overfill the fuel tank, and make sure the filler cap is closed securely after refueling.
-
Page 9: Component Identification
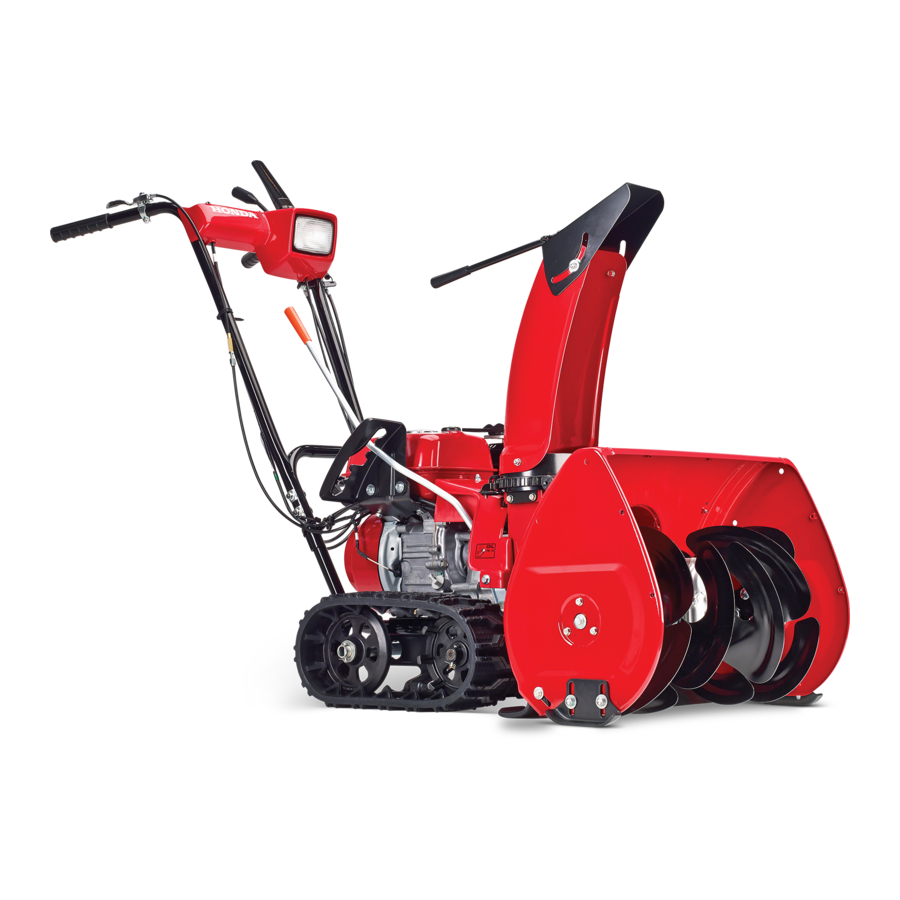
COMPONENT IDENTIFICATION AUG/ER CLUTCH LEVER ENGINE SWITCH SNOW CHUTE SHIFT LEVER CHUTE GUIDE FUEL VALVE STARTER GRIP OIL FILLER CAP Record the frame and engine serial numbers for your reference. Refer to the serial numbers when ordering parts, and when making technical or warranty inquiries (see page 47 ). -
Page 10: Controls
CONTROLS Engine Switch Use the engine switch to turn the ignition system ON for starting, to STOP the engine. ENGINE SWITCH Fuel Valve The fuel valve opens and closes the fuel line leading from the fuel tank to the carburetor. Make sure that the valve is positioned exactly... -
Page 11: Choke Lever
Choke Lever Close the choke when the engine is cold or difficult to start. Starter Grip See page 19 for starting procedures. Pull this grip to start the engine. STARTER GRIP... -
Page 12: Throttle Lever
Throttle Lever Use the throttle lever to select engine speed. In normal operation, the “FAST” position. THROlTLE LEVER Shift Lever Use the shift lever to select drive speed or direction. (1): LOW SPEED (2): HIGH SPEED (3): NEUTRAL (4): REVERSE SHIFT LEVER 1: LOW SPEED N: NEUTRAL... -
Page 13: Chute Guide
Chute Guide The chute guide controls the snow discharge angle and direction. CHUTE GUIDE CHUTE GUIDE Drive Clutch Lever Use the drive clutch lever to propel or stop the snowblower. DRIVE CLUTCH LEVER... -
Page 14: Auger Clutch Lever
Auger Clutch Lever Squeezing the auger clutch lever also operates the drive clutch lever; snowblowing mechanism starts snowblower moves forward. Releasing the auger clutch lever stops both the snowblowing mechanism and the forward motion of the snowblower. AUGER CLUTCH LEVER STOP Height Adjustment Bolt... -
Page 15: Skid Plate And Scraper
Skid Plate and Scraper Adjust the skid plates and scraper for the auger housing ground clearance best suited to your snow removal conditions. (See page 22 ) SCRAPER Handle Height Adjusting Bolt can be set in the high, low or middle position to suit The handlebars... -
Page 16: Engine Oil
Engine Oil Inspection With the snowblower on a level surface, remove the oil filler cap and wipe the dipstick clean. Insert the dipstick into the filler neck, but do not screw it in. Remove the dipstick and check the oil level. If the level is low,... -
Page 17: Fuel
Fuel Refueling Fuel tank capacity: 3.5 0 (0.92 US gal, 0.77 Imp gal) Check the fuel level gauge, and refill the tank if the fuel level is low. Gasoline is highly flammable and explosive. You can be burned or seriously injured when handling fuel. Stop the engine and keep heat, sparks, and flames away. - Page 18 % rands of gasoline. If spark knock or pinging normal load, than see an aut R orized Honda servicing dealer. persists, Running the engine with persistent spark knock or pinging can cause engine damage. Running the engine with persistent...
- Page 19 Oxygenated Fuels Some conventional gasolines are being blended with alcohol or an ether compound. These gasolines are collectively referred to as oxygenated fuels. To meet clean air standards, some areas of the United States and Canada use oxygenated fuels to help reduce emissions.
-
Page 20: Auger Bolts
Auger Bolts Check the auger for loose or broken bol,ts. If broken, replace them with new ones (page 39 ). AUGER SHEAR BOLT Other Checks 1. Check all bolts, nuts and other fasteners for security. 2. Check each part for operation. 3.Check the entire machine... -
Page 21: Starting The Engine
STARTING THE ENGINE Never run the engine in an enclosed or confined .area. Exhaust contains poisonous carbon monoxide gas; exposure can cause loss of consciousness and may lead to death. 1. Turn the engine switch to the ON position. ENGIN,E SWITCH 2. - Page 22 3. In cold weather and when the engine is cold, move the choke to the CLOSE position. CHOKE LEVER 4. Pull the starter grip lightly until you feel resistance, then pull briskly. Do not allow the starter grip to snap back against the engine.
- Page 23 5. Let the engine warm up for several minutes. If the choke has been moved to the CLOSE position, gradually move the choke lever to the OPEN position as the engine warms up. CHOKE LEVER --T----...
-
Page 24: Snowblower Operation
SNOWBLOWER OPERATION Operating the Controls 1. Adjust the skid plate and scraper positions with the engine stopped and the spark plug cap removed. The skid plate and scraper have three adjusting positions. Select the position according to the surface conditions described in the chart. - Page 25 2. Start the engine according to the procedures described on page 19 . Before operating this equipment you should read and understand Safety information on page 4 thru 3. Move the throttle lever to the FAST position for normal operation. THROlTLE LEVER 4.
- Page 26 5. With the shift lever in a forward gear, the machine will move and clear snow simultaneously when you squeeze the auger clutch lever. AUGER CLUTCH LEVER 6.To move from one place to another, or to change direction, use the drive clutch lever without squeezing the auger clutch lever.
- Page 27 8.Adjust the snow discharge chute guide according to the discharge angle and distance as required. Adjust the snow discharge chute to avoid hitting the operator, bystanders, windows, and other objects with thrown snow. Stay clear of the snow discharge chute while the engine is running. If the snow discharge chute becomes clogged, stop the engine and use a wooden stick to unclog it.
-
Page 28: Clearing Snow
Clearing Snow For best efficiency, clear snow before it melts, refreezes, and hardens. Do not use the throttle lever to adjust your forward speed. The throttle lever must remain in the FAST position good snow-clearing performance. Tips for clearing deep or hard-packed snow Clear narrow widths. - Page 29 Clear with back-and-forth motions If the snow is so hard that the snowblower tends to ride over the surface, move it back and forth to remove snow gradually. Clear in layers If the height of the snow is greater than height of the snowblowing...
-
Page 30: High Altitude Operation
High Altitude Operation high altitude, standard air-fuel mixture will be too rich. Performance will decrease, and fuel consumption will increase. A very rich mixture will also foul the spark plug and cause hard starting. High altitude performance can be improved by specific modifications to the carburetor. -
Page 31: Stopping The Engine
STOPPING THE ENGINE 0 In an emergency: Turn the engine switch to the OFF position. ENGINE SWITCH @At normal use: 1. Release the auger clutch lever. 2. Move the drive clutch lever to the NEUTRAL position. 3. Move the throttle lever to the SLOW position. -
Page 32: Maintenance
Other service tasks that are more difficult, or require special tools, are best handled by professionals and are normally performed by a Honda technician other qualified mechanic. The maintenance schedule applies to normal operating conditions. -
Page 33: Maintenance Safety
Remember that your servicing dealer knows your snowblower best and is fully equipped to maintain and repair it. To ensure best quality and reliability, use only new, genuine Honda parts or their equivalents for repair or replacement. -
Page 34: Proper Maintenance Is The Owner's Responsibility
Proper Maintenance is the Owner’s Responsibility Replacement parts The emission control systems on your Honda engine were designed, built, and certified. to conform with California emissions regulations. Honda recommends only the use of new, genuine Honda parts or their equivalent. -
Page 35: Maintenance Schedule
Clean Every 5 years or 300 hours (1)These parts may require more frequent inspection and replacement under heavy use. (2)These items should be serviced by an authorized Honda dealer, unless the owner has the proper tools and is mechanically proficient. -
Page 36: Tools
Tools SPARE AUGER SHEAR BOLT SET SPARK PLUG WRENCH TWO 6 x 35 mm BOLTS TWO 6 mm LOCK NUTS WRENCH HANDLE 10 x 12 mm WRENCH 10 x 14 mm WRENCH TOOL BAG... -
Page 37: Engine Oil Change
Engine Oil Change Drain oil while engine is still warm to assure rapid complete draining. 1. Remove the drain plug and filler cap, and drain the oil. Retighten drain plug securely. 2. Fill the crankcase with the recommended oil (see page 14 ) and check the level. -
Page 38: Spark Plug Service
Spark Plug Service BPR5ES (NGK) Recommended spark plug: Wl GEPR-U (NIPPONDENSO) ensure proper engine operation, the spark plug must be properly gapped and free of deposits. If the engine has been running, muffler will be very hot. Be careful not to touch the muffler. 1. - Page 39 5. Measure the plug gap with a feeler gauge. Correct as necessary by bending the side electrode. The gap should 0.70-0.80 mm (0.028-0.031 PLUG GAP 6. Make sure that the spark plug washer is in good condition, thread the spark plug in by hand to prevent cross-threading. 7,After the spak plug is seated, tighten with...
-
Page 40: Track Adjustment
Track Adjustment Make sure the tracks are clean and dry before adjustment. The tracks cannot be correctly adjusted if clogged with snow or debris, or coated with ice. Check track deflection by pressing down midway between the wheels with a force of 15 kg (33 lb). When correctly adjusted,... -
Page 41: Auger And Blower Inspection
Additional shear bolts nuts are available from authorized Honda snowblower dealers. riisiq Shear bolts are designed to break under force that would otherwise damage auger and blower parts. Do not replace shear bolts with or- dinary hardware bolts. Shear Bolt Replacement Procedure 1. -
Page 42: Storage
After removal from storage, drain stored gasoline into a suitable container, and fill with fresh gasoline before starting. *Use gasoline conditioners that are formulated to extend storage life. Contact your authorized Honda snowblower dealer recommendations for gasoline conditioners. - Page 43 Before storing the snowblower for an extended period: I. Be sure the storage area is free of excessive humidity and dust. 2. Drain the fuel. Gasoline is highly flammable and explosive. You can be burned or seriously injured when handling fuel. Stop the engine and keep heat, sparks, and flames away.
- Page 44 4. Remove the spark plug and pour a tablespoon (5- 10 cc) of clean motor oil into the cylinder. Pull the starter rope slowly two or three times to distribute the oil. Reinstall the spark plug. 5. Pull the starter grip until resistance is felt.
- Page 45 6. Apply oil to the following parts for lubrication and rust prevention. CLUTCH LEVER PIVOT -3 - CHUTE SLIDING SURFACE AUGER CLUTCH LEVER PIVOT AND SPRING JOINT...
-
Page 46: Troubleshooting
7. If the engine still does start, take snowblower to an authorized Honda dealer. If the auger or blower does not operate, check the shear bolts (p. 39 1. Replacement shear bolts nuts were supplied... -
Page 47: Specifications
(differs according to the kind of snow) 35 Ton/hour Clearing capacity 3 hours Continuous operating time Engine Mnfbl HONDA GX160 Kl < 1 4.9 hp at 4,000 rpm Maximum output IE i3 cm3 (9.9 cu-in) Displacement 68 X 45 mm (2.7 x 1.8 in) -
Page 48: Warranty
If you are dissatisfied with the decision made by the dealership’s management, contact the Honda Power Equipment Customer Service Office. You can write to: American Honda Motor Co., Inc. Honda Power Equipment Division Customer Service Office... - Page 49 INDEX ..............COMPONENT IDENTIFICATION CONTENTS ....................CONTROLS ....................Auger Clutch Lever ................Choke Lever ....................Chute Guide ................... Drive Clutch Lever ................. Engine Switch ..................Fuel Valve ....................Bolt ............... Handle Height Adjusting Bolt ................. Height Adjustment Shift Lever ..................... Skid Plate and Scraper ................