Honda EB3000c Owner's Manual
Hide thumbs
Also See for EB3000c:
- Owner's manual (76 pages) ,
- Information (28 pages) ,
- Owner's manual (63 pages)
Table of Contents
Advertisement
Quick Links
Advertisement
Table of Contents

Related Manuals for Honda EB3000c


Summary of Contents for Honda EB3000c
- Page 2 The information and specifications included in this publication were in effect at the time of approval for printing. Honda Motor Co., Ltd. reserves the right, however, to discontinue or change specifications or design at any time without notice and without incurring any obligation whatever.
- Page 3 Congratulations on your selection of a Honda generator. We are certain you will be pleased with your purchase of one of the finest generators on the market. We want to help you get the best results from your new generator and to operate it safely.
- Page 4 A FEW WORDS ABOUT SAFETY Your safety and the safety of others are very important. And using this generator safely is an important responsibility. To help you make informed decisions about safety, we have provided operating procedures and other information on labels and in this manual.
-
Page 5: Table Of Contents
CONTENTS GENERATOR SAFETY ................Safety Label Locations ............... Important Safety Information ............COMPONENT IDENTIFICATION .............. CONTROLS ....................10 Engine Switch ..................10 Starter Grip ..................10 Fuel Valve Lever ................. 11 Choke Rod ................... 11 AC Circuit Breaker ................ - Page 6 TROUBLESHOOTING ................48 WIRING DIAGRAM ................. . 50 SPECIFICATIONS ..................51 WARRANTY SERVICE INFORMATION ..........52 Dealer Locator Information .............. . 52 Customer Service Information ............52 Honda Publications ................53 INDEX ...................... . 54...
-
Page 7: Generator Safety
SAFETY LABEL LOCATIONS These labels warn you of potential hazards that can cause serious injury. Read them carefully. If a label comes off or becomes hard to read, contact your Honda servicing dealer for a replacement. CALIFORNIA TYPE NON-CALIFORNIA TYPE... -
Page 8: Important Safety Information
IMPORTANT SAFETY INFORMATION Honda generators are designed to give safe and dependable service if operated according to instructions. Read and understand this owner’s manual before operating your generator. You can help prevent accidents by being familiar with your generator’s controls, and by observing safe operating procedures. - Page 9 Electric Shock Hazards The generator produces enough electric power to cause a serious shock or electrocution if misused. Using a generator or electrical appliance in wet conditions, such as rain or snow, or near a pool or sprinkler system, or when your hands are wet, could result in electrocution.
-
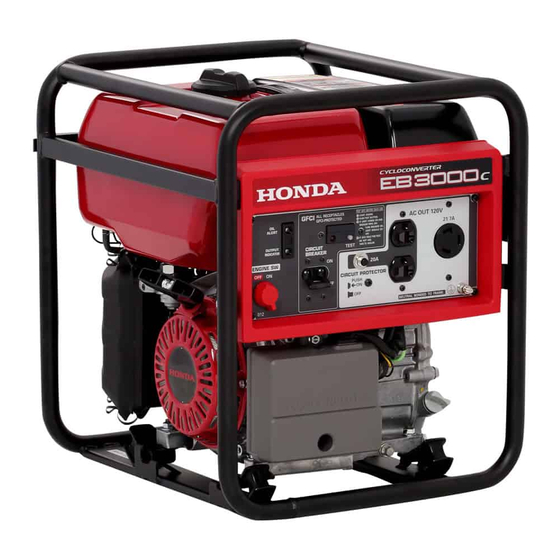
Page 10: Component Identification
COMPONENT IDENTIFICATION AC RECEPTACLES TEST BUTTON DC RECEPTACLE AC CIRCUIT PROTECTOR DC CIRCUIT PROTECTOR OIL ALERT INDICATOR LIGHT OUTPUT INDICATOR LIGHT GROUND TERMINAL ENGINE SWITCH RESET BUTTON AC CIRCUIT BREAKER CONTROL PANEL... - Page 11 FUEL VALVE LEVER CONTROL PANEL OIL FILLER CAP/DIPSTICK CLEANER FUEL SEDIMENT STARTER GRIP CYCLOCONVERTER ENGINE SERIAL NUMBER UNIT NON-CALIFORNIA TYPE CALIFORNIA TYPE FUEL GAUGE FUEL TANK CAP FUEL GAUGE FUEL TANK CAP MUFFLER MUFFLER CHOKE CHOKE SPARK PLUG SPARK PLUG FRAME SERIAL OIL DRAIN PLUG FRAME SERIAL...
-
Page 12: Controls
CONTROLS ENGINE SWITCH To start and stop the engine. Switch position: OFF: To stop the engine. To start and run the engine. ENGINE SWITCH STARTER GRIP To start the engine, pull the starter grip lightly until you feel resistance, then pull briskly in the direction of the arrow as shown below. Do not allow the starter grip to snap back against the engine. -
Page 13: Fuel Valve Lever
FUEL VALVE LEVER The fuel valve is located between the fuel tank and carburetor. When the valve lever is in the ON position, fuel is allowed to flow from the fuel tank to the carburetor. Be sure to return the fuel valve lever to the OFF position after stopping the engine. -
Page 14: Ac Circuit Breaker
AC CIRCUIT BREAKER The AC circuit breaker will automatically switch OFF if there is a short circuit or an overload of the generator at the AC receptacle. If the AC circuit breaker is switched OFF automatically, check that the appliance is working properly and does not exceed the rated load capacity of the AC circuit before switching the AC circuit breaker ON again. -
Page 15: Ac Circuit Protector
AC CIRCUIT PROTECTOR The AC circuit protector will automatically shut off the AC output power if there is a short circuit or an overload of the generator at the 20A receptacle. The yellow indicator inside the clear circuit protector button will pop out to show that the circuit protector has switched OFF. -
Page 16: Output Indicator Light
Determine if the cause is a short circuit in a connected appliance or an overheated CycloConverter unit. Correct the problem and restart the engine. If the output indicator light (green) blinks again, consult your Honda generator dealer. The output indicator light (green) may blink at intervals of 2.5 seconds depending on connected appliance(s) to the AC receptacles. -
Page 17: Dc Receptacle
DC RECEPTACLE The DC receptacle may ONLY be used for charging 12 volt automotive type batteries. DC CIRCUIT PROTECTOR The DC circuit protector automatically shuts off the DC battery charging circuit when the DC charging circuit is overloaded, when there is a problem with the battery, or when the connections between the battery and the generator are improper. -
Page 18: Ground Terminal
GROUND TERMINAL The generator ground terminal is connected to the frame of the generator, the metal non-current-carrying parts of the generator, and the ground terminals of each receptacle. Before using the ground terminal, consult a qualified electrician, electrical inspector or local agency having jurisdiction for local codes or ordinances that apply to the intended use of the generator. -
Page 19: Oil Alert System
OIL ALERT SYSTEM The Oil Alert system is designed to prevent engine damage caused by an insufficient amount of oil in the crankcase. Before the oil level in the crankcase can fall below a safe limit, the Oil Alert indicator light comes on and the Oil Alert system will automatically stop the engine (the engine switch will remain in the ON position). -
Page 20: Ground Fault Circuit Interrupter (Gfci) Receptacle
GROUND FAULT CIRCUIT INTERRUPTER (GFCI) RECEPTACLE The 20-ampere, 120-volt duplex receptacle that has TEST and RESET buttons is protected by a Ground Fault Circuit Interrupter (GFCI) against the hazards of ground fault currents. An example of ground fault current is the current which would flow through a person who is using an appliance with faulty insulation and, at the same time, is in contact with an electrical ground such as a plumbing fixture, wet floor, or earth. - Page 21 Unplug all appliances from the generator. Start the engine. Turn the circuit breaker ON. Press the TEST BUTTON The RESET BUTTON should extend with a click. If the RESET BUTTON does not extend, contact an authorized Honda generator dealer. TEST BUTTON RESET BUTTON...
- Page 22 The RESET BUTTON should be flush with the base. If the RESET BUTTON is not flush with the TEST BUTTON, contact an authorized Honda generator dealer. When the RESET BUTTON extends during operation: Unplug all appliances from the GFCI protected receptacle.
-
Page 23: Generator Use
GROUND SYSTEM Honda portable generators have a system ground that connects generator frame components to the ground terminals in the AC output receptacles. The system ground is not connected to the AC neutral wire. -
Page 24: Ac Applications
AC APPLICATIONS Before connecting an appliance or power cord to the generator: Make sure that it is in good working order. Faulty appliances or power cords can create a potential for electrical shock. If an appliance begins to operate abnormally, becomes sluggish or stops suddenly, turn it off immediately. -
Page 25: Ac Operation
AC OPERATION Start the engine and make sure the output indicator light (green) comes on (see page Switch ON the AC circuit breaker. Plug in the appliance. Be sure that all appliances are in good working order before connecting them to the generator. If an appliance begins to operate abnormally, becomes sluggish, or stops suddenly, turn off the engine switch immediately. -
Page 26: Dc Operation
DC OPERATION The DC receptacle should ONLY be used for charging 12-volt automotive type batteries. The DC charging output is not regulated. Connecting the battery charging cable: Before connecting the battery charging cable (optional equipment) to a battery that is installed in a vehicle, disconnect the vehicle battery ground cable from the negative ( ) battery terminal. - Page 27 If this happens, wait a few minutes before pushing in the circuit protector button to resume operation. If the circuit protector continues to go OFF, discontinue charging and see your authorized Honda generator dealer. Disconnecting the battery charging cable: Stop the engine.
-
Page 28: High Altitude Operation
HIGH ALTITUDE OPERATION At high altitude, the standard carburetor air-fuel mixture will be too rich. Performance will decrease, and fuel consumption will increase. A very rich mixture will also foul the spark plug and cause hard starting. Operation at an altitude that differs from that at which this engine was certified, for extended periods of time, may increase emissions. -
Page 29: Pre-Operation Check
PRE-OPERATION CHECK ENGINE OIL SAE VISCOSITY GRADES Check the oil level BEFORE EACH USE with the generator on a level surface and the engine stopped. Use 4-stroke motor oil that meets or exceeds the requirements for API service classification SJ or later (or equivalent). -
Page 30: Refueling
REFUELING With the engine stopped, check the fuel level gauge. Refill the fuel tank if the fuel level is low. Refuel carefully to avoid spilling fuel. Do not fill above the upper limit. Gasoline is highly flammable and explosive. You can be burned or seriously injured when handling fuel. Stop the engine and keep heat, sparks, and flame away. -
Page 31: Fuel Recommendations
CALIFORNIA TYPE FUEL TANK CAP UPPER LIMIT (FUEL STRAINER SHOULDER) CHAIN EMPTY FULL FUEL LEVEL GAUGE After refueling, reinstall the fuel tank cap securely. FUEL RECOMMENDATIONS This engine is certified to operate on regular unleaded gasoline with a pump octane rating of 86 or higher. Never use stale or contaminated gasoline or an oil/gasoline mixture. -
Page 32: Starting The Engine
STARTING THE ENGINE STARTING THE ENGINE For your safety, avoid starting or operating the generator in an enclosed area such as a garage. Your generator’s exhaust contains poisonous carbon monoxide gas that can collect rapidly in an enclosed area and cause illness or death. Carbon monoxide gas is toxic. -
Page 33: Stopping The Engine
STOPPING THE ENGINE STOPPING THE ENGINE In an emergency: To stop the engine in an emergency, turn the engine switch to the OFF position. In normal use: Turn the AC circuit breaker to the OFF position. Unplug appliances from the generator receptacles. Turn the engine switch to the OFF position. -
Page 34: Maintenance
Other service tasks that are more difficult, or require special tools, are best handled by professionals and are normally performed by a Honda technician or other qualified mechanic. The maintenance schedule applies to normal operating conditions. -
Page 35: Maintenance Safety
MAINTENANCE SAFETY Some of the most important safety precautions follow. However, we cannot warn you of every conceivable hazard that can arise in performing maintenance. Only you can decide whether or not you should perform a given task. Failure to properly follow maintenance instructions and precautions can cause you to be seriously hurt or killed. -
Page 36: Emission Control System Information
The following instructions and procedures must be followed in order to keep the emissions from your Honda engine within the emission standards. Tampering and Altering Tampering with or altering the emission control system may increase emissions beyond the legal limit. - Page 37 EPA and California emission regulations (models certified for sale in California). We recommend the use of genuine Honda parts whenever you have maintenance done. These original-design replacement parts are manufactured to the same standards as the original parts, so you can be confident of their performance.
-
Page 38: Air Index
AIR INDEX (Models certified for sale in California) An Air Index Information hang tag/label is applied to engines certified to an emission durability time period in accordance with the requirements of the California Air Resources Board. The bar graph is intended to provide you, our customer, the ability to compare the emissions performance of available engines. -
Page 39: Maintenance Schedule
Replace paper element type only. Service more frequently when used in dusty areas. These items should be serviced by an authorized Honda dealer, unless the owner has the proper tools and is mechanically proficient. For commercial use, log hours of operation to determine proper maintenance intervals. -
Page 40: Engine Oil Change
ENGINE OIL CHANGE Drain the oil while the engine is warm to assure rapid and complete draining. Place a suitable container below the engine to catch the oil, then remove the oil drain plug and sealing washer, remove the oil filler cap, and drain the oil. -
Page 41: Air Cleaner Service
AIR CLEANER SERVICE A dirty air filter will restrict air flow to the carburetor. To prevent carburetor malfunction, service the air cleaner regularly. Service more frequently when operating the generator in extremely dusty areas. Using gasoline or flammable solvent to clean the air filter can cause a fire or explosion. - Page 42 Soak the foam air filter in clean engine oil and squeeze out the excess oil. The engine will smoke during initial startup if too much oil is left in the foam air filter. Reinstall the foam air filter to the air cleaner cover.
-
Page 43: Spark Plug Service
SPARK PLUG SERVICE In order to service the spark plug, you will need a spark plug wrench (commercially available). Recommended spark plugs: BPR6ES (NGK) W20EPR-U (DENSO) An incorrect spark plug can cause engine damage. To ensure proper engine operation, the spark plug must be properly gapped and free of deposits. - Page 44 Check that the spark plug sealing washer is in good condition, and thread the spark plug in by hand to prevent cross-threading. After the spark plug is seated, tighten with a spark plug wrench to compress the washer. If installing a new spark plug, tighten 1/2 turn after the spark plug seats to compress the washer.
-
Page 45: Fuel Sediment Cup Cleaning
FUEL SEDIMENT CUP CLEANING The sediment cup prevents dirt or water which may be in the fuel tank from entering the carburetor. If the engine has not been run for a long time, the sediment cup should be cleaned. Turn the engine switch to the OFF position. Turn the fuel valve lever to the OFF position. -
Page 46: Spark Arrester Maintenance
SPARK ARRESTER MAINTENANCE If the generator has been running, the muffler will be very hot. Allow it to cool before proceeding. The spark arrester must be serviced every 100 hours to maintain its efficiency. Remove the 5 mm bolt, and remove the spark arrester from the muffler. -
Page 47: Transporting/Storage
TRANSPORTING/STORAGE TRANSPORTING If the generator has been used, allow it cool for at least 15 minutes before loading the generator on the transport vehicle. A hot engine and exhaust system can burn you and can ignite some material. When transporting the generator, turn the engine switch and the fuel valve lever OFF, and keep the generator level to reduce the possibility of fuel leakage. -
Page 48: Storage
Change the engine oil (page 38). After removal from storage, drain the stored gasoline into a suitable container, and fill with fresh gasoline before starting. Use gasoline stabilizers that are formulated to extend storage life. Contact your authorized Honda generator dealer for stabilizer recommendations. - Page 49 Storage Procedure Drain the fuel tank, the carburetor and the fuel sediment cup. Remove the carburetor drain bolt and sealing washer. Drain the gasoline from the carburetor into a suitable container. Install the sealing washer to the drain bolt and tighten the carburetor drain bolt.
-
Page 50: Troubleshooting
Turn off the fuel does not start, take v a l v e l e v e r a n d the generator to an remove the drain authorized Honda bolt. generator dealer. Turn on the fuel valve lever. Fuel should flow from the drain. - Page 51 DEFECTS equipment to an electrical shop defects. for repair. No electricity at the DC receptacle: Is the DC circuit Turn the DC circuit protector ON (see page 15). protector on? Take the generator to an authorized Honda dealer.
-
Page 52: Wiring Diagram
WIRING DIAGRAM... -
Page 53: Specifications
Refer to page 41 Valve clearance IN: 0.15 0.02 mm (cold) See your authorized EX: 0.20 0.02 mm (cold) Honda dealer. Other specifications No other adjustments needed. Specifications may vary according to the types, and are subject to change without notice. -
Page 54: Warranty Service Information
WARRANTY SERVICE INFORMATION Dealer Locator Information To find an authorized Honda Servicing Dealer anywhere in the United States: Visit our website: www.hondapowerequipment.com Customer Service Information Servicing dealership personnel are trained professionals. They should be able to answer most questions you may have. If you encounter a problem that your dealer does not solve to your satisfaction, please discuss it with the dealership’s management. -
Page 55: Honda Publications
Shop Manual This manual covers complete maintenance and overhaul procedures. It is intended to be used by a skilled technician. Available through your Honda dealer or through Helm Inc. at 1 888- 292-5395 or visit www.hondapowerequipment.com Parts Catalog This manual provides complete, illustrated parts lists. Available through your Honda dealer. -
Page 56: Index
INDEX COMPONENT IDENTIFICATION .............. CONTENTS ....................CONTROLS ....................10 AC Circuit Breaker ................12 AC Circuit Protector ................13 Choke Rod ................... 11 DC Circuit Protector ................15 DC Receptacle ..................15 Engine Switch .................. - Page 57 Storage ....................46 Transporting ..................45 TROUBLESHOOTING ................48 WARRANTY SERVICE INFORMATION ..........52 Customer Service Information ............52 Dealer Locator Information .............. . 52 Honda Publications ................53 WIRING DIAGRAM ................. . 50...
- Page 58 MEMO...