Table of Contents
Advertisement
Advertisement
Table of Contents
Troubleshooting

Related Manuals for Samsung SAMSUNG WB2100


Summary of Contents for Samsung SAMSUNG WB2100
- Page 1 USER MANUAL WB2100 Click a topic This user manual includes detailed usage instructions for your camera. Please read this manual thoroughly. Basic troubleshooting Quick reference Contents Basic functions Extended functions Shooting options Playback/Editing Settings Appendixes Index...
-
Page 2: Health And Safety Information
Do not use the flash in close proximity (closer than 1 m/3 ft) to people or animals. power sources, such as the battery or charger, and then contact a Samsung If you use the flash too close to your subject’s eyes, this can cause temporary or service center. - Page 3 • Samsung is not responsible for damage or injuries caused by unapproved This may cause a fire or electric shock. batteries, chargers, cables or accessories. Do not drop or subject the camera to strong impacts.
- Page 4 Do not place the camera in or near magnetic fields. Doing so may cause the camera to malfunction. Do not use the camera if the screen is damaged. If the glass or acrylic parts are broken, visit a Samsung Electronics Service Center to have the camera repaired.
- Page 5 Outline of the User Manual Copyright information Basic functions • Microsoft Windows and the Windows logo are registered trademarks of the Learn about your camera’s layout, icons, and basic functions for Microsoft Corporation. shooting. • Mac and Apple App Store are registered trademarks of the Apple Extended functions Corporation.
- Page 6 Indicators used in this manual Icons used in this manual Shooting mode Indicator Icon Function Smart Auto Additional information Program Safety warnings and precautions Manual Camera buttons. For example, [Shutter] represents the shutter button. Scene Page number of related information Panorama The order of options or menus you must select to perform a step;...
- Page 7 Expressions used in this manual Pressing the shutter Exposure (Brightness) • Half-press [Shutter]: Press the shutter halfway down The amount of light that enters your camera determines the exposure. You can alter • the exposure by changing the shutter speed, aperture value, or ISO sensitivity. By Press [Shutter]: Press the shutter all the way down altering the exposure, your photos will be darker or lighter.
-
Page 8: Basic Troubleshooting
Basic troubleshooting Learn to solve common problems by setting shooting options. The subject’s eyes Red eye occurs when the subject's eyes reflect light from the camera flash. appear red. • Red-eye or Red-eye Fix. (p. 59) Set the flash option to •... -
Page 9: Table Of Contents
Quick reference Capturing photos of people Adjusting the exposure (brightness) Applying effects to videos • • • Red-eye/Red-eye Fix (to prevent or correct red-eye) mode > HDR mode > Movie Filter • ISO sensitivity (to adjust the sensitivity to light) ... - Page 10 Contents Using the Mode screen Basic functions ................... 26 ......................... 13 Selecting a Mode Screen ..................26 Unpacking ........................14 Icons on the Mode screen ..................27 Camera layout ......................15 Selecting options or menus .................. 28 Using the screen ..................... 18 Using [m] ......................
- Page 11 Contents Extended functions Shooting options ....................... 39 ......................55 Using the Smart Auto mode Selecting a resolution and quality ................. 40 ..............56 Selecting a resolution .................... 56 Using the Program mode ..................42 Selecting an image quality ................... 57 Using the Manual mode ..................
- Page 12 Contents Using Face Detection Playback/Editing ....................67 ......................80 Detecting faces ....................... 67 Viewing photos or videos in Playback mode ..........81 Capturing a self portrait shot ................67 Starting Playback mode ..................81 Capturing a smile shot ................... 68 Viewing photos .......................
- Page 13 Contents Settings Appendixes ..........................104 ........................110 Settings menu Error messages ......................105 ......................111 Accessing the settings menu ................105 Camera maintenance .................... 112 Sound ........................106 Cleaning your camera ..................112 Display ........................106 Using or storing the camera ................113 Connectivity ......................
-
Page 14: Basic Functions
Basic functions Learn about your camera’s layout, icons, and basic functions for shooting. Unpacking Selecting options or menus ……………………………………… 14 …………………… 28 Using [m] …………………………………… 28 Camera layout …………………………………… 15 Using [s] ……………………………………… 30 Using the screen ……………………………… 18 Setting the display and sound Attaching a strap ………………………………... -
Page 15: Unpacking
• The items included in the box may differ depending on the model. • You can purchase optional accessories at a retailer or a Samsung service center. Samsung is not responsible for any problems caused by using unauthorized accessories. Basic functions... -
Page 16: Camera Layout
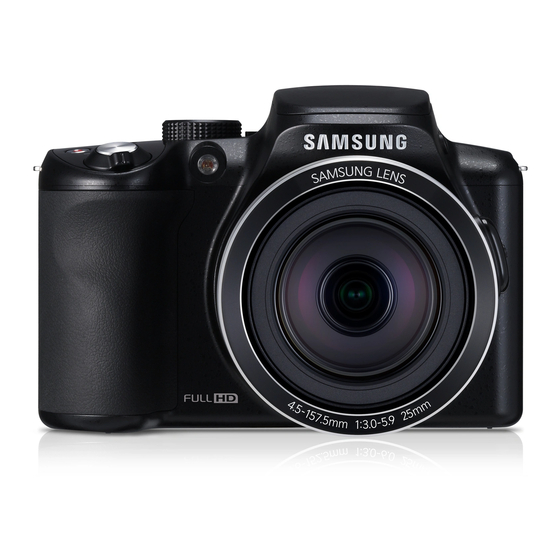
Camera layout Before you start, familiarize yourself with your camera’s parts and their functions. Mode dial (p. 17) POWER button Flash Recording button Speaker Shutter button Eyelet for camera strap Flash pop-up button AF-assist light/Timer lamp Zoom button This button works the same way as the zoom button on the next page. - Page 17 Camera layout Microphone Zoom button • In Shooting mode: Zoom in or out Status lamp • In Playback mode: Zoom in on • Blinking: When the camera is part of a photo or view files as saving a photo or video, being thumbnails, or adjust the volume read by a computer when the image is out of focus...
- Page 18 Camera layout Buttons Mode dial Button Description Icon Description Smart Auto: Capture a photo with a scene mode selected automatically Lock the adjusted exposure value in Shooting mode. by the camera. Access options or menus. Program: Capture a photo by setting options except the shutter speed Move back.
-
Page 19: Using The Screen
Camera layout Using the screen Low-angle shot A low-angle shot is a shot from a camera positioned below the eyeline, looking up Pull the display outwards and rotate it up or down for high- and low-angle photos. the subject. High-angle shot A high-angle shot is a shot from a camera positioned above the eyeline, looking down on the subject. -
Page 20: Attaching A Strap
Camera layout Attaching a strap Attaching a lens cap Attach a strap to carry your camera conveniently. Attach a lens cap with a lens cap strap to protect the camera lens. Basic functions... -
Page 21: Inserting The Battery And Memory Card
Memory card Memory card Insert the battery with the Samsung logo facing up. Using the memory card adapter To use micro memory cards with this product, a PC, or a memory card reader, insert the card into an adapter. -
Page 22: Charging The Battery And Turning On Your Camera
Charging the battery and turning on your camera Charging the battery Turning on your camera Before you use the camera for the first time, you must charge the battery. Plug the Press [X] to turn your camera on or off. small end of the USB cable into your camera, and then plug the other end of the •... -
Page 23: Performing The Initial Setup
Performing the initial setup When the initial setup screen appears, follow the steps below to configure the camera’s basic settings. The default language is preset for the country or region where the camera is sold. You can change the language as desired by selecting Language. Press [c] to select Time Zone, and then press [t] or [o]. - Page 24 Performing the initial setup Press [c] to select Date Type, and then press [t] or [o]. Press [D/c] to select a time type, and then press [o]. Press [D/c] to select a date type, and then press [o]. Press [r] to finish the initial setup. Date Type The screen may differ depending on the language selected.
-
Page 25: Learning Icons
Learning icons The camera displays icons for the mode and options you set. The icons flash yellow for a while if you change options. Shooting options (left) Icon Description Icon Description Flash Shooting mode Frame Rate (per second) White Balance Photo resolution Image adjustment (Sharpness, Contrast, and Saturation) - Page 26 Learning icons Shooting information Icon Description Icon Description Current date Aperture value Current time Shutter speed Auto focus frame Available recording time Camera shake Exposure value Zoom indicator Auto Exposure Lock on Photo resolution when the Intelli zoom is on Available number of photos Zoom ratio Memory card inserted...
-
Page 27: Using The Mode Screen
Using the Mode screen Use the mode dial to select a shooting mode or function. Rotate the mode dial to a desired mode. Selecting a Mode Screen Description In Shooting or Playback mode, rotate the mode dial to display a Mode Screen. Current Mode screen You can select an icon on the Mode screen in Magic Plus mode. -
Page 28: Icons On The Mode Screen
Using the Mode screen Icons on the Mode screen Mode Icon Description Mode Icon Description Smart Auto: Capture a photo with a scene mode selected Low Light Shot: Capture multiple photos in low light automatically by the camera. (p. 40) conditions without a flash. -
Page 29: Selecting Options Or Menus
Selecting options or menus To select an option or a menu, press [m] or [s]. Using [m] Going back to the previous menu To select an option or a menu, press [m], and then press [D/c/F/t] or Press [r] to go back to the previous menu. [o]. - Page 30 Selecting options or menus For example, to select a White Balance option in Program mode: Press [D/c] to select White Balance, and then press [t] or [o]. Rotate the mode dial to . Press [F/t] to select a White Balance option. White Balance : Daylight Press [m].
-
Page 31: Using [S]
Selecting options or menus Using [s] Rotate [Zoom] to select a White Balance option. You can also access shooting options by pressing [s], but some options are not White Balance : Daylight available. For example, to select a White Balance option in Program mode: Rotate the mode dial to . -
Page 32: Setting The Display And Sound
Setting the display and sound Learn how to change the basic display information and sound settings. Setting the display type About histograms A histogram is a graph that illustrates how light is distributed in your photo. If the You can select a display type for the Shooting or Playback mode. Each type displays histogram has a high peak on the left, the photo is underexposed and will appear different shooting or playback information. -
Page 33: Setting The Sound
Setting the display and sound Setting the option display view Setting the sound You can hide or show the option display appearing in some modes. Turn on or off the sound your camera emits when you perform functions. Press [o] repeatedly. Rotate the mode dial to •... -
Page 34: Capturing Photos
Capturing photos Learn how to capture photos easily and quickly in Smart Auto mode. Half-press [Shutter] to focus. Rotate the mode dial to • A green frame means the subject is in focus. • A red frame means the subject is out of focus. Align your subject in the frame. -
Page 35: Zooming
Capturing photos Zooming Digital zoom The Digital zoom is supported by default in Shooting mode. If you zoom in on You can capture close-up photos by adjusting the zoom. a subject in Shooting mode and the zoom indicator is in the digital range, your camera is using the Digital zoom. - Page 36 Capturing photos Intelli zoom Setting Intelli zoom If the zoom indicator is in the Intelli range, your camera is using the Intelli zoom. In Shooting mode, press [m]. Photo resolution varies according to the zoom rate if you use the Intelli zoom. By using both the Optical zoom and Intelli zoom, you can zoom in up to 70 times.
-
Page 37: Reducing Camera Shake (Ois)
Capturing photos Reducing camera shake (OIS) • OIS may not function properly when: you move your camera to follow a moving subject In Shooting mode, you can set either the Optical Image Stabilizer (OIS) to reduce or you use the Digital zoom eliminate picture blurriness from camera shake. -
Page 38: Tips For Getting A Clearer Photo
Tips for getting a clearer photo Holding your camera correctly Reducing camera shake Ensure nothing is blocking the lens, flash, Set the Optical Image Stabilization option to reduce camera or microphone. shake digitally. (p. 36) Half-pressing the shutter button When is displayed Half-press [Shutter] and adjust the focus. -
Page 39: Turn On The Flash. (P
Preventing your subject from being out of focus It may be difficult to get your subject in focus when: there is little contrast between the subject and background (for example, when • When you capture photos in low light your subject is wearing clothing that is similar in color to the background) the light source behind the subject is too bright Turn on the flash. -
Page 40: Extended Functions
Extended functions Learn how to capture a photo and record a video by selecting a mode. Using the Smart Auto mode Using the Movie mode …………………… 40 ………………………… 51 Recording high-speed videos ………………… 53 Using the Program mode ……………………… 42 Using the Smart Scene Detection mode ………... -
Page 41: Using The Smart Auto Mode
Using the Smart Auto mode In Smart Auto mode, your camera automatically chooses the appropriate camera settings based on the type of scene it detects. The Smart Auto mode is helpful if you are not familiar with the camera settings for various scenes. Rotate the mode dial to Icon Description... - Page 42 Using the Smart Auto mode Icon Description Camera is stabilized on a tripod and the subject is not moving for a certain period of time. (when shooting in the dark) Actively moving subjects • If the camera does not recognize an appropriate scene mode, it uses the default settings for mode.
-
Page 43: Using The Program Mode
Using the Program mode In Program mode, you can set most options, except the shutter speed and aperture value, which the camera sets automatically. Align your subject in the frame, and then half-press [Shutter] to Rotate the mode dial to . focus. -
Page 44: Using The Manual Mode
Using the Manual mode The Manual mode allows you to adjust both the aperture value and the shutter speed manually. Align your subject in the frame, and then half-press [Shutter] to Rotate the mode dial to focus. Press [o], and then press [F/t] to select the aperture or shutter Press [Shutter] to capture the photo. -
Page 45: Using The Scene Mode
Using the Scene mode In Scene mode, you can capture a photo with options that are preset for a specific scene. Rotate the mode dial to Option Description Help the other person capture a photo of you by showing Select a scene. Frame Guide part of the pre-composed scene. -
Page 46: Using The Panorama Mode
Using the Panorama mode In Panorama mode, you can capture a wide panoramic scene in a single photo. Capture and combine a series of photos to create a panoramic image. With [Shutter] pressed, slowly move the camera in the direction that will let it capture the rest of the panorama. - Page 47 Using the Panorama mode • For best results when capturing panoramic photos, avoid the following: moving the camera too quickly or too slowly moving the camera too little to capture the next image moving the camera at irregular speeds shaking the camera shooting in dark places capturing moving subjects nearby shooting conditions where the brightness or color of light is changing...
-
Page 48: Using The Magic Plus Mode
Using the Magic Plus mode Capture a photo or record a video by selecting appropriate modes for various effects. Using the Low Light Shot mode Rotate the mode dial to In low light conditions, capture multiple photos and combin them into a bright Select image having less blurring and noise without using the flash. -
Page 49: Using The Split Shot Mode
Using the Magic Plus mode Using the Split Shot mode Align your subject in the frame, and then half-press [Shutter] to focus. In Split Shot mode, you can capture several photos and arrange them with preset layouts. Press [Shutter] to capture a photo. Rotate the mode dial to •... -
Page 50: Using The Photo Filter Mode
Using the Magic Plus mode Using the Photo Filter mode Option Description Apply various filter effects to your photos to create unique images. Apply a tilt-shift effect to make the subject appear in Miniature miniature. (The top and bottom of the photo will be blurred.) Apply the retro-looking colors, high contrast, and strong Vignetting... -
Page 51: Using The Movie Filter Mode
Using the Magic Plus mode Using the Movie Filter mode Press (Video recording) to start recording. Apply various filter effects to your videos to create unique images. Press (Video recording) again to stop recording. Rotate the mode dial to • If you select Miniature, playback speed will increase. -
Page 52: Using The Movie Mode
Using the Movie mode In Movie mode, you can customize settings to record Full HD (1920 X 1080) videos of up to 20 minutes in length. The camera saves recorded videos as MP4 (H.264) files. • MP4 (H.264) is a high-compression video format established by the international standards organizations ISO-IEC and ITU-T. •... - Page 53 Using the Movie mode Pause recording Capturing still images while recording a video The camera allows you to temporarily pause a video while recording. With this You can capture still images while recording a video without switching to the photo function, you can record separate scenes as a single video.
-
Page 54: Recording High-Speed Videos
Using the Movie mode Recording high-speed videos Rotate the mode dial to • You can record a high-speed video only in mode. You can record high-speed videos by setting frame rates. High-speed videos will be played in slow motion at 60 FPS or 30 FPS, depending on the frame rate of the Press [m] and then select Frame Rate. -
Page 55: Using The Smart Scene Detection Mode
Using the Movie mode Using the Smart Scene Detection mode Icon Description In Smart Scene Detection mode, your camera automatically chooses the Landscapes appropriate camera settings based on the scene it has detected. Sunsets Rotate the mode dial to Blue skies Press [m]. -
Page 56: Shooting Options
Shooting options Learn how to set the options in Shooting mode. Selecting a resolution and quality Detecting eye blinking …………… 56 ………………………… 68 Selecting a resolution Tips for detecting faces ………………………… 69 ………………………… 56 Selecting an image quality …………………… 57 Adjusting brightness and color …………………... -
Page 57: Selecting A Resolution And Quality
Selecting a resolution and quality Learn how to change the image resolution and quality settings. Selecting a resolution Setting the video resolution As you increase the resolution, your photo or video will include more pixels, so it In Shooting mode, press [m]. can be printed on larger paper or displayed on a larger screen. -
Page 58: Selecting An Image Quality
Selecting a resolution and quality Selecting an image quality Setting the video frame rate The camera compresses and saves the videos you record in MP4 (H.264) format. Set the photo and video quality settings. Higher image quality settings will result in larger file sizes. -
Page 59: Using The Timer
Using the timer Learn how to set the timer to delay shooting. In Shooting mode, press [t]. Press [Shutter] to start the timer. • The AF-assist light/timer lamp blinks. The camera will automatically capture a photo after the specified time has elapsed. •... -
Page 60: Shooting In The Dark
Shooting in the dark Learn how to capture photos at night or in low light conditions. Preventing red-eye How to use the flash If the flash fires when you capture a photo of a person in the dark, a red glow may Press [F] to pop the flash up when it is need. -
Page 61: Using The Flash
Shooting in the dark Using the flash In Shooting mode, press [F]. Use the flash when you capture photos in the dark or when you need more light in your photos. Press [F] to pop the flash up when it is need. Flash : Auto Exit Adjust... - Page 62 Shooting in the dark Select an option. Icon Description Icon Description Red-eye Fix: • The flash fires twice when the subject or background is dark. The Off: camera corrects red-eyes through its advanced software analysis. • The flash will not fire. •...
-
Page 63: Adjusting The Iso Sensitivity
Shooting in the dark Adjusting the ISO sensitivity The ISO sensitivity is the measure of a film’s sensitivity to light as defined by the International Organization for Standardization (ISO). The higher ISO sensitivity you select, the more sensitive to light your camera becomes. Use a higher ISO sensitivity to capture better photos and reduce camera shake when not using the flash. -
Page 64: Changing The Camera's Focus
Changing the camera’s focus Learn how to adjust the camera’s focus to suit the subject and the shooting conditions. Using macro Changing the focus option Use macro to capture close-up photos of subjects, such as flowers or insects. You can get clearer photos by selecting an appropriate focus option according to (Refer to "Changing the focus option".) the distance between the camera and subjects. -
Page 65: Adjusting The Focus Area
Changing the camera’s focus Select an option. Adjusting the focus area You can get clearer photos by selecting an appropriate focus area according to your Icon Description subject's location in the scene. Normal (AF): Focus on a subject farther than 31 in. (80 cm) away. Farther than 59 in. - Page 66 Changing the camera’s focus Focusing on a selected area Using tracking auto focus You can focus on an area that you have selected. Tracking AF allows you to track and auto focus on your subject, even when you are moving. In Shooting mode, press [m].
- Page 67 Changing the camera’s focus • If you do not select a focus area, the focus frame will appear in the center of the screen. • Tracking a subject may fail when: the subject is too small the subject moves excessively the subject is backlit or you are shooting in a dark place colors or patterns on the subject and the background are the same the subject includes horizontal patterns, such as blinds...
-
Page 68: Using Face Detection
Using Face Detection If you use Face Detection options, your camera can automatically detect a human face. When you focus on a human face, the camera adjusts the exposure automatically. Use Blink Detection to detect closed eyes or Smile Shot to capture a smiling face. Detecting faces Capturing a self portrait shot Your camera automatically detects up to 10 human faces in one scene. -
Page 69: Capturing A Smile Shot
Using Face Detection Capturing a smile shot Detecting eye blinking The camera automatically releases the shutter when it detects a smiling face. If your camera detects closed eyes, it will automatically capture 2 photos in succession. In Shooting mode, press [m]. In Shooting mode, press [m]. -
Page 70: Tips For Detecting Faces
Using Face Detection Tips for detecting faces • When your camera detects a face, it tracks the detected face automatically. • Face Detection may not be effective when: the subject is far from the camera it is too bright or too dark the subject is not facing the camera the subject is wearing sunglasses or a mask the subject’s facial expression changes drastically... -
Page 71: Adjusting Brightness And Color
Adjusting brightness and color Learn how to adjust the brightness and color for better image quality. Adjusting the exposure manually (EV) Press [F/t] to adjust the exposure. • The photo will be brighter as the exposure value increases. Depending on the intensity of the ambient light, your photos may be too bright or dark. -
Page 72: Locking The Exposure Value (Ael)
Adjusting brightness and color Locking the exposure value (AEL) Compensating for backlighting (ACB) The adjusted exposure value locks when [A] is pressed, and remains locked until When the light source is behind your subject or there is high contrast between your [A] is pressed again. -
Page 73: Metering
Adjusting brightness and color Changing the metering option Selecting a White Balance setting The metering mode refers to the way in which a camera measures the quantity The color of your photo depends on the type and quality of the light source. If you of light. - Page 74 Adjusting brightness and color In Shooting mode, press [m]. Customizing preset White Balance options You can customize preset White Balance options except Auto WB and Custom Set. Select White Balance. In Shooting mode, press [m]. Select an option. Select White Balance. Icon Description Auto WB: Automatically set the White Balance based on the...
- Page 75 Adjusting brightness and color Defining your own White Balance Adjusting color temperature You can customize the White Balance by capturing a photo of a white surface, such In Shooting mode, press [m]. as a piece of paper, under the lighting conditions in which you intend to capture a photo.
-
Page 76: Using Burst Modes (Continuous/Precapture/Bracket)
Using burst modes (Continuous/Precapture/Bracket) It can be difficult to capture photos of fast-moving subjects or capture natural facial expressions and gestures of your subjects in photos. Also, it can be difficult to adjust the exposure correctly and select a proper light source. In these cases, select one of the burst modes. Align your subject in the frame, and then half-press [Shutter] to focus. -
Page 77: Precapture
Using burst modes (Continuous/Precapture/Bracket) Capturing photos in the Precapture mode Capturing bracketed photos In Precapture mode, the camera starts shooting before you even press the shutter You can use the automatic bracketing feature to capture multiple photos of the all the way down. If you do not want to miss the first couple of important shots, same subject with different setting values slightly modified, such as exposure or simply use this mode and select the photo with the best results after shooting. - Page 78 Using burst modes (Continuous/Precapture/Bracket) Selecting a bracketing option In Shooting mode, press [m]. Select Bracket Set. Select a bracketing option. Press [D/c] to select a detailed option. • Adjust the color for the selected light source (white balance) or select an exposure value.
-
Page 79: Adjusting Images
Adjusting images Adjust the sharpness, contrast, or saturation of your photos. In Shooting mode, press [m]. Press [F/t] to adjust each value. Sharpness Description Select Image Adjust. Soften the edges on your photos (suitable for editing the Select an option. photos on your computer). -
Page 80: Reducing The Sound Of The Zoom
Reducing the sound of the zoom When you use the zoom while recording videos, the camera can record the sound of the zoom. Use the Zoom Mute function not to record zoom noise. In Shooting mode, press [m]. Select Voice. Select an option. -
Page 81: Playback/Editing
Playback/Editing Learn how to play back photos or videos, and edit photos or videos. Also, learn how to connect your camera to your computer or TV. Viewing photos or videos in Playback mode Viewing files on a TV or HDTV …... -
Page 82: Viewing Photos Or Videos In Playback Mode
Viewing photos or videos in Playback mode Learn how to play back photos or videos and how to manage files. Starting Playback mode Photo file information View photos or play videos stored in your camera. Memory in use Press [P]. •... -
Page 83: Viewing Files As Thumbnails
Viewing photos or videos in Playback mode Video file information Viewing files as thumbnails Scan thumbnails of files. In Playback mode, rotate [Zoom] to the left to view thumbnails (12 at a time). Rotate [Zoom] to the left once more to display more thumbnails (24 at a time). -
Page 84: Viewing Files By Category
Viewing photos or videos in Playback mode Viewing files by category Scroll to a desired list, and then press [o] to open the list. View files by category, such as date or file type. Scroll to a desired file, and then press [o] to view the file. In Playback mode, rotate [Zoom] to the left. - Page 85 Viewing photos or videos in Playback mode Viewing files as a folder Protecting files Photos captured in a Continuous mode or in Precapture mode appear as a folder. Protect a file from accidental deletion. In Playback mode, press [F/t] to scroll to a desired folder. In Playback mode, select a file to protect.
- Page 86 Viewing photos or videos in Playback mode Deleting files Deleting multiple files You can select multiple files, and then delete them at once. Select files to delete in Playback mode. In Playback mode, press [s]. Deleting a single file • When in thumbnails view, press [m], select Delete →...
-
Page 87: Viewing Photos
Viewing photos or videos in Playback mode Deleting all files Viewing photos You can select all files, and then delete them at once. Enlarge part of a photo or view photos as a slide show. In Playback mode, press [m]. Enlarging a photo •... - Page 88 Viewing photos or videos in Playback mode Viewing panoramic photos Description View photos captured in Panorama mode. Move the enlarged area Press [D/c/F/t]. Press [o], and then select Yes. In Playback mode, press [F/t] to scroll to a desired panoramic Trim the enlarged photo (The trimmed photo will be saved as a new file.
- Page 89 Viewing photos or videos in Playback mode Playing a slide show Press [m]. Apply effects and audio to a slide show of your photos. The slide show function Select Start Slide Show. does not work for videos. View the slide show. In Playback mode, press [m].
-
Page 90: Playing A Video
Viewing photos or videos in Playback mode Playing a video Description In Playback mode, you can view a video, and then capture or trim parts of the Press [F]. Each time you press [F], you playing video. You can save the captured or trimmed segments as new files. Scan backward change the scan speed in this order: 2X, 4X, In Playback mode, select a video, and then press [o]. - Page 91 Viewing photos or videos in Playback mode Trimming a video Capturing an image from video In Playback mode, select a video, and then press [m]. While viewing a video, press [o] at the point where you want to capture an image. Select Trim Movie.
-
Page 92: Editing A Photo
Editing a photo Learn how to edit photos. • The camera will save edited photos as new files. • When you edit photos, the camera will automatically convert them to a lower resolution. Photos that you rotate or resize manually are not automatically converted to a lower resolution. -
Page 93: Applying Smart Filter Effects
Editing a photo Applying Smart Filter effects Option Description Apply special effects to your photos. Normal No effect Apply a tilt-shift effect to make the subject appear in Rotate the mode dial to Miniature miniature. (The top and bottom of the photo will be Select blurred.) Apply the retro-looking colors, high contrast, and strong... -
Page 94: Adjusting Your Photos
Editing a photo Adjusting your photos Press [F/t] to adjust the option. Learn how to adjust the brightness, contrast, or saturation or how to correct the Press [o]. red-eye effect. If the center of a photo is dark, you can adjust it to be brighter. Press [c] to save. - Page 95 Editing a photo Retouching faces Removing red-eye Rotate the mode dial to Rotate the mode dial to Select Select Rotate [Zoom] to the left, and then select a photo. Rotate [Zoom] to the left, and then select a photo. Select Face Retouch. Select Red-eye Fix.
-
Page 96: Viewing Files On A Tv Or Hdtv
Viewing files on a TV or HDTV Play back photos or videos by connecting your camera to a TV with the A/V cable. Turn on your TV, and then select the A/V video source. Rotate the mode dial to Turn on your camera. Select Connectivity →... - Page 97 (p. 107) to control the camera and TV with the TV’s remote control. • Anynet+ lets you control all connected Samsung A/V devices with the TV remote control. • The time it takes for the camera to connect to your HDTV may vary with the type of SD, SDHC, or SDXC card you use.
-
Page 98: Transferring Files To The Computer
Transferring files to the computer Connect the camera to the computer, to transfer files from the camera's memory card to the computer. Transferring files to your Windows OS computer Turn on the camera. • The computer recognizes the camera automatically. Connect the camera to your computer as a removable disk. -
Page 99: Transferring Files To Your Mac Os Computer
Transferring files to the computer Transferring files to your Mac OS computer Turn on the camera. • The computer recognizes the camera automatically and displays a removable When you connect the camera to your Mac OS computer, the computer will disk icon. -
Page 100: Using Programs On The Computer
Using programs on the computer i-Launcher allows you to playback files with Multimedia Viewer and provides links so that you can download useful programs. Installing i-Launcher Turn on the camera. Select a destination folder on your computer, and then select Yes. Rotate the mode dial to •... -
Page 101: Using I-Launcher
Using programs on the computer Available programs when using i-Launcher Using i-Launcher i-Launcher allows you to play back files with Multimedia Viewer. Option Description Multimedia Viewer You can view files with Multimedia Viewer. • The requirements are recommendation only. i-Launcher may not work properly even when the computer meets the requirements, depending on the condition of your computer. - Page 102 Using programs on the computer Windows OS Requirements Opening i-Launcher On your computer, select Start → All Programs → Samsung → i-Launcher → Item Requirements Samsung i-Launcher. Intel Core 2 Duo® 2.0 GHz or higher/ AMD Phenom 2.4 GHz or higher...
- Page 103 Using programs on the computer Using Multimedia Viewer Multimedia Viewer allows you to play back files. From the Samsung i-Launcher screen, click Multimedia Viewer. • Multimedia Viewer supports the following formats: Videos: MP4 (Video: H.264, Audio: AAC), WMV (WMV 7/8/9), AVI (MJPEG) Photos: JPG, GIF, BMP, PNG, TIFF, MPO •...
- Page 104 Using programs on the computer Viewing Videos Description File name Adjust the volume. Open the selected file. Move to the next file. Stop Pause Move to the previous file. Progress bar Playback/Editing...
-
Page 105: Settings
Settings Refer to options to configure your camera’s settings. Settings menu ……………………………………… 105 Accessing the settings menu …………………… 105 Sound ……………………………………………… 106 Display …………………………………………… 106 Connectivity ……………………………………… 107 General …………………………………………… 108... -
Page 106: Settings Menu
Settings menu Learn to configure your camera's settings. Accessing the settings menu Select an item. Rotate the mode dial to Sound Volume Medium Select a menu. Beep Sound Settings Shutter Sound Sound 1 Sound Start Sound Display AF Sound Connectivity Back Select General... -
Page 107: Sound
Settings menu Sound Display * Default * Default Item Description Item Description Set the volume of all sounds. (Off, Low, Medium*, High) Volume Set a start image to display when the camera turns on. • Off*: Display no start image. Set the sound the camera emits when you press the buttons or Beep Sound •... -
Page 108: Connectivity
Settings menu Connectivity * Default * Default Item Description Item Description Adjust the brightness of the screen. (Auto*, Dark, Normal, Set the video signal output for your region. Bright) • NTSC: USA, Canada, Japan, Korea, Taiwan, Mexico, etc Display • PAL (supports only BDGHI): Australia, Austria, Belgium, China, Brightness Normal is fixed in Playback mode even if you have selected... -
Page 109: General
Settings menu General * Default * Default Item Description Item Description Language Set a language for the display text. Specify how to name files. • Reset: Set the file number to start from 0001 when you Set the time zone for your location. When you travel insert a new memory card, format a memory card, or Time Zone to another country, select Visit, and then select the... - Page 110 Settings menu * Default * Default Item Description Item Description Set whether or not to display the date and time on Format the internal memory and the memory card. captured photos. (Off*, Date, Date & Time) Formatting will delete all files, including protected files. (Yes, No) •...
-
Page 111: Appendixes
Appendixes Get information about error messages, specifications, and maintenance. Error messages ……………………………………… 111 Camera maintenance ……………………………… 112 Cleaning your camera …………………………… 112 Using or storing the camera ……………………… 113 About memory cards ……………………………… 115 About the battery ………………………………… 118 Before contacting a service center ………………... -
Page 112: Error Messages
Error messages When the following error messages appear, try these remedies. Error message Suggested remedies Error message Suggested remedies • Turn off your camera, and then turn it on again. File Error Delete the damaged file or contact a service center. •... -
Page 113: Camera Maintenance
Camera maintenance Cleaning your camera Camera body Wipe gently with a soft, dry cloth. Camera lens and display Use a blower brush to remove dust and wipe the lens gently with a soft cloth. If any dust remains, apply lens cleaning liquid to a piece of lens cleaning paper and wipe gently. -
Page 114: Using Or Storing The Camera
Camera maintenance Using or storing the camera Storing for extended period of time • When you store the camera for an extended period, place it in a sealed container with an absorbent material, such as silica gel. Inappropriate places to use or store the camera •... - Page 115 Do not insert foreign objects into any of your camera’s compartments, slots, or could cause injury to your hands and face. Take the camera to a Samsung service access points. Damage due to improper use may not be covered by your warranty.
-
Page 116: About Memory Cards
Camera maintenance About memory cards Memory card adapter Supported memory cards This product supports SD (Secure Digital), SDHC (Secure Digital High Capacity), SDXC (Secure Digital eXtended Capacity), microSD, microSDHC, or microSDXC memory cards. Memory card Terminal To use micro memory cards with this product, a PC, or a memory card reader, insert the card into an adapter. - Page 117 Camera maintenance Memory card capacity Video The memory capacity may differ depending on shooting scenes or shooting Size 60fps 30fps conditions. These capacities are based on a 2 GB SD card: Approx. 09' 44" 1920 X 1080 Photo Approx. 15' 39" 1280 X 720 Size Super Fine...
- Page 118 Camera maintenance • Cautions when using memory cards Prevent memory cards from making contact with liquids, dirt, or foreign substances. If dirty, wipe the memory card clean with a soft cloth before you • Avoid exposing memory cards to very cold or very hot temperatures (below insert the memory card into your camera.
-
Page 119: Flash Options
Record videos at resolution and 60 FPS. 70 min • The figures above are measured by Samsung’s standards. Your results may differ, depending on your actual usage. • Several videos were recorded in succession to determine the total recording time. - Page 120 Camera maintenance Low battery message Cautions about using the battery When the battery has fully discharged, the battery icon will turn red and the "Low Protect batteries, chargers, and memory cards from damage Battery" message will appear. Prevent batteries from making contact with metal objects, as this can create a connection between the + and –...
- Page 121 Camera maintenance • Handling and disposing of batteries and chargers with care If you reconnect the power cable when the battery is fully charged, the status lamp turns on for approximately 30 minutes. • Never dispose of batteries in a fire. Follow all local regulations when you dispose •...
- Page 122 Camera maintenance Personal injury or death can occur if the battery is handled carelessly • Do not disassemble or puncture the battery with any sharp object. or improperly. For your safety, follow these instructions for proper • Avoid exposing the battery to high pressure or crushing forces. battery handling: •...
-
Page 123: Before Contacting A Service Center
Before contacting a service center If you are having trouble with your camera, try these troubleshooting procedures before you contact a service center. If you have attempted the suggested remedy and are still having problems with your device, contact your local dealer or service center. When you leave your camera at a service center, be sure to also leave the other components that may have contributed to the malfunction, such as the memory card and battery. - Page 124 Before contacting a service center Situation Suggested remedies Situation Suggested remedies • The flash fires The flash may fire due to static electricity. The camera is Make sure that the focus option you set is suitable for unexpectedly not malfunctioning. close-up shots.
- Page 125 In this case, click Start → All Programs • Make sure that you are using a supported operating camera → Samsung → i-Launcher → Samsung i-Launcher on system. your computer. (For Windows 8, click Start → All apps Your computer →...
-
Page 126: Camera Specifications
0.4 in. (1 cm)– Auto Macro 59 in. (150 cm)–infinity infinity Lens Super Macro 0.4 in. (1 cm) Samsung Lens f = 4.5–157.5 mm Focal length (35 mm film equivalent: 25–875 mm) Shutter speed F-stop range F3.0 (W)–F5.9 (T) •... -
Page 127: Optical Image Stabilization (Ois)
Camera specifications Flash Shooting • Mode Off, Auto, Red-eye, Fill in, Slow Sync, Red-eye Fix Modes: Smart Auto (Portrait, Night Portrait, Backlight Portrait, Night, Backlight, Landscape, White, Natural Green, • Wide: 31-236 in. (80 cm–6 m) (ISO Auto) Range Blue Sky, Sunset, Macro, Macro text, Macro Color, Tripod, •... - Page 128 Camera specifications Playback Icon Size • Type: Single image, Thumbnails, Multi Slide Show with Music 4608 X 3456 and Effect, Movie clip • 4608 X 3072 Edit: Resize, Rotate, Smart Filter, Crop Photos • Effect: Image Adjust (Brightness, Contrast, Saturation, ACB, 4608 X 2592 Face Retouch, Red-eye Fix), Smart Filter (Normal, Miniature, 3648 X 2736...
- Page 129 Camera specifications Interface Dimensions (W X H X D) Digital output 4.7 X 3.3 X 2.2 in. (118.9 X 83.8 X 56.5 mm) (without protrusions) USB 2.0 connector Weight Audio input/ 17.7 oz. (503 g) (without battery and memory card) Internal speaker (Mono), Microphone (Stereo) output Operating Temperature...
-
Page 130: Glossary
Glossary ACB (Auto Contrast Balance) Composition This feature automatically improves the contrast of your images when the subject is Composition in photography means arranging objects in a photo. Usually, abiding backlit or when there is a high contrast between your subject and the background. by the rule of thirds leads to a good composition. - Page 131 Glossary DIS (Digital Image Stabilization) Exposure This feature compensates in real-time for shaking and vibrating while shooting. The amount of light allowed to reach the camera’s sensor. Exposure is controlled by There can be a certain amount of image degradation compare to Optical Image a combination of the shutter speed, the aperture value, and ISO sensitivity.
- Page 132 Glossary ISO sensitivity MJPEG (Motion JPEG) The sensitivity of the camera to light, based on the equivalent film speed used in A video format which is compressed as a JPEG image. a film camera. At higher ISO sensitivity settings, the camera uses a higher shutter Noise speed, which can reduce blur caused by camera shake and low light.
- Page 133 Glossary Shutter speed Shutter speed refers to the amount of time it takes to open and close the shutter, and it is an important factor in the brightness of a photo, as it controls the amount of light which passes through the aperture before it reaches the image sensor. A fast shutter speed allows less time to let light in and the photo becomes darker and more easily freezes subjects in motion.
- Page 134 Dispose unwanted electronics through an approved recycler. To find the nearest recycling location, go to our website: PlanetFirst represents Samsung Electronics' commitment to www.samsung.com/recyclingdirect Or call, (877) 278 - 0799 sustainable development and social responsibility through eco-driven business and management activities.
-
Page 135: Fcc Notice
Declaration of Conformity Any changes or modifications in construction of this device which are not expressly Trade Name : Samsung Electronics America, Inc. approved by the party responsible for compliance could void the user's authority to operate Model No. : Samsung WB2100 the equipment. -
Page 136: Index
Index AF-assist light Battery Camera maintenance 112 Date/Time Set 108 location 15 Caution 119 Camera specifications 125 Deleting files 85 Settings 109 Charging 21 Capturing an image from video 90 Digital zoom 34 Inserting 20 AF Lamp 109 Charging 21 Disconnecting the camera 97 Blink Detection 68 AF Sound 106... - Page 137 Index Image Adjustment ACB 93 Face Detection 67 Guide Line 106 Language settings 108 Brightness Flash Playback mode 93 Auto 61 Shooting mode 70 Fill in 61 Contrast Half-press shutter 37 Macro Playback mode 93 Off 61 Auto Macro 64 HDMI Size 107 Shooting mode 78 Red-eye 61...
- Page 138 Index Memory card Reset 109 Shooting portraits Caution 117 Blink Detection 68 Resolution Panorama mode 45 Insert 20 Face Detection 67 Playback mode 91 Playback button 17 Red-eye 61 Menu button 17 Shooting mode 56 Playback mode 81 Red-eye fix 61 Metering Retouching faces 94 POWER button 15...
- Page 139 Index Thumbnails 82 Video White Balance 72 Playback mode 89 Timer Shooting mode 51 Shooting mode 58 Video out 107 Timer lamp 15 Zoom Time settings 22 Viewing files Using the zoom 34 Category 83 Zoom button 16 Time zone settings 22, 108 HDTV 96 Zoom sound settings 79 Transferring files...
- Page 140 Please refer to the warranty that came with your product or visit our website www.samsung.com for after-sales service or inquiries.