Table of Contents
Advertisement
Quick Links
Advertisement
Table of Contents

Related Manuals for Panasonic DMC-TS5D


Summary of Contents for Panasonic DMC-TS5D
- Page 1 Owner’s Manual for advanced features Digital Camera DMC-TS5 Model No. Please read these instructions carefully before using this product, and save this manual for future use. Register online at www.panasonic.com/register VQT4U19 (U.S. customers only) F0113MG0...
-
Page 2: Table Of Contents
Contents Before Use Care of the camera ...................... 7 (Important) About the Waterproof/Dustproof and Anti-shock Performance of the Camera..............10 Standard Accessories....................15 Names and Functions of Main Parts................ 16 Preparation Charging the Battery....................18 • Charging ......................18 • Approximate operating time and number of recordable pictures ......20 Inserting and Removing the Card (optional)/the Battery........ - Page 3 Recording About the LCD Monitor ..................... 62 Using the Zoom ......................64 • Optical Zoom ...................... 64 • Extended Optical Zoom (EZ) ................65 • Intelligent Zoom ....................65 • Digital Zoom......................65 Taking Pictures Using the Built-in Flash..............66 •...
- Page 4 • [Pet] ........................91 • [Sunset]....................... 92 • [High Sens.] ......................92 • [Starry Sky] ......................92 • [Glass Through] ....................92 • [3D Photo Mode]....................93 Entering Text......................94 Using the [Rec] Menu....................95 • [Aspect Ratio] ..................... 95 •...
- Page 5 • Output GPS logs to files ................... 133 • Delete GPS Logs ....................134 Sensors (compass/altimeter/barometer) are operated ........135 Using the altimeter ....................136 • Adjusting the Altimeter..................137 • Adding an altimeter log ..................139 • Viewing the altimeter log................... 140 •...
- Page 6 Connecting Easily to a Smartphone/tablet (NFC)..........182 • Controlling this camera remotely with a smartphone/tablet by using the NFC function ................182 • Transferring images in this camera to a smartphone/tablet one at a time by using the NFC function ................183 •...
-
Page 7: Before Use
Before Use Please be sure to read “ (Important) About the Waterproof/Dustproof and Anti-shock ” Performance of the Camera (P10) before using this unit underwater to prevent the unit from being mishandled, which may cause water to seep in. Care of the camera ∫... - Page 8 • Contact Panasonic if the fogging does not disappear. Conditions in which inner side of the lens may be fogged Condensation may occur and the inner side of the lens may be fogged when the camera is...
- Page 9 Before Use About the GPS Your Panasonic Lumix digital still camera is GPS-equipped which can automatically record the precise location coordinates of where the photo was taken. The specific physical address of this location can easily be derived from this information.
-
Page 10: (Important) About The Waterproof/Dustproof And Anti-Shock Performance Of The Camera
5 devices) Panasonic’s test method is based on the above “MIL-STD 810F Method 516.5-Shock”. However, the drop height was changed from 122 cm (4 feet) to 200 cm (6.6 feet) dropping onto 3 cm (0.1 feet) thick plyboard. - Page 11 Waterproofing is not guaranteed if the unit is subject to an impact as a result of being hit or dropped etc. If an impact to the camera occurs, it should be inspected (subject to a fee) by Panasonic to verify that the waterproofing is still effective.
- Page 12 The integrity of the rubber seals may decrease after about 1 year, with use and age. To avoid permanently damaging the camera the seals should be replaced once each year. Please contact Panasonic for related costs and other information. Close the side door securely.
- Page 13 Before Use Using the camera underwater Use the camera underwater to 13 m (43 feet) with the water temperature between 0 oC and 40 oC • (32 oF and 104 oF). • Do not use for scuba diving (Aqualung). • Do not use the camera at a depth of over 13 m (43 feet).
- Page 14 Before Use Drain water by holding the camera upside down and shaking it lightly a few times. • Make sure to put your hand through the strap to prevent the camera from falling. Wipe off water drops on the camera with a soft, dry cloth and dry the camera in a shaded area that is well ventilated.
-
Page 15: Standard Accessories
You can record or play back pictures on the built-in memory when you are not using a card. • If any accessories are lost, customers in the USA and Puerto Rico should contact Panasonic’s parts department at 1-800-833-9626 and customers in Canada should contact 1-800-99-LUMIX (1-800-995-8649) for further information about obtaining replacement parts. -
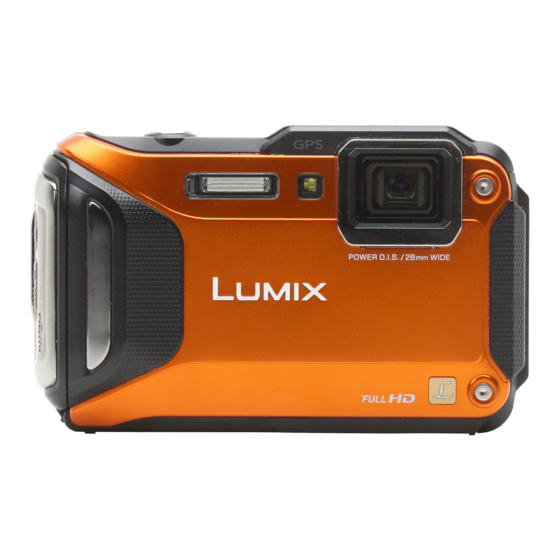
Page 16: Names And Functions Of Main Parts
Before Use Names and Functions of Main Parts Flash (P66) Self-timer indicator (P70)/ AF Assist Lamp (P115)/ LED light (P56) Lens (P8, 237, 255) Speaker (P53) LCD monitor (P62, 231, 236) 8 9 10 [Wi-Fi] button (P177) ® Wi-Fi connection lamp (P174) Zoom button (P64) - Page 17 26 Card slot (P22) 27 Battery slot (P22) • When using an AC adaptor, ensure that the Panasonic DC coupler (optional) and AC adaptor (optional) are used. For connection details, refer to P23. 28 [AV OUT/DIGITAL] socket (P213, 222, 225, 226)
-
Page 18: Preparation
Please be advised that we are not liable for any accident or failure occurring as a result of use of a counterfeit battery pack. To ensure that safe products are used, we would recommend that a genuine Panasonic battery pack is used. - Page 19 Preparation ∫ About the [CHARGE] indicator Charging. Off: Charging has completed. (Disconnect the charger from the electrical socket and detach the battery after charging is completed.) • When the [CHARGE] indicator flashes – The battery temperature is too high or too low. It is recommended to charge the battery again in an ambient temperature between 10 oC and 30 oC (50 oF and 86 oF).
-
Page 20: Approximate Operating Time And Number Of Recordable Pictures
CIPA is an abbreviation of [Camera & Imaging Products Association]. Temperature: 23 oC (73.4 oF)/Humidity: 50%RH when LCD monitor is on. • • Using a Panasonic SD Memory Card (32 MB). • Using the supplied battery. • Starting recording 30 seconds after the camera is turned on. (When the Optical Image Stabilizer function is set to [ON].) - Page 21 Preparation ∫ Recording motion pictures [AVCHD] [MP4] (Recording with picture quality set (Recording with picture quality set to [FHD/60p]) to [FHD/30p]) Recordable time Approx. 80 min Approx. 95 min Actual recordable time Approx. 35 min Approx. 45 min These times are for an ambient temperature of 23 oC (73.4 oF) and a humidity of 50%RH. Please be •...
-
Page 22: Inserting And Removing The Card (Optional)/The Battery
Check that this unit is turned off. • Confirm that there is no foreign object. (P12) • We recommend using a Panasonic card. 1: Slide the [LOCK] switch A, and release the lock. 2: Slide the release lever B and open the side door. - Page 23 Using an AC adaptor (optional) and a DC coupler (optional) instead of the battery The AC adaptor (optional) can only be used with the designated Panasonic DC coupler (optional). The AC adaptor (optional) cannot be used by itself. 1 Open the side door A.
-
Page 24: About The Built-In Memory/The Card
• Check that the PC and other equipment are compatible when using the SDXC Memory Cards. SDXC Memory Card http://panasonic.net/avc/sdcard/information/SDXC.html (48 GB, 64 GB) • Only the cards with capacity listed left can be used. ¢ SD Speed Class is the speed standard regarding continuous writing. Check via the label on the card, etc. - Page 25 Preparation • Do not turn this unit off, remove its battery or card, or disconnect the AC adaptor (optional) during access (when pictures are being written, read or deleted, or the built-in memory or the card is being formatted). Furthermore, do not subject the camera to vibration, impact or static electricity.
-
Page 26: Approximate Number Of Recordable Pictures And Available Recording Time
Preparation Approximate number of recordable pictures and available recording time ∫ About the display of the number of recordable pictures and available recording time • Switch the display (number of recordable pictures, available recording time, etc.) by pressing [DISP.]. (P62) A Number of recordable pictures B Available recording time R1m10s... - Page 27 Preparation ∫ Available recording time (when recording motion pictures) • “h” is an abbreviation for hour, “m” for minute and “s” for second. • [AVCHD] [Rec Quality] 2 GB 32 GB 64 GB [FHD/60p/ 9m00s 2h32m00s 5h08m00s [FHD/60p] 9m00s 2h32m00s 5h08m00s [FHD/60i/ 15m00s...
-
Page 28: Setting Date/Time (Clock Set)
Preparation Setting Date/Time (Clock Set) • The clock is not set when the camera is shipped. Press camera [ON/OFF] button. • If the language select screen is not displayed, proceed to [Requirements for Underwater use] below. Press [MENU/SET]. Press 3/4 to select the language, and press [MENU/SET]. [Requirements for Underwater use] Be sure to check this so that you can maintain the waterproof performance. -
Page 29: Changing The Clock Setting
Preparation Press [MENU/SET]. • Confirmation screen is displayed. Press [MENU/SET]. Select [Yes] to automatically correct the clock, and then press [MENU/ SET]. • Message screen is displayed. Press [MENU/SET]. Press 2/1 to select the home area, and then press [MENU/SET]. •... -
Page 30: Tips For Taking Good Pictures
Preparation Tips for taking good pictures Fit the strap and hold the camera carefully Hold the camera gently with both hands, keep your arms still at your side and stand with your feet slightly apart. • To prevent dropping, be sure to attach the supplied strap and fit it to your wrist. (P16) •... -
Page 31: Basic
Basic Selecting the Recording Mode Press [MODE]. Press 3/4/2/1 to select the Recording Mode. Press [MENU/SET]. ∫ List of Recording Modes Intelligent Auto Mode (P32) Snow Mode (P80) The subjects are recorded using settings This allows you to take pictures that show automatically selected by the camera. -
Page 32: Taking Pictures Using The Automatic Function (Intelligent Auto Mode)
Basic Taking Pictures using the Automatic Function (Intelligent Auto Mode) Recording Mode: The camera will set the most appropriate settings to match the subject and the recording conditions so we recommend this mode for beginners or those who want to leave the settings to the camera and take pictures easily. - Page 33 Basic Scene Detection When the camera identifies the optimum scene, the icon of the scene concerned is displayed in blue for 2 seconds, after which its color changes to the usual red. When taking pictures > ¦ [i-Portrait] [i-Scenery] ¢ [i-Macro] [i-Night Portrait] ¢...
-
Page 34: Changing The Settings
Basic Changing the settings Following menus can be set. Menu Item ¢ ¢ ¢ [Picture Size] /[Burst] /[Time Lapse Shot]/[Color Mode] [Rec] [Motion Deblur]/[iHandheld Nite Shot]/[iHDR]/[Face Recog.] [Motion Picture] [Rec Format]/[Rec Quality] [GPS Setting]/[Repositioning]/[Sensor Settings]/[GPS Log]/ [GPS Area Select]/[Assist Data]/[Area Info. Set]/[My Landmark]/ [GPS/Sensor] [Altimeter]/[Calibrate compass] ¢... - Page 35 Basic ∫ [iHDR] When [iHDR] is set to [ON] and there is, for example, strong contrast between the background and the subject, multiple still pictures are recorded with differing exposures and combined to create a single still picture rich in gradation. •...
-
Page 36: Taking Pictures With Your Favorite Settings (Program Ae Mode)
Basic Taking Pictures with Your Favorite Settings (Program AE Mode) Recording Mode: The camera automatically sets the shutter speed and the aperture value according to the brightness of the subject. You can take pictures with greater freedom by changing various settings in the [Rec] menu. Press [MODE]. -
Page 37: Focusing
Basic Focusing Aim the AF area at the subject, and then press the shutter button halfway. 1/60 1/60 1/60 F3.3 F3.3 F3.3 When the subject is focused When the subject is not Focus focused Focus indication A Blinks AF area B White>Green White>Red Sound... - Page 38 Basic ∫ When the subject is not in focus (such as when it is not in the center of the composition of the picture you want to take) Aim the AF area at the subject, and press the shutter button halfway to fix the focus and exposure.
-
Page 39: Recording Motion Pictures
Basic Recording Motion Pictures Applicable modes: This can record full high definition motion pictures compatible with the AVCHD format or motion pictures recorded in MP4. Audio will be recorded in stereo. Start recording by pressing the motion picture button. A Available recording time B Elapsed recording time •... - Page 40 • For details on AVCHD Progressive and MP4 compatible devices, refer to the support sites below. http://panasonic.jp/support/global/cs/dsc/ (This Site is English only.) • When a motion picture is recorded in a high temperature environment or is recorded continuously, the recording may stop after [ ] is displayed to protect this unit.
- Page 41 Basic • If you end motion picture recording after a short time when using [Miniature Effect] of the Creative Control Mode, the camera may go on recording for a certain period. Please continue to hold the camera until the recording finishes. •...
-
Page 42: Playing Back
Basic Playing Back Press [(]. Press 2/1 to select pictures. A File number 100-0001 100-0001 100-0001 B Picture number If you press and hold 2/1, you can play back the pictures in • succession. • Speed of picture Forwarding/Rewinding changes depending on the playback status. -
Page 43: Displaying Multiple Screens (Multi Playback)
Basic • When the camera is turned off, press and hold [(]. If you turn it on this way, the playback screen will be displayed automatically. • This camera complies with the DCF standard “Design rule for Camera File system” established by JEITA “Japan Electronics and Information Technology Industries Association”... -
Page 44: Creating Still Pictures From A Motion Picture
Basic Creating Still Pictures from a Motion Picture You can create a single still picture from a recorded motion picture. Press 3 to pause motion picture playback. Press [MENU/SET]. • Confirmation screen is displayed. It is executed when [Yes] is selected. Exit the menu after it is executed. - Page 45 Basic Continuously playing back Group Pictures ]), and then press 3. Select a picture with the group picture icon ([ ], [ ˜ • If you have filtered images for playback by using [Slide Show] (P147) or [Filtering Play] (P149), the selection screen appears.
-
Page 46: Deleting Pictures
Basic Deleting Pictures Once deleted, pictures cannot be recovered. • Pictures on the built-in memory or the card that are being played back will be deleted. • Pictures that are not in the DCF standard or those that are protected cannot be deleted. To delete a single picture Select the picture to be deleted, and then press •... -
Page 47: To Delete Multiple Pictures (Up To 100) Or All The Pictures
Basic To delete multiple pictures (up to 100) or all the pictures Press [ Press 3/4 to select [Delete Multi] or [Delete All] and then press [MENU/SET]. [Delete All] > Confirmation screen is displayed. • Pictures are deleted by selecting [Yes]. •... -
Page 48: Setting The Menu
Basic Setting the Menu The camera comes with menus that allow you to choose the settings for taking pictures and playing them back just as you like and menus that enable you to have more fun with the camera and use it more easily. In particular, the [Setup] menu contains some important settings relating to the camera’s clock and power. -
Page 49: Using The Quick Menu
Basic Press 3/4 to select the menu item and then press [MENU/SET]. A Menu screen page • It will switch to next page when you reach the bottom. (It will also switch by pressing the zoom button) Press 3/4 to select the setting and then press [MENU/SET]. -
Page 50: About The Setup Menu
Basic About the Setup Menu For details on how to select the [Setup] menu settings, refer to P48. • [Clock Set], [Economy] and [Auto Review] are important items. Check their settings before using them. ¢ • In Intelligent Auto Mode, only [Clock Set], [World Time], [Airplane Mode], [Beep] , [LED Light], [Language], [Stabilizer Demo.] can be set. - Page 51 Basic Set the time in your home area and travel destination. You can display the local times at the travel destinations and record them on the pictures you take. After selecting [Destination] or [Home], press 2/1 to select an area, and press [MENU/SET] to set. •...
- Page 52 Basic Departure date and return date of the travel as well as the name of the travel destination can be set. You can display the number of days that have passed when playing back the pictures and stamp it on the recorded pictures with [Text Stamp] (P160).
- Page 53 Basic Restricts GPS/Sensor/Wi-Fi/NFC settings. [ON]: Wi-Fi and NFC functions cannot be used. Furthermore, when this unit is turned off, GPS positioning and compass/altimeter/barometer do not work. [Airplane Mode] [OFF] • When you bring the camera on an airplane or to a hospital, etc., set [Airplane Mode] to [ON], and turn off the camera because electromagnetic waves, etc.
- Page 54 Basic These menu settings make it easier to see the LCD monitor when you are in bright places. ¢ [„] ([Auto Power Monitor]) The brightness is adjusted automatically depending on how bright it is around the camera. [Monitor Luminance] […] ([Power Monitor]): The LCD monitor becomes brighter and easier to see even when taking pictures outdoors.
- Page 55 Basic This allows you to set either to display or not display the histogram. [ON]/[OFF] A Histogram is a graph that displays brightness along the horizontal axis (black to white) and the number of [Histogram] pixels at each brightness level on the vertical axis. It allows you to easily check a picture’s exposure.
- Page 56 Basic This will illuminate the subject with a lamp when taking motion pictures in dark surrounding. Also, the LED can also be used as a simple light when necessary. ] ([On]): LED light A is turned on continuously while recording motion pictures. To use a simple light [LED Light] ], and press and hold down 1 (‰)
- Page 57 Basic The camera is automatically turned off if the camera has not been used for the time selected on the setting. Also, the battery life is conserved by dimming the LCD monitor. p [Auto Power Off]: The camera is automatically turned off if the camera has not been used for the time selected on the setting.
- Page 58 Basic Set the length of time that the picture is displayed after taking the still picture. [1 SEC] o [Auto Review] [2 SEC] [HOLD]: The pictures are displayed until one of the buttons is pressed. [OFF] • [Auto Review] is activated regardless of its setting in the following cases. –...
- Page 59 Basic ¢ Reset all settings in the [Wi-Fi] menu to factory default settings. [Reset Wi-Fi Settings] • Always reset the camera when disposing or selling it to prevent personal information saved within the camera from being misused. • Always reset the camera after making a copy of personal information when sending the camera in to be repaired.
- Page 60 Basic Setup so this unit can be controlled by the remote control of the VIERA by automatically coupling this unit with the VIERA Link compatible equipment using HDMI micro cable (optional). [ON]: Remote control operation of the VIERA Link compatible equipment is [VIERA Link] enabled.
- Page 61 • It may take longer to format the built-in memory than the card. • If the built-in memory or the card cannot be formatted, consult Panasonic. For USA and Puerto Rico assistance, please call: For Canadian assistance, please call: 1-800-211-PANA(7262) or, contact us via the web at: 1-800-99-LUMIX (1-800-995-8649) http://www.panasonic.com/contactinfo...
-
Page 62: About The Lcd Monitor
Recording About the LCD Monitor Press [DISP.] to change. 1 LCD monitor • When the menu screen appears, the [DISP.] button is not activated. During Playback Zoom, motion picture playback, sequential playback, panorama playback or a slide show, you can only select “Normal display G”... - Page 63 Recording In Playback Mode 100-0001 100-0001 00' 00' 00.00 F3.3 1/60 000' 00' 00.00 1013hPa 10:00 DEC.1.2013 6000ft G Normal display ¢1 H Display with recording information I Environment information J Altimeter log ¢2 K No display ¢1 If the [Histogram] in [Setup] menu is set to [ON], histogram will be displayed. ¢2 Name of the registered person in [Face Recog.] is displayed when [DISP.] is pressed.
-
Page 64: Using The Zoom
Recording Using the Zoom Applicable modes: You can zoom in to make people and objects appear closer or zoom out to record landscapes in wide angle. To make subjects appear further away use (Wide) Press [W] on the zoom button. To make subjects appear closer use (Tele) Press [T] on the zoom button. -
Page 65: Extended Optical Zoom (Ez)
Recording Extended Optical Zoom (EZ) This function works when any of the picture sizes (P96) indicated with is selected. You can zoom in further than you can with the Optical Zoom without deteriorating the image quality. Maximum magnification: 10.5k (This includes the optical zoom magnification. The magnification level differs depending on [Picture Size] setting.) •... -
Page 66: Taking Pictures Using The Built-In Flash
Recording Taking Pictures Using the Built-in Flash Applicable modes: A Photo flash Do not cover the flash with your fingers or other objects. Switching to the appropriate flash setting Set the flash to match the recording. Press 1 [‰]. Press 3/4 to select the item and then press [MENU/SET]. - Page 67 Recording ∫ Available flash settings by Recording Mode The available flash settings depend on the Recording Mode. (±: Available, —: Not available, ¥: Scene Mode initial setting) ‡ ‰ Œ ¢ ± ± — — — ± ± ± ± ±...
- Page 68 Recording ∫ Shutter speed for each flash setting Flash setting Shutter speed (Sec.) Flash setting Shutter speed (Sec.) ‡ ¢1 1 to 1/1300 ¢1 1/60 to 1/1300 ¢2 1 or 1/4 to 1/1300 ‰ Œ ¢1 Varies according to the settings of [Min. Shtr Speed] and [Sensitivity]. ¢2 When [Min.
-
Page 69: Taking Close-Up Pictures ([Af Macro]/[Macro Zoom])
Recording Taking Close-up Pictures ([AF Macro]/[Macro Zoom]) Applicable modes: This mode allows you to take close-up pictures of a subject, e.g. when taking pictures of flowers. Press 4 [#]. Press 3/4 to select the item and then press [MENU/SET]. Item Description of settings You can take pictures of a subject as close as 5 cm (0.16 feet) from the lens by pressing the zoom button upmost to Wide (1k). -
Page 70: Taking Pictures With The Self-Timer
Recording Taking Pictures with the Self-timer Applicable modes: Press 2 [ë]. Press 3/4 to select the item and then press [MENU/SET]. Item Description of settings Picture is taken 10 seconds after shutter is pressed. ] ([10sec.]) Picture is taken 2 seconds after shutter is pressed. •... -
Page 71: Compensating The Exposure
Recording Compensating the Exposure Applicable modes: Use this function when you cannot achieve appropriate exposure due to the difference in brightness between the subject and the background. Underexposed Properly exposed Overexposed Compensate the exposure Compensate the exposure towards positive. towards negative. Press 3 [È] until [Exposure] appears. -
Page 72: Taking Pictures Using Auto Bracket
Recording Taking Pictures Using Auto Bracket Applicable modes: In this mode, 3 pictures are automatically recorded in the selected exposure compensation range each time the shutter button is pressed. With Auto Bracket d1 EV 1st picture 2nd picture 3rd picture d0 EV j1 EV i1 EV... -
Page 73: Taking Picture By Setting The Exposure Manually (Manual Exposure Mode)
Recording Taking picture by setting the exposure manually (Manual Exposure Mode) Recording Mode: Determine the exposure by manually setting the aperture value and the shutter speed. The Manual Exposure Assistance appears on the lower portion of the screen to indicate the exposure. - Page 74 Recording ∫ Manual Exposure Assistance The exposure is adequate. Set to faster shutter speed or larger aperture value. Set to slower shutter speed or smaller aperture value. • The Manual Exposure Assistance is an approximation. We recommend checking the pictures on the playback screen.
-
Page 75: Taking Pictures With Different Image Effects (Creative Control Mode)
Recording Taking Pictures with different image effects (Creative Control Mode) Recording Mode: This mode records with additional image effects. You can set the effects to add by selecting example images and checking them on the screen. Press [MODE]. Press 3/4/2/1 to select [Creative Control], and then press [MENU/ SET]. -
Page 76: [Expressive]
Recording ¢ These pictures are examples to show the effect. [Expressive] This effect emphasizes the color to make a pop art picture. [Retro] This effect gives a faded image. [High Key] This effect adds a bright, airy and soft feel to the overall image. •... -
Page 77: [Sepia]
Recording [Sepia] This effect creates a sepia image. [Dynamic Monochrome] This effect gives a higher contrast to create an impressive black and white picture. [Impressive Art] This effect gives your photo a dramatic contrast look. • If you select this effect with Panorama Shot Mode, seams between pictures may become noticeable. -
Page 78: [Cross Process]
Recording [Cross Process] This effect gives your photo a dramatic color look. Items that can be set Color Green tone/Blue tone/Yellow tone/Red tone Press 2/1 to select the color to enhance, and • press [MENU/SET]. [Toy Effect] This effect reduces peripheral brightness to give the impression of a toy camera. -
Page 79: [Soft Focus]
Recording [Soft Focus] This effect blurs the overall image to produce a soft feel. • Display of the recording screen will be delayed more than usual and the screen will look as if frames are dropping. [Star Filter] This effect transforms pin-points of light into a star effect. •... -
Page 80: Take The Outdoors Scene Expressively
Recording Take the Outdoors Scene Expressively Recording Mode: By setting the Recording Mode to [ ], [ ], [ ] or [ ] pictures can be taken more effectively matching the conditions such as sports, snow, beach & snorkeling. • Tone of the color of the image may change when picture is taken with unmatched usage. -
Page 81: Beach & Snorkeling Mode
Recording Beach & Snorkeling Mode This is optimal for taking pictures underwater and at the beach. Depth meter will automatically operate. It can be a rough indication of how deep you have gone underwater. You can use [Color Reproduction] (P115) in the [Rec] menu and take pictures underwater without losing the red tinge. - Page 82 Recording ∫ About the white balance You can adjust the hue to your preferred setting using [WB Adjust.] (P101). ∫ To beautifully record the underwater red tinge (Underwater color reproduction) Subjects appear blue in pictures taken underwater. Using [Color Reproduction] in the [Rec] menu will allow pictures to be taken without the subjects losing their red tone.
-
Page 83: Advanced Underwater Mode
Recording Advanced Underwater Mode This is optimal for taking pictures underwater deeper than 13 m (43 feet) by the use of the marine case (DMW-MCFT5: optional). You can use [Color Reproduction] (P115) in the [Rec] menu and take pictures underwater without losing the red tinge. ¢... -
Page 84: Taking Panorama Pictures (Panorama Shot Mode)
Recording Taking panorama pictures (Panorama Shot Mode) Recording Mode: Pictures are recorded continuously while moving the camera horizontally or vertically, and are combined to make a single panorama picture. Press [MODE]. Press 3/4/2/1 to select [Panorama Shot], and then press [MENU/SET]. Press 3/4 to select the recording direction and then press [MENU/SET]. - Page 85 Recording Press the shutter button fully and record a picture while moving the camera in a small circle in the direction selected in Step Recording from left to right Move the camera in a single panning motion for about 8 seconds. •...
- Page 86 Recording • The zoom position is fixed to Wide. • [Stabilizer] is fixed to [OFF]. • The focus, white balance, and exposure are fixed at the optimum values for the first picture. As a result, if the focus or brightness changes substantially during recording, the entire panorama picture may not be recorded at the suitable focus or brightness.
-
Page 87: Taking Pictures That Match The Scene Being Recorded (Scene Mode)
Recording Taking pictures that match the scene being recorded (Scene Mode) Recording Mode: When you select a Scene Mode to match the subject and recording situation, the camera sets the optimal exposure and hue to obtain the desired picture. Press [MODE]. Press 3/4/2/1 to select [Scene Mode], and then press [MENU/SET]. -
Page 88: [Portrait]
Recording [Portrait] When taking pictures of people outdoors during the day, this mode allows you to improve the appearance of the persons and make their skin tones look healthier. ∫ Technique for Portrait Mode To make this mode more effective: 1 Press and hold down the zoom button as far as possible to Tele. -
Page 89: [Night Portrait]
Recording [Night Portrait] This allows you to take pictures of a person and the background with near real-life brightness. ∫ Technique for Night Portrait Mode • Use the flash. (You can set to [‹].) • Ask the subject not to move while taking a picture. •... -
Page 90: [Hdr]
Recording [HDR] You can combine several pictures with different levels of exposure into a single picture with rich gradation. You can minimize the loss of gradations in bright areas and dark areas when, for example, the contrast between the background and the subject is large. ∫... -
Page 91: [Baby1]/[Baby2]
Recording [Baby1]/[Baby2] This takes pictures of a baby with a healthy complexion. When you use the flash, the light from it is weaker than usual. It is possible to set different birthdays and names for [Baby1] and [Baby2]. You can select to have these appear at the time of playback, or have them stamped on the recorded image using [Text Stamp] (P160). -
Page 92: [Sunset]
Recording [Sunset] Select this when you want to take pictures of a sunset view. This allows you to take vivid pictures of the red color of the sun. [High Sens.] This mode minimizes the jitter of the subjects, and enables you to take pictures of these subjects in dimly lit rooms. -
Page 93: [3D Photo Mode]
Recording [3D Photo Mode] Pictures are recorded continuously while moving the camera horizontally, and two pictures selected automatically are combined to make a single 3D picture. To view 3D pictures, a television that supports 3D is required. (This unit will play back in 2D) Refer to P217 for details about the playback method. -
Page 94: Entering Text
Recording Entering Text It is possible to enter babies’ and pets’ names and the locations when recording. When a screen that looks like the one on the right is displayed, you can enter characters. (Only alphabetical characters and symbols can be entered.) Press 3/4/2/1 to select text and then press [MENU/SET] to register. -
Page 95: Using The [Rec] Menu
Recording Using the [Rec] Menu For details on [Rec] menu settings, refer to P48. [Aspect Ratio] Applicable modes: This allows you to select the aspect ratio of the pictures to suit printing or the playback method. Settings Description of settings [Aspect Ratio] of a 4:3 TV [Aspect Ratio] of a 35 mm film camera [Aspect Ratio] of a high-definition TV, etc. -
Page 96: [Picture Size]
Recording [Picture Size] Applicable modes: Set the number of pixels. The higher the numbers of pixels, the finer the detail of the pictures will appear even when they are printed onto large sheets. [Aspect Ratio]: [X] [Aspect Ratio]: [Y] Settings Picture Size Settings Picture Size... -
Page 97: [Quality]
Recording [Quality] Applicable modes: Set the compression rate at which the pictures are to be stored. Settings Description of settings When giving priority to the picture quality ([Fine]) [›] When using the standard picture quality and increasing the number of pictures to be recorded without changing the number of pixels ([Standard]) •... -
Page 98: [Sensitivity]
Recording [Sensitivity] Applicable modes: This allows the sensitivity to light (ISO sensitivity) to be set. Setting to a higher number enables pictures to be taken even in dark places without the resulting pictures coming out dark. Settings Description of settings The ISO sensitivity is automatically adjusted according to the brightness. -
Page 99: [White Balance]
Recording [White Balance] Applicable modes: In sunlight, under incandescent lights or in other such conditions where the color of white takes on a reddish or bluish tinge, this item adjusts to the color of white which is closest to what is seen by the eye in accordance with the light source. - Page 100 Recording ∫ Auto White Balance Depending on the conditions prevailing when pictures are taken, the pictures may take on a reddish or bluish tinge. Furthermore, when a multiple number of light sources are being used or there is nothing with a color close to white, Auto White Balance may not function properly. In this case, set the White Balance to a mode other than [AWB].
- Page 101 Recording Finely adjusting the White Balance You can finely adjust the White Balance when you cannot acquire the desired hue by setting the White Balance. • Fine adjustment is possible only when the White Balance is set to [V]/[Ð]/[î]/[Ñ]/[Ò]. Select the White Balance to finely adjust and then press [DISP.] to display [WB Adjust.].
-
Page 102: [Af Mode]
Recording [AF Mode] Applicable modes: This allows the focusing method that suits the positions and number of the subjects to be selected. Settings Description of settings The camera automatically detects the person’s face. (max. [š] 15 areas) The focus and exposure can then be adjusted to fit that face no ([Face Detection]) matter what portion of the picture it is in. - Page 103 Recording ∫ About [š] ([Face Detection]) The following AF area frames are displayed when the camera detects the faces. Yellow: When the shutter button is pressed halfway, the frame turns green when the camera is focused. White: Displayed when more than one face is detected. Other faces that are the same distance away as faces within the yellow AF areas are also focused.
-
Page 104: [Quick Af]
Recording ∫ Setting up [ ] ([AF Tracking]) Align the subject with the AF tracking frame, and then press 4 to lock onto the subject. A AF tracking frame • AF area will be displayed in yellow when a subject is recognized, and focus will automatically adjust continuously following the subject’s movement (Dynamic tracking). -
Page 105: [Face Recog.]
Recording [Face Recog.] Applicable modes: Face Recognition is a function which finds a face resembling a registered face and prioritizes focus and exposure automatically. Even if the person is located towards the back or on the end of a line in a group photo, the camera can still take a clear picture. Settings: [ON]/[OFF]/[MEMORY] [Face Recog.] is initially set to [OFF] on the camera. - Page 106 Recording Face Settings You can register information such as names and birthdays for face images of up to 6 people. Registration can be facilitated by taking multiple face images of each person. (up to 3 pictures/registration) Select [Face Recog.] on the [Rec] menu and then press [MENU/SET]. Press 3/4 to select [MEMORY] and then press [MENU/SET].
- Page 107 Recording Select item to edit with 3/4, and then press [MENU/SET]. Item Description of settings 1 Press 4 to select [SET] and then press [MENU/SET]. 2 Enter the name. [Name] • refer to “ ” For details on how to enter characters, Entering Text section on P94.
- Page 108 Recording ∫ Point of recording when registering the face images (Good example for • Face front with eyes open and mouth closed, making sure the registering) outline of the face, the eyes, or the eyebrows are not covered with the hair when registering. •...
-
Page 109: [I.exposure]
Recording [i.Exposure] Applicable modes: Contrast and exposure will be adjusted automatically when there is a big difference in brightness between the background and subject, to bring the image close to real life. Settings: [ON]/[OFF] • ] in the screen turns to yellow when [i.Exposure] is in effect. •... -
Page 110: [I.resolution]
Recording [i.Resolution] Applicable modes: Pictures with sharp profile and resolution can be taken by utilizing the Intelligent Resolution Technology. Settings Description of settings [i.Resolution] is activated. [ON] [i.Resolution] is activated, and zoom magnification increased to [i.ZOOM] approx. 2 times while limiting deterioration of the picture. [OFF] •... -
Page 111: [Burst]
Recording [Burst] Applicable modes: Pictures are taken continuously while the shutter button is pressed. Pictures taken with [ ] and [ ] are recorded as a single Picture Group (P44). Number of Settings Description of settings recordable pictures • The burst speed is set to approximately 2 frames/second or 5 frames/second in accordance with the movement of the subject. - Page 112 Recording • When [ ], [ ] or [ ] is selected, the picture size setting will become as shown below. Aspect ratio [4:3] [5M], [3M], [0.3M] [2.5M], [0.3M] [3M] [3:2] [4.5M], [2.5M], [0.3M] [3M], [0.3M] [2.5M] [16:9] [3.5M], [2M], [0.2M] [3.5M], [0.2M] [2M] [1:1]...
-
Page 113: [Time Lapse Shot]
Recording [Time Lapse Shot] Applicable modes: You can set the recording start time, the recording interval and the number of pictures, and automatically record subjects such as animals and plants as time elapses. Pictures are recorded as a single Picture Group (P44). You can create motion pictures using [Time Lapse Video] in [Playback] menu. - Page 114 Recording Press 3/4 to select [Start Shooting] and then press [MENU/SET]. Press the shutter button fully. • The recording starts automatically. • If the recording interval is set to 40 seconds or more, this unit will turn off automatically while in recording standby.
-
Page 115: [Color Mode]
Recording [Color Mode] Applicable modes: Sets various color effects, including making the picture sharper, brighter, or applying a sepia tone. Settings Description of settings [STANDARD] This is the standard setting. ¢1 [Happy] Image with enhanced brightness and vividness. ¢2 [VIVID] The picture becomes sharper. -
Page 116: [Red-Eye Removal]
Recording [Red-Eye Removal] Applicable modes: When Red-Eye Reduction ([ ], [ ]) is selected, Red-Eye Removal is performed whenever the flash is used. The camera automatically detects red-eye and corrects the picture. Settings: [ON]/[OFF] • Only available when [AF Mode] is set to [š] and Face Detection is active. •... -
Page 117: [Date Stamp]
Recording [Date Stamp] Applicable modes: You can take a picture with date and time of recording. Settings Description of settings [W/O TIME] Stamp the year, month, and day. [WITH TIME] Stamp the year, month, day, hour, and minutes. [OFF] — •... -
Page 118: Using The [Motion Picture] Menu
Recording Using the [Motion Picture] Menu For details on [Motion Picture] menu settings, refer to P48. • The [Motion Picture] menu is not displayed in the following cases. – [Soft Focus]/[Star Filter] (Creative Control Mode) – [3D Photo Mode] (Scene Mode) [Rec Format] Applicable modes: This sets up the data format of motion pictures. -
Page 119: [Rec Quality]
Recording [Rec Quality] Applicable modes: This sets up the picture quality of motion pictures. When [AVCHD] is selected Item Size Frame rate Bit rate Aspect ratio ¢1,2 [FHD/60p/ 1920k1080 28 Mbps ¢1 [FHD/60p] ¢2 [FHD/60i/ 1920k1080 17 Mbps 16:9 [FHD/60i] ¢2 [HD/60p/ 1280k720... -
Page 120: [Continuous Af]
Recording [Continuous AF] Applicable modes: It will continually keep on focusing to the subject that the focus was once set. Settings: [ON]/[OFF] • Set this function to [OFF] if you wish to fix the focus on the position where you started the motion picture recording. -
Page 121: Gps/Sensor
GPS/Sensor Recording using the GPS function Applicable modes: Before use, read “About the GPS” on and “User License Agreement for Location Name data” on P241. ∫ About the “GPS” GPS is an abbreviation of [Global Positioning System], which is a system that allows you to check your position utilizing GPS satellites. -
Page 122: Acquiring Of The Gps Information
GPS/Sensor Acquiring of the GPS information When [GPS Setting] is set to [ON], positioning is performed at regular intervals. When the positioning is successful, location name information and latitude/longitude are acquired. For details on the screen display for the acquired information, read “About the display of positioning status and positioning results”... - Page 123 GPS/Sensor About the display of positioning status and positioning results When the GPS begins positioning, an icon indicating the positioning status is displayed on the recording screen. When the positioning is successful, the location name information and latitude/longitude are displayed. A Location name information B Icon indicating positioning status C Icon indicating positioning results...
- Page 124 GPS/Sensor ∫ When positioning is taking a long time Under the following conditions, successful positioning may take 2 to 3 minutes even when reception is good. • When positioning is performed for the first time • When reception has been poor for a significant time •...
-
Page 125: Update The Gps Information
GPS/Sensor Update the GPS information When the displayed location name information is different from the current location or when the positioning is not successful, move to a location where the radio waves from GPS satellites can be received better and perform the positioning update. •... -
Page 126: Change The Recorded Location Name Information
GPS/Sensor Change the recorded location name information When the information acquired by the positioning is different from the current location, it is possible to change it by selecting the desired location name or landmark from the selectable candidates registered in the database of this unit. •... -
Page 127: Switch Between Displaying And Hiding The Location Name Information
GPS/Sensor Switch between displaying and hiding the location name information Switches the displaying and hiding of the location name information displayed on the screen. Select [Area Info. Set] on the [GPS/Sensor] menu, and then press [MENU/ SET]. Press 3/4 to select the item to change, and then press [MENU/SET]. Select [ON] for the items to display and [OFF] for the items not to display by pressing 3/4, and then press [MENU/SET]. -
Page 128: Reducing The Time Required For Positioning
GPS/Sensor Reducing the Time Required for Positioning Applicable modes: You can reduce the time required for positioning by copying the predicted satellite information (GPS assist data) of GPS satellites required for positioning to the camera in advance. • To acquire/update the GPS assist data, you can use the “GPS Assist Tool” on your PC, or use the Wi-Fi function. - Page 129 Doing so may cause malfunction. • Do not use any other USB connection cables except the supplied one or a genuine Panasonic USB connection cable (DMW-USBC1: optional). A USB connection cable (supplied) B Align the marks, and insert.
- Page 130 GPS/Sensor ∫ Using a card reader/writer (commercially available) Preparation: Close all other running applications. Insert the card into the unit. Select [Assist Data] on the [GPS/Sensor] menu, and then press [MENU/ SET]. Press 3/4 to select [Update], and then press [MENU/SET]. Press 3/4 to select [SD card], and then press [MENU/SET].
-
Page 131: Update Using The Wi-Fi Function
GPS/Sensor Update using the Wi-Fi Function The GPS assist data can be updated by connecting to a wireless access point that is connected to the internet. Select [Assist Data] on the [GPS/Sensor] menu, and then press [MENU/ SET]. Press 3/4 to select [Update], and then press [MENU/SET]. Press 3/4 to select [Wi-Fi], and then press [MENU/SET]. -
Page 132: Gps Logs
GPS/Sensor GPS Logs Applicable modes: Record GPS Logs Location information acquired in the GPS positioning is recorded continuously as a GPS log. • GPS logs are not recorded to the built-in memory. Please use the card. Select [GPS Log] on the [GPS/Sensor] menu, and then press [MENU/ SET]. -
Page 133: Output Gps Logs To Files
GPS/Sensor Output GPS logs to files GPS logs are saved as NMEA format files. GPS logs can be output to KML format files. Select [GPS Log] on the [GPS/Sensor] menu, and then press [MENU/ SET]. Press 3/4 to select [KML File Output], and then press [MENU/SET]. Select the recording date of the GPS Log, and then press [MENU/SET]. -
Page 134: Delete Gps Logs
GPS/Sensor Delete GPS Logs Select [GPS Log] on the [GPS/Sensor] menu, and then press [MENU/ SET]. Press 3/4 to select [Delete Log], and then press [MENU/SET]. Press 3/4 to select settings, and then press [MENU/SET]. Settings Description of settings Deletes 1 GPS log. Press 3/4 to select the log you want to delete, and then press [1 DAY] [MENU/SET]. -
Page 135: Sensors (Compass/Altimeter/Barometer) Are Operated
GPS/Sensor Sensors (compass/altimeter/barometer) are operated Applicable modes: The direction, altitude, and atmospheric pressure can be measured and recorded in the recorded images. • If compass/altimeter/barometer are operated in the time settings (P28) at the time of purchase, [Sensor Settings] will be set to [ON] automatically. Select [Sensor Settings] on the [GPS/Sensor] menu, and then press [MENU/SET]. -
Page 136: Using The Altimeter
GPS/Sensor Using the altimeter Applicable modes: You can check the altitude of the current location. Altimeter is not adjusted at the time of purchase. Displaying range is j600 m (–2000 feet) to 9000 m (30000 feet). • • A depth meter will be displayed instead of the altimeter in Beach & Snorkeling mode. -
Page 137: Adjusting The Altimeter
GPS/Sensor Adjusting the Altimeter The altimeter can be adjusted manually or using GPS. To measure altitude with greater accuracy, we recommend that you perform [Adjust] regularly by comparing a reference altitude on a sign or other accurate altitude information with the altitude indicated by the unit. - Page 138 GPS/Sensor ∫ Example of adjusting the altitude manually (measuring the height from the ground to the roof of a building) Set [ON] in [Adjust] in [Altimeter] on the ground A, and then set the altimeter to 0 m (0 feet). Move from the ground A to the roof B.
-
Page 139: Adding An Altimeter Log
GPS/Sensor Adding an altimeter log The altitude is recorded at 15 minute intervals and displayed as a graph. • Set the date and time settings in advance. (P28) • It cannot be recorded into the built-in memory. Please use a card. Select [Altimeter] on the [GPS/Sensor] menu, and then press [MENU/ SET]. -
Page 140: Viewing The Altimeter Log
GPS/Sensor Viewing the altimeter log You can specify the period of the recorded altimeter log to display. Select [Altimeter] on the [GPS/Sensor] menu, and then press [MENU/ SET]. Press 3/4 to select [Display Log], and then press [MENU/SET]. Press 3/4 to select the recording start date, and press [MENU/SET]. -
Page 141: Deleting The Altimeter Log
GPS/Sensor Deleting the altimeter log You can delete part of the altimeter log by specifying a period. Select [Altimeter] on the [GPS/Sensor] menu, and then press [MENU/ SET]. Press 3/4 to select [Delete Log], and then press [MENU/SET]. Press 3/4 to select the recording start date, and press [MENU/SET]. •... -
Page 142: Using The Barometer
GPS/Sensor Using the barometer Applicable modes: With the current atmospheric pressure as a reference, it is 1013hPa 1013hPa 1013hPa displayed on the graph within the range of j10 hPa to _10 hPa. +10 hPa (Atmospheric pressure out of range cannot be displayed in -10 hPa details) A 24 hours earlier... - Page 143 GPS/Sensor ∫ About the measured altitude and atmospheric pressure • Altitude value may show errors depending on the change in atmospheric pressure compared to areas such as locations with altimeter reference signs. Perform frequently with [Adjust] in [Altimeter]. • Altitude announced onboard an airplane is measured using the atmospheric pressure surrounding the airplane.
-
Page 144: Using The Compass
GPS/Sensor Using the compass Applicable modes: 16 bearings are measured based on the direction the lens of North the camera is pointing in. • The colored portion of the compass needle points north. • When [GPS Setting] is set to [OFF], magnetic declination is not corrected. -
Page 145: Adjusting The Compass
GPS/Sensor Adjusting the compass When [ ] is displayed on the compass, perform [Calibrate compass]. Select [Calibrate compass] on the [GPS/Sensor] menu, and then press [MENU/SET]. Securely hold the unit vertically, and adjust by turning it in a figure of 8 by rolling your wrist a few times. -
Page 146: Playback/Editing
Playback/Editing Various methods of playback You can play back the recorded pictures in various methods. Press [(]. Press [MODE]. Press 3/4/2/1 to select item, and then press [MENU/SET]. • Following items can be selected. ] ([All]) (P42) ¢ ] ([2D/3D Settings]) ] ([Slide Show]) (P147) ] ([Filtering Play]) -
Page 147: [Slide Show]
Playback/Editing [Slide Show] Recorded pictures can be played back in fixed intervals in order along with music. It is also possible to playback only the still pictures, only the motion pictures, only the 3D pictures, or pictures recorded with the location name information or the altitude information, etc., as a slide show. - Page 148 Playback/Editing ∫ Changing the slide show settings By selecting [Setup] on the slide show menu screen, you can change the settings such as [Effect] and [Duration] for slide show playback. Settings Description of settings This allows you to select the screen effects or music effects when switching from one picture to the next.
-
Page 149: [Filtering Play]
Playback/Editing [Filtering Play] Pictures are classified into only still pictures, only motion pictures, or only 3D pictures etc., and played back. Settings Description of settings [Picture Only] Only still pictures are played back. [Video Only] Only motion pictures are played back. Only 3D pictures are played back. - Page 150 Playback/Editing ∫ To cancel filtering Press 3 while playing back one picture at a time. Press 3/4 to select [Filtering Off] and then press [MENU/SET]. • Filtering is also canceled by turning off the camera or switching to Recording Mode. Sorting by category to play back Press 3/4 to select [Category Selection] and then press [MENU/SET].
- Page 151 Playback/Editing You can play back pictures taken on each date Press 3/4 to select [Select Date] and then press [MENU/SET]. Press 3/4/2/1 to select the date to be played back, and then press [MENU/SET]. • If there were no pictures recorded during a month, that month is not displayed.
-
Page 152: [Calendar]
Playback/Editing [Calendar] You can search for images by recorded date. Press 3/4/2/1 to select the date you want to search. • If there were no pictures recorded during a month, that month is not displayed. Press [MENU/SET] to display the list of images. •... -
Page 153: Having Fun With Recorded Pictures (Retouch)
Playback/Editing Having Fun with Recorded Pictures (Retouch) You can adjust the color tone of the pictures taken, or add your preferred effects. • The processed pictures are newly generated, so be sure that you have enough space in the built-in memory or on the card. -
Page 154: [Creative Retouch]
Playback/Editing [Creative Retouch] You can add your desired effects to the pictures that you have taken. Press 2/1 to select an picture, and then press 3. • If you have filtered images for playback by using [Slide Show] (P147) or [Filtering Play] (P149), the selection screen appears. -
Page 155: [Color Reproduction]
Playback/Editing [Color Reproduction] You can recreate the red tinge of the pictures taken underwater. ¢ These pictures are examples to show the effect. Press 2/1 to select an picture, and then press 3. • If you have filtered images for playback by using [Slide Show] (P147) or [Filtering Play] (P149), the selection screen appears. -
Page 156: Using The [Playback] Menu
Playback/Editing Using the [Playback] Menu You can perform actions like cropping recorded pictures, as well as set up the protection of recorded images, etc. • With [Text Stamp], [Retouch], [Time Lapse Video], [Resize] or [Cropping] a new edited picture is created. - Page 157 Playback/Editing ∫ To pause the recording of location information Press [MENU/SET] while recording of the location information onto pictures is taking place. • During a suspended period, [±] is displayed. Select the period with [±] to restart the recording process from the picture you left off. ∫...
-
Page 158: [Title Edit]
Playback/Editing [Title Edit] You can add text (comments) to pictures. After text has been registered, it can be stamped in prints using [Text Stamp] (P160). Select [Title Edit] on the [Playback] menu. (P48) Press 3/4 to select [SINGLE] or [MULTI] and then press [MENU/SET]. [SINGLE] [MULTI] Select the picture, and then press... -
Page 159: [Place-Name Edit]
Playback/Editing [Place-Name Edit] Place name information can be written in images. Select [Place-Name Edit] on the [Playback] menu. (P48) Press 2/1 to select the picture, and then press [MENU/SET]. Press 3/4 to select the settings, and then press [MENU/SET]. Item Settings Display other candidates by searching within the database in this unit using the location information. -
Page 160: [Text Stamp]
Playback/Editing [Text Stamp] You can stamp the recording date/time, name, location, travel date, the location name or landmark name stored by the GPS function, etc., onto the recorded pictures. Select [Text Stamp] on the [Playback] menu. (P48) Press 3/4 to select [SINGLE] or [MULTI] and then press [MENU/SET]. [SINGLE] [MULTI] Select the picture, and then press... - Page 161 Playback/Editing Press 3/4 to select the settings, and then press [MENU/SET]. Item Setting item [W/O TIME]: Stamp the year, month and day. [WITH TIME]: [Shooting Date] Stamp the year, month, day, hour and minutes. [OFF] ([Face Recognition]) Name registered in Face Recognition will be stamped. ([Baby/Pet]) [Name] Stamps names registered in name settings for...
-
Page 162: [Retouch]
Playback/Editing Press [Q.MENU/ ]. Press 3 to select [OK], and then press [MENU/SET]. • Confirmation screen is displayed. It is executed when [Yes] is selected. Exit the menu after it is executed. • When you print pictures stamped with text, the date will be printed over the stamped text if you specify printing of the date at the photo shop or on the printer. -
Page 163: [Video Divide]
Playback/Editing [Video Divide] Recorded motion picture can be divided in two. It is recommended for when you want to divide a part you need with a part you do not need. It cannot be restored once divided. Select [Video Divide] on the [Playback] menu. (P48) Press 2/1 to select the motion picture to divide, and then press [MENU/ SET]. -
Page 164: [Time Lapse Video]
Playback/Editing [Time Lapse Video] This function allows you to create a motion picture from a picture group recorded with [Time Lapse Shot]. The created motion picture is saved in MP4 recording format. Select [Time Lapse Video] on the [Playback] menu. (P48) Press 2/1 to select the picture group from which you want to create a motion picture, and then press [MENU/SET]. -
Page 165: [Resize]
Playback/Editing [Resize] To allow easy posting to web pages, attachment to e-mail etc., picture size (number of pixels) is reduced. Select [Resize] on the [Playback] menu. (P48) Press 3/4 to select [SINGLE] or [MULTI] and then press [MENU/SET]. Select the picture and size. [SINGLE] setting Press 2/1 to select the picture, and then press [MENU/ SET]. -
Page 166: [Cropping]
Playback/Editing [Cropping] You can enlarge and then crop the important part of the recorded picture. Select [Cropping] on the [Playback] menu. (P48) Press 2/1 to select the picture, and then press [MENU/SET]. Use the zoom button and press 3/4/2/1 to select the parts to be cropped. -
Page 167: [Favorite]
Playback/Editing [Favorite] You can do the following if a mark has been added to pictures and they have been set as favorites. • Play back only the pictures set as favorites. ([Favorite] in [Filtering Play]) • Play back the pictures set as favorites only as a slide show. •... -
Page 168: [Print Set]
When you set [Print Set] for a group pictures, the print setting for the number of prints will be applied to every picture in the group. For more information visit: http://panasonic.jp/dc/dpof_110/white_e.htm Select [Print Set] on the [Playback] menu. (P48) Press 3/4 to select [SINGLE] or [MULTI] and then press [MENU/SET]. - Page 169 Playback/Editing ∫ Canceling all the [Print Set] settings Select [Print Set] on the [Playback] menu. Press 3/4 to select [CANCEL] and then press [MENU/SET]. • Confirmation screen is displayed. It is executed when [Yes] is selected. Exit the menu after it is executed. ∫...
-
Page 170: [Protect]
Playback/Editing [Protect] You can set protection for pictures you do not want to be deleted by mistake. Select [Protect] on the [Playback] menu. (P48) Press 3/4 to select [SINGLE] or [MULTI] and then press [MENU/SET]. [SINGLE] [MULTI] Select the picture, and then press [MENU/SET]. -
Page 171: [Face Rec Edit]
Playback/Editing [Face Rec Edit] You can delete or change the information relating to Face Recognition for the selected picture. Select [Face Rec Edit] on the [Playback] menu. (P48) Press 3/4 to select [REPLACE] or [DELETE] and then press [MENU/ SET]. Press 2/1 to select the picture and then press [MENU/SET]. -
Page 172: [Copy]
Playback/Editing [Copy] You can copy the data of the pictures you have taken from the built-in memory to a card or from a card to the built-in memory. Select [Copy] on the [Playback] menu. (P48) Press 3/4 to select the copy destination and then press [MENU/SET]. All the picture data in the built-in memory are copied onto the card at one time. -
Page 173: Wi-Fi
LAN devices, ensure that the appropriate measures are taken for safety designs and defects for the systems used. Panasonic will not take any responsibility for any damage that arises when using the camera for any purpose other than as a wireless LAN device. - Page 174 Wi-Fi ∫ Images that can be sent Destination Images to [AV device] [Smart [Cloud Sync. [Web send ¢1 [PC] [Printer] phone] Service] service] [Home] [External] ± ± ± ± ± ± ± JPEG ¢1 ± ± ± ± — — —...
-
Page 175: What You Can Do With The Wi-Fi Function
Wi-Fi What you can do with the Wi-Fi function Linking with the Wi-Fi compatible equipment allows you to remotely operate the camera, or share pictures with people in distant places even during recording or playing back. Remote Shooting (P176) Playback on TV (P188) Linking with a smartphone/tablet enables the By linking with the DLNA compatible TV, you... -
Page 176: Remote Shooting
Wi-Fi Remote Shooting You can remotely operate the camera using a smartphone/tablet. You need to install “Panasonic Image App” (referred to as “Image App” from this point on) on your smartphone/tablet. Installing the smartphone/tablet app “Image App” The “Image App” is an application provided by Panasonic. -
Page 177: Connecting To A Smartphone/Tablet
Wi-Fi Connecting to a smartphone/tablet For details on how to connect easily using the NFC function, refer to P182 Preparations: • Install the “Image App” in advance. (P176) Press [Wi-Fi]. Press 3/4/2/1 to select [New Connection], and then press [MENU/SET]. •... -
Page 178: Taking Pictures Via A Smartphone/Tablet (Remote Recording)
Wi-Fi ∫ Changing the connection method • When connecting with [Via Network] (On the camera) Press 3/4 to select [Via Network], and then press [MENU/SET]. Select the method for connecting to a wireless access point, and set. • Refer to P185 for details. -
Page 179: History Connection
Wi-Fi • Read the [Help] in the “Image App” menu for further details on how to operate. • To quit [Remote Shooting], press [Q.MENU/ • Caution: Be sure to pay special attention to the privacy, the likeness rights, etc. of the subject when you use this function. -
Page 180: Favorite Connection
Wi-Fi Registering to favorites If you register a frequently used Wi-Fi connection, you can quickly call it and connect. Press [Wi-Fi]. Press 3/4/2/1 to select [History Connection], and then press [MENU/SET]. Select the item you want to register to favorites with 3/4, and then press 1. - Page 181 Wi-Fi Editing the items registered to favorites Press [Wi-Fi]. Press 3/4/2/1 to select [Favorite Connection], and then press [MENU/SET]. Select the favorite item you want to edit with 3/4, and then press 1. Press 3/4 to select the item, and press [MENU/SET]. Item Description of settings [Remove from Favorite]...
-
Page 182: Connecting Easily To A Smartphone/Tablet (Nfc)
Wi-Fi Connecting Easily to a Smartphone/tablet (NFC) Using the NFC “Near Field Communication” function, you can easily transfer data necessary for a Wi-Fi connection between this camera and the smartphone/tablet. ∫ Compatible models This function can be used with the NFC compatible device with Android (OS version 2.3.3 or higher). -
Page 183: Transferring Images In This Camera To A Smartphone/Tablet One At A Time By Using The Nfc Function
Wi-Fi Transferring images in this camera to a smartphone/tablet one at a time by using the NFC function You can transfer pictures in this camera to the smartphone/tablet. This function is useful when you want to transfer an image to the smartphone/tablet of your family or friend. Preparation: (On the camera) •... -
Page 184: About Nfc
Wi-Fi About NFC • If the camera is not recognized even when touching the smartphone/tablet, change positions and try again. • Do not touch this camera to the smartphone/tablet strongly. • For information on the operation and settings of NFC-compatible smartphones/tablets, refer to the operating instructions of your device. -
Page 185: Selecting The Connection Method
Wi-Fi Selecting the connection method Connecting via a wireless access point You can select the method for connecting to a wireless access point. ¢ WPS refers to a function that allows you to easily configure the settings related to the connection and security of wireless LAN devices. To check if the wireless access point you are using is compatible with WPS, refer to the manual of the wireless access point. - Page 186 Wi-Fi If you are not sure about the WPS compatibility (connecting by [Manual Connection]) Search for available wireless access points. • Confirm encryption key of the selected wireless access point if the network authentication is encrypted. • When connecting by [Manual Input], confirm SSID, encryption type, encryption key of the wireless access point you are using.
-
Page 187: Connecting Directly
Wi-Fi Connecting directly You can select the method for connecting to the device you are using. Select the connection method supported by your device. Connection method Description of settings Set the device to Wi-Fi Direct mode. Press 3/4 to select [Wi-Fi Direct] and then press [MENU/ SET]. -
Page 188: Playback On Tv
Set the TV to DLNA waiting Mode. • Read the operating instructions for your TV. • For details on compatible devices, refer to the support sites below. http://panasonic.jp/support/global/cs/dsc/ (This Site is English only.) Press [Wi-Fi]. Press 3/4/2/1 to select [New Connection], and then press [MENU/SET]. - Page 189 Wi-Fi • Motion pictures cannot be played back. • During the multi/calendar playback, pictures displayed on the screen of this unit are not displayed on • When a TV is connected to this unit, the TV screen may temporarily return to the status before the connection.
-
Page 190: Send Images While Recording
Wi-Fi Send Images While Recording A picture can be automatically sent to a specified device every time you take it. Since the camera gives priority to recording, sending may take longer during the recording. • Motion pictures cannot be sent. •... - Page 191 Wi-Fi Selecting the method for connecting to the smartphone/tablet ∫ When you want to connect to the smartphone/tablet via a wireless access point (On your smartphone/tablet) On the setting menu of your smartphone/tablet, turn on the Wi-Fi function. Select the wireless access point you want to connect to, and set. ¢...
- Page 192 Wi-Fi Changing the settings for sending images Press 3/4 to select the item, and press [MENU/SET]. Item Description of settings Resize the image to send. ¢1 [Original]/[Auto] /[Change] • If you select [Auto], the image size is determined by the circumstances at [Size] the destination.
-
Page 193: When Sending Images To Pc
Wi-Fi When sending images to PC Preparations: • Turn the computer on. • Prepare folders for receiving images on the PC before sending a picture to the PC. (P194) • If the workgroup of the destination PC has been changed from the standard setting, you also need to change the setting of this unit in [PC Connection]. - Page 194 Wi-Fi To create a folder that receives images • Create a PC user account [account name (up to 254 characters) and password (up to 32 characters)] consisting of alphanumeric characters. An attempt to create a receive folder may fail if the account includes non-alphanumeric characters. ∫...
-
Page 195: When Sending Images To [Cloud Sync. Service]
Wi-Fi When sending images to [Cloud Sync. Service] Preparations: You need to register to “LUMIX CLUB” (P206) and configure the Cloud Sync. setting to send a picture to a Cloud Folder. Press [Wi-Fi]. Press 3/4/2/1 to select [New Connection], and then press [MENU/SET]. -
Page 196: When Sending Images To Web Service
Check this information before uploading images to WEB services. • Panasonic assumes no responsibility for the damages resulting from the leakage, loss, etc. of images uploaded on WEB services. •... -
Page 197: When Sending Images To Av Device
Wi-Fi When sending images to AV device Preparations: When sending a picture to [Home], set your device to DLNA waiting mode. • Read the operating instructions of your device for details. When sending images to [External], the following are required: •... -
Page 198: Send Images Stored In The Camera
Wi-Fi Send Images Stored in the Camera • When sending images on a mobile network, high packet communication fees may be incurred depending on the details of your contract. • Details of the playback menu [Favorite] or [Print Set] settings will not be sent. •... - Page 199 Wi-Fi Selecting the method for connecting to the smartphone/tablet ∫ When you want to connect to the smartphone/tablet via a wireless access point (On your smartphone/tablet) On the setting menu of your smartphone/tablet, turn on the Wi-Fi function. Select the wireless access point you want to connect to, and set. ¢...
- Page 200 Wi-Fi Select and send the images [SINGLE] setting [SINGLE] [MULTI] 1 Press 2/1 to select the picture. 2 Press [MENU/SET]. • Confirmation screen is displayed. It is executed when [Yes] is selected. [MULTI] setting 1 Select the picture, and then press [DISP.] Press 2/1 to select Press 3/4/2/1 to to set (repeat).
-
Page 201: When Sending Images To Pc
Wi-Fi When sending images to PC Preparations: • Turn the computer on. • Prepare folders for receiving images on the PC before sending a picture to the PC. (P194) • If the workgroup of the destination PC has been changed from the standard setting, you also need to change the setting of this unit in [PC Connection]. -
Page 202: When Sending Images To [Cloud Sync. Service]
Wi-Fi When sending images to [Cloud Sync. Service] Preparations: You need to register to “LUMIX CLUB” (P206) and configure the Cloud Sync. setting (P195) send a picture to a Cloud Folder. Press [Wi-Fi]. Press 3/4/2/1 to select [New Connection], and then press [MENU/SET]. -
Page 203: When Sending Images To Web Service
Check this information before uploading images to WEB services. • Panasonic assumes no responsibility for the damages resulting from the leakage, loss, etc. of images uploaded on WEB services. •... -
Page 204: When Sending Images To Av Device
Wi-Fi When sending images to AV device Preparations: When sending a picture to [Home], set your device to DLNA waiting mode. • Read the operating instructions of your device for details. When sending images to [External], the following are required: •... -
Page 205: When Sending Images To Printer
You can print out recorded pictures wirelessly from a PictBridge (wireless LAN-compatible) printer. ¢ Compliant with the DPS over IP standards. See the following website for information on the PictBridge (wireless LAN-compatible) printer. http://panasonic.jp/support/global/cs/dsc/ (This Site is English only.) Press [Wi-Fi]. Press 3/4/2/1 to select [New Connection], and then press [MENU/SET]. -
Page 206: Using "Lumix Club
You can set the same “LUMIX CLUB” login ID for this unit and a smartphone/tablet. (P208) Refer to the “LUMIX CLUB” site for details. http://lumixclub.panasonic.net/eng/c/ Please note; • The service may be suspended due to regular maintenance or unexpected troubles, and the service contents may be changed or added, without prior notice to the users. - Page 207 Wi-Fi Enter a password and press [MENU/SET]. • Enter any combination of 8 to 16 characters and numbers for the password. • “ ” For details on how to enter characters, refer to Entering Text section on P94. Check the login ID and press [MENU/SET]. •...
- Page 208 Wi-Fi To set the same login ID for the camera and the smartphone/tablet • Setting the same login ID on this unit and your smartphone/tablet is convenient for sending images on this unit to other devices or WEB services. When either this unit or the smartphone/tablet has acquired the login ID: Connect this unit to the smartphone/tablet.
-
Page 209: Using Web Services
“LUMIX CLUB”. Registering multiple WEB services will send images to all services simultaneously. • Check the “FAQ/Contact us” on the following site for compatible WEB services. http://lumixclub.panasonic.net/eng/c/lumix_faqs/ Preparation: Make sure that you have created an account on the WEB service you want to use, and have the login information available. -
Page 210: Configuring The External Av Device Settings
Images can be sent to the AV device of relatives and acquaintances via “LUMIX CLUB”. • See the following site for AV device that is compatible with “LUMIX CLUB”. http://panasonic.jp/support/global/cs/dsc/ (This Site is English only.) Preparation: Check the address number (16-digit number) and access number (4-digit number) of the destination AV device issued by “LUMIX CLUB”. -
Page 211: How To Use The [Wi-Fi Setup] Menu
Wi-Fi How to Use the [Wi-Fi Setup] Menu For details on how to select the [Wi-Fi] menu settings, refer to P48. Configure the settings required for the Wi-Fi function. [Wi-Fi Setup] cannot be changed when connected to Wi-Fi. Select [Wi-Fi Setup] in the [Wi-Fi] menu, and press [MENU/SET]. (P48) Press 3/4 to select item, and press [MENU/SET]. - Page 212 Wi-Fi To prevent incorrect operation or use of the Wi-Fi function by a third party and to protect saved personal information, it is recommended that you protect the Wi-Fi function with a password. Setting a password will automatically display the password input screen when the Wi-Fi function is used.
-
Page 213: Connecting To Other Equipment
Do not connect devices to incorrect terminals. Doing so may cause malfunction. To connect with an HDMI micro cable (optional) • Always use a genuine Panasonic HDMI micro cable (RP-CHEU15: optional). Part number: RP-CHEU15 (1.5 m) (5 feet) •... - Page 214 Connecting to other equipment Turn on the TV and select the input to match the terminal in use. Turn the camera on and then press [(]. • Depending on the [Aspect Ratio], black bands may be displayed on the top and bottom or the left and right of the pictures.
-
Page 215: Using Viera Link (Hdmi)
What is the VIERA Link (HDMI) (HDAVI Control™)? • This function allows you to use your remote control for the Panasonic TV for easy operations when this unit has been connected to a VIERA Link compatible device using an HDMI micro cable (optional) for automatic linked operations. - Page 216 Available linked operations between this unit and a Panasonic TV is different depending on the types of Panasonic TVs even if they are compatible with VIERA Link. Refer to the operating instructions of the TV for the operations that support on the TV.
-
Page 217: Playing Back 3D Pictures
SD card slot. For current information regarding devices that can play back 3D pictures recorded with this unit, please refer to the below support site. http://panasonic.jp/support/global/cs/dsc/ (This site is English only.) Preparations: Set [3D Playback] (P60) to [3D]. - Page 218 Pictures cannot be deleted when 3D pictures are being played back. The [Wi-Fi] menu, [Setup] menu, [GPS/Sensor] menu, [Playback] menu and Playback zoom functions cannot be used. • 3D pictures can be saved to your computer or Panasonic devices. (P219, 225) - 218 -...
-
Page 219: Saving Still Pictures And Motion Pictures On Your Pc
(Doing so will cause recorded images to be erased so do not choose to format.) If the card is not recognized, please refer to the below support site. http://panasonic.net/avc/sdcard/information/SDXC.html ∫ PC that can be used The unit can be connected to any PC capable of recognizing a mass storage device. -
Page 220: About The Supplied Software
Connecting to other equipment About the supplied software The supplied CD-ROM includes the following software. Install the software on to your computer before use. • PHOTOfunSTUDIO 9.1 PE (Windows XP/Vista/7/8) This software allows you to manage images. For example, you can send pictures and motion pictures to a PC and sort them by recording date or model name. - Page 221 Connecting to other equipment ∫ Installing supplied software • Before inserting the CD-ROM, close all running applications. Check the environment of your PC. • Operating environment of “PHOTOfunSTUDIO 9.1 PE” – Windows XP (32bit) SP3, Windows Vista (32bit) SP2, Windows 7 (32bit/64bit) or SP1 Windows 8 (32bit/64bit)
- Page 222 Doing so may cause malfunction. • Do not use any other USB connection cables except the supplied one or a genuine Panasonic USB connection cable (DMW-USBC1: optional). A USB connection cable (supplied) B Align the marks, and insert.
- Page 223 Connecting to other equipment ∫ Copying to a PC without using “PHOTOfunSTUDIO” If the installation of “PHOTOfunSTUDIO” fails, you can copy files and folders to your PC by dragging and dropping them from the camera after connecting to your PC. Directory structure of built-in memory/card of this unit is shown by the figure below.
- Page 224 Connecting to other equipment ∫ Disconnecting the USB connection cable safely Select the [ ] icon in task tray displayed on the PC, and then click [Eject DMC-XXX] (XXX varies by model). • Depending on your PC’s settings, this icon may not be displayed. •...
-
Page 225: Saving Still Pictures And Motion Pictures On A Recorder
Saving still pictures and motion pictures on a Recorder If you insert card holding content recorded with this unit into a Panasonic recorder, you can dub the content to a Blu-ray Disc or DVD etc. For details on Panasonic devices compatible with the respective file format (such as a Blu-ray Disc recorder), refer to the support sites below. -
Page 226: Printing The Pictures
Doing so may cause malfunction. • Do not use any other USB connection cables except the supplied one or a genuine Panasonic USB connection cable (DMW-USBC1: optional). A USB connection cable (supplied) B Align the marks, and insert. -
Page 227: Selecting A Single Picture And Printing It
Connecting to other equipment Selecting a single picture and printing it PictBridge Press 2/1 to select the picture and then press [MENU/ SET]. Press 3 to select [Print start] and then press [MENU/ SET]. • Refer to P228 for the items which can be set before starting to print the pictures. -
Page 228: Print Settings
Connecting to other equipment Print Settings Select and set the items both on the screen in step of the “Selecting a single picture and printing it” and in step of the “Selecting multiple pictures and printing them” procedures. • When you want to print pictures in a paper size or a layout which is not supported by the camera, set [Paper Size] or [Page Layout] to [{] and then set the paper size or the layout on the printer. - Page 229 Connecting to other equipment [Paper Size] Item Description of settings Settings on the printer are prioritized. [L/3.5qk5q] 89 mmk127 mm [2L/5qk7q] 127 mmk178 mm [POSTCARD] 100 mmk148 mm [16:9] 101.6 mmk180.6 mm [A4] 210 mmk297 mm [A3] 297 mmk420 mm [10k15cm] 100 mmk150 mm [4qk6q]...
- Page 230 Connecting to other equipment [Page Layout] (Layouts for printing that can be set with this unit) Item Description of settings Settings on the printer are prioritized. á 1 picture with no frame on 1 page â 1 picture with a frame on 1 page ã...
-
Page 231: Screen Display
Others Screen Display ∫ In recording 16 Number of days that have passed since the departure date (P52) Location (P52) Name (P91) (P91) Current date and time (P123, 124) Location name information 3s 3s 3s 3s “: World Time (P51) 1/60 1/60 1/60... - Page 232 Others ∫ In playback 17 Auto Retouch (P153) 1 2 3 4 Creative Retouch (P154) Underwater Color Reproduction (P155) 100 0001 100 0001 0001 Motion picture playback (P42) 3s 3s 3s 3s Play panorama (P86) Continuously Burst Picture Group Playback (P44) Continuously [Time Lapse Shot] Picture Group Playback...
-
Page 233: Cautions For Use
Waterproofing is not guaranteed if the unit is subject to an impact as a result of being hit or dropped etc. If an impact to the camera occurs, it should be inspected (subject to a fee) by Panasonic to verify that the waterproofing is still effective. - Page 234 Others When using in a cold climate or at low temperatures • It may cause injury to the skin if you directly touch the metal parts of the unit in places where temperature is very low [environments under 0 oC (32 oF), such as ski resorts or places at high altitude] for a long period of time.
- Page 235 Others Optimal use of the camera Keep this unit as far away as possible from electromagnetic equipment (such as microwave ovens, TVs, video games etc.). • If you use this unit on top of or near a TV, the pictures and/or sound on this unit may be disrupted by electromagnetic wave radiation.
- Page 236 Others Cleaning Before cleaning the camera, remove the battery or the DC coupler (optional), or disconnect the power plug from the outlet. Then wipe the camera with a soft, dry cloth. • When the camera is soiled badly, it can be cleaned by wiping the dirt off with a wrung wet cloth, and then with a dry cloth.
- Page 237 Others About the lens, the microphone, and the speaker • Do not press the lens with excessive force. • Do not leave the camera with the lens facing the sun as rays of light from the sun may cause it to malfunction.
- Page 238 Others Charger • The [CHARGE] indicator may blink under the influence of static electricity or electromagnetic wave. This phenomenon have no effects on charging. • If you use the battery charger near a radio, the radio reception may be disturbed. •...
- Page 239 Information including personal information may be altered or vanish due to erroneous operation, effect of static electricity, accident, malfunction, repair, or other handlings. Please note in advance that Panasonic is not liable in any way for any direct or indirect damage from the alteration or vanishing of information or personal information.
- Page 240 About the picture data Recorded data may be damaged or lost if the camera breaks down due to inappropriate handling. Panasonic will not be liable for any damage suffered due to loss of recorded data. About tripods or unipods •...
- Page 241 No Warranty. This Data is provided to you “as is,” and you agree to use it at your own risk. Panasonic Corporation and its licensors (and their licensors and suppliers) make no guarantees,...
- Page 242 Export Control. Panasonic Corporation shall not export from anywhere any part of the Data or any direct product thereof except in compliance with, and with all licenses and approvals required under, applicable export laws, rules and regulations, including but not limited to the laws, rules and regulations administered by the Office of Foreign Assets Control of the U.S.
- Page 243 Others About location information/place name information About the geographical coordinate system The latitude and longitude standard (geographical coordinate system) recorded with this camera is WGS84. About copyright According to copyright law, the map data stored in this camera may not be used for purposes other than personal use without the permission of the copyright holder.
- Page 244 Others Territory Notice C Bundesamt für Eich- und Vermessungswesen Austria C EuroGeographics Croatia Belgium Traffic Codes for Belgium are provided by the Ministerie van de Vlaamse (If using Traffic Gemeenschap and the Ministèrie de l’Equipement et des Transports. Codes for Belgium) C EuroGeographics Cyprus C EuroGeographics...
- Page 245 Others Territory Notice CUnited States Postal ServiceR 2012. Prices are not established, United States controlled or approved by the United States Postal ServiceR. The following trademarks and registrations are owned by the USPS: United States Postal Service, USPS, and ZIP+4. Australia Copyright.
- Page 246 Others ∫ Landmark types The following points of interest, such as tourist spots and public facilities, are displayed as landmarks. • Although approx. 1,000,000 landmarks, are registered in the built-in memory, there are some unregistered landmarks. (The registered information is current as of October 2012 and will not be updated.) •...
-
Page 247: Message Display
Others Message Display Confirmation messages or error messages will be displayed on the screen in some cases. The major messages are described below as examples. [GPS feature is not available in this region.] • The GPS may not operate in China or close to the Chinese border in neighbouring countries. (As of January 2013) [This picture is protected] >... - Page 248 • This message will be displayed when the lens did not operate properly. > Turn the camera off and on. If the message persists, contact the dealer or Panasonic. [Memory Card Error]/[Memory card parameter error]/[This memory card cannot be used] >...
- Page 249 3D. [This battery cannot be used] • Use a genuine Panasonic battery. If this message is displayed even when a genuine Panasonic battery is used, contact the dealer or Panasonic. • If the battery terminal is dirty, clean it and remove any objects.
- Page 250 Others [Connection failed. Please retry in a few minutes.]/[Network disconnected. Transfer stopped.] • Radio waves from the wireless access point are getting weak. Perform the connection closer to the wireless access point. • There is no reply from the server or it has exceeded the communication processing time. Try again after a while.
-
Page 251: Troubleshooting
Others Troubleshooting First, try out the following procedures (P251–266). If the problem is not resolved, it may be improved by selecting [Reset] (P58) on the [Setup] menu. Battery and power source The camera cannot be operated even when it is turned on. The camera turns off immediately after it is turned on. - Page 252 Others About the GPS Positioning is not possible. • [GPS Setting] is set to [OFF]. (P122) • Radio waves from GPS satellites may not be received depending on the recording environment, such as indoors or close to a building. (P121) >...
- Page 253 Others Recording The picture cannot be recorded. • Is there any memory remaining on the built-in memory or the card? > Delete the pictures which are not necessary to increase the available memory. (P46) • You may not be able to record for a short while after turning this unit on when using a large capacity card.
- Page 254 Others Taking pictures using Auto Bracket is not possible. • Is there any memory remaining on the built-in memory or the card? The recorded picture looks rough. Noise appears on the picture. • Is the ISO sensitivity high or the shutter speed slow? (ISO sensitivity is set to [AUTO] when the camera is shipped.
- Page 255 Others Motion Picture Recording stops in the middle. • Use a card with SD Speed Class with “Class 4” or higher when recording motion pictures. • Depending on the type of the card, recording may stop in the middle. > If Motion Picture Recording stops during use of a card of at least “Class 4” or if you use a card that has been formatted on a PC or other equipment, the data-writing speed is lower.
- Page 256 Others LCD monitor The LCD monitor becomes darker or brighter for a moment. • This phenomenon appears when you press the shutter button halfway to set the aperture value and does not affect the recorded pictures. • This phenomenon also appears when the brightness changes when the camera is zoomed or when the camera is moved.
- Page 257 Others Playback The picture being played back is rotated and displayed in an unexpected direction. • [Rotate Disp.] (P60) is set to [ ] or [ The picture is not played back. The recorded pictures are not displayed. • Is there a picture on the built-in memory or the card? >...
- Page 258 Others White round spots like soap bubbles appear on the recorded picture. • If you take a picture with the flash in a dark place or indoors, white round spots may appear on the picture caused by the flash reflecting of particles of dust in the air.
- Page 259 Others About the Wi-Fi function It cannot connect to the wireless LAN. Radio waves get disconnected. • Use within the communication range of the wireless LAN network. • Connection types and security setting methods are different depending on the wireless access point. >...
- Page 260 I have forgotten the login ID or password for the “LUMIX CLUB”. • Check the information in the login screen of “LUMIX CLUB”. http://lumixclub.panasonic.net/eng/c/ I do not have a wireless access point at my home, but I would like to perform service user registration of the “LUMIX CLUB”.
- Page 261 Others The image that was supposed to have uploaded to the WEB service is not there. • Upload may not complete when it is disconnected while transmitting the image. • It may take some time after uploading the image to be reflected in the WEB service depending on the status of the server.
- Page 262 Others Motion picture cannot be transmitted. • File format of the motion picture that can be sent differs depending on the destination. (P174) • Is the size of the image too large? > Transmit after dividing the motion picture with [Video Divide] (P163). I cannot send images to an AV device.
- Page 263 Others TV, PC and printer The picture does not appear on the television. • Is the camera connected to the TV correctly? > Set the TV input to External Input Mode. The display areas on the TV screen and the camera’s LCD monitor are different. •...
- Page 264 The card is not recognized by the PC. (SDXC memory card is used.) > Check if your PC is compatible with SDXC memory cards. http://panasonic.net/avc/sdcard/information/SDXC.html > A message prompting to format the card may be displayed when connecting, but do not format.
- Page 265 Others Others [Requirements for Underwater use] is displayed repeatedly whenever this unit is turned on. • Press [MENU/SET] after viewing the last screen (12/12). For details, refer to P11. An unreadable language was selected by mistake. > Press [MENU/SET], select the [Setup] menu icon [ ].
- Page 266 Others The lens clicks. • When the brightness changes due to zoom or camera movement etc., the lens may click and the picture on the screen may drastically change. However, the picture is not affected. The sound is caused by the automatic adjustment of the aperture. This is not a malfunction. The clock is reset.
- Page 267 • SDXC Logo is a trademark of SD-3C, LLC. • “AVCHD”, “AVCHD Progressive” and the “AVCHD Progressive” logo are trademarks of Panasonic Corporation and Sony Corporation. • Manufactured under license from Dolby Laboratories. Dolby and the double-D symbol are trademarks of Dolby Laboratories.
- Page 268 This product incorporates the following software: (1) the software developed independently by or for Panasonic Corporation, (2) the software owned by third party and licensed to Panasonic Corporation and/or, (3) open sourced software including the software developed by the OpenSSL Project for use in the OpenSSL Toolkit (http://www.openssl.org/), and the software written by Eric Young...
- Page 269 Others This product includes cryptographic software written by Eric Young (eay@cryptsoft.com). This product includes software written by Tim Hudson (tjh@cryptsoft.com). Original SSLeay License Copyright (C) 1995-1998 Eric Young (eay@cryptsoft.com) All rights reserved. This package is an SSL implementation written by Eric Young (eay@cryptsoft.com). The implementation was written so as to conform with Netscapes SSL.
- Page 270 Others This product contains encryption software developed by Eric Young, and can be used under the following licencing conditions. Copyright (C) 1995-1998 Eric Young (eay@cryptsoft.com) All rights reserved. This package is an SSL implementation written by Eric Young (eay@cryptsoft.com). The implementation was written so as to conform with Netscapes SSL. This library is free for commercial and non-commercial use as long as the following conditions are adhered to.
- Page 271 Others This product contains NetBSD software, and can be used under the following licencing conditions. Copyright (c) 1990 The Regents of the University of California. All rights reserved. This code is derived from software contributed to Berkeley by Chris Torek. Redistribution and use in source and binary forms, with or without modification, are permitted provided that the following conditions are met: Redistributions of source code must retain the above copyright notice, this list of conditions and...
- Page 272 Others This product contains OpenSSL software developed by the OpenSSL Project, and can be used under the following licencing conditions. Copyright (c) 1999-2002 The OpenSSL Project. All rights reserved. Redistribution and use in source and binary forms, with or without modification, are permitted provided that the following conditions are met: Redistributions of source code must retain the above copyright notice, this list of conditions and the following disclaimer.
- Page 273 Others This product contains encryption software developed by Eric Young, and can be used under the following licencing conditions. Copyright (C) 1995-1998 Eric Young (eay@cryptsoft.com) All rights reserved. This package is an SSL implementation written by Eric Young (eay@cryptsoft.com). The implementation was written so as to conform with Netscapes SSL. This library is free for commercial and non-commercial use as long as the following conditions are adhered to.
- Page 274 Others This product contains NetBSD software, and can be used under the following licencing conditions. Copyright (c) 1990 The Regents of the University of California. All rights reserved. This code is derived from software contributed to Berkeley by Chris Torek. Redistribution and use in source and binary forms, with or without modification, are permitted provided that the following conditions are met: Redistributions of source code must retain the above copyright notice, this list of conditions and...
- Page 275 Others This product contains NetBSD software, and can be used under the following licencing conditions. Copyright (c) 1989 The Regents of the University of California. All rights reserved. This code is derived from software contributed to Berkeley by Tom Truscott. Redistribution and use in source and binary forms, with or without modification, are permitted provided that the following conditions are met: Redistributions of source code must retain the above copyright notice, this list of conditions and...
- Page 276 Others This product contains NetBSD software, and can be used under the following licencing conditions. Copyright (c) 1990, 1993 The Regents of the University of California. All rights reserved. This code is derived from software contributed to Berkeley by Chris Torek. Redistribution and use in source and binary forms, with or without modification, are permitted provided that the following conditions are met: Redistributions of source code must retain the above copyright notice, this list of conditions and...
- Page 277 This product contains XML parser library, and can be used under the following licencing conditions. Copyright (c) 1998, 1999, 2000 Thai Open Source Software Center Ltd Permission is hereby granted, free of charge, to any person obtaining a copy of this software and associated documentation files (the "Software"), to deal in the Software without restriction, including without limitation the rights to use, copy, modify, merge, publish, distribute, sublicense, and/or sell copies of the Software, and to permit persons to whom the Software is furnished to do so, subject to...