
Related Manuals for Yamaha Portable Grand DGX-640


Summary of Contents for Yamaha Portable Grand DGX-640
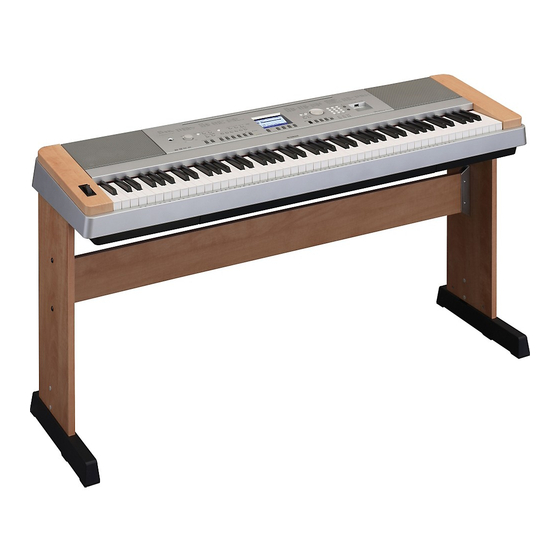
- Page 1 Owner’s Manual Keyboard Stand Assembly For information on assembling the keyboard stand, refer to the instructions on page 10 of this manual.
- Page 2 This product should be used only with the components supplied or; a never mix different types of batteries. Batteries MUST be installed cor- cart, rack, or stand that is recommended by Yamaha. If a cart, etc., is rectly. Mismatches or incorrect installation may result in overheating and used, please observe all safety markings and instructions that accom- battery case rupture.
- Page 3 Yamaha Music U.K. Ltd. Serial No. (bottom) COMPLIANCE INFORMATION STATEMENT (DECLARATION OF CONFORMITY PROCEDURE) Responsible Party : Yamaha Corporation of America Address : 6600 Orangethorpe Ave., Buena Park, Calif. 90620 Telephone : 714-522-9011 Type of Equipment : Digital Piano Model Name : DGX-640 This device complies with Part 15 of the FCC Rules.
- Page 4 AC outlet. Then have the instrument inspected by qualified Yamaha service personnel. • Only use the voltage specified as correct for the instrument. The required voltage is printed on the name plate of the instrument.
-
Page 5: Saving Data
• This product incorporates and bundles computer programs and contents in which Yamaha owns copyrights or with respect to which it has license to use others’ copyrights. Such copyrighted materials include, without limitation, all computer software, style files, MIDI files, WAVE data, musical scores and sound recordings. - Page 6 The instrument is capable of displaying lyrics when an XF file containing lyric data is played. STYLE FILE The Style File Format is Yamaha’s original style file format which uses a unique conversion system to provide high-quality automatic accompaniment based on a wide range of chord types. Owner’s Manual...
-
Page 7: About This Owner's Manual And Data List
The MIDI Reference section contains MIDI related information. The MIDI Reference is available for downloading from the Yamaha Manual Library at: http://www.yamaha.co.jp/manual/ Included Accessories The DGX-640 package includes the following items. Please check that you have them all. • Music rest • AC Power Adaptor * May not be included depending on your particular area. -
Page 8: Special Features
The keyboard’s sensitivity can even be adjusted to match your playing style. This Graded Hammer technology also enables the DGX-640 to provide authentic touch in a lightweight instrument. Performance assistant technology Page 43 Play along with a song on the instrument’s keyboard and produce a perfect per-... -
Page 9: Table Of Contents
Contents About this Owner’s Manual and Data List ......7 Adding DSP ..............67 Included Accessories ............7 Panel Sustain ..............68 Special Features ..............8 Pitch Bend..............68 Select an EQ Setting for the Best Sound .......69 Handy Performance Features Setting Up Tap Start ................70 Setting Up One Touch Setting ............70 Setting the Click bell sound..........70... -
Page 10: Setting Up
Setting Up Setting Up Keyboard Stand Assembly CAUTION Read these cautions carefully before you assemble or use the keyboard stand. These cautions are to promote safe use of the stand and to prevent injury and damage from occurring to you and others. By fol- lowing these cautions carefully, your keyboard stand will provide you with safe and prolonged use. - Page 11 Setting Up Attach the stand bases. Insert the joint connectors into the side boards as shown. The joint connectors have been installed properly if you can see the screw head on the con- Joint nector. connectors NOTE • If you put the connectors in wrong direction and want to take them out, tap around the holes on the boards.
- Page 12 Setting Up Put the keyboard on the stand. Check the back-to-front orientation for stand, and Be sure to place your hands at carefully place the keyboard on the side boards. least 10 cm from either end of the Slowly move the keyboard so that the holes on the keyboard when positioning it.
-
Page 13: Power Requirements
Setting Up Be sure to do the following operations BEFORE turning on the power. Power Requirements Make sure that the [ ](Standby/On) switch of the instrument is in the “Standby” position. WARNING • Use the specified adaptor (page 112). The use of other adaptors may result in irreparable damage to both the adaptor and the instrument. -
Page 14: Connecting A Pedal Unit (Pedal Unit Jack)
Setting Up Connecting a Pedal Unit (PEDAL UNIT jack) This jack is for connecting an optional LP-7A pedal unit. When connecting the pedal unit, make sure to also assemble the unit on the supplied keyboard stand. NOTE • Make sure that power is OFF when connecting or disconnect- ing the pedal. -
Page 15: Connecting To A Computer (Usb Terminal)
Setting Up Connecting to a Computer (USB Terminal) Connect the instrument’s USB terminal to the USB terminal of a computer, and you can transfer perfor- mance data and song files between the two (page 97). Turning the Power On The [ ](Standby/On) switch turns the power to the Backup data in the flash memory is loaded to the instrument on (... -
Page 16: Panel Controls And Terminals
Panel Controls and Terminals Front Panel Song List Style List (Data List) (Data List) Front Panel !4 STYLE ](Standby/On) switch...... page 15 w [MASTER VOLUME] control ....page 15 [ACMP ON/OFF] button....page 25 e [DEMO/BGM] button ....pages 31, 85 [INTRO/ENDING/rit.] button ..... -
Page 17: Rear Panel
Panel Controls and Terminals Display Voice List Music Database List (page 36) (Data List) (Data List) !7 !8 @7 @8 @9 Rear Panel Rear Panel #3 CONTRAST knob .........page 37 #6 PEDAL UNIT jack ......... page 14 #4 USB TO HOST terminal......page 97 #7 PHONES/OUTPUT jack...... -
Page 18: Quick Guide
Try Playing a Variety of Instrument Voices Quick Guide In addition to piano, organ, and other “standard” keyboard instruments, this instru- ment has a large range of voices that includes guitar, bass, strings, sax, trumpet, drums and percussion, sound effects … a wide variety of musical sounds. Select and Play a Voice—MAIN This procedure selects the main voice you will play on the keyboard. -
Page 19: Play The Grand Piano Voice
Try Playing a Variety of Instrument Voices Play the keyboard. NOTE • Voice Settings (page 72) Adjusts volume. Try selecting and playing a variety of voices. Press the [EXIT] button to return to the MAIN display. Preset Voice Types 001–142 Instrument Voices 155–535 Various drum and percussion sounds are assigned to... -
Page 20: Play Two Voices Simultaneously-Dual
Try Playing a Variety of Instrument Voices Play Two Voices Simultaneously—DUAL Once you press the [DUAL ON/OFF] button to turn the dual function on, a second voice will sound that will play in addition to the main voice when you play the keyboard. The second voice is known as the “dual”... -
Page 21: Play Different Voices With The Left And Right Hands-Split
Try Playing a Variety of Instrument Voices Play Different Voices with the Left and Right Hands—SPLIT Once you press the [SPLIT ON/OFF] button to turn the split function on, you can play different voices to the left and right of the keyboard “split point”. The main and dual voices can be played to the right of the split point, while the voice played to the left of the split point is known as the “split voice”. -
Page 22: The Metronome
The Metronome The instrument includes a metronome with adjustable tempo and time signature. Play and set the tempo that is most comfortable for you. Start the Metronome Turn the metronome on and start it by pressing the [METRONOME ON/OFF] button. To stop the metronome, press the [METRONOME ON/OFF] button again. -
Page 23: Setting The Time Signature
The Metronome Setting the Time Signature In this example we’ll set up a 5/8 time signature. Press and hold the [METRONOME ON/OFF] button for longer than a second to select the function “Time Signature–Numerator” . Numerator Denominator (Number of beats (The length of Hold for longer per measure.) -
Page 24: Playing Styles
Playing Styles This instrument has an auto accompaniment feature that produces accompaniment (rhythm + bass + chords) in the style you choose to match chords you play with your left hand. You can select from 165 different styles covering a range of musical genres and time signatures. -
Page 25: Play Along With A Style
Playing Styles Play Along with a Style You learned how to select a style rhythm on the preceding page. Here we’ll see how to add bass and chord accompaniment to the basic rhythm to produce a full, rich accompaniment that you can play along with. -
Page 26: Start Playing
Playing Styles Start playing. NOTE Style playback will begin as soon as you play a chord in the accompa- • Chords (page 27) niment range of the keyboard. Try playing the chord progression • Looking Up Chords Using shown below. The accompaniment will change according to the left- the Chord Dictionary (page hand notes you play. - Page 27 Playing Styles Chords For users who are new to chords, this chart features common chords. Since there are many useful chords and many different ways to use them musically, refer to commercially available chord books for further details. indicates the root note. Major Minor Seventh...
-
Page 28: Playing Songs
Playing Songs With this instrument the term “song” refers the data that makes up a piece of music. You can simply enjoy listening to the 30 internal songs, or use them with just about any of the many functions provided—the performance assistant technology feature, les- sons, and more. - Page 29 Playing Songs The songs are organized by category. • The songs in this category have been created to give you an idea of the advanced capabilities of this instrument. • These songs features some of the instrument’s many useful voices. •...
-
Page 30: Select And Play Songs On A Usb Flash Memory
Playing Songs Select and Play Songs on a USB Flash Memory MIDI songs stored on a USB flash memory connected to the instrument can be directly selected and played. The procedure is exactly the same as that for selecting internal songs (page NOTE •... -
Page 31: Song Fast Forward, Fast Reverse, And Pause
Playing Songs Song Fast Forward, Fast Reverse, and Pause These are just like the transport controls on a cassette deck or CD player, letting you fast forward [FF], rewind [REW] and pause [PAUSE] playback of the song. When lit the functions indi- cated by the labels above the buttons can be used. -
Page 32: Displaying The Song Score
Playing Songs Displaying the Song Score This instrument is capable of display the scores of songs. Scores are displayed for the 30 internal preset songs as well as songs in SMF format stored in a USB flash memory or the instrument’s internal flash memory. Select a song. -
Page 33: Display The Lyrics
Playing Songs Display the Lyrics If a song contains lyric data, the lyrics can be made to appear on the display. No lyrics will be displayed for a song that contains no lyric data even if the [LYRICS] button is pressed. -
Page 34: Reference
Basic Operation Reference Basic Operation Overall DGX-640 control is based on the following simple operations. Press a button to select a basic function. Use the dial to select an item or value. Start a function. Start a function. Select a basic function. - Page 35 Basic Operation Use the dial to select an item or value. When you select a basic function, the item corresponding to that function will be listed in the display. You can then use the The currently selected item dial or the number buttons [0]–[9] to select is highlighted in the display.
-
Page 36: The Displays
Basic Operation The Displays Display Names All operations are carried out while watching the display. A number of display types are provided for different modes and functions. The name of the current display appears at the top of the display. MAIN Display Title To Return To the MAIN Display... -
Page 37: Main Display Items
Basic Operation MAIN Display Items The MAIN display shows all of the current basic settings: song, style, voice. It also includes a range of indicators that show the on/off status of a range of functions. * Adjust the LCD CONTRAST control on the rear panel of the instrument for optimum display legibility. -
Page 38: Select A Song For A Lesson
Select a Song For a Lesson Yamaha Education Suite You can select song you like and use it for a left-hand, right-hand, or both-hands les- son. During the lesson you can play as slowly as you like, and you can even play wrong notes. - Page 39 The displayed range (61 keys) Actual keyboard range (DGX-640 = 88 keys) 61 keys of the keyboard’s range are shown on the display. The DGX-640 actu- ally have 88 keys. In some songs that include very high or low notes, those notes may fall outside the displayed range and may not be shown on the display.
- Page 40 Select a Song For a Lesson Lesson 2—Your Tempo Learn to play the correct notes with the correct timing. Song playback tempo will vary to match the speed you are playing at. The song will slow down when you play wrong notes, so you can learn at your own pace. Select the song and part you want to practice (steps 1 and 3 on page 38).
- Page 41 Select a Song For a Lesson Lesson 3—Minus One Here’s where you can perfect your technique. The song will play at the normal tempo, minus the part you have chosen to play. Play along while listening to the song. Select the song and part you want to practice (steps 1 and 3 on page 38).
- Page 42 Select a Song For a Lesson NOTE • The evaluation feature can See How You’ve Done be turned off via the FUNC- When the lesson song has played all the way through your performance will be TION Grade item (page 88). evaluated in 4 levels: OK, Good, Very Good, or Excellent.
-
Page 43: The Easy Way To Play Piano
The Easy Way to Play Piano This instrument includes a performance assistant technology feature that lets you play along with a song and sound like a great pianist (even though you might be making lots of mistakes)! In fact, you can play any notes and still sound good! You could even just tap one key and the results would be a beautiful melody. - Page 44 The Easy Way to Play Piano CHORD Type—Play with Both Hands Try out the performance assistant technology using the preset song “Ave Maria.” Press the [P.A.T. ON/OFF] button. This turns on the performance assistant technology feature. The currently selected type is shown in the MAIN display when the perfor- mance assistant technology feature is on.
- Page 45 The Easy Way to Play Piano Play on the keyboard. Before After NOTE Try playing the score on the left with both hands. You can even play the same • The score for Ave Maria is keys over and over: C, E, G, C, E, G, C, E. You’ll notice that at measure five the provided in the separate notes will come out according to the score on the right.
- Page 46 The Easy Way to Play Piano CHORD/FREE Type—Applying the Chord Type to the Left Hand Only Try out the performance assistant technology using the preset song “Nocturne.” Press the [P.A.T. ON/OFF] button. This turns on the performance assistant technology feature. The currently selected type is shown in the MAIN display when the perfor- mance assistant technology feature is on.
- Page 47 The Easy Way to Play Piano Play on the keyboard. Play to the right of the split point with your right hand, and to the left of the split point with your left hand. Split point With this type notes played on the left-hand side of the split point will actually sound an octave higher.
- Page 48 The Easy Way to Play Piano MELODY Type—Play with One Finger Press the [P.A.T. ON/OFF] button. This turns on the performance assistant technology feature. The currently selected type is shown in the MAIN display when the perfor- mance assistant technology feature is on. The currently selected type Select the MELODY type.
- Page 49 The Easy Way to Play Piano Play on the keyboard. The marker will indicate the current position in the score during playback. If you play a key each time the marker appears above a note in the score you will be able to play the melody with the correct “original” rhythm. Appears when the performance assistant technology is on ...
- Page 50 The Easy Way to Play Piano CHORD/MELODY—Chord Type with the Left Hand, Melody with the Right Press the [P.A.T. ON/OFF] button. This turns on the performance assistant technology feature. The currently selected type is shown in the MAIN display when the perfor- mance assistant technology feature is on.
- Page 51 The Easy Way to Play Piano Play on the keyboard. Play to the right of the split point with your right hand, and to the left of the split point with your left hand. Appears when the performance assistant technology is on ...
- Page 52 The Easy Way to Play Piano Use the Performance Assistant to Play Like a Pro! Here are a few hints for using the Chord type. If you select Chord/Free or Chord/Melody, the left-hand section of the keyboard becomes the Chord type sec- tion, so use these hints on the left-hand section of the keyboard.
-
Page 53: Play Using The Music Database
Play Using the Music Database You want to play music in your favorite style, but you’re not sure how to select the best voice and style for the type of music you want to play ... simply select the appropriate style from the Music Database. -
Page 54: Change A Song's Style
Change a Song’s Style In addition to each song’s default style, you can select any other style to play the song with the Easy Song Arranger feature. This means that you can play a song that is nor- mally a ballad, for example, as a bossa nova, as a hip-hop tune, etc. You can create totally different arrangements by changing the style with which a song is played. - Page 55 Change a Song’s Style Select a style. Press the [STYLE] button and then rotate the dial to hear how the song sounds with different styles. As you select different styles the song will remain the same while only the styles change. Changing a song melody voice.
-
Page 56: Record Your Own Performance
Record Your Own Performance You can record up to 5 of your own performances and save them as user songs 031 through 035. Once your performances have been saved as user songs they can be played in the same way as the internal songs. User songs can also be saved to a USB flash memory device, as described on page 94. - Page 57 Record Your Own Performance Recording to a specified track NOTE Recordable Data • Up to approximately 30,000 You can record up to a total of 6 tracks: 5 melody tracks and 1 style (chord) notes can be recorded for the five user songs if you track.
- Page 58 Record Your Own Performance Record a Melody track NOTE Press the melody track button [1]–[5] you want to record to while holding the • If style accompaniment is on [REC] button. Select button [1]–[3] if you want to record a dual voice. Split and track [A] has not yet voices cannot be recorded.
- Page 59 Record Your Own Performance NOTICE Save the song. • The recorded Song data When recording is stopped a message asking if you want to save the song will will be lost if you turn the appear. Press the [+/YES] button to save the song, or the [-/NO] button if you power to the instrument off without executing the Save don’t want to save the song.
- Page 60 Record Your Own Performance Song Clear—Deleting User Songs This function clears an entire user song (all tracks). NOTE • If you only want to clear a specific track from a user From the MAIN display select the user song (031–035) you want song use the Track Clear function.
- Page 61 Record Your Own Performance Track Clear—Deleting a Specified Track from a User Song This function lets you delete a specified track from a user song. From the MAIN display select the user song (031–035) you want to clear. Press and hold the track button ([1]–[5], [A]) corresponding to the track you want to clear for longer than a second.
-
Page 62: Memorize Your Favorite Panel Settings
Memorize Your Favorite Panel Settings This instrument has a Registration Memory feature that lets you save your favorite set- tings for easy recall whenever they’re needed. Up to 32 complete setups can be saved (8 banks of four setups each). 8 Banks Up to 32 presets (eight banks of four each) -
Page 63: Recalling A Registration Memory
Memorize Your Favorite Panel Settings Recalling a Registration Memory Press the [BANK] button. A bank number will appear in the dis- play when you release the button. Bank number Use the dial or the [1]–[8] number buttons to select bank you want to recall. -
Page 64: Backup And Initialization
Backup and Initialization Backup The following settings are always backed up, and are maintained even when the power is turned off. If you want to initialize the settings, use the Initialize operation “Backup Clear” as explained below. NOTE The Backup Parameters •... -
Page 65: Play With A Variety Of Effects
Play with a Variety of Effects Adding Harmony This feature adds harmony notes to the main voice. Press the [HARMONY ON/OFF] button Use the dial to select a harmony type. to turn Harmony feature on. Refer to the Effect Type List in the separate Data List for information about the available harmony To turn Harmony off, press the [HARMONY types. -
Page 66: Adding Reverb
Play with a Variety of Effects Adding Reverb Adding Chorus Reverb lets you play with a rich concert hall type The chorus effect creates a thick sound that is similar ambience. When you select a style or song the opti- to many of the same voices being played in unison. -
Page 67: Adding Dsp
Play with a Variety of Effects Adding DSP DSP is term of abbreviated form of Digital Signal Processor. The DSP effect can be added to the Main and Dual Voices. These range from reverb-like ambience effects to distortion and other dynamic processing tools that let you enhance the sound, or completely transform it. -
Page 68: Panel Sustain
Play with a Variety of Effects Panel Sustain Pitch Bend This function adds sustain to the keyboard voices. Use The pitch bend wheel can be used to add smooth pitch it when you want to add sustain to the voices at all variations to notes you play on the keyboard. -
Page 69: Select An Eq Setting For The Best Sound
Play with a Variety of Effects Select an EQ Setting for the Best Sound Five different master equalizer (EQ) settings are provided to give you the best possible sound when listening through different reproduction systems—the instrument’s internal speakers, headphones, or an external speaker system. -
Page 70: Handy Performance Features
Handy Performance Features Tap Start Setting the Click bell sound You can start the song/style by simply tapping the This allows you to select whether the click sound has [TEMPO/TAP] button at the required tempo—4 times a bell accent, or plays only a click sound. for time signatures in 4, and three times for time sig- Press the [FUNCTION] button. -
Page 71: Adjusting The Metronome Volume
Handy Performance Features Adjusting the Metronome Volume Changing the Display Language Press the [FUNCTION] button. This instrument allows you to select English or Japa- nese as the display language. The default display lan- guage is English, but if you switch to Japanese the lyrics, file names, and some messages will be dis- played in Japanese where appropriate. -
Page 72: Voice Settings
Voice Settings Voice Editing Category Function Item Range/Settings Main Volume 000–127 Create original voices by editing the many available Main Octave -2–+2 voice parameters. By editing the various parameters available you can create new voices that best suit your 000 (left)– Main Pan 64 (center)–... -
Page 73: Selecting A Dual Voice
Voice Settings Selecting a Dual Voice Selecting a Split Voice Press and hold the [DUAL ON/OFF] but- Press and hold the [SPLIT ON/OFF] but- ton for longer than a second. ton for longer than a second. The dual voice selection display will appear. The split voice selection display will appear. -
Page 74: Pitch Controls (Transpose)
Voice Settings Pitch Controls (Transpose) Pitch Controls (Tuning) The overall pitch of the instrument can by shifted up The overall tuning of the instrument can by shifted up or down by a maximum of 1 octave in semitone incre- or down by a maximum of 100 cents in 1-cent incre- ments. -
Page 75: Touch Response Sensitivity
Voice Settings Touch Response Sensitivity You can adjust the keyboard’s sensitivity to dynamics in three steps. Press the [FUNCTION] button. Use the dial to select a touch sensitivity The currently selected function will appear in the setting between 1 and 3. Higher values display. -
Page 76: Style (Auto-Accompaniment) Functions
Style (Auto-accompaniment) Functions Basic operation of the Style (auto-accompaniment) feature is described on page 24 of the Quick Guide. Here are some other ways you can play the styles, the style volume adjustment proce- dure, and more. Pattern Variation (Sections) The instrument features a wide variety of style “sections”... - Page 77 Style (Auto-accompaniment) Functions Press the [STYLE] button and then Press the [MAIN/AUTO FILL] button. select a style. Press the [ACMP ON/OFF] button to turn auto accompaniment on. The name of the selected section— MAIN A or MAIN B—will be displayed. Press the [INTRO/ENDING/rit.] button.
- Page 78 Style (Auto-accompaniment) Functions Press the [MAIN/AUTO FILL] button. Synchro Stop When this function is selected the accompaniment style will only play while you are playing chords in the accompaniment range of the keyboard. Style playback will stop when you release the keys. To turn the function on, press the [SYNC STOP] button.
-
Page 79: Changing The Tempo Of The Style
Style (Auto-accompaniment) Functions Changing the tempo of the Style Adjusting the Style Volume Styles can be played at any tempo you desire—fast or Press the [STYLE] button to engage the style func- slow. tion. Press the [TEMPO/TAP] button to call Press the [FUNCTION] button. -
Page 80: Setting The Split Point
Style (Auto-accompaniment) Functions Setting the Split Point Play a Style with Chords but No Rhythm (Stop Accompaniment) The initial default split point is key number 54 (the F#2 key), but you can change it to another key using When auto accompaniment is on (the ACMP ON icon the procedure described below. -
Page 81: Ai Fingered
Style (Auto-accompaniment) Functions AI Fingered Playing Styles Using the Entire Keyboard Less than three notes can be played to indicate the chords (based on the previously played chord, etc.). In “Play Along with a Style” on page 25 we described a method of playing styles in which chords were Press and hold the [ACMP ON/OFF] but- detected only to the left of the keyboard split point. -
Page 82: Looking Up Chords Using The Chord Dictionary
Style (Auto-accompaniment) Functions Looking Up Chords Using the Chord Dictionary The Dictionary function is essentially a built-in “chord book” that shows you the individual notes of chords. It is ideal when you know the name of a certain chord and want to quickly learn how to play it. Press and hold the [MINUS ONE] button Press the “M7”... -
Page 83: Song Settings
Song Settings Changing the tempo of the Song Song Volume Songs can be played at any tempo you desire—fast or Press the [FUNCTION] button. slow. Press the [TEMPO/TAP] button to call up the Tempo setting in the display after selecting a Song. Use the CATEGORY [r] and [f] but- tons to select the Song Volume item. -
Page 84: A-B Repeat
Song Settings A-B Repeat Muting Independent Song Tracks You can specify a section of a song—“A” is the start Each “track” of a song plays a different part of the point and “B” is the end point—for repeat playback. song—melody, percussion, accompaniment, etc. You can mute individual tracks and play the muted part on the keyboard yourself, or simply mute tracks other than the ones you want to listen to. -
Page 85: Bgm Playback
Song Settings BGM Playback Random Song Playback With the default setting only one demo song is played The random play mode causes the songs in the group back and repeated when the [DEMO/BGM] button is selected for BGM playback to be played back in ran- pressed. -
Page 86: The Functions
The Functions The “Functions” provide access to a range of detailed instrument parameters for tun- ing, setting the split point, and adjusting the voices and effects. Take a look at the func- tion list starting on the opposite page. There are 53 function parameters in all. When you locate a function you want to set up, simply select the function’s display name and adjust as required. - Page 87 The Functions Function Setting List Category Function Item Range/Settings Description Style Volume 000–127 Determines the volume of the Style. VOLUME Song Volume 000–127 Determines the volume of the Song. Transpose -12–+12 Determines the pitch of the instrument by semitone increments. Tuning -100–+100 Sets the pitch of the instrument’s sound in 1-cent increments.
- Page 88 The Functions Category Function Item Range/Settings Description Reverb Type 01–36 Determines the Reverb type, including off. Chorus Type 1–45 Determines the Chorus type, including off. DSP ON/OFF ON/OFF Determines whether the DSP effect is on or off. DSP Type 001–239 Determines the DSP type.
- Page 89 The Functions Category Function Item Range/Settings Description Determines whether Demo cancel is enabled or not. When this is set to ON, Demo Cancel ON/OFF the Demo Song will not play, even if the [DEMO/BGM] button is pressed. 1(Demo), 2(Preset), DEMO DEMO GROUP 3(User), Determines the repeat playback group.
-
Page 90: Saving And Loading Data
Saving and Loading Data USB flash memory is a memory medium used for storing data. When a USB flash memory is inserted in this instrument’s USB TO DEVICE terminal, registered settings can be saved from or loaded into the instrument. In this section we’ll look at the procedures for setting up and formatting USB flash memory devices, as well as for saving and loading data to and from them. -
Page 91: Precautions When Using The Usb To Device Terminal
The instrument does not necessarily support all com- Formatting USB storage media mercially available USB devices. Yamaha cannot guarantee operation of USB devices that you pur- When a USB storage device is connected or media is chase. Before purchasing a USB device for use with... -
Page 92: Formatting Usb Flash Memory
Saving and Loading Data Formatting USB Flash Memory All the instructions in this chapter are related New USB flash memory must be formatted before to the FILE CONTROL display. To call up the they can be used by this instrument. FILE CONTROL display, press the [FILE CONTROL] button. - Page 93 Saving and Loading Data Saving User Files (Registration Change the file name as necessary. • The [-] button moves the cursor to the left, and Memory) to USB Flash Memory the [0] button moves it to the right. This operation saves a “User File” containing the reg- •...
- Page 94 Saving and Loading Data Save a User Song to USB Flash Press the [EXECUTE] button. A cursor will appear below the first character in Memory the file name. This operation saves a user song (song numbers 031– 035) to USB flash memory. Use the CATEGORY [r] and [f] but- tons to locate the User Song Save item.
-
Page 95: Loading Files From A Usb Flash Memory
Saving and Loading Data Loading Files from a USB Flash A message will appear on the display to inform you that the operation has fin- Memory ished. User files as well as Style, Song, and Music Database Press the [EXIT] button to return to the MAIN files residing on a USB flash memory can be loaded display. -
Page 96: Deleting Data From A Usb Flash Memory
Saving and Loading Data Deleting Data from a USB Flash Delete User Data from the Instru- Memory ment This procedure deletes User, Style and Music Data- This procedure deletes the User Song as well as Style, base files and Song files that were created on this Song, and Music Database files transferred from an instrument from a USB flash memory. -
Page 97: Connecting To A Computer
If you want to know more about MIDI and how to When connecting the computer to the USB TO HOST use it, refer to this introductory book. MIDI Basics is available for downloading from the Yamaha Manual terminal, make sure to observe the following points. Library at: Failing to do so risks freezing the computer and cor- http://www.yamaha.co.jp/manual/... -
Page 98: Transferring Performance Data To And From A Computer
Connecting to a Computer Transferring Performance Data to and from a Computer By connecting the instrument to a computer, the instrument’s performance data can be used on the computer, and performance data from the computer can be played on the instrument. MIDI settings PC Mode These settings pertain to performance data transmis-... -
Page 99: Transferring Data Between The Computer And Instrument
Connecting to a Computer Initial Send Transferring Data Between the This function lets you send the panel setup data to a Computer and Instrument computer. Before you record performance data to a sequencer application running on your computer, it is Songs, styles, or Music Database files residing on a a good idea to first send and record the panel setup computer or the supplied CD-ROM, can be trans-... - Page 100 Connecting to a Computer Use Musicsoft Downloader To At this point you can select a Style or Music Database file on the computer or CD-ROM and Transfer Songs From the Accessory transfer it to the instrument in the same way as a CD-ROM To the Instrument’s flash song file.
- Page 101 Connecting to a Computer Transfer a Backup file from the Close the window to end the Musicsoft Downloader. instrument to a computer NOTE You can use the Musicsoft Downloader to transfer • End the Musicsoft Downloader to playback the file trans- “Backup”...
-
Page 102: Accessory Cd-Rom Installation Guide
• Yamaha makes no representations or warranties with regard to the use of the software and documentation and cannot be held responsible for the results of the use of this manual and the software. -
Page 103: Cd-Rom Contents
Accessory CD-ROM Installation Guide CD-ROM Contents When the included CD-ROM is inserted into the CD-ROM drive, the following start window will appear automat- ically. (If the start window does not appear automatically, open the “My computer” folder and double click “Start.exe”... -
Page 104: System Requirements
Accessory CD-ROM Installation Guide System Requirements Data Computer Memory Hard Disk Display Windows 2000/XP Home 233 MHz or higher; Intel Pen- 128 MB or more 64 MB or more 800 x 600 Musicsoft Edition/XP Professional/Vista tium/Celeron Processor family (at least 512 MB (256 MB or more is HighColor Downloader... - Page 105 • This display will not appear when using Windows XP x64/Vista/7 . No restart is necessary. When the “Welcome to the InstallShield Wizard for Yamaha USB-MIDI Driver” window appears, click [Next]. Checking the version of the driver If the warning message below appears during the Open the “Control Panel”...
-
Page 106: Troubleshooting
• Is any unknown device registered? Downloader at the following web site. If driver installation fails, the instrument will be http://music.yamaha.com/download/ marked as an “Unknown device”, and you will not be able to install the driver. Delete the “Unknown IMPORTANT device”... - Page 107 Click “Change or Remove Programs” http://music.yamaha.com/download/ located in the upper left, then select “Yamaha USB-MIDI Driver” or “Yamaha Musicsoft Downloader” from the list in the Playback response is delayed. right panel. • Does your computer satisfy the system require- Click [Remove].
- Page 108 THIRD PARTY SOFTWARE. permission by Yamaha Corporation. • Yamaha is not liable to you or any other person for any damages, including, Copyrighted data, including but not limited to MIDI data for songs, obtained by without limitation, any direct, indirect, incidental or consequential damages,...
-
Page 109: Appendix
Troubleshooting Appendix For the Instrument Problem Possible Cause and Solution When the instrument is turned on or off, a popping This is normal and indicates that the instrument is receiving electrical sound is temporarily produced. power. When using a mobile phone, noise is produced. Using a mobile phone in close proximity to the instrument may produce interference. -
Page 110: Messages
Messages LCD Message Comment Access error! Indicates the failure in reading or writing from/to the media or the flash memory. All Memory Clearing... Displayed while erasing all data in the flash memory. Never turn the power off during data transmission. Are you sure? Confirms whether Song Clear or Track Clear is executed or not. - Page 111 Messages LCD Message Comment Saving... Displayed while saving data in the memory. Never turn the power off while saving. Doing so may result in data loss. Send OK? Confirms whether the data transmission is executed or not. Sending... Displayed while transmitting data. “Since the media is in use now, this Indicates that the file control function is currently unavailable since the media is being function is not available.”...
-
Page 112: Specifications
• Performance assistant technology: * Specifications and descriptions in this owner’s manual are for Performance assistant technology Type information purposes only. Yamaha Corp. reserves the right to change • PC: PC Mode or modify products or specifications at any time without prior notice. -
Page 113: Index
Index A-B Repeat ........ 84 Easy Chords .......27 Main (Section) ......76 Accessories Easy Song Arranger MAIN Display ......... 7 ....54 ......36 ACMP Effect Main Voice ........25 ..........65 ........ 18 AI Fingered Ending Master EQ Type ....27, 81, 87 ........76 ...... - Page 114 Index Recording ........56 USB TO DEVICE ....30, 90 Registration Memory USB TO HOST ....62 ......97 Repeat USB-MIDI Driver ........42, 84 ... 103–105 Reverb User file ........66 ........93 Reverb Level User File Save ......72 ......93 Rewind (REW) ......
- Page 115 Warranty service will only be provided for defective products within the Warranted Area. Contact your local authorized Yamaha dealer who will advise you of the procedures to be followed. If this is not successful, contact Yamaha at the address, telephone number or website shown below. Yamaha may request that you send the defective product to a local authorized Yamaha Servicer or authorize return of the defective product to Yamaha for repair.
- Page 116 Owner’s Manual...
- Page 117 Owner’s Manual...
- Page 119 For details of products, please contact your nearest Yamaha representative or the authorized distributor listed below. NORTH AMERICA ASIA THE NETHERLANDS/ BELGIUM/LUXEMBOURG CANADA THE PEOPLE’S REPUBLIC OF CHINA Yamaha Music Europe Branch Benelux Yamaha Canada Music Ltd. Yamaha Music & Electronics (China) Co.,Ltd.
- Page 120 Yamaha Home Keyboards Home Page http://music.yamaha.com/homekeyboard/ Yamaha Manual Library http://www.yamaha.co.jp/manual/ U.R.G., Pro Audio & Digital Musical Instrument Division, Yamaha Corporation © 2010 Yamaha Corporation WT98820 XXXPOXXX.X-01A0 Printed in China...