Table of Contents
Advertisement
Quick Links
Advertisement
Table of Contents

Related Manuals for Gigabyte P2742G


Summary of Contents for Gigabyte P2742G
- Page 2 Congratulations on your purchase of the GIGABYTE Notebook P2742! This Manual will help you to get started with setting up your notebook. For more detailed information, please visit our website at http://www.gigabyte.com. All specifications are subject to the manufacturer's configuration at the time of shipping and may change without prior notice, written or otherwise.
-
Page 3: Switching On The Power
Switching on the Power After you turn on the P2742 for the very first time, do not turn it off until the operating system has been configured. Please note that the volume for the ® audio will not function until Windows Setup has completed. -
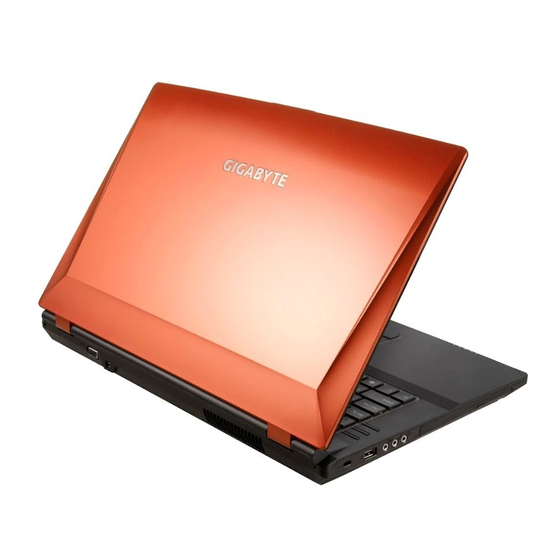
Page 4: Left View
Your GIGABYTE Notebook Tour Top & Front View Webcam Status LED Indicator Webcam Display GPU Button LED Indicators Keyboard Built-In Microphone Touchpad & Buttons LED Indicators LED Indicators Power Button Speakers * Refer more information on page 5... -
Page 5: Right View
Right View Multi-in-1 Card Reader USB 3.0 Port x 2 Combined eSATA/ USB 3.0 Port HDMI-Out Port RJ-45 LAN Jack Rear & Bottom View External Monitor Port DC in Jack Component Bay Cover Vent HDD Bay Battery... -
Page 6: Hot Key Buttons & Led Indicators
Hot Key Buttons & LED Indicators The LED indicators on the computer display helpful information about the current status of the computer. See overleaf for information on the Top Case LED indicators. Button & Indicator Icon Light Color Description Green UMA Mode Activated GPU Button ... - Page 7 Function Key Indicators Using the <Fn> key with another key creates a hot key, providing a quick and convenient method for controlling various functions. To use a hot key, first hold down the <Fn> key. Next, press the second key (ex:<~>, <F1>~<F12>, NumLk, ScrLk) in the combination.
-
Page 8: Control Center
Control Center Press the Fn + Esc key combination, or double-click the icon in the notification area of the taskbar to toggle the Control Center on/off. The Control Center gives quick access to frequently used controls, power management features and enables you to quickly turn modules on/off. Power Modes: You can set a Power Mode by clicking the appropriate icon at the top of the Control Center. - Page 9 Power Status The Power Status icon will show whether you are currently powered by the battery, or by the AC/DC adapter plugged in to a working power outlet. The power status bar will show the current battery charge state. Brightness The Brightness icon will show the current screen brightness level.
-
Page 10: Gigabyte Smart Recovery
Caps Lock/Scroll Lock/ Number Lock Click the button to toggle the appropriate lock mode. GIGABYTE Smart Recovery ● System Recovery (Restore your P2742 operating system) : The hard drive of the P2742 has a hidden partition that contains a full backup image of the operating system that can be used to recovery the system in the event that something happens to the operating system. -
Page 11: Warranty And Service
5. Press "Exit" to quit from Smart Recovery. Appendix Warranty & Service: ■ For Warranty, Service and related information, please refer to the warranty card or GIGABYTE service website as the following link: http://www.gigabyte.com/support-downloads/technical-support.aspx FAQ: ■ For FAQ (Frequent Asked Questions), please refer to the following link:...