Olympus Camedia E-100RS Instructions Manual
E-100rs instructions (english)
Hide thumbs
Also See for Camedia E-100RS:
- Quick start manual (2 pages) ,
- Guía de inicio rápido (2 pages) ,
- Manual rapide de démarrage (2 pages)
Table of Contents
Advertisement
Quick Links
See also:
Basic Manual
Advertisement
Table of Contents

Related Manuals for Olympus Camedia E-100RS


Summary of Contents for Olympus Camedia E-100RS
- Page 1 DIGITAL CAMERA INSTRUCTIONS Before using your camera, read this manual carefully to ensure correct use. We recommend that you take test shots to get accustomed to your camera before taking important photographs.
-
Page 2: Legal And Other Notices
Thank you for purchasing an Olympus digital camera. Before you start to use your new camera, please read these instructions carefully to enjoy optimum performance and a longer service life. Keep this manual in a safe place for future reference. -
Page 3: Trademarks
Declaration of Conformity Model Number: E-100RS Trade Name: OLYMPUS Responsible Party: Olympus America Inc. Address: 2 Corporate Center Drive, Melville, New York 11747-3157 U.S.A. Telephone Number: 631-844-5000 This device complies with Part 15 of the FCC rules. Operation is subject to... -
Page 4: Table Of Contents
Contents Legal and other notices Radio and television interference Trademarks Contents Important safety instructions Handling batteries Handling the camera Camera care and storage Selecting batteries for your camera LCD display and backlight Main features Package contents Names of parts Camera Control panel indications Viewfinder/Monitor indications (Picture information) GETTING STARTED... - Page 5 Display mode menu list Still picture display menu —Shown when a still picture is displayed Movie picture display menu —Shown when a movie is displayed How to use this instruction manual RECORD AND DISPLAY BASICS Turn the power on How to use the viewfinder/monitor Pre-recording check Checking the batteries Checking the card—Card check...
-
Page 6: Contents
Contents (Cont.) SHOOTING PICTURES CONSECUTIVELY ..79 Shooting pictures consecutively at high speed —Sequential mode Selecting the sequential mode Sequential shooting/AF sequential shooting Selecting the sequential shooting speed Recording pictures just before shutter release —Pre-capture Displaying sequential shots DIFFERENT SHOOTING OPTIONS TO SUIT EVERY APPLICATION ..........000 Taking pictures under different conditions Taking portrait pictures... - Page 7 SHOOTING WITH FLASH ......105 Selecting the flash pattern Red-eye reduction flash Fill-in flash (forced activation) Off (flash override) How to use the flash Correcting the amount of light produced by the flash—Flash intensity control Selecting the flash light emission timing —Slow synchronization flash mode Shooting with an external flash Taking pictures using both the main flash and the...
- Page 8 Contents (Cont.) Changing the tint Selecting the tint—PRE-SET Customizing the tint Other recording Recording with special effects—FUNCTION Recording sound when taking a picture —Sound record Recording pictures sequentially with different exposures/ white balance—Auto bracket DISPLAY FUNCTIONS ........143 Displaying a single image—Single image display 144 Enlarging pictures—Close-up display Rotating and checking vertically oriented pictures Displaying multiple pictures at one time...
- Page 9 FUNCTION SETTINGS FOR EASIER OPERATION ..........177 Mode setting menu How to use the mode setting menu screen Resetting the camera’s settings when turning it off—ALL RESET Resetting the camera’s settings when turning it on—ALL RESET—CUSTOM Setting image sharpness Changing the shutter sound effect Changing the camera warning sound volume Setting the assist lamp for focusing...
- Page 10 Contents (Cont.) TRANSFERRING PICTURES TO A COMPUTER ..........199 Transferring your pictures to a personal computer Connecting directly to a computer by cable Saving directly from a card Connecting to a computer using the exclusive USB cable Connecting to a computer Removing the card MISCELLANEOUS ........211 Troubleshooting...
-
Page 11: Important Safety Instructions
CAUTION: TO REDUCE THE RISK OF ELECTRICAL SHOCK, DO NOT REMOVE COVER (OR BACK). NO USER-SERVICEABLE PARTS INSIDE. REFER SERVICING TO QUALIFIED OLYMPUS SERVICE PERSONNEL. A lightning flash with an arrowhead, enclosed in a triangle, alerts you to the presence of uninsulated voltage points inside the product which could cause a serious electrical shock. - Page 12 6 Attachments — For your safety, and to avoid damaging the product, use only accessories recommended by Olympus. 7 Water and Moisture — Never use this product around water (near a bathtub, kitchen sink, laundry tub, wet basement, or swimming pool).
- Page 13 12 Lightning — If a lightning storm occurs while using the optional AC adapter, unplug the adapter power cord from the wall outlet immediately. To avoid damage from unexpected power surges, always unplug the AC adapter from the power outlet and disconnect it from the camera when the camera is not in use.
-
Page 14: Handling Batteries
Follow these important guidelines to prevent the batteries from leaking, overheating, burning, exploding, or causing electrical shock or burns. DANGER 1 When using NiMH batteries, use only Olympus brand NiMH batteries and charger. 2 Never load batteries with their +/– terminals reversed. Never force batteries into the battery compartment. - Page 15 5 Never heat batteries or incinerate them. 6 Never attempt to connect a battery directly to a power outlet, or to a cigarette lighter in a vehicle. 7 If battery fluid gets into your eyes, flush your eyes immediately with clear, cold running water and seek medical attention immediately.
- Page 16 Important safety instructions (cont.) CAUTION 1 Olympus NiMH batteries are intended for use only with Olympus digital cameras. Never use these batteries with any other device. 2 Never subject batteries to strong shocks or continuous vibration. 3 Never mix batteries (old and new batteries, charged and uncharged batteries, batteries of different manufacture or capacity, etc.).
-
Page 17: Handling The Camera
7 If the camera is accidentally dropped in water, or if liquid is spilled into the camera, stop using the camera, allow the camera to dry, and then remove the batteries. Contact the nearest Olympus authorized service center. -
Page 18: Camera Care And Storage
Contact the nearest Olympus service center immediately. 2 Never attempt to disassemble the camera. The internal circuits contain high voltage points which could cause serious burns or electrical shock. -
Page 19: Selecting Batteries For Your Camera
• This camera can use four AA NiMH batteries, four AA Alkaline batteries, four AA lithium batteries, four AA NiCd batteries, or two CR- V3 lithium battery packs. Use of Olympus brand batteries is strongly recommended. • Alkaline battery performance is limited, especially at low temperatures. -
Page 20: Lcd Display And Backlight
The backlight built into the monitor and control panel has a limited service life. When the monitor gets dark and jittery, consult your nearest Olympus dealer. In places subject to low temperatures, the backlight may take a long time to turn on or its color may change temporarily. -
Page 21: Main Features
Main features Sequential shooting at high shutter speeds (max. 15 frames/second) in all modes except TIFF. Shutter speed can be selected from 10, 7.5 and 5 frames/second. Pre-capture allows images to be recorded just before the Shutter button is pressed. (P. 00) 10X optical zoom lens with a stabilization system plus 2.7X Super-telephoto allows you to shoot pictures equivalent to 27X zoom. -
Page 22: Package Contents
Package contents Camera Strap A/V cable USB cable Remote control Lens cap Warranty card/ Instructions/ Remote control Registration card Quick Start Guide instructions Software CD’s... - Page 23 Battery charger AA NiMH batteries Power plug (4 pieces) Instructions SmartMedia Static-free case Index labels (SSFDC-8MB) (2 pieces) Write-protect adhesive Instructions seals (4 pieces)
-
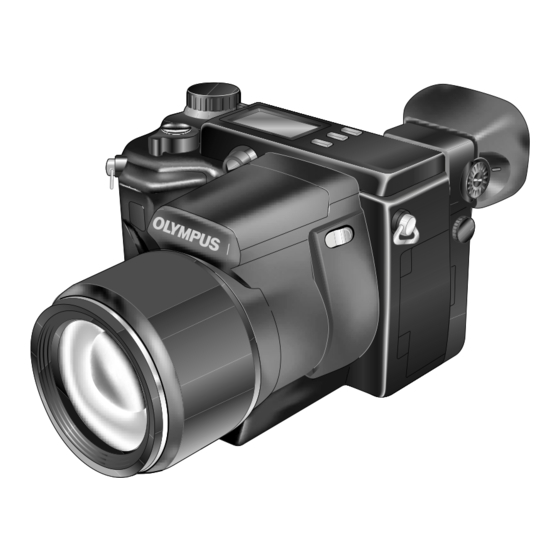
Page 24: Names Of Parts
Names of parts Camera 2 3 4 5 & Zoom lever (T/W) (P. 71)/ Remote control receiver (P. 121) Index-display lever ( Lens (P. 125) Flash (built-in) (P. 72/106–116) Shutter button (P. 67) Flash switch ( ) (P. 72/108/113) Mode dial (P. 44) Connector cover (P. - Page 25 ) qw e r t y Viewfinder (P. 28/29/65) Arrow pad (P. 45–47) INFO button (P. 28) Monitor (P. 28/29/65) Flash mode button ( OK button (P. 47)/Manual focus (P. 106/108)/Erase button ( button (MF) (P. 94)/Protect button (P. 77/78) ) (P.
-
Page 26: Control Panel Indications
Names of parts (cont.) Control panel indications : Flash mode (P. 106) : Red-eye reduction flash, : Off (flash override), : Fill-in flash (forced activation), No indication: Auto flash : Slow shutter synchronization flash (P. 110) Displayed when is set on the menu. : Flash intensity control (P. - Page 27 : ISO (P. 101) Displayed when the ISO is set to any mode except AUTO. When the ISO is increased automatically in the AUTO mode, this indication blinks. : Self-timer/Remote control (P. 119/120) To use the Self-timer/remote control, press the button repeatedly until this indication appears.
-
Page 28: Viewfinder/Monitor Indications (Picture Information)
Names of parts (cont.) Viewfinder/Monitor indications (Picture information) Press the Monitor button ( ) to select whether images appear on the Monitor or in the viewfinder. (P. 00) Press the INFO button to select how much information is displayed (P. 26). The following 3 types of display are available. - Page 29 Flash stand-by/Jitter warning/Flash charge (P. 72/108) AF confirmation mark (P. 68) Shooting mode (P. 44) Battery check (displayed after the camera is turned on and when warnings appear) (P. 60) Aperture value (P. 87/89) Shutter speed (P. 88) Exposure compensation/ Exposure differential (P. 99) Drive mode (P.
-
Page 31: Getting Started
GETTING STARTED This chapter outlines all of the things you need to do before you start using your camera such as loading batteries and inserting cards. It also explains how to use the Mode dial and the Menus. -
Page 32: Attaching The Strap
Be careful with the strap when you carry the camera, as it can easily catch on stray objects, causing serious damage. Attach the strap correctly as shown so that the camera does not fall off. If the strap is attached incorrectly and the camera falls off, Olympus is not responsible for any damages. -
Page 33: Loading The Batteries
Loading the batteries This camera uses 2 CR-V3 lithium battery packs or 4 AA NiMH batteries, NiCd batteries, alkaline batteries or lithium batteries. Important: Do not peel the label on a CR-V3 lithium battery pack. If an insulating sheet covers the terminals, peel it off ONLY from the terminals. Make sure that the camera power switch is in the off position. - Page 34 Loading the batteries (Cont.) Insert the batteries. When using AA batteries Insert the batteries with their poles oriented in the direction shown in the illustration. When using lithium battery packs Insert the batteries in the direction When using AA batteries shown in the illustration.
- Page 35 Note: CR-V3 lithium battery packs cannot be charged. Alkaline batteries have a lot of variation in their performance and deteriorate particularly at low temperatures. It is recommended that lithium battery packs or NiMH batteries be used. Manganese batteries cannot be used. Please read the cautions concerning batteries.
-
Page 36: Service Life Of Nimh Battery
Loading the batteries (Cont.) Service life of NiMH battery The table below shows the approximate number of photographs that can be taken and the display time available with the NiMH batteries. Note that the lives of battery packs may vary according to the type of battery, manufacture, camera shooting conditions, etc. -
Page 37: Using The Ac Power Adapter (Optional)
Using the AC power adapter (Optional) An optional Olympus AC adapter allows you to power your digital camera from a common AC wall outlet. Use an AC adapter designed for the area camera is used. Consult your nearest Olympus dealer or Service center for details. - Page 38 Incorrect use of the batteries may cause fire or electric shock. Be sure to use an Olympus AC adapter. Using a non-Olympus adapter could be hazardous and may damage the camera. Olympus is not responsible for any damage caused by the use of AC adapters not designed for this camera.
-
Page 39: Using The Card
Read the provided SmartMedia instruction manual carefully. Do not touch the contact area of the card. Do not use 5V cards. Use Olympus cards or other 3V (3.3V) cards. Non-Olympus 3V (3.3V) cards must be formatted by the camera (see... - Page 40 Using the card (Cont.) What is CompactFlash? CompactFlash is a recording medium similar to SmartMedia, but with a higher storage capacity. Using a LEXAR Media device, equipped with a USB connector, you can transfer images to a computer at high speed using a JumpShot cable.
-
Page 41: Inserting The Card
Inserting the card To use CompactFlash, select it on the menu. [ “Selecting the card” (P. 00) Make sure that the camera power switch is in the off position. Open the Card cover. When using the SmartMedia card: Insert the card in the direction shown in the illustration. -
Page 42: Ejecting The Card
Using the card (Cont.) Ejecting the card Make sure that the camera power switch is in the off position. Open the Card cover. When using the SmartMedia card When using the SmartMedia card: Push the card in slightly. When using the CompactFlash card: Raise the tab and push it in. - Page 43 When using the SmartMedia card The card pops out so that it can be withdrawn easily. Remove the card. The card is ejected When using the CompactFlash card The card is ejected Note: NEVER open the Card cover, eject the card, remove the batteries, or disconnect the optional AC adapter while the camera is in use.
-
Page 44: Selecting The Card
Selecting the card Select the card you are using on the menu. button 3, 4 Set the Power switch to ON. Press (Menu button). The menu is displayed in the viewfinder when the Mode dial is set to the Record mode. The menu can be displayed on the monitor by pressing (Monitor button). -
Page 45: Setting The Date And Time
Setting the date and time You can adjust and include the date and time, and put them on recorded pictures. 2, 3, 4 Press (Menu button). (P.45) Menu will be displayed on the monitor. Press on the Arrow pad to select MODE SETUP, then press to select SETUP. - Page 46 Setting the date and time (Cont.) 5, 6 Press to move to the year (Y) setting. Press to select the year. When the year is selected, press to set the month. Repeat the procedure until the date and time are completely set. Press the OK button.
-
Page 47: Setting The Mode Dial
Setting the mode dial You can change modes by turning the mode dial on the top righthand side of the camera. P (Program mode): In program mode, you can take a properly exposed photograph by simply aiming the camera and pressing the shutter button. Aperture and shutter speed are set automatically by the camera. -
Page 48: How To Use The Menu
How to use the menu Most functions can be easily displayed and set with the menu on the Monitor. Adjustments to the mode dial will determine available menu selections. Modes not available on the menu can be set with the corresponding buttons on the camera. - Page 49 Example: When PRE-CAPTURE is set F2.8 1/800 Example: When moving to the following pages SM/CF F2.8 1/800 PRE-CAPTURE SM/CF AUTO 1 / 5 PRE-CAPTURE AUTO 1 / 5 F2.8 1/800 SM/CF F2.8 1/800 PRE-CAPTURE 1 / 5 SLOW To set up 1.0 x3 MULTI METERING...
- Page 50 How to use the menu (Cont.) Press to view additional menu options (for each selection), then press to select the desired option. When finished, press the OK button or The green frame moves to the left and adjusted items are displayed on the right.
-
Page 51: Record Mode Menu List
Record mode menu list The following items can be adjusted. This can be done any time. Please refer to How to use the menu (P.45), and/or the pages for each function, in order to set the following items (P.48 – 53). Still picture record menu Displays by the Still picture record mode (P, A, S, M, S-Prg). - Page 52 Record mode menu list (Cont.) Menu Display Function Initial setting page Activates the Stabilization system. (P.97) AF MODE Adjusts the focusing range when using NORMAL autofocus. (P.96) FULL-TIME The camera automatically focuses without pressing the shutter button halfway. (P.95) SUPER TELE 2.7x digital zoom is available.
-
Page 53: Movie Picture Record Menu
Movie picture record menu Options when the movie picture record mode is activated. Menu Display Function Initial setting page SM/CF Allows you to select the card you are going to use. (P. 00) Activates the Stabilization system. (P.97) SUPER TELE 2.7x digital zoom is available. - Page 54 Record mode menu list (Cont.) Menu Display Function Initial setting page FUNCTION Changes the picture color to monochrome. (P. 00) CARD SETUP Formats the card. – (P.42) MODE SETUP Change the camera to your desired setting. – [ Mode setting menu (P.
-
Page 55: Display Mode Menu List
Display mode menu list Still picture display menu —Shown when a still picture is displayed Options available when a still picture is displayed. Menu Display Function Initial setting page SM/CF Allows you to select the card you are going to use. -
Page 56: Movie Picture Display Menu-Shown When A Movie Is Displayed
Display mode menu list (Cont.) Movie picture display menu—Shown when a movie is displayed Options available when a movie picture is displayed. Menu Display Function Initial setting page SM/CF Allows you to select the card you are going to use. (P. 00) MOVIE PLAY Plays back movie –... -
Page 57: How To Use This Instruction Manual
How to use this instruction manual This manual uses various signs and symbols to indicate different types of information. Please read the following explanation carefully before operating your digital camera. Before operation, switch the mode dial until the following signs appear. If the mode dial's setting signs are not displayed, you can use functions without setting the mode dial. -
Page 59: Record And Display Basics
RECORD AND DISPLAY BASICS This chapter demonstrates how to use your camera’s basic functions, such as taking pictures, displaying stored pictures, and erasing stored pictures. Please read this section carefully. -
Page 60: Turn The Power On
Turn the power on 5 Setting the power switch : Power off : Power on RESET Move the switch to reset momentarily and then release, the power switch will automatically move back to ON. Mode settings in the menu (P.144) will be reset to the initial settings. -
Page 61: How To Use The Viewfinder/Monitor
How to use the viewfinder/monitor Press to switch the display to the monitor. When the power is turned on in the Display mode , the monitor turns on. (Monitor button) If nothing appears on the viewfinder: Is the power on? Has the lens cap been removed? Is the camera in the sleep mode? Is the monitor turned on with the... -
Page 62: Pre-Recording Check
Pre-recording check Checking the batteries When the power is turned on, the Control panel remaining battery power will be displayed on the control panel. If it is low, please replace the batteries. If your batteries are either NiMH or NiCd, please charge them when their power is low. -
Page 63: Checking The Card-Card Check
Checking the card—Card check When the power is turned on, the camera checks the card. Control panel Corrective actions and indications monitor indications When there is no card in the camera: The card error indicator on the monitor blinks and NO CARD appears on the viewfinder. -
Page 64: Checking The Remaining Number Of Storable Pictures And Remaining Time
Pre-recording check (Cont.) Checking the remaining number of storable pictures and remaining time When the power is turned on in the still picture mode, the number of storable pictures will appear on the control panel. For movie pictures, the seconds remaining will appear. -
Page 65: Number Of Storable Pictures
Number of storable pictures The number of storable pictures and recording time remaining will vary depending on the selected recording mode or remaining card storage. Preset print or sound recording will also affect memory capacity. Number of still pictures that can be taken Memory capacity Number of (Image only/Image with sound) -
Page 66: Adjusting The Diopter
Adjusting the diopter Turn the Diopter adjustment dial to see the AF target mark clearly. Viewfinder P F2.8 1/30 AF target mark Holding the camera Hold the camera firmly with both hands while keeping your elbows at your sides to prevent the camera from moving. Proper Improper Keep your fingers away... -
Page 67: Using The Shutter Release Correctly -Pressing Fully/Halfway
Using the shutter release correctly —Pressing fully/halfway How to press the shutter button and focus There are 2 steps when releasing the Shutter. Practice well before actually taking photos. Press the shutter button halfway. Press halfway The AF confirmation mark lights and the camera emits a beep when the focus and exposure are locked. -
Page 68: Recording And Display
Recording and display Taking still pictures and displaying them Taking still pictures 2, 3 Compose the picture by turning the camera towards the subject. The picture is slightly larger than scene you viewed through the viewfinder/monitor. Press the shutter button halfway to lock the focus and exposure. - Page 69 Press the shutter button fully to P F2.8 1/30 take a picture. A shutter sound means that the picture was taken successfully. The lower image memory gauge will light up and the camera will begin storing the image onto the card.
-
Page 70: Quick View
Recording and display (Cont.) Quick view You can quickly shift from the record mode to the display mode by pressing . This allows you to check the movie you have just recorded. Press twice quickly. The monitor will turn on and the last recorded picture will be displayed. -
Page 71: Recording Movies And Displaying Them
Recording movies and displaying them Recording movies 2, 3 Compose the picture by turning the camera towards the subject. Press the shutter button halfway to lock the focus and exposure. The AF confirmation mark will light up and the camera will beep. If the focus and exposure are not locked, the AF confirmation mark blinks. -
Page 72: Displaying Movies
Recording and display (Cont.) Displaying movies 2, 4 Use the Quick view to display a recorded movie (P.73). Select images with the mark using the Arrow pad. Press (Menu button). The menu screen will appear. Select MOVIE PLAY, then press to select START. - Page 73 Press the OK button. The movie display will start after the card access lamp stops blinking. When you want to pause... Press the OK button while displaying images. You can display frames with the Arrow pad when normal displaying is paused or stopped. : Jumps to the beginning of the movie.
-
Page 74: Protection
Protection You can prevent accidental erasure of pictures you want to keep. Set the mode dial to The card access lamp will blink and a list of stored images will be read out. After that, the last recorded picture will be displayed. Display the picture you want to protect. -
Page 75: Erasing Images
Erasing images Unwanted images can be erased using the same process for both still images and movies. Before erasing, make sure that the protection seal has been removed from the card and other image protection settings on the camera have been cancelled. Be aware of the following! NEVER perform the following acts while erasing pictures. -
Page 76: All-Frame Erasure
Erasing images (Cont.) All-frame erasure Set the mode dial to The card access lamp will blink and a list of stored images will be read out. After that, the last recorded picture will be displayed. Press (Menu button). The menu screen will be displayed. Select CARD SETUP, then 4, 5 Press the OK button. -
Page 77: Telephoto/Wide-Angle Shooting-Zoom
Telephoto/Wide-angle shooting—Zoom You can select telephoto or wide-angle with the 10x zoom. When SUPER TELE in the menu is turned ON (P.98), 27x zoom is available with the 2.7x digital zoom. When you take a picture from a distance (telephoto): Press the zoom lever toward T to zoom When you take a picture at close range (wide-angle):... -
Page 78: Using The Flash-Auto Flash
Using the flash—Auto flash The flash will work automatically in low-light conditions. For other conditions, refer to P.107. Flash mode button Slide (flash switch) located under flash (see illustration) to raise the flash. Make sure that 2, 3 do not appear on the control panel. If there is one or more of them, press (flash mode button) to... -
Page 79: Turning Off The Power
Turning off the power When you are finished using the camera, turn the power off. Although the camera will automatically enter sleep mode if not used for an extended period of time, turning off the power is still highly recommended. Turn the camera's power switch off. -
Page 81: Shooting Pictures Consecutively
SHOOTING PICTURES CONSECUTIVELY... -
Page 82: Shooting Pictures Consecutively At High Speed -Sequential Mode
Shooting pictures consecutively at high speed —Sequential mode Selecting the Sequential mode Use this mode to take pictures in sequence. When the shutter release button is held down, the camera will take pictures in sequence. Picture-taking will stop when you release your finger from the button. The Sequential mode is not available if the record mode is set to TIFF. -
Page 83: Sequential Shooting/Af Sequential Shooting
Sequential shooting/AF sequential shooting Control panel Set the record mode to any mode other than TIFF. If the record mode is set to TIFF, the Sequential mode is not available. (P. 104). Make sure that the mode dial is switched to P, A, S, M or S-Prg. Record mode Press until... -
Page 84: Selecting The Sequential Shooting Speed
Shooting pictures in sequence at high speed —Sequential mode (Cont.) Selecting the sequential shooting speed Sequential shooting speed is the number of frames per second. 4 speeds are available. 2, 3 Press (Menu button). The menu is displayed. Press on the Arrow pad to select , then press Press... -
Page 85: Recording Pictures Just Before Shutter Release -Pre-Capture
Recording pictures just before shutter release —Pre-capture Normally, when you press the Shutter button all the way down, a picture will be taken. However, the picture cannot be recorded at the same time as the Shutter button is pressed down. With Pre-capture, pressing the Shutter button halfway starts picture capture, and pressing it all the way records pictures. -
Page 86: Displaying Sequential Shots
Displaying sequential shots With sequential shot display (P. 00), an indication appears to show that the frame currently displayed represents the sequence. You can move from this frame to subsequent frames. Sequential shots are pictures recorded in the following modes: –... -
Page 87: Different Shooting Options To Suit Every Application
DIFFERENT SHOOTING OPTIONS TO SUIT EVERY APPLICATION... -
Page 88: Taking Pictures Under Different Conditions
Taking pictures under different conditions Taking portrait pictures A portrait-style photograph features an in-focus subject against a blurred background. Your camera offers two different ways of achieving this effect. With the mode dial set to “S-Prg”, select “S-Prg”–“ ” in the Menu (P. 86). -
Page 89: Taking Pictures Focusing On Both Subject And The Background
Taking pictures focusing on both subject and the background For example, if you want to take a picture with a beautiful background when you are on travel, you will want to have both your subject and the background in focus. Your camera offers two different ways of achieving this effect. -
Page 90: Taking Night Scenes
Taking pictures under different conditions (Cont.) Taking night scenes To capture a twilight scene or sunset naturally, you need to set your shutter speed to a lower value. If the Mode dial is set to “P”, the lack of brightness will result in a dark picture with only the glow of the sunset or sparkle of the stars appearing. -
Page 91: Using The Scene Program (S-Prg) Mode
Using the scene program (S-Prg) mode 2, 3 Press to display the Menu. You can display the menu regardless of the mode selected by the mode dial (P, A, S, M, S-Prg). Press on the Arrow pad to select “S-Prg”, then press Select the desired S-Prg mode from “... -
Page 92: Setting The Aperture-Aperture Priority Mode
Setting the aperture—Aperture priority mode You can set the aperture manually in the Aperture priority mode. This is especially useful for taking portrait pictures with blurred backgrounds. Set the Mode dial to “A”. Aperture setting is displayed in green. Select on the Arrow pad to select the aperture. -
Page 93: Setting The Shutter Speed-Shutter Priority Mode
Setting the shutter speed—Shutter priority mode You can set the shutter speed manually in the Shutter priority mode. Set the shutter to a fast speed to capture a moving object. Set it to a slow speed to express motion. Set the Mode dial to “S”. Shutter speed appears on the display. -
Page 94: Setting The Aperture And Shutter Speed -Manual Recording
Setting the aperture and shutter speed —Manual recording You can set the aperture and the shutter speed manually in the Manual mode. To check the exposure, refer to the exposure differential on the display. Set the mode dial to “M”. The aperture and the shutter speed appear on the display. -
Page 95: Taking Close-Up Pictures-Macro Mode
Taking close-up pictures—Macro mode Use the Macro mode to shoot subjects at close range. You can get as close as 4 inches to your subject (when the zoom lever is set to “W” to the maximum position), allowing you to fill the entire frame with your subject. Press to display “... -
Page 96: Taking Pictures Using The Self-Timer
Taking pictures using the self-timer Use a tripod to fix the camera securely. Press until (self- timer/remote control) is displayed on the control panel. Press the shutter button. The self-timer lamp on the front of the camera will light up for approx. 10 seconds. -
Page 97: Taking Pictures Using The Remote Control
Taking pictures using the remote control You can shoot and display pictures using the remote control. (P. 76) Before use, attach the camera to a tripod securely. Press until (self- timer/remote control) appears. Control panel Self-timer/Remote Control... - Page 98 Taking pictures using the remote control (Cont.) Compose the picture, aim the remote control at the remote control receiver on the camera, then press the shutter button on the remote control to take the picture. The self-timer lamp will blink. When the mode dial is set to P, A, S, M, or S-Prg...
-
Page 99: Record Mode Selection
RECORD MODE SELECTION... -
Page 100: Selecting The Record Mode/Picture Size
Selecting the record mode/picture size Select the desired record mode. With the mode dial set to P, A, S, M or S-Prg (for still pictures) You can select from TIFF, SHQ, HQ and SQ. Image quality increases in the order of SQ[HQ[SHQ[TIFF. These modes are suitable for telephoto pictures. - Page 101 Default resolution and compression rate settings Refer to the table below for image quality factory presets. For TIFF mode, you can select the resolution. For SQ mode, you can select the resolution and compression rate (p.154). [Setting picture size for TIFF recording —TIFF (p.96), Setting the picture size/record mode for SQ recording —...
-
Page 102: Setting Picture Size For Tiff Recording-Tiff
Setting picture size for TIFF recording—TIFF When setting a picture size for TIFF recording, we recommend that you select a large size if you plan to enlarge the picture for display or printing. picture size you select is applied when shooting in TIFF. (P. 104) 2, 3 Display the Mode setting screen. -
Page 103: Setting The Picture Size/Record Mode For Sq Recording-Sq
Setting the picture size/record mode for SQ recording —SQ You can set both picture quality and size in SQ mode. With “NORMAL”, more pictures can be stored, while with “HIGH”, noise generated in JPEG compression can be reduced. 2, 3 Display the Mode setting screen. - Page 104 Setting the picture size/record mode for SQ recording —SQ (Cont.) Press and select “HIGH” or “NORMAL”, then press the OK button to confirm the setting. Press the OK button and the mode setting screen disappears. The Menu screen appears. Set the picture quality to “SQ” on the Menu screen.
-
Page 105: Shooting With Flash
SHOOTING WITH FLASH... -
Page 106: Selecting The Flash Pattern
Selecting the flash pattern Select a flash mode to match the lighting conditions and the effect you want to achieve. You can also correct the amount of light using the flash compensation mode (p.109). To use the external flash, refer to page 112. When (flash mode button) is pressed with the flash up, the flash mode switches as follows. -
Page 107: Red-Eye Reduction Flash
Red-eye reduction flash This mode significantly reduces the phenomenon of “red-eye” by emitting about 10 pre-flashes before firing the regular flash. This mode works the same way as the auto-flash except for the pre-flashes. Note: It takes about 1 sec. before the Shutter is released. Effectiveness may be limited if the subject is not looking directly at the preflashes, or if the shooting range is too far. -
Page 108: How To Use The Flash
How to use the flash Slide (flash switch) to pop up 3, 4 the flash. The flash may not fire even when the flash is up. Press (flash mode button) until the desired flash mode appears on the control panel (see below). Auto-flash (no display) [ Red-eye reduction flash ( ) [ Fill-in... -
Page 109: Correcting The Amount Of Light Produced By The Flash-Flash Intensity Control
Correcting the amount of light produced by the flash—Flash intensity control You can adjust the amount of light emitted by the flash to correspond with your shooting requirements. 2, 3 Press to display Menu. Press on the Arrow pad to select , then press Press... -
Page 110: Selecting The Flash Light Emission Timing -Slow Synchronization Flash Mode
Selecting the flash light emission timing —Slow synchronization flash mode This mode allows you to synchronize the light emitted by the flash with a slow shutter speed. Setting the shutter speed to a lower value lets you capture a sharper image. SLOW 1 : 1st-CURTAIN: To capture the subject at the beginning of the... - Page 111 Press to select SLOW 1 or SLOW 2, then press the OK button. appears on the control panel. Press the OK button again to store the setting. The Menu disappears and the normal screen is restored. Take a picture. When SLOW 2 is selected, the flash will fire a pre-flash before the F2.8 1/30 regular flash.
-
Page 112: Shooting With An External Flash
To connect the FL-40 to the camera, the exclusive FL-BK01 flash bracket (optional) and FL-CB01 bracket cable (optional) are required. Without these options, the FL-40 will not perform differently from non-Olympus external flashes. Taking pictures using both the main flash and the FL-40 external flash... - Page 113 Set the Mode dial to P, A, S, M, or S-Prg. Turn on the external flash. The mode for the external flash is TTL-AUTO. Slide (flash switch) on the camera to open the main flash. Press (Flash mode button) to select the camera’s flash mode.
-
Page 114: Taking Pictures Using The Fl-40 External Flash By Itself
Shooting with an external flash (Cont.) Taking pictures using the FL-40 external flash by itself See steps 1 and 2 in Taking pictures using both the main flash and the FL-40 external flash (P.112) Make sure that the main flash is closed. -
Page 115: Taking Pictures With Commercially Available External Flashes
In this case, even if the flash is connected, it will not fire. Contact the manufacturer of the flash for more information. Confirm in advance that the external flash you are using is synchronized with the camera. We highly recommend that an Olympus external flash be used with this camera. -
Page 116: Usable Commercially Available External Flashes
Shooting with an external flash (Cont.) Usable commercially available external flashes When selecting an extension flash, use products which meet the following basic conditions. (1) Exposures when using an extension flash require that adjustments be made on the extension flash unit. If an extension flash is used in the Auto mode, match it with the F value and ISO sensitivity settings on the camera. -
Page 117: Advanced Shooting Techniques
ADVANCED SHOOTING TECHNIQUES In this section, you will find out how to take pictures using more advanced functions, such as manual focus, brightness adjustment, special effects, etc. -
Page 118: Focusing
Focusing Subjects that are difficult to focus on Under certain types of conditions auto focus may not work properly. If you run into problems, try the procedure below or switch to Manual focus (p.94). Conditions Auto focus may not work properly. The AF confirmation mark may blink. Subjects with low contrast Lock the focus on an object that is at the same distance from the camera as the subject, then aim... -
Page 119: Focusing On Subjects That Are Not In The Center Of The Frame -Focus Lock
Focusing on subjects that are not in the center of the frame — Focus lock When your main subject is not within the AF target marks, follow the procedure below. P F2.8 1/800 Position your subject within the AF target mark, and press the Shutter button halfway. -
Page 120: Creative Focusing-Manual Focus
Focusing (Cont.) Creative focusing—Manual focus If Auto Focus is unable to focus, focus manually. 2, 3 Press the OK button. The focus mode selection menu appears. Press on the Arrow pad to select MF. and the distance indicator appear on the control panel. Press to select the focal 1, 4... -
Page 121: A Reliable Time-Saving Way To Focus-Full-Time Af
A reliable time-saving way to focus—FULL-TIME AF With FULL-TIME AF, focusing time may be shorter. FULL-TIME AF keeps the image on the LCD monitor/viewfinder in focus at all times. To select/cancel FULL-TIME AF, set it to ON or OFF in the Menu. 2, 3 Press Menu appears. -
Page 122: Changing The Focus Range-Af Mode
Focusing (Cont.) Changing the focus range—AF MODE You can select the focus range of your subject. NORMAL : Focus selection is based on the entire image on the screen (factory preset). SPOT : Focus selection is based on the image within the AF target mark. -
Page 123: Compensating For Image Blur-Stabilization System
Compensating for image blur—Stabilization system When you take pictures with at wide-angle or telephoto, camera shake is more likely to affect the picture, causing image blur. If this happens to you, you can compensate for camera shake with the camera shake prevention feature. Under some conditions, may not work effectively. -
Page 124: Using The 27X Zoom-Super Tele
Focusing (Cont.) Using the 27X zoom—SUPER TELE You can take a 2.7X zoom photograph with the maximum optical zoom. If you use a 10X optical zoom, you can take an 27X zoom photograph with DIGITAL ZOOM. Press Menu appears. Press on the Arrow pad to select SUPER TELE, then press Press... -
Page 125: Brightness/Exposure
Brightness/exposure Changing the brightness—Exposure compensation You can adjust exposure manually by ±2 (in increments of approx. 1/3). If you want a white object to appear as white as possible, adjust + to increase the exposure. If you want a black object to appear as black as possible, adjust – to decrease the exposure. -
Page 126: Changing The Metering Area
Brightness/exposure (Cont.) Changing the metering area—Metering mode You can select the area of the brightness for metering. When you know the area is properly exposed, press the to choose the metering mode. Setting mode/Control panel display Functions Standard Meters the center of the subject (digital ESP metering) and the area around the subject (digital ESP metering) -
Page 127: Locking The Iso-Iso Setting
Locking the ISO—ISO setting Increase the ISO when you want to take pictures in low-light situations with a fairly high shutter speed. You can select from AUTO, as well as 100, 200 and 400. When you set to AUTO, the sensitivity is automatically changed depending on the shooting conditions. -
Page 128: Locking The Exposure-Ae Lock
Brightness/exposure (Cont.) Locking the exposure—AE lock By pressing the AEL button, you can lock the exposure at the setting you prefer. This is useful when you want to set an exposure that is different from what the camera would normally choose. Set the Mode Dial to P, A, S, S-Prg AE Lock is not available when it is set to M. - Page 129 AF confirmation mark Position the AF target mark where you like to focus, then press the P F2.8 1/800 shutter button halfway down. AF confirmation mark lights. Press the shutter button all the way down. After recording, the AE lock is released, and the AEL display disappears.
-
Page 130: Multi Metering
Brightness/exposure (Cont.) Metering the exposure of more than one point in the frame —MULTI METERING Meters the brightness of the subject at up to 8 different points to set the correct exposure based on the average brightness. 3, 4 Press (Metering mode button) and select (Center-weighted... - Page 131 Aim the camera at the subject and press (Multi-Metering button). At the bottom of the screen, a progress bar appears. Brightness readings are ignored after the 9th reading. When you press , all metered values are reset. When you press , the Multi- Metering average (up to that point) is memorized (AE Memory).
-
Page 132: Changing The Tint
Changing the tint Selecting the tint—PRE-SET Color reproduction differs depending on the lighting conditions. You can adjust the white balance to match the lighting conditions and assure natural looking colors. Settings for tungsten and fluorescent lights are also available, allowing you to get better results indoors. 2, 3 Press The Menu screen appears. - Page 133 Press and select a setting item (see below), then press the OK button. Setting Items: (Daylight), (Overcast), (Tungsten Light) or (Fluorescent). If the OK button is pressed again, the setting is stored and the Menu screen disappears. The normal screen comes back on. F2.8 1/800 When any setting except Auto is selected, "WB"...
-
Page 134: Customizing The Tint
Changing the tint (Cont.) Customizing the tint Lets you adjust the tint to your requirements instead of using PRESET. (P. 00) Do steps 1 and 2 in "Selecting the tint – PRESET" (P. 00) Press on the Arrow pad to select , then press . - Page 135 Hold a sheet of plain white paper in front of the lens. Position the white paper so that it fills the screen (to ensure there is no shadow). Focus on the paper, then press the OK button. To cancel white balance setting, press (Menu button).
-
Page 136: Other Recording
Other recording Recording with special effects—FUNCTION Lets you record in black and white. 2, 3 Press The Menu screen appears. Press on the Arrow pad and select "FUNCTION", then press Press to select BLACK & WHITE, then press the OK button. If the OK button is pressed again, the setting is stored and the Menu screen disappears. -
Page 137: Recording Sound When Taking A Picture-Sound Record
Recording sound when taking a picture—Sound record Select to take pictures with or without sound. Still Picture Recording: 4-second sound recording is possible. Movie Recording: Simultaneous sound recording is possible. Set the sound record mode in the Still picture record mode or the mode independently. - Page 138 Other recording (Cont.) Press the OK button, then take the picture. Settings will be stored and the menu screen will disappear. 0.5 seconds after the shutter is released, sound recording will start. During recording, turn the camera microphone towards the subject. External During recording, the recording Microphone...
-
Page 139: Recording Pictures Sequentially With Different Exposures/White Balance-Auto Bracket
Recording pictures sequentially with different exposures/white balance—Auto bracket Brightness (exposure) and/or white balance is metered in each frame. Focus is locked at the first frame. You can also specify the number of pictures. Control panel Set the record mode to any mode other than TIFF. - Page 140 Other recording (Cont.) 5, 6, 7 Press to select brightness (exposure) range, then press If you do not want to change the exposure, select OFF. Press to select the number of pictures, then press the OK button repeatedly until you go back to AE.
- Page 141 Press to select the white balance range. Press the OK button. Press the OK button repeatedly until the menu disappears. Press (drive mode button) repeatedly until appears on the control panel. 8, 9 Take a picture. When the Shutter button is released, shooting stops even during Auto bracketing.
-
Page 143: Display Functions
DISPLAY FUNCTIONS... -
Page 144: Displaying A Single Image-Single Image Display
Displaying a single image—Single Image Display Single-picture display or index display (showing multiple pictures at one time) are available. You can also magnify a single picture (close-up display) or display pictures like an automatic slide-show (automatic display). Set the mode dial to The card access lamp will blink and the last picture taken will appear on the Monitor. -
Page 145: Enlarging Pictures-Close-Up Display
Enlarging pictures—Close-up display By moving the zoom lever to the T side, images can be enlarged 1.5x, 2x, 2.5x, or 3x. Select the images you want to enlarge. Images with the mark cannot be enlarged. Press the zoom lever towards T With each further press of the zoom lever, the picture will be enlarged 1.5x, 2x, 2.5x, or 3x. -
Page 146: Rotating And Checking Vertically Oriented Pictures
Displaying a single image—Single Image Display (Cont.) Rotating and Checking Vertically Oriented Pictures When you take a shot with the camera held in the vertical position, the image will be oriented vertically, ie. longer vertically than horizontally. You can turn it horizontally, 90°... -
Page 147: Displaying Multiple Pictures At One Time -Index Display
Displaying multiple pictures at one time —Index display If you turn the zoom lever to W, you can display multiple pictures at once (4, 9, or 16-grid). This is convenient for picking one picture in comparison to several others. To change the number of pictures displayed [ Setting the number of pictures displayed on the screen (P.165) Set the mode dial to The card access lamp will blink and... -
Page 148: Setting The Number Of Pictures Displayed On The Screen-4/9/16 Frames
Setting the number of pictures displayed on the screen —4/9/16 frames When displaying pictures, you can increase the number of pictures displayed on the monitor by moving the zoom lever to W. 4-, 9-, or 16-image displays can be selected. 2, 3 Display the mode setting screen. -
Page 149: Displaying Multiple Pictures Automatically In Sequence-Slide-Show
Displaying multiple pictures automatically in sequence —Slide-show This mode allows you to automatically run through multiple pictures stored on the card. Press (Menu button). The menu screen will be displayed. Press on the Arrow pad to select , then press select PLAY. -
Page 150: Displaying Picture Information
Displaying picture information Press the INFO button to select how much information is displayed (P. 26). The following 3 types of display are available. No information: Only battery check, and card are displayed. Partial information: These indications disappear after a certain amount of time has elapsed. -
Page 151: Movie Picture Information
Movie picture information INFO 3456 Partial information No information INFO INFO SIZE: 320x240 12.23. , 00 21:56 FILE:123–34567 Full information Battery check (P. 60) White balance Print reserve (P. 169/170) Number of pixels Number of prints (P. 173) Aperture value Sound record (P. -
Page 152: Displaying On Tv
Displaying on TV Recorded images and sound can be displayed on TV with the AV cable. [Connection] * Make sure that the TV and camera power are off before connecting. 1 Connect the AV cable to the camera's A/V OUT jack (black). AV cable 2 Connect the AV cable to the TV's video input (yellow) and audio input... -
Page 153: Adjusting The Sound Volume
Adjusting the sound volume It is possible to adjust the sound volume in the display mode. You can also adjust the sound emitted during Slide Show (P. 00) to the same setting. 2, 4 Press (Menu button). The menu is displayed. Press on the Arrow pad to select... -
Page 154: Adding A Sound Memo To Recorded Still Pictures
Adding a sound memo to recorded still pictures You can add sound to still pictures or change the audio that has already been recorded, How to use an external microphone... Sound can be recorded with an external microphone (optional). Use only microphones exclusively made for digital cameras. -
Page 155: Initializing A Card-Card Setup
Initializing a card—CARD SETUP Formatting a card prepares it to accept data. Olympus Brand-formatted cards are highly recommended. When using non-Olympus cards or cards formatted by a PC, be sure to format them with the camera before use. Press (Menu button). - Page 156 All existing data stored on the card will be erased when the card is formatted. Make sure that you save or transfer important data before formatting a used card. Recording time may be higher with non-Olympus cards, PC-formatted cards, and used cards. In such cases, re-formatting with the camera is recommended.
-
Page 157: Image Copy Between Cards
Image copy between cards Images can be copied between SmartMedia and CompactFlash. It is possible to copy all images or selected images. 2, 3, 4, 5 Press (Menu button) to display the menu. To select an image source card, do the following: Press the Arrow pad to select SM/CF, then press . - Page 158 Image copy between cards (Cont.) Select the frame using the Arrow pad, then press the OK button. COPY is displayed on the selected frames. To cancel, press the OK button again. When you've finished selecting images, press (Menu button). The copy confirmation screen is displayed.
-
Page 159: Print Settings
PRINT SETTINGS Recorded images can be printed out with a printer. Selected images can be reserved in a SmartMedia card for printing on a printer or at a photo lab that supports the DPOF (Digital Print Order Format) system. -
Page 160: About Print Settings
DPOF. If a SmartMedia with Print-reserve data recorded in it is inserted into an Olympus CAMEDIA P-400/P-330N printer, printing can be performed at the touch of a button. For more information, consult your printer’s user manual. - Page 161 (index-display mode), it is possible to confirm the print reserve status. This camera cannot be directly connected to printers such as the Olympus P-300 digital printer. Not all functions may be available on all printers or at all photo labs.
-
Page 162: Print All Frames Stored In A Card
Printing all frames stored in a card —All-frame print reserve Print reserve This allows you to store the data needed to make prints of your photos on a printer or at a lab that supports this system. All-frame print reserve allows you to store print data for all the pictures on the card, as well as allowing you to choose how may prints you want. - Page 163 Press to select , then press to select DATE or TIME. Press the OK button. The Menu screen disappears and the picture reappears. The print reserve indicator and the number of prints are displayed. print reserve indicator is not displayed Although you can use Print reserve with pictures protected with the Protect : DATE...
- Page 164 Printing selected frames—Single-frame print reserve Single-frame print reserve This allows you to store print data for specified pictures. Set the Mode dial to to display a still picture. Print reserve cannot be performed for a picture displayed with Press The Print reserve setting screen is displayed.
- Page 165 4, 6 Press the Arrow pad to select the picture you wish to print. : Displays the picture in the previous frame. : Displays the picture in the next frame. : Displays the picture 10 frames back. : Displays the picture 10 frames forward.
-
Page 166: Print Selected Frames
Printing selected frames —Single-frame print reserve (Cont.) Press to select , then press to select DATE or TIME. When Print reserve has been performed for a picture without date/time settings (P. 54), you cannot select DATE and TIME in this step. Press the OK button to complete the setting. -
Page 167: Resetting Print Reserve
Resetting print reserve This resets all the print reserve settings for images saved in a card. Set the Mode dial to display a still picture. Press The Print order setting screen is displayed. If there are no pictures on the card, this screen is not displayed. -
Page 169: Function Settings For Easier Operation
FUNCTION SETTINGS FOR EASIER OPERATION This chapter discusses various advanced recording/displaying techniques that give you greater creative flexibility. You can control various settings and functions as precisely as desired. Note that the items you can adjust in the Still Image Recording Display menu are different from the items you can adjust in the Movie Recording and Display Menus. -
Page 170: Mode Setting Menu
Mode setting menu Item Description Initial Setting ALL RESET (P.148) Returns all setting to default settings. (P.152) Sets the level of picture sharp- NORMAL ness. TIFF *1, *2 (P.153) Selects image size in TIFF. 1360 x 1024 SQ *1, *2 (P.154) Selects image size and quality 640 x 480 (NORMAL) in SQ mode. -
Page 171: How To Use The Mode Setting Menu Screen
How to use the mode setting menu screen 2, 4 Press The Menu screen appears. Press on the Arrow pad and select "MODE SETUP", then press to select "SETUP". Press the OK button. The Mode Setting screen appears. Press and select the item you want to set, then press If the selected item has more than Still picture record menu... - Page 172 How to use the mode setting menu screen (Cont.) When the selected item has more one setting available Press to select the setting item, then press the OK button to set it. Go to step 7. When "ALL RESET" — "CUSTOM" is selected.
- Page 173 When "SETUP" is displayed 1 Press the OK button. 2 Press and select the set- ting item. 3 When the selected setting has only one option Press the OK button. The Mode setting screen comes back on. When the selected setting has more than one option.
-
Page 174: Resetting The Camera's Settings When Turning It Off-All Reset
Resetting the camera’s settings when turning it off —ALL RESET Before turning off the power, set “OFF” to save the current settings. This will allow you to use the current settings again when the power is turned back on. Display the mode setting screen. [ See "How to use the Mode Setting Menu Screen 1 –... - Page 175 When you select “ON”, following items will be reset to their default settings when the camera is turned on again after the power is turned off. Setting Initial setting Flash (P.106) Auto Flash intensity control (P.109) Metering mode (P.100) Macro mode (p.90) Normal Multi metering (p.132) Drive (P.117)
-
Page 176: Resetting The Camera's Settings When Turning It On-All Reset-Custom
Resetting the camera’s settings when turning it on —ALL RESET—CUSTOM Settings such as Zoom and Aperture can be preset so that they will be auto- matically ready when the power is turned on. 2, 3 Display the mode setting screen. [ See "How to use the Mode Setting Menu Screen 1 —... - Page 177 Press to select “RESET ON” or “RESET OFF”, then press the OK button. Repeat steps 2, 3, and 4 if there are other settings you want to change. Press the OK button repeatedly until the menu disappears. The settings in "CUSTOM" will be saved even if you select settings 4, 5 other than "CUSTOM"...
-
Page 178: Setting Image Sharpness
Setting image sharpness Selecting “NORMAL” will sharpen the outlines of images, making it ideal for printing. Selecting “SOFT” will make outlines softer. Selecting “HARD” will emphasize the outlines of images so that the images themselves will be clear and crisp. Adjust it to suit your needs. Display the mode setting screen [ See "How to use the Mode Setting Menu Screen 1 –... -
Page 179: Changing The Shutter Sound Effect
Changing the shutter sound effect Adjusts the type of shutter sound effect and the shutter sound volume. Two shutter sound effect types and sound volume levels are available. If a shutter sound effect type is not selected, the shutter sound volume cannot be set. 2, 3, 4 Display the Mode setting screen. -
Page 180: Changing The Camera Warning Sound Volume
Changing the camera warning sound volume Sets the beep sound for warnings, etc. 2, 3 Display the mode setting screen. [ See "How to use the Mode Setting Menu Screen 1 – 3" (P.145). Press on the Arrow pad and select "... -
Page 181: Setting The Assist Lamp For Focusing -Af Illuminator
Setting the assist lamp for focusing —AF ILLUMINATOR The AF assist lamp provides additional illumination when the subject is dark. It always operates by default, but you can disable it (OFF). 2, 3 Display the mode setting screen. [ See "How to use the Mode Setting Menu Screen 1 –... -
Page 182: Displaying The Image During Recording-Rec View
Displaying the image during recording—REC VIEW Selects whether or not the picture will be displayed on the monitor during recording. 2, 3 Display the mode setting screen. [ See "How to use the Mode Setting Menu Screen 1 – 3" (P.145). -
Page 183: Setting The Times For Power Saving Mode-Sleep
Setting the times for power saving mode—SLEEP The camera will automatically switch to Power Saving Mode (SLEEP) if the time you set has passed with no operations. This function can be disabled (OFF). Time settings can be selected for Record mode (P. A. S. M. S-Prg. ) and Display mode ( ) separately. -
Page 184: Selecting The File Numbering System-File Name
Selecting the file numbering system—FILE NAME You can select the file numbering system for images transferred to a personal computer. Files can be numbered from 0001 to 9999 and folders can be numbered from 100 to 999. About the File No. and Folder No. The file number and folder number used for each image are expressed as shown. - Page 185 AUTO When AUTO is selected, the same folder number and a continuing num- ber from the last file number of the last card will be used, so that the same file number will not be used for pictures taken together and saved in multiple cards.
- Page 186 Selecting the file numbering system —FILE NAME (Cont.) 2, 3 Display the mode setting screen. [ See "How to use the Mode Setting Menu Screen 1 – 3" (P.145) Press on the Arrow pad to select "FILE NAME", then press Press to select "AUTO"...
-
Page 187: Canceling Image Writing To The Card -Shot Cancel
Canceling image writing to the card —SHOT CANCEL You can prevent images from being written to the card. (P. 00) Only pictures remaining in the camera’s memory can be canceled. It is not possible to stop in the middle of image writing. 2, 3 Display the mode setting screen. -
Page 188: Adjusting The Brightness Of The Monitor
Adjusting the brightness of the monitor Adjusting the brightness of the Monitor and Viewfinder to your preferences. The brightness of each can be adjusted separately. 3, 4 Press to display the Monitor or Viewfinder, depending on which one you want to adjust. Display the mode setting screen. -
Page 189: Selecting Meters Or Feet As A Measurement Unit -M/Ft
Selecting meters or feet as a measurement unit —m/ft In the Manual focus mode (P.94), you can select either meters or feet. (In the Macro mode, these are replaced by centimeters or inches respectively.) 2, 3 Display the mode setting screen. [ See "How to use the Mode Setting Menu Screen 1 –... -
Page 190: Changing The Number Of Movie Frames Per Second-Rate
Changing the number of movie frames per second — RATE You can select how many movie frames are shot per second. 15 fps records 15 frames per second, and 30 fps records 30 frames per second. 2, 3 Display the mode setting screen. [ See "How to use the Mode Setting Menu Screen 1 –... -
Page 191: Transferring Pictures To Acomputer
TRANSFERRING PICTURES TO A COMPUTER Your computer can save pictures stored on a card. Once the image data is in your comput- er, you can take advantage of various image processing capabilities and use your images in publications, web sites, multimedia, etc. -
Page 192: Transferring Your Pictures To A Personal Computer
* The USB driver is included on the CAMEDIA Master 2.5 CD-ROM (optional). You can also download the latest version of CAMEDIA Master from the Olympus website. If your computer is running Mac OS 8.6 (or higher), USB MASS Storage Support 1.3.5 (or higher) is required. -
Page 193: Saving Directly From A Card
Saving directly from a card Card adapters enable you to save images on your personal computer without using any special software. For the latest information on available adapters, consult our Customer Support Center. Computer operating Card type Required devices environment Personal computer FlashPath MAFP-2N equipped with 3.5"... - Page 194 Transferring your pictures to a personal computer (Cont.) Computer operating Card type Required devices environment Personal computer CompactFlash PC card equipped with a PC card adapter slot (PCMCIA) or an external PC card reader/writer CompactFlash With LEXAR Media CompactFlash, image data is transferred to a personal computer equipped with a USB port via the exclusive cable.
-
Page 195: Connecting To A Computer Using The Exclusive
Connecting to a computer using the exclusive USB cable This section explains how to save image data to a personal computer by connecting it to the camera with the exclusive USB cable. Transfer methods vary depending on the computer operating environment. [ Connecting directly to a computer by cable (P. -
Page 196: Removing The Card
Connecting to a computer using the exclusive USB cable (Cont.) Set the camera’s Mode dial to The personal computer recognizes the card selected on the camera as a removable disk. On a Macintosh desktop, the card selected on the camera is displayed as a new folder. The image data stored in the card can be treated just as files are treated on a floppy-disk or MO using software such as Windows Explorer. - Page 197 Macintosh Make sure the camera’s access lamp is off. Drag and drop the Driver icon onto the Trash on the desktop or select “Special” — “Eject” on the menu. Open the card cover on the camera and remove the card. [ Setting the card (P.
-
Page 199: Miscellaneous
MISCELLANEOUS... -
Page 200: Troubleshooting
Troubleshooting Operating Problems SYMPTOM The camera does not work. POSSIBLE CAUSES CORRECTIVE ACTION REF. PAGE The power is OFF. Set the Power switch to ON to P. 58 turn on the power. The batteries are loaded Reload the batteries correctly. P. - Page 201 SYMPTOM No picture is taken when the Shutter button is pressed. POSSIBLE CAUSES CORRECTIVE ACTION REF. PAGE The card is full. Replace the card, delete P. 40–42 unwanted pictures or transfer P. 78 the data to a computer and P. 180–189 delete all of the pictures.
- Page 202 Troubleshooting (Cont.) SYMPTOM The flash does not fire. POSSIBLE CAUSES CORRECTIVE ACTION REF. PAGE The flash is pushed Slide the Flash switch to raise P. 72 down. the flash. P. 108 The subject is lighted. Set the flash to Fill-In mode. P.
- Page 203 SYMPTOM The monitor is not clear. POSSIBLE CAUSES CORRECTIVE ACTION REF. PAGE The brightness is not Adjust the brightness. P. 163 adjusted properly. The monitor is exposed Block the sunlight. to direct sunlight. SYMPTOM Image rotate, Image protect, Single-erase, All-frame erase and Card formatting cannot be performed.
-
Page 204: Problems With Images
Troubleshooting (Cont.) Problems with Images SYMPTOM The subject’s eyes appear red in pictures recorded with the flash. POSSIBLE CAUSES CORRECTIVE ACTION REF. PAGE The flash is in the Auto- This “red-eye phenomenon” P. 107 flash mode. occurs with all cameras when a flash is used. - Page 205 SYMPTOM The picture is out of focus. POSSIBLE CAUSES CORRECTIVE ACTION REF. PAGE The Manual focus was Use the right Manual focus for P. 94 used with the wrong the distance. focal range. The subject was dark Set the AF assist lamp to on. P.
- Page 206 Troubleshooting (Cont.) SYMPTOM The colors of pictures taken indoors look unnatural. POSSIBLE CAUSES CORRECTIVE ACTION REF. PAGE The lighting fixture(s) Set the flash mode to Fill-In. P. 107 affected the picture. The subject is mostly Include white in the image or P.
-
Page 207: User Maintenance
User maintenance After use Be sure to turn off the power and attach the lens cap to the lens. Cleaning the camera Set the Power switch to OFF. Remove the batteries (P. 33/34). When using the AC adapter, unplug the AC adapter from the camera and the AC outlet. (P. 37) Exterior..Wipe gently with a soft cloth. -
Page 208: Connectable Devices-System Chart
Connectable devices—System chart A variety of capabilities are available when connected to optional equipment. Printer (P-400/P-330N) FlashPath MO drive SmartMedia PC card adapter SmartMedia Reader/ Writer Personal computer Camera AC adapter Conversion lens adapter Tele Conversion lens Remote Wide conversion lens control Macro conversion lens External flash... -
Page 209: Error Codes
Error codes Error codes appear when there is a problem with the camera. Error codes displayed on the control panel will flash. Viewfinder/ Control panel Error content Remedy monitor CARD The card cover is Insert a card and close COVER open. - Page 210 Error codes (Cont.) Viewfinder/ Control panel Error content Remedy monitor (Format The card is not Format the card. confirmation formatted. screen) There are no Insert a card which PICTURE pictures in the contains images. card, so there is nothing to play back.
-
Page 211: Optional Items
LEXAR Media CompactFlash NiMH Battery Charger USB cable USB SmartMedia Reader/Writer Visit the Olympus home page (http://www.olympus.com) for the latest information on optional items. Compatibility of the picture data Images taken by this camera may not be properly displayed or printed with other Olympus digital cameras. -
Page 212: Specifications
Full Auto TTL (iESP auto), Preset (Daylight, Overcast, Tungsten light, Fluorescent), white balance Lens Olympus lens 7.0 to 70.0, F2.8 to F3.5, 13 elements in 10 groups (equivalent to 38 to 380 mm lens on 35 mm camera), aspherical glass Photometric system... - Page 213 Exposure control Program auto exposure, Aperture priority auto exposure, Shutter priority auto exposure, Manual exposure, Night Scene program exposure Aperture W : F2.8 to 8.0 T : F3.5 to 8.0 Shutter speed Used with mechanical shutter Still 1/2 to 1/800 sec. (2 to 1/10000 sec. with manual setting) Movie 1/30 to 1/10000 sec.
- Page 214 Specifications (Cont.) Outer connector DC-IN jack, A/V OUT jack, USB connector (USB 1.0 compatible), 5-pin external flash socket, External microphone jack, Remote cable jack Date and time Recorded with picture data simultaneously Automatic calendar Up to 2030 system Power supply for Built-in lithium battery calendar Operating environment...
-
Page 215: Index
Index DPOF ............168 Drive mode ........117 — 121 AC adapter ..........37 AC outlet..........37 Adjusting the monitor brightness ..163 Adjusting the sound volume ....00 Erasing pictures ........77, 78 AE lock ..........130, 131 Exposure compensation......99 AE memory........130, 133 External flash ........112 AF assist lamp ........157 External microphone ......123 AF mode, iESP........96 AF mode, SPOT ........96... - Page 216 Index (Cont.) Mode dial, M..........44 Mode dial, S-Prg........44 Record mode ........104 Mode dial, ..........44 Recording movies........70 Mode setup menu, Red-eye reduction flash ......107 ALL RESET ......148 – 151 Remaining battery power ......60 Mode setup menu, (sharpness)..152 Remote control ........76, 120 Resetting print reserve ......178 Mode setup menu, (shutter sound...
- Page 217 White balance, Auto ......134 White balance, PRESET ......00 White balance, (overcast) ....134 White balance, (daylight) ....134 White balance, (tungsten light) ..134 White balance, (fluorescent) ..134 White balance, ........00 Wide-angle shooting........71 Zoom ............71...
- Page 220 OLYMPUS AMERICA INC. Two Corporate Center Drive, Melville, NY 11747-3157, U.S.A. Tel. 631-844-5000 (Customer support) Tel. 1-888-553-4448 http://www.olympus.com OLYMPUS OPTICAL CO. (EUROPA) GMBH. (Premises/Goods delivery) Wendenstraße 14-16, 20097 Hamburg, Germany. Tel. 040-237730 (Letters) Postfach 10 49 08, 20034 Hamburg, Germany. http://www.olympus-europa.com Serial number / Numéro de série / Número de serie...