Advertisement
Programmable Thermostats
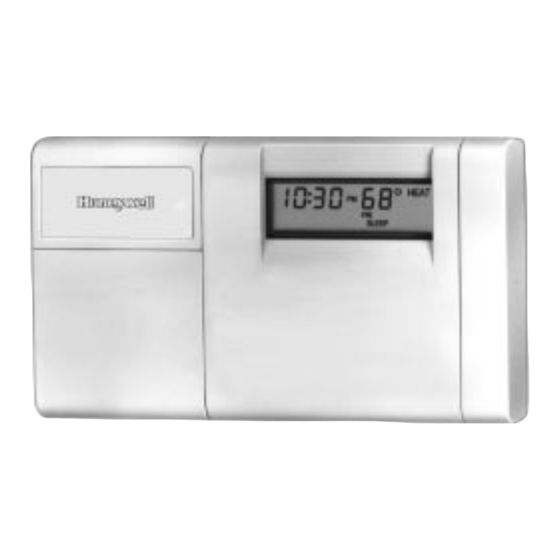
The T8131 and T8132 Thermostats provide
energy savings for single-stage heating and cool-
ing applications while providing reliable, precise
temperature control.
T8131/T8132 Models
HEAT-OFF-COOL system switch.
AUTO-ON fan switch.
Separate programs for weekdays and weekends
5 day/2 day.
Digital LCD display.
Easy to program and install.
Precise temperature control.
Four daily energy saving programs.
Available in taupe and Premier White
Compatible with most 24 Vac standing pilot, gas
electronic ignition, oil or central electric systems.
T8131A,B,C; T8132A,B,C
™
.
B.M. • Rev. 6-94 • ©Honeywell Inc. 1994 • Form Number 68-0148-1
T8131C
T8132C
T8131 Models Only
Powered directly from 24 Vac system transformer.
Green light emitting diode (LED) lights when prop-
erly connected.
Two AA alkaline batteries for backup power
recommended.
T8132 Models Only
Requires two AA alkaline batteries.
LCD flashes "bAt Lo" indicating low battery power.
Isolated heating/cooling circuits.
CONTENTS
Specifications ................................................ 2
Ordering Information .................................... 2
Installation .................................................... 3
Programming the Thermostat ....................... 8
Checkout and Settings ................................. 10
Troubleshooting .......................................... 11
Cross Reference .......................................... 12
1
68-0148-1
Advertisement

Summary of Contents for Honeywell T812A1002 - Mechanical Thermostat
-
Page 1: Table Of Contents
Specifications ..........2 Ordering Information ........2 Installation ............ 3 Programming the Thermostat ....... 8 Checkout and Settings ......... 10 Troubleshooting .......... 11 Cross Reference .......... 12 B.M. • Rev. 6-94 • ©Honeywell Inc. 1994 • Form Number 68-0148—1 68-0148—1... -
Page 2: Specifications
If you have additional questions, need further information, or would like to comment on our products or services, please write or phone: 1. Your local Honeywell Home and Building Control Sales Office (check white pages of phone directory). 2. Home and Building Control Customer Satisfaction Honeywell Inc., 1985 Douglas Drive North... -
Page 3: Installation
Heat pumps/Multistage Equipment Not compatible with any 120/240 volt circuit. Not designed for steam or gravity systems. Compatible with 2-wire Honeywell zone valves. Isolating relay required for 3-wire thermostats for zone valves. Not compatible with 2-wire White Rodgers no. 1361 Valves. - Page 4 T8131A,B,C; T8132A,B,C I N S T A L L A T I O N Fig. 3—Mounting thermostat mounting plate. Fig. 5—3-wire heat-only application. WALL 3-WIRE HEAT-ONLY ANCHORS (2) WIRES THROUGH WALL OPENING WALL HEATING MOUNTING RELAY OR (HOT) PLATE VALVE COIL POWER SUPPLY.
- Page 5 T8131A,B,C; T8132A,B,C I N S T A L L A T I O N Fig. 8—2-wire heat-only application (jumper Fig. 10—4-wire heat/cool application (jumper intact). intact). 2-WIRE HEAT-ONLY (JUMPER INTACT) 4-WIRE HEAT/COOL (JUMPER INTACT) JUMPER JUMPER HEATING COOLING HEATING RELAY OR RELAY OR CONTACTOR VALVE COIL...
- Page 6 T8131A,B,C; T8132A,B,C I N S T A L L A T I O N ADJUST FAN OPERATION SWITCH, AS an electric heat system, set the switch to “E.” The “E” REQUIRED setting will allow the fan to turn on immediately with the The thermostat fan operation switch, labeled FUEL heating or cooling in a system where the “G”...
- Page 7 T8131A,B,C; T8132A,B,C I N S T A L L A T I O N IMPORTANT: Although the thermostat has a low battery indicator, replace the batteries once a year to pre- Fig. 14—Installing position for batteries. vent the thermostat from losing time and program due to lack of battery power.
-
Page 8: Programming The Thermostat
T8131A,B,C; T8132A,B,C PROGRAMMING THE THERMOSTAT Programming the Thermostat T8131A AND T8132A MODELS T8131B AND T8132B MODELS Set Current Time/Day Set Current Time/Day To set time, press and release Set Clock/Day once, then To set time, press and release Clock/Day once, then press Ahead or Back until the current time displays. - Page 9 T8131A,B,C; T8132A,B,C PROGRAMMING THE THERMOSTAT T8131C AND T8132C MODELS A Quick Guide for Operating or Making Changes Set Current Time/Day To set time, press and release Set Clock/Day once, then NOTE: System switch must be set to Heat or Cool to press Ahead or Back until current time displays.
-
Page 10: Checkout And Settings
T8131A,B,C; T8132A,B,C CHECKOUT AND SETTINGS Checkout and Settings CHECKOUT After the thermostat is mounted on the subbase, check operation as follows: Model Heating For T8131 models only, first check that the green power LED is lit, indicating the thermostat is powered properly. Cool Heat Do not check heating system operation by jumpering thermostat terminals at the... -
Page 11: Troubleshooting
T8131A,B,C; T8132A,B,C CHECKOUT AND SETTINGS • TROUBLESHOOTING SETTINGS AND ADJUSTMENTS Set the Fan and System Switches Auto First set the fan switch FAN AUTO: Normal setting for most homes. A single-speed fan will turn on automatically with the air conditioner or furnace. -
Page 12: Cross Reference
® C1012 T8131C1012 Honeywell logo; TRADELINE model; Premier White™. T8132 models: A1007 T8132C1003 F only. Honeywell logo; Honeywell Canada ® TRADELINE model; configurable for F/ C. T8132C1011 Replacement is Premier White™, F only. A1015 T8132C1003 Carrier Weathermaker logo; Carrier part no.


