Table of Contents
Advertisement
Quick Links
Advertisement
Chapters
Table of Contents

Related Manuals for Zte Adamant


Summary of Contents for Zte Adamant
-
Page 2: Legal Information
ZTE Corporation. ZTE Corporation reserves the right to make modifications on print errors or update specifications in this guide without prior notice. Version No. : R1.0 Edition Time : 2011.9.27... -
Page 3: Table Of Contents
Contents Welcome ················································· 6 Your Adamant ............6 Phone Overview............7 Getting Started····································· 11 Installing the Battery..........11 Removing the Battery..........12 Charging the Battery ..........12 Installing the SIM Card ...........13 Removing the SIM Card .........14 Installing the microSD Card........14 Removing the microSD Card........15 Powering On/Off Your Phone .........15 Activating Your Phone..........16 Idle Mode ...............16... - Page 4 Wait/Pause .............42 Caller ID ..............43 In-Call Options............43 Turn Vibration Mode on or off .........44 Recent Calls ............44 Contacts ··············································· 45 Adding a New Contact..........45 Editing a Contact ............45 Updating a Contact..........46 Changing the Default Number ........46 Finding a Contact ...........47 Managing Contacts..........47 Grouping Contacts..........50 Backup Assistant............52...
- Page 5 Opening a New Browser Tab .........72 Setting a Speed Dial ..........72 Adding Favorites ............73 Browser Settings ............73 Exiting the Browser ..........74 Media Center ········································ 75 Apps...............75 Bing Search ............77 My Music..............77 My Sounds .............81 My Ringtones ............82 Taking a Picture .............83 Viewing and Managing My Pictures......84 Online Album............86 Bluetooth...
- Page 6 Master Volume .............101 Keyguard Settings ..........101 Sound Settings .............102 Display Settings............105 Phone Settings .............110 Call Settings ............121 Memory ..............125 Phone Info ............129 SIM Info..............129 Software Updating via PC ················· 130 For Your Safety ·································· 131 General Care............131 Aircraft Safety............134 Hospital Safety .............135 General Guidelines..........135 Road Safety............136 Vehicles Equipped With an Airbag......137...
-
Page 7: Welcome
Welcome Your Adamant Thank you for choosing Adamant for your mobile phone. Adamant can works in both CDMA and GSM networks, so you can make calls and send messages or emails while traveling or roaming. To guarantee this mobile phone is always in its best condition, please read this manual carefully and keep it for future reference. -
Page 8: Phone Overview
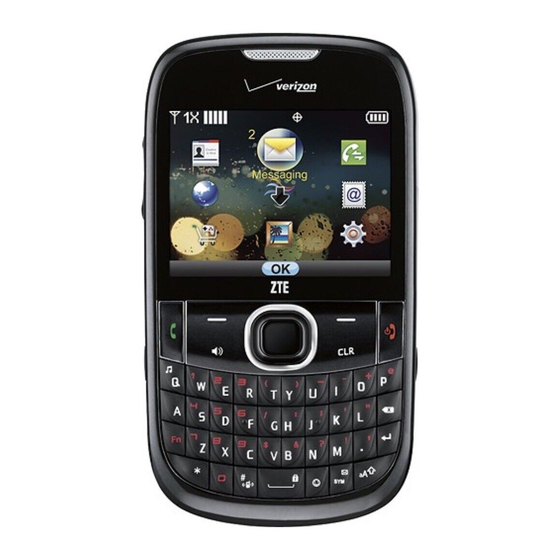
Phone Overview... - Page 10 Earpiece: Allows you to hear the caller. LCD Screen: Displays all the information needed to operate your phone. Left Soft Key: Press to display the Messaging menu or access the function listed above the key. Send Key: Press to make or receive a call. From idle mode, press to access the All Calls list.
- Page 11 14. Right Soft Key: Press to display the Contacts List or access the function listed above the key. 15. Directional Key: Allows you to scroll through phone menu options and provides a shortcut to phone functions from idle mode. 16. Accessory/Charger Port: Connects the phone to the wall adapter, or other compatible accessories.
-
Page 12: Getting Started
Getting Started Installing the Battery Remove the battery cover by pressing downward and sliding it off. Align the battery contacts with the phone terminal and press until you hear the “click”. Align the battery cover over the battery compartment and slide it upward until it clicks into place. -
Page 13: Removing The Battery
Removing the Battery Turn the phone off. Press downward on the battery cover and slide the battery cover downward to remove it. Remove the battery from the battery compartment by lifting the battery up using the fingertip cutout. Charging the Battery Your device comes with a wall adapter and a USB cable which connect together to charge your phone. -
Page 14: Installing The Sim Card
Warning: Please use only an approved charging accessory to charge your device. Improper handling of the charging port, as well as the use of an incompatible charger, may cause damage to your device and void the warranty. When not using the battery for a long time, remove it from the phone and store in a cool dry place. -
Page 15: Removing The Sim Card
Slide the SIM card into the SIM card holder until it stops. Align the battery contacts with the phone terminal and press until you hear the “click”. Align the battery cover over the battery compartment and slide it upward until it clicks into place. CAUTION: Do not bend, scratch, or unnecessarily touch the SIM card’s metal surface. -
Page 16: Removing The Microsd Card
Remove the battery cover, as previously instructed. Position the microSD card with the metal contacts facing down and slide it into place until it is fully inserted and locked in place. Replace the battery cover, as previously instructed. Removing the microSD Card 1. -
Page 17: Activating Your Phone
• To power off the phone, press and hold the End/Power Key until the display turns off. Activating Your Phone Please contact your service provider for more information. Idle Mode The start screen indicates that your device is in Idle Mode. Take the following start screen in CDMA mode for example. -
Page 18: Main Display Icons
Location: Location information sharing mode. Battery strength: Four bars indicate a fully charged battery. Note: The start screen may vary if you change the default display settings. Main Display Icons Top Display Icons Digital: Digital service is available. More bars indicate a stronger signal. - Page 19 Data Call: Data call is in progress. Dormant: Data call is in the dormant state. No data is being transmitted or received. No Service: Your phone is outside the service area. TTY: TTY mode is active. Voice Call: A voice call is in progress. E911: Global Positioning Service (GPS) location feature for 911 is enabled (for emergency calls only).
- Page 20 Bottom Display Icons All Sounds Off: All sounds are silenced including incoming call ringtone, message alert, alarm sound and other alert sounds. Alarm Only: Your phone only rings for the alarm sounds. Vibrate On: Your phone vibrates for calls and alerts.
- Page 21 Mobile 1 Mobile 2 Home Business Personal Email Business Email Groups Picture Ringtone Speed Dial Voice Dial New/Unread Message Opened/Read Message Message Delivered Incomplete Delivery Sent Message, Delivery Failed Message Locked...
- Page 22 Text Message Draft Multimedia Message Draft Priority Corrupt Message Pending Message Send Unread MMS Read MMS Sent Message Unread WAP PUSH Read WAP PUSH Multiple Message Delivered Multiple Message Failed Multiple Message Incomplete Multiple Message Pending Multiple Message Sent...
-
Page 23: Menu Outline
Menu Outline Contacts 1. New Contact 2. Contact List 3. Backup Assistant 4. Groups 5. Speed Dials 6. In Case of Emergency 7. My Name Card Messaging 1. New Message 1. TXT Message 2. Picture Message 3. Voice Message 2. Messages 3. - Page 24 2. Received 3. Dialed 4. All 5. View Timers Mobile Web Media Center 1. Apps 2. Search 3. Mobile Web 4. Music & Tones 1. My Ringtones 2. My Music 1. All Songs 2. Playlists 3. Artists 4. Genres 5. Albums 6.
-
Page 25: My Pictures
7. Music Settings 1. Repeat 2. Shuffle 3. Music Only Mode 3. My Sounds 1. Record New 5. Pictures 1. My Pictures 2. Take Picture 3. Online Album Mobile Email Apps My Pictures Settings & Tools 1. My Verizon 2. Master Volume 3. - Page 26 5. Alarm Clock 6. Stop Watch 7. World Clock 8. Notepad 9. USB Mass Storage 4. Bluetooth Menu 1. Add New Device 5. Keyguard Settings 1. Auto Lock 2. Unlock Options 6. Sounds Settings 1. Easy Set-up 2. Call Sounds 1.
- Page 27 3. Voicemail 1. Tone 2. Vibrate 3. Reminder 4. Emergency Tone 5. Missed Call 1. Tone 2. Vibrate 3. Reminder 4. Keypad Volume 5. Digit Dial Readout 6. Service Alerts 1. ERI 2. Minute Beep 3. Call Connect 4. Software Update 7.
- Page 28 1. Display 2. Keypad 4. Wallpaper 1. My Pictures 2. Fun Animations 5. Display Themes 6. Main Menu Settings 1. Menu Layout 2. Replace Menu Items 3. Position Menu Items 4. Reset Menu Settings 1. Menu Layout 2. Menu Items 3.
- Page 29 3. Shortcut 3 4. Shortcut 4 2. Set Directional Keys 1. UP Directional Key 2. LEFT Directional Key 3. DOWN Directional Key 3. Voice Commands Settings 1. Confirmation 2. Sensitivity 3. Adaptation 1. Adapt Voice 4. Prompts 1. Mode 2. Audio playback 3.
- Page 30 3. Phone Lock Setting 4. Lock Phone Now 5. Restore Phone 8. SIM Security 1. PIN Code 1. PIN Lock 2. Edit PIN Code 2. SIM Lock 9. Network Mode 10. Global Data Settings 11. System Select 1. CDMA Settings 2.
- Page 31 8. Hearing Aid Mode 10. Memory 1. Save Options 1. Pictures 2. Sounds 2. Phone Memory 1. Memory Usage 2. My Pictures 3. My Ringtones 4. My Music 5. My Sounds 6. My Contacts 7. Move All To Card 3. Card Memory 1.
- Page 32 2. GSM Number 2. SW/HW Version 3. Icon Glossary 4. Software Update 1. Status 2. Check New 5. Operating System 12. SIM Info 13. Set-up Wizard *Note: The phone menu may change according to the current network mode, or whether the microSD card or SIM card is inserted.
-
Page 33: Basic Operation
Basic Operation Menu Navigation Your phone can be customized via the menu. Each function can be accessed by scrolling with the Directional Key or by pressing the number that corresponds with the menu item. Press the Center Select Key to unlock the phone. To access the menu, press the Center Select Key [MENU]. -
Page 34: Locking/Unlocking Your Phone
Locking/Unlocking Your Phone To keep your phone from unauthorized use, you can lock the phone. The use of your phone is restricted once the phone is locked. You can still make emergency calls when the phone is locked. Locking Your Phone Press the Center Select Key to unlock the keypad. -
Page 35: Choosing The Network Mode
• To unlock the keypad, you can press the Center Select Key, or press the Left or Right Soft Key and Center Select Key sequentially depending on the current unlock options. Note: To change the unlock options, press the Center Select Key [MENU] >... -
Page 36: Easy Set-Up
Press the Center Select Key to unlock the phone. Press the Center Select Key [MENU] > Settings & Tools > Set-up Wizard. Follow the prompts on the screen, and press the Center Select Key [SET] to set each option or press the Right Soft Key [Skip] to skip setting the option. -
Page 37: Entering Text
Entering Text Your phone has a QWERTY keypad – a compact version of a standard computer keyboard. Here’s how it works. • For lowercase letters, simply press the keys as normal. • To enter a single uppercase letter, press then press the corresponding key. •... - Page 38 • Press the Left Soft Key to change the input mode: predictive text, alphabetic and numeric. You can also press and hold to switch the input modes. • To open the symbols, press or press the Left Soft Key and select Symbols. Use the Directional Key and the Center Select Key to enter a symbol.
-
Page 39: Calling
Calling Making a Call Using the Keypad Press the Center Select Key to unlock the phone. Enter the phone number including the full area code if needed. Delete wrong digits by pressing the CLR Key or Press the Send Key. Note: To make an emergency call, enter the emergency number and press the Send Key. -
Page 40: Answering A Call
Using the Call History Press the Center Select Key to unlock the phone. Press the Center Select Key [MENU] > Recent Calls. Navigate through the menu and press the Center Select Key to view Missed, Received, Dialed or All Calls. Select a number or contact you want to call and press the Send Key. -
Page 41: Three-Way Call
Answering a call-waiting call: When you receive a call while on a call, press the Send Key to place the first call on hold and answer the new call. Press the Send Key again to return to the first call. Note: Call waiting requires network support and may result in additional charges. - Page 42 One-Touch Dialing: 1-9: Press and hold the number you wish to connect to for more than 1 second. 1: Speed Dial entry 1 (Voicemail) is already assigned. Two-Touch Dialing: 10-99: Press the first digit then press and hold the second digit of the number to dial.
-
Page 43: Wait/Pause
Removing a Speed Dial Press the Center Select Key to unlock the phone. Press the Center Select Key [MENU] > Contacts > Speed Dials. Select a speed dial entry, or enter the speed dial digits in the Go To field. Press the Right Soft Key [Remove]. -
Page 44: Caller Id
2-Sec Pause (P) The phone waits 2 seconds before sending the next string of digits automatically. Press the Center Select Key to unlock the phone. Enter the phone number. Press the Right Soft Key [Options]. Select Add 2-Sec Pause and press the Center Select Key [OK]. -
Page 45: Turn Vibration Mode On Or Off
New TXT Message: Create a new text message. Contact List: View the contact list. Recent Calls: View the call history. Bluetooth Menu: Open the Bluetooth menu. Main Menu: Open the main menu. Notepad: Open the notepad. Voice Privacy: Turn the voice privacy feature on or off. -
Page 46: Contacts
Contacts Adding a New Contact Press the Center Select Key to unlock the phone. Press the Center Select Key [MENU] > Contacts > New Contact. Enter the contact information you need (Name, Mobile 1, Home, Business, Mobile 2, Fax, Personal Email, Business Email, IM Screen Name, Picture, Ringtone, Message Tone, Group, Home Address, Work Address or Notes) and press the Center Select Key [SAVE]. -
Page 47: Updating A Contact
Updating a Contact Press the Center Select Key to unlock the phone. Enter the phone number you want to save in idle mode. Press the Left Soft Key [Save]. Select Update Existing and press the Center Select Key [OK]. Select the contact you would like to update and press the Center Select Key [OK]. -
Page 48: Finding A Contact
Finding a Contact Press the Center Select Key to unlock the phone. Press the Right Soft Key [Contacts] in idle mode to view the contact list. Enter the contact name in the Go To field and the contacts matching the name will be displayed. Managing Contacts Filtering Contacts When your SIM card is inserted into the phone, you can... - Page 49 Press the Center Select Key [MARK] to mark the contacts, or press the Right Soft Key [Mark All] to mark all contacts and then press the Left Soft Key [Done]. Select Yes and press the Center Select Key [OK] to confirm.
- Page 50 Press the Center Select Key to unlock the phone. Press the Right Soft Key [Contacts] in idle mode. Select a phone or SIM contact and press the Right Soft Key [Options]. Select Move & Copy > Move to SIM Card/Copy to SIM Card and press the Center Select Key [OK] to move or copy the phone contact to your SIM card.
-
Page 51: Grouping Contacts
Sending Contacts via Bluetooth You can send the contacts (vCards) to the Bluetooth devices that support vCards. Press the Center Select Key to unlock the phone. Press the Right Soft Key [Contacts] in idle mode. Select a contact and press the Right Soft Key [Options]. -
Page 52: Adding Contacts To A Group
Adding Contacts to a Group Press the Center Select Key to unlock the phone. Press the Center Select Key [MENU] > Contacts > Groups. Select a group and press the Right Soft Key [Options]. Select Add or Edit and press the Center Select Key [OK]. -
Page 53: Backup Assistant
Select New TXT Message, New Picture Message or New Voice Message and press the Center Select Key [OK]. Write the message and press the Center Select Key [SEND]. Backup Assistant Backup Assistant is a wireless service that saves a copy of your phone’s address book to a secure web site. - Page 54 Select Contact 1, Contact 2 or Contact 3 and press the Center Select Key [ADD]. Select an option in the ADD CONTACT screen and press the Center Select Key [OK]. • From Contacts: Choose a contact from the contact list and press the Center Select Key [OK].
-
Page 55: My Name Card
Select Personal Info and press the Center Select Key [VIEW]. Select Note 1, Note 2 or Note 3 and press the Center Select Key [ADD]. Enter the information and press the Center Select Key [SAVE]. The information you entered now appears in place of Note 1, Note 2 or Note 3. - Page 56 Enter your contact information and press the Center Select Key [SAVE]. Sending My Name Card via Message Press the Center Select Key to unlock the phone. Press the Center Select Key [MENU] > Contacts > My Name Card. Press the Right Soft Key [Options], then select Send via TXT/Picture/Voice Message and press the Center Select Key [OK].
-
Page 57: Messaging
Messaging Your phone is able to send text, picture and voice messages. To access Messaging, press the Center Select Key [MENU] > Messaging. Shortcut: To quickly access the message box, press the Center Select Key to unlock the phone, then press the Left Soft Key [Message] in idle mode. -
Page 58: Creating And Sending A Text Message
Creating and Sending a Text Message Press the Center Select Key to unlock the phone. Press the Center Select Key [MENU] > Messaging > New Message > TXT Message. In the To field, enter the phone number or email address and press the Center Select Key [OK]. Or press the Right Soft Key [Add] to access the following options: •... -
Page 59: Creating And Sending A Picture Message
• Priority Level: Set the priority level of the message to High or Normal. • Cancel Message: Cancel the message, with the option to save it in the Drafts folder. Press the Center Select Key [SEND] or press the Send Key to send the message. Creating and Sending a Picture Message Press the Center Select Key to unlock the phone. - Page 60 Select the Picture field and press the Left Soft Key [My Pics]. Select a picture and press the Center Select Key [OK] to add the picture. Select the Sound field and press the Left Soft Key [Sounds]. Select a sound or record a new sound, and then press the Center Select Key [OK] to add the sound file.
-
Page 61: Creating And Sending A Voice Message
• Remove Name Card: Remove the added name card in the Name Card field. • Remove Slide: Remove the added slide. • Cancel Message: Cancel the message, with the option to save it in the Drafts folder. Press the Center Select Key [SEND] or press the Send Key to send the message. -
Page 62: Message Folders
• Review: Review the message before sending. • Save As Draft: Save the current message in the Drafts folder. • Insert Quick Text: Insert already written sentences in the Text or Subject fields. • Insert Contact Number/Email: Add the contact number or Email address in the Text field. - Page 63 Select a message and press the Right Soft Key [Options] to access the following options. • Reply: Reply to the message. • Reply w. Copy: Reply with a copy of the original message included. • Forward: Forward the message. • Extract Addresses: Extract all phone numbers, email addresses or URLs in the message.
- Page 64 Messages The default Inbox View is set to Contact. The received and sent messages are saved in the combined Messages folder. You can view the messages grouped by a contact or phone number. Press the Center Select Key to unlock the phone. Press the Center Select Key [MENU] >...
- Page 65 Sent When the Inbox View is set to Time, the sent messages are saved in the Sent folder. You can view the messages sorted by time. Press the Center Select Key to unlock the phone. Press the Center Select Key [MENU] > Messaging >...
-
Page 66: Erasing Messages
Press the Center Select Key to unlock the phone. Press the Center Select Key [MENU] > Messaging > Drafts. Select a message and press the Right Soft Key [Options] to access the following options. • Send: Send the draft message. •... -
Page 67: Backing Up/Restoring Messages
• Erase All: Erase all messages or all except unread messages in all message folders. Select the desired option and press the Center Select Key [OK] to confirm. Note: When the Inbox View is set to Contact (default setting), you can erase all Sent/Received messages in the Messages folder. -
Page 68: Voicemail
Select Backup & Restore > Restore and press the Center Select Key [OK]. Select a backup file and press the Left Soft Key [Restore]. After the restoring, you can check the message folders to view the restored messages. Voicemail All unanswered calls to your phone can be transferred to voicemail, even if your phone is powered off. -
Page 69: Mobile Im
Select an emergency alert and press the Center Select Key [OK] to view it. Note: You can enable or disable extreme/severe/AMBER alerts by selecting Emergency Alerts > Receive Alerts in Messaging Settings. Mobile IM Mobile IM allows you to send and receive instant messages on your phone. -
Page 70: Messaging Settings
Messaging Settings Press the Center Select Key to unlock the phone. Press the Center Select Key [MENU] > Messaging and then press the Left Soft Key [Settings]. Select one of the following options and press the Center Select Key [OK]. •... - Page 71 • Multimedia Auto Receive: Choose On to download the picture/voice messages automatically. Choose Off to have the phone prompt you to download the picture/voice messages. • Quick Text: Create or edit the quick text which you can add to a message. Press the Center Select Key [EDIT] to edit a quick text.
-
Page 72: Mobile Web
Mobile Web The Opera Mini web browser is preinstalled in your phone, which allows you to access the Internet with ease. This browser compresses the data of the web pages you visit and speeds up the browsing experience while saving your data airtime. -
Page 73: Opening A New Browser Tab
Opening a New Browser Tab The Opera Mini browser supports multi-tab browsing. You can open a different web page in each tab. Use the Directional Key to highlight on the upper right of the browser screen and press the Center Select Key [Tabs] to view the tabs. Select and press the Center Select Key [OK]. -
Page 74: Adding Favorites
Adding Favorites You can add a web page in Favorites, so that you can open it easily next time. Press the Left Soft Key [Menu] in the browser screen and highlight and then press the Center Select Key [Favorites]. Highlight Add and press the Center Select Key [Add]. -
Page 75: Exiting The Browser
• Information: View the web page and browser information. • Font Size: Change the size of the text in a web page to Small, Medium, or Large. Exiting the Browser Press the Left Soft Key [Menu] in the browser screen and then press the Right Soft Key [Exit]. Select Yes and press the Center Select Key [Select] to exit the browser. -
Page 76: Media Center
Media Center Apps Apps is Verizon’s mobile storefront which allows you to download all kinds of applications and games. You can search, purchase, and use applications from your phone in Apps. Shopping Applications Press the Center Select Key to unlock the phone. Press the Center Select Key [MENU] >... -
Page 77: Application Folder
Enter the keywords and press the Center Select Key [Search]. Application Folder Application folders allow you to organize the applications you purchased into your own categories. You can move any of your applications into a folder. To create an application folder: Press the Center Select Key to unlock the phone. -
Page 78: Bing Search
To remove an application from a folder: Open a folder and select the application you want to remove from the folder. Press the Right Soft Key [Options] > Remove from Folder. Bing Search Bing Search allows you to get free maps, local business listings, nearby services and other information right on your phone when you need them. -
Page 79: Playing Music
Playing Music Press the Center Select Key to unlock the phone. Press the Music Key in idle mode to access My Music. The phone will check your phone memory and the microSD card (if inserted) for music files. Select All Songs, Artists, Genres, Albums or Playlists and press the Center Select Key [OK] to view the songs or playlists. -
Page 80: Creating A Playlist
Song Info: View detailed song information. Home Screen: Return to idle mode and the music is still playing. Repeat: Set the repeat mode (Repeat All, Repeat One or Off). Shuffle: Turn on or off the shuffle. • Press the End/Power Key to go back to idle mode and the music will continue playing in the background. -
Page 81: Adding Songs To A Playlist
Adding Songs to a Playlist Press the Center Select Key to unlock the phone. Press the Music Key in idle mode. Select Playlists and press the Center Select Key [OK]. Select a playlist and press the Left Soft Key [View]. Press the Right Soft Key [Options] and select Add Songs then press the Center Select Key [OK]. -
Page 82: My Sounds
My Sounds In My Sounds, you can play and use the sound files stored on your phone and microSD card. IMPORTANT: To use the sound files on the microSD card, please store them in synched\sounds on the microSD card. The phone will load the sound files in this directory. Recording a New Sound Press the Center Select Key to unlock the phone. -
Page 83: My Ringtones
Press the Right Soft Key [Options] for more options: • Send: Send the sound. • Rename: Rename the sound. (Not available for preloaded sounds.) • Move To Memory Card/Move To Phone: Move the sound to the microSD card or phone memory. The locked sound cannot be moved. -
Page 84: Taking A Picture
Select a ringtone and press the Center Select Key [PLAY] to play it. Press the Left Soft Key [Set As] to set a preloaded ringtone as default Ringtone, Contact ID or Alert Sounds (for All Messages, TXT Message, Multimedia Message or Voicemail) by pressing the Center Select Key [OK]. -
Page 85: Viewing And Managing My Pictures
• Self Timer: Choose from Off, 10 Seconds, 5 Seconds and 3 Seconds. • Shutter Sound: Choose from Shutter, Ready! 1 2 3, Say “Cheez” and Silent. • Resolution: Choose from 1600x1200, 1280x960, 800x600, 640x480 and 320x240. • Save Option: Choose Phone to save the new pictures in the phone or choose Card to save them in the microSD card. - Page 86 Press the Center Select Key to unlock the phone. Press the Center Select Key [MENU] > My Pictures. Select a picture and press the Center Select Key [VIEW] to view it. Select a picture and press the Left Soft Key [Erase] to delete it.
-
Page 87: Online Album
• Rename: Rename the picture. (Not available for preloaded pictures.) • File Info: View detailed picture information. Note: Please insert the microSD card before moving the pictures. The pictures moved to the microSD card are saved in synched\pics. Online Album Press the Center Select Key to unlock the phone. -
Page 88: Bluetooth
Bluetooth ® Your phone is capable of connecting to a variety of Bluetooth wireless accessories. It allows you to transfer data between Bluetooth devices, talk with a Bluetooth wireless earphone, etc. The approximate range for Bluetooth wireless technology is up to 30 feet (10 meters). - Page 89 The phone will prompt you to place the device you are connecting to in discoverable mode. Press the Center Select Key [OK] to continue. A list of visible Bluetooth devices in range will be shown. Select the Bluetooth device to be paired to and press the Center Select Key [PAIR].
-
Page 90: Bluetooth Settings
• Send Name Card Via Bluetooth: Send contact information (vCard) to the paired device. • Send V-calendar Via Bluetooth: Send calendar events (vCalendar) to the paired device. • Send Pictures Via Bluetooth: Send pictures in My Pictures to the paired device. •... -
Page 91: Tools
Tools Voice Commands Voice Commands is advanced voice recognition software that can be used to activate a wide variety of functions on your phone. Press the Center Select Key to unlock the phone. Press the Center Select Key [MENU] > Settings & Tools >... - Page 92 • Send <MSG Type > To create a message, say “Send” and the command system will prompt you for the type of message. After choosing the message type, you will be prompted for the contact name, number or group. You can say a full-sentence command, which states the message type and the name or number of the contact (for example, “Send Text Message to Bob Smith”), and the...
- Page 93 • Contact <Name> Say “Contact” and the command system allows you to access information for a contact. For example, stating “Contact Bob Smith” will display all the detailed information of that contact. You will also be prompted to call, modify or erase the contact, or create a new contact.
- Page 94 • Help The “Help” command allows you to view a general guideline about using Voice Commands. Note: If you are frequently prompted to repeat a command, press the Right Soft Key [Settings] > Adaptation, and adapt the system to your voice. Setting Voice Commands Press the Center Select Key to unlock the phone.
- Page 95 Least Sensitive: The voice commands system will decrease the sensitivity to filter out more potential matches. • Adaptation: Adaptation is the process of optimizing the voice recognition software to your voice. Adaptation requires recording your voice, which is then used to customize the voice recognition system.
-
Page 96: Calculator
Calculator Your phone has a basic calculator for addition, subtraction, multiplication and division. Press the Center Select Key to unlock the phone. Press the Center Select Key [MENU] > Settings & Tools > Tools > Calculator and use the keypad to operate. •... -
Page 97: Calendar
Calendar You can use the function to arrange and remind you of your upcoming events. Shortcut: In idle mode, press the Directional Key right to access the My Shortcuts menu, select Calendar and press the Center Select Key [OK]. Adding a New Event Press the Center Select Key to unlock the phone. -
Page 98: Alarm Clock
Press the Center Select Key [VIEW] again to see detailed information about the event. Calendar Options From the calendar view, press the Right Soft Key [Options] to access the calendar options. • Weekly View/Monthly View: Choose to display the calendar in weekly view or monthly view. •... -
Page 99: Stop Watch
From the Turn On/Off field press the Left Soft Key [Set] to turn the alarm On or Off. Scroll down to adjust the remaining settings, including Set Time, Repeat and Ringtone. Press the Center Select Key [SAVE]. Alarm Options From the Alarm Clock menu, highlight an existing alarm and press the Right Soft Key [Options] to access the following options. -
Page 100: Notepad
Press the Center Select Key to unlock the phone. Press the Center Select Key [MENU] > Settings & Tools > Tools > World Clock. Press the Directional Key left or right to display different cities and time zones. Note: Press the Left Soft Key [DST] to enable or disable daylight savings time. - Page 101 Press the Center Select Key to unlock the phone. Press the Center Select Key [MENU] > Settings & Tools > Tools > USB Mass Storage. The phone will be in USB mode and you can transfer data between the microSD card and PC. If you want to exit from the USB mode, press the Center Select Key [EXIT].
-
Page 102: Settings
Settings My Verizon You can use My Verizon to access the detailed information about your Verizon Wireless account. Press the Center Select Key to unlock the phone. Press the Center Select Key [MENU] > Settings & Tools > My Verizon. Shortcut: In idle mode, press the Directional Key left to access My Verizon. -
Page 103: Sound Settings
Sound Settings Call Sounds Press the Center Select Key to unlock the phone. Press the Center Select Key [MENU] > Settings & Tools > Sounds Settings > Call Sounds. You can set the following options. • Call Ringtone: Choose a ringtone from the list for incoming calls and press the Center Select Key [SET]. - Page 104 • TXT Message: Choose Tone, Vibrate, or Reminder for incoming text message alerts and press the Center Select Key [OK]. • Multimedia Message: Choose Tone, Vibrate, or Reminder for incoming multimedia message alerts and press the Center Select Key [OK]. •...
-
Page 105: Keypad Volume
Keypad Volume Adjust the volume played for keypad presses. Press the Center Select Key to unlock the phone. Press the Center Select Key [MENU] > Settings & Tools > Sounds Settings > Keypad Volume. Press the Directional Key up or down to adjust the volume and press the Center Select Key [SET]. -
Page 106: Display Settings
• Software Update: The phone will alert you when a software update is completed. Select On or Off, and press the Center Select Key [SET]. Power On/Off Enable or disable the sound played when you power on or off the phone. Press the Center Select Key to unlock the phone. - Page 107 • ERI Banner: Choose to display the ERI banner in idle mode or not by selecting On or Off and pressing the Center Select Key [SET]. Backlight Set the backlight duration for the display screen and keypad. Press the Center Select Key to unlock the phone. Press the Center Select Key [MENU] >...
-
Page 108: Display Themes
Select My Pictures or Fun Animations and press the Center Select Key [OK]. Select a picture and press the Left Soft Key [Preview] to view it. Press the Center Select Key [SET] to set it as wallpaper. Display Themes Choose different themes for the phone's menus. Press the Center Select Key to unlock the phone. - Page 109 Replacing Menu Items Press the Center Select Key to unlock the phone. Press the Center Select Key [MENU] > Settings & Tools > Display Settings > Main Menu Settings > Replace Menu Items. Select the item you want to replace and press the Center Select Key [EDIT].
-
Page 110: Dial Fonts
Select Menu Layout, Menu Items, Item Positions or All and press the Center Select Key [OK]. Dial Fonts Set the font size in the dialer. Press the Center Select Key to unlock the phone. Press the Center Select Key [MENU] > Settings & Tools >... -
Page 111: Phone Settings
Clock Format Choose the clock type displayed in idle mode. Press the Center Select Key to unlock the phone. Press the Center Select Key [MENU] > Settings & Tools > Display Settings > Clock Format. Choose from the following options: Analog, Large Analog, Digital 12, Large Digital 12, Digital 24, Large Digital 24 or Off. -
Page 112: Setting Shortcuts
Setting Shortcuts Setting My Shortcuts Press the Center Select Key to unlock the phone. Press the Center Select Key [MENU] > Settings & Tools > Phone Settings > Set Shortcuts > Set My Shortcuts. Select the shortcut you want to change and press the Center Select Key [SET]. -
Page 113: Voice Commands Settings
Setting Directional Keys Assign a shortcut key (Directional Key left, up and down) to a favorite or often-used function. Press the Center Select Key to unlock the phone. Press the Center Select Key [MENU] > Settings & Tools > Phone Settings > Set Shortcuts > Set Directional Keys. -
Page 114: Current Country
Location This Global Positioning Service (GPS) location feature can identify your location to the network. You can fully enable this GPS location function or set GPS to work only when you dial 911 from your phone. Press the Center Select Key to unlock the phone. Press the Center Select Key [MENU] >... -
Page 115: Phone Security
Phone Security Lock your phone, set restrictions and other security options. Note: You will need to enter the phone lock code to enter this menu. The default lock code is the last 4 digits of your phone number. Edit Codes Edit the Phone Only lock code for Phone Security, or edit the Calls &... - Page 116 Restrictions Press the Center Select Key to unlock the phone. Press the Center Select Key [MENU] > Settings & Tools > Phone Settings > Phone Security. Enter the phone lock code and press the Center Select Key [OK]. Select Restrictions and press the Center Select Key [OK].
-
Page 117: Restore Phone
Select Phone Lock Setting and press the Center Select Key [OK]. Select one of the following options and press the Center Select Key [SET]. • Unlocked: The phone is not locked whenever you power up the phone. • On Power Up: You need to enter the phone lock code whenever you power up your phone. -
Page 118: Sim Security
SIM Security Insert the SIM card to your phone and you can set the PIN lock and PIN code for your SIM card. Note: The SIM card is pre-installed in your phone. You need to enter the phone lock code to enter this menu. The default lock code is the last 4 digits of your phone number. - Page 119 Editing the PIN Code Press the Center Select Key to unlock the phone. Press the Center Select Key [MENU] > Settings & Tools > Phone Settings > SIM Security. Enter the phone lock code and press the Center Select Key [OK]. Select PIN Code >...
-
Page 120: Network Mode
To enable the SIM lock, select Locked and press the Center Select Key [SET]. Enter the SIM UNLOCK 2 code, and press the Center Select Key [OK]. Note: Please contact your service provider for the SIM UNLOCK 1 and SIM UNLOCK 2 codes. Warning: If you enter the wrong SIM UNLOCK 1 or SIM UNLOCK 2 code five times in a row, you cannot disable or enable the SIM lock. -
Page 121: System Select
System Select You can set the system selection for CDMA or GSM mode. You don’t need to set this option unless you want to change the system selection. Please contact your service provider for details. CDMA Settings Press the Center Select Key to unlock the phone. Press the Center Select Key [MENU] >... -
Page 122: Call Settings
NAM Select Set the phone’s NAM (Number Assignment Module). Press the Center Select Key to unlock the phone. Press the Center Select Key [MENU] > Settings & Tools > Phone Settings > NAM Select. Select NAM1 or NAM2, and press the Center Select Key [SET]. -
Page 123: Auto Retry
Press the Center Select Key to unlock the phone. Press the Center Select Key [MENU] > Settings & Tools > Call Settings > Answer Options. Select from the following options and press the Center Select Key [MARK]. • Any Key: Calls are answered when any key is pressed except the End/Power Key, Left and Right Soft Keys and Volume Keys. -
Page 124: One Touch Dial
Press the Center Select Key to unlock the phone. Press the Center Select Key [MENU] > Settings & Tools > Call Settings > TTY Mode. Select one of the following options and press the Center Select Key [SET]. • TTY Full: Users who cannot talk or hear may use this mode to send and receive text messages through TTY device. -
Page 125: Dtmf Tones
Press the Center Select Key to unlock the phone. Press the Center Select Key [MENU] > Settings & Tools > Call Settings > Voice Privacy. Select On or Off and press the Center Select Key [SET]. DTMF Tones Set the DTMF tones length. Press the Center Select Key to unlock the phone. -
Page 126: Memory
Hearing Aid Mode Your phone supports HAC (Hearing Aid Compatibility) function. When you turn on the Hearing Aid Mode and use a hearing aid with a Telecoil to answer the phone, it will help you hear more clearly during the phone call. For more information on HAC, see “For Your Safety - Turning on the HAC Setting”... -
Page 127: Phone Memory
Phone Memory View the phone memory usage information and manage the files stored in the phone. To move files to the microSD card, you need to insert the card to your phone first. Note: The preloaded pictures, ringtones and sounds in your phone are not available for Phone Memory menu. -
Page 128: Card Memory
Press the Right Soft Key [Options] to access more options. • Erase: Delete marked pictures, ringtones, music files, sounds or contacts. • Move To Memory Card: Move marked pictures, music files or sounds to the microSD card. • Copy: Copy marked contacts to the microSD card. -
Page 129: Card Lock
• My Contacts: View the contacts saved on the microSD card. • Move All To Phone: Move all movable files on the microSD card to your phone. • Format: Format the microSD card. All data in the card will be erased. Press the Right Soft Key [Options] to access more options. -
Page 130: Phone Info
Phone Info Press the Center Select Key to unlock the phone. Press the Center Select Key [MENU] > Settings & Tools > Phone Info. Select one of the following menus and press the Center Select Key [OK]. • My Number: Select CDMA Number to view the MDN and MIN information. -
Page 131: Software Updating Via Pc
Software Updating via PC You can connect your phone to the PC with a USB cable and update the phone software. Note: Your PC needs an Internet connection to download the phone software. The USB mass storage feature should be disabled when you connect the phone to your PC. -
Page 132: For Your Safety
For Your Safety General Care Your handset contains delicate electronic circuitry, magnets and battery systems. You should treat it with care and give particular attention to the following points: • Do not allow the handset, battery or accessories to come into contact with liquids or moisture at any time. Do not immerse it in any liquid. - Page 133 Only use the battery for the system for which it is specified. • Only use the battery with a charging system that has been qualified by ZTE. Use of an unqualified battery or charger may present a risk of fire, explosion, leakage, or other hazard. •...
- Page 134 • The phone shall only be connected to products that bear the USB-IF logo or have completed the USB-IF compliance program. • Do not put a battery into a microwave oven, dryer or high-pressure container. • Use only authorized chargers. •...
-
Page 135: Aircraft Safety
• Third party equipment: The use of third party equipment, cables, or accessories, not made or authorized by ZTE, may invalidate the warranty of your phone and also adversely affect the phone’s safety and operation. • Remember to make backup copies of all important data on your handset. -
Page 136: Hospital Safety
Many jurisdictions have laws and regulations about taking pictures in public or private areas regarding the processing and further use of such pictures. ZTE encourages its customers to obey all laws and to honor the personal rights of others. •... -
Page 137: Road Safety
• If you have a heart condition, be careful with the setting of call vibration or tone volume. This phone is capable of producing loud noises which may damage your hearing. Turn down the volume before using headphones, Bluetooth stereo headsets or other audio devices. -
Page 138: Vehicles Equipped With An Airbag
• Observe all of the recommendations contained in your local traffic safety documentation. • Pull off the road and park before making or answering a call, if driving conditions require so. Check if local laws and/or regulations restrict the use of cellular phones while driving. •... -
Page 139: Third Party Equipment
Third Party Equipment The use of third party equipment, cables or accessories, not made or authorized by ZTE, may invalidate the warranty of the handset and also adversely affect the handset’s operation. For example, use only the ZTE charger supplied with the handset. - Page 140 determined at the highest certified power level, the actual SAR level of the phone while operating can be well below the maximum value. This is because the phone is designed to operate at multiple power levels so as to use only the power required to reach the network.
-
Page 141: Emergency Services
not use a body-worn accessory and are not holding the phone at the ear, position the handset a minimum of 1.5 cm from your body when the phone is switched on. Emergency Services To make an emergency call in any country: Ensure your phone is ON and in service. - Page 142 Caution: Changes or modifications not expressly approved by the manufacturer could void the user’s authority to operate the equipment. NOTE: This equipment has been tested and found to comply with the limits for a Class B digital device, pursuant to part 15 of the FCC Rules. These limits are designed to provide reasonable protection against harmful interference in a residential installation.
-
Page 143: Using Your Phone With A Hearing Aid Device
Using Your Phone With a Hearing Aid Device Your Adamant is compliant with the FCC Hearing Aid Compatibility (HAC) requirements. For additional HAC information, including the HAC rating of this product, please refer to www.zteusa-support.com. When some wireless phones are used near some hearing devices (hearing aids and cochlear implants), users may detect a buzzing, humming, or whining noise. -
Page 144: Turning On The Hac Setting
T-Ratings: Phones rated T3 or T4 meet FCC requirements and are likely to be more usable with a hearing device’s telecoil (“T Switch” or “Telephone Switch”) than unrated phones. T4 is the better/higher of the two ratings. (Note that not all hearing devices contain telecoils.) The more immune your hearing aid device is, the less likely you are to experience interference noise from your wireless phone. -
Page 145: Copyright Notice
CAUTION: Do not turn on the HAC setting unless you use a hearing aid with a telecoil. Using this setting without a hearing aid or with a hearing aid without a telecoil may be harmful to your hearing. Copyright Notice The video/audio recordings you download are protected by copyright laws. -
Page 146: Consumer Limited Warranty
Consumer Limited Warranty ZTE ("Seller") offers you a limited warranty that the enclosed product or products (the "Product") will be free from defects in material and workmanship for a period that expires one year from the date of sale of the Product... - Page 147 This limited warranty does not cover and is void with respect to the following: (i) any Product which has been improperly installed, repaired, maintained or modified; (ii) any Product which has been subjected to misuse (including any Product used in conjunction with hardware electrically or mechanically incompatible or used with accessories not approved by Seller), abuse, accident, physical damage, abnormal operation, improper...
- Page 148 SELLER SPECIFICALLY DISCLAIMS LIABILITY FOR ANY AND ALL DIRECT, INDIRECT, SPECIAL, GENERAL, PUNITIVE, EXEMPLARY, AGGRAVATED, INCIDENTAL OR CONSEQUENTIAL DAMAGES, EVEN IF ADVISED OF THE POSSIBILITY OF SUCH DAMAGES, WHETHER FORESEEABLE OR UNFORESEEABLE OF ANY KIND WHATSOEVER, INCLUDING BUT NOT LIMITED TO LOSS OF PROFITS, UNANTICIPATED BENEFITS OR REVENUE, ANTICIPATED PROFITS ARISING OUT OF USE OF OR INABILITY TO USE ANY PRODUCT (FOR...
- Page 149 WARRANTY OR CONDITION ARISING OUT OF TRADE USAGE OR OUT OF A COURSE OF DEALING OR COURSE OF PERFORMANCE. NO DEALER, DISTRIBUTOR, AGENT OR EMPLOYEE IS AUTHORIZED TO MAKE ANY MODIFICATION OR ADDITION TO THIS WARRANTY. Some jurisdictions do not allow the exclusion or limitation of incidental or consequential damages, or allow limitations on how long an implied warranty lasts, so the above limitations or exclusions may not apply to you.