Table of Contents
Advertisement
Available languages
Available languages
Operator's
Manual
RN°
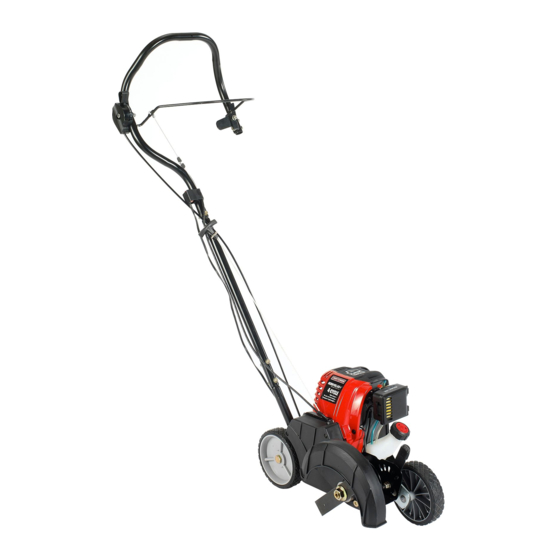
4-Cycle Gasoline
LAWN EDGER
Model No. 316.772370
CAUTION:
Before
using
this product,
read this
manual
and follow
all
safety
rules and operating
instructions.
• SAFETY
• ASSEMBLY
• OPERATION
• MAINTENANCE
• PARTS LIST
• ESPANOL, E E1
Sears, Roebuck and Co., Hoffman Estates, IL 60179, U.S.A.
Visit our website:
www.sears.com/craftsman
769-03850A
Advertisement
Table of Contents

Related Manuals for Craftsman 77237 - 29cc 4 Cycle Gas Edger


Summary of Contents for Craftsman 77237 - 29cc 4 Cycle Gas Edger
- Page 1 • OPERATION CAUTION: Before using • MAINTENANCE this product, read this • PARTS LIST manual and follow • ESPANOL, E E1 safety rules and operating instructions. Sears, Roebuck and Co., Hoffman Estates, IL 60179, U.S.A. Visit our website: www.sears.com/craftsman 769-03850A...
- Page 2 TABLE OF CONTENTS The purpose of safety symbols is to attract your attention to possible Rules for Safe Operation ......... dangers. The safety symbols, and their explanations, deserve your Warranty Information ........careful attention and understanding. The safety warnings do not by Know Your Unit ........
- Page 3 WHILE OPERATING before continuing. Repair or replace affected parts as necessary. • Keep bystanders, especially children and pets, at least 50 ft (15 m) away. • Stop and switch the unit to off for maintenance or repair. • Wear safety glasses or goggles that are marked as meeting ANSI •...
- Page 4 FULL WARRANTY If this Craftsman product fails due to a defect in material or workmanship within two years from the date of purchase, return it to any Sears store, Parts and Repair Service Center, or other Craftsman outlet in the United States for free repair (or replacement if repair proves impossible).
- Page 5 APPLICATIONS • Edging a long paths, driveways, rockeries, etc. Muffler Handle Bail Lock Bail Throttle Bail Lock Oil Plug Lever Gas Tank Starter Rope Grip Straight Metal Shaft Spark Plug Zip Ties Air Filter Cover Wheel Depth Adjustment Lever Wheel Edger Blade Blade Shield...
- Page 6 HANDLE ASSEMBLY 10. Firmly push the switch/throttle assembly onto the upper handle, making sure that the post slightly protrudes through the Remove the nuts and bolts from the middle handle only, but not hole on the opposite side. the eyehook. 11.
-
Page 7: Recommended Oil/Fuel Type
Definition of Blended Fuels CAUSE SERIOUS PERSONAL INJURY. Check and maintain Today's fuels are often a blend of gasoline and oxygenates such as the proper oil level in the crank case; it is important and ethanol, methanol or MTBE (ether). Alcohol-blended fuel absorbs water. cannot be overemphasized, Check the oil before each use As little as 1% water in the fuel can form acids when stored. - Page 8 WARNING: Operate this unit only in a well- ventilated outdoor area. Carbon monoxide exhaust fumes can be Switch etha n a conf ned area. WARNING: Avoid accidental starting. Make sure you are in the starting position when pulling the starter rope (Fig.
- Page 9 HOLDING THE UNIT NOTE: Make sure you have a firm grip on the unit. The spinning blade will contact the ground before the wheel does and will create continuous forward thrust. eye, hearing, foot and body Walk slowly behind the unit while maintaining a firm grip on the unit. protection to reduce the risk of TIPS FOR BEST EDGING RESULTS injury when operating this unit.
-
Page 10: Blade Replacement
NOTE: Use the bottle and spout saved from initial use to measure the Use only Craftsman replacement parts. correct amount of oil. The top of the label on the bottle measures approximately 3.04 ounces (90 ml or 3/8 cup) (Fig. 23). Check the... -
Page 11: Idle Speed Adjustment
NOTE: I ftheunitisoperated without theairfilter, y ouwill V OID the of adjustment idle. Check the warranty. condition of the air filter before 7. Reinstall theairfilter c over. Position thetabs onthesides ofthe adjusting the idle speed screw. Idle airfilter c over o nto theslots atthetopofthebackplate (Fig. 2 5). Refer to Air Filter Maintenance. - Page 12 Install a correctly-gapped spark plug Rocker Arms INTAKE Adjusting 1 Screws in the cylinder head. Turn the 5/8 in. socket clockwise until snug. If using a torque wrench, torque to: 110-120 in.•lb. (12.3-13.5 N•m) Do not over tighten. SPARK ARRESTOR MAINTENANCE Remove the rear engine cover.
- Page 13 REPLACING THE DRIVE BELT To replace the drive belt: Drive Pulley Place the unit on a level surface, preferrably a workbench. Move the depth adjustment lever all the way forward (Fig. 36) to raise the front wheel enough to provide clearance for the blade to turn freely.
- Page 14 CAUSE ACTION Fill fuel tank with new fuel Empty fuel tank Old fuel Drain gas tank and add fresh fuel Plugged spark arrestor Clean or replace spark arrestor W :1# [€t1#1 = UAvl IIII I I #[e]nlIm] I ! CAUSE ACTION Air filter is plugged Replace or clean the air filter...
- Page 15 lQll Displacement ..................Operating RPM ..................6,800+ rpm Idle Speed RPM ..................2,800 - 3,600 rpm Ignition Type ....................Electronic On/Off Stop Control ..................Momentary Valve clearance ................ 0.003-0.006 in. (0.076-0.152 ram) Spark Plug Gap ................. 0.025 inch (0.635 ram) Lubrication ....................
- Page 16 • In order to file a claim, go to your nearest Authorized Sears Service Center. Warranty services or repairs will be provided at all Authorized Sears Service Centers. • Any manufacturer approved replacement part may be used in the performance of any warranty maintenance or repair of emission related parts and will be provided without charge to the owner.
- Page 17 • MONTAJE utilizar este producto, • FUNCIONAMIENTO este manual y siga todas • MANTENIMIENTO las reglas de seguridad • LISTADO DE PIEZAS las instrucciones funcionamiento. Sears, Roebuck and Co., Hoffman Estates, IL 60179, U.S.A. Visite nuestro sitio web" www.sears.com/craftsman 769-03850A...
- Page 18 INDICE DE CONTENIDOS Los sfmbolos de seguridad se utilizan para Ilamar su atenci6n Normas para una operaci6n segura ....... sobre posibles peligros. Los simbolos de seguridad y sus Garantia ..........explicaciones merecen toda su atenci6n y comprensi6n. Conozca su unidad ........simbolos de seguridad no eliminan ningQn peligro por si mismos.
- Page 19 • Nunca arranque ni opere la unidad dentro de una sala o edificio La vibraci6n es seSal de que hay problemas, Inspeccione bien si cerrado. La respiraci6n de los gases del escape pueden ser letales. hay tuercas o pernos flojos o daSos antes de continuar, Repare o Opere esta unidad Qnicamente en un Area exterior bien ventilada.
- Page 20 GARANTiA TOTAL DE CRAFTSMAN Si este producto de Craftsman Professional falla debido a un defecto en el material o en la mano de obra dentro de un periodo de tres a_os a partir de la fecha de compra, devuelvalo a cualquier tienda o Centro de Servicio de Piezas y Reparaciones Sears u otto establecimiento Craftsman en los Estados Unidos para que sea reparado sin costo alguno (o set reemplazado si resulta imposible repararlo).
- Page 21 APPLICACIONES • Para hacer recortes a Io largo de senderos, estacionamientos, jardincillos rocosos, etc. Silenciador Manubrio Traba del asa Control regulador Palanca de Tap6n del aceite traba del asa Tanque de combustible Interruptor de Encendido/Apag Mango de la cuerda de arranque Eje metalico recto Bujia de encendido Cincho de plastico...
- Page 22 ENSAMBLAJE DEL MANGO alambres hacia la parte superior del mango. Quite las tuercas y los pernos solamente del mango intermedio, Alinee el poste del conjunto de interruptor / control del regulador con pero no el gancho de ojo. el agujero que se encuentra en el lade del mango superior (Fig. 3). NOTA: NO quite el pemo y la tuerca del mango superior.
- Page 23 TIPO DE COMBUSTIBLE RECOMENDADO La gasolina viejo es la causa principal del mal funcionamiento de la PUEDE CAUSAR LESIONES PERSONALES GRAVES No unidad. AsegQrese de usar gasolina nuevo, limpio y sin plomo. podemos exagerar la im[_ortancia del control _ mantenimiento Elimine la gasolina vieja de acuerdo a los reglamentos federales, del nivel correcto de acelte en el cigOer_al.Venfique el aceite I _11_ I ADVERTENClA:...
- Page 24 Co to,e < ADVERTENCIA: Use esta unidad s61o en un Area exterior bien ventilada. Los gases de escape de mon6xido encendido de carbono pueden ser eta es en un Area cerrada, y apagado ADVERTENCIA: Evite los arranques accidentales. Col6quese en posici6n de inicio cuando tire de la cuerda de arranque (Fig.
- Page 25 COMO SOSTENER LA UNIDAD para acoplar la cuchilla y hacer que esta gire. Lentamente baje la unidad hasta que la rueda delantera haga contacto con el suelo. siempre protector para los NOTA: AsegQrese de sostener la unidad firmemente. La cuchilla ojos, oidos, los pies y el cuerpol hara contacto con el suelo antes que la rued&...
- Page 26 REEMPLAZO DE LA CUCHILLA Retire el tap6n de relleno de aceite / varilla de medici6n y seque el aceite. Vuelva a insertarlo completamente hacia adentro. ADVERTENCIA: Paraevitar lesiones personas graves, Retire el tap6n de relleno de aceite / varilla de medici6n e Ileve puesto siempre guantes cuando manipule, quite o inspeccione el nivel del aceite.
- Page 27 Pantalla 2. Limpieza del Filtro de Aire La condici6n del filtro de aire es Filtro de aire importante para el funciona- Tornillo de miento de la unidad. Un filtro de ajuste de aire sucio limitara el flujo de aire y minima cambiara la mezcla de aire y combustible.
- Page 28 Tire lentamente de la cuerda de arranque para traer el pist6n hacia Limpie alrededor de la bujfa de la parte superior de su recorrido (conocido come punto muerto encendido. Saque la buj[a de encendido de la cabeza del cilindro girando una superior).
- Page 29 COMO CAMBIAR L ACORREA DE TRANSMISION Para cambiar la correa de transmisi6n: Polea conductora Coloque la unidad sobre una superficie plana, preferentemente un banco de trabajo. Protector Mueva la palanca de ajuste de profundidad completamente hacia adelante (Fig. 36) para levantar la rueda delantera de manera que la cuchilla tenga holgura para girar libremente.
- Page 30 CAUSA ACCION El tanque de combustible esta vacio Llene el tanque con combustible bien mezclado El combustible es viejo Drene el tanque de gasolina / Agregue combustible nueva Parachispas obstruido Limpie o cambie el parachispas CAUSA ACCION El filtro de aire esta obstruido Cambie o limpie el filtro de aire Velocidad minima no esta ajustado en forma correcta Ajuste velocidad minima...
- Page 31 li'll'l" Tipo de motor ................Enfriado por aire, 4 tiempos Desplazamiento ................29 cc (1,8 pulgadas cObicas) R,P.M. de operacidn ................... 6,800+ r,p.m. R,P.M. de velocidad mfnima ................2.800-3,600 r,p.m. Tipo de encendido ..................Electr6nico Interruptor de encendido ................Interruptor oscilante Huelgo de la valvula (entrada y escape) ..........
- Page 32 garant[a se realizaran en todos los Centros de Servicio Sears Autorizados, • Cualquier pieza de reemplazo aprobada por el fabricante se puede usar al realizar cualquier mantenimiento o reparaci6n de piezas bajo garantia relacionadas con emisiones y se proporcionaran sin cargo alguno para el propietario. Cualquier pieza de reemplazo que sea equivalente en rendimiento o durabilidad se puede usar en mantenimiento o reparaci6n sin garant[a y no reducira las obligaciones de garant[a del fabricante.
- Page 33 REPLACEMENT PARTS - MODEL 316.772370 4-CYCLE GAS EDGER...
- Page 34 REPLACEMENT PARTS - MODEL 316.772370 4-CYCLE GAS EDGER Part No. Description Item Part No. Description Item 753-04030 O-Ring 753-05206 Engine Cover Assembly (includes 2 & 3) 753-05507 753-04595 Cover Screw Air Filter Mounting Screw 753-05835 753-05377 Screw Air Cleaner Cover Assembly 753-05209 Rocker Cover (includes 33, 34 &...
- Page 35 REPLACEMENT PARTS - MODEL 316.772370 4-CYCLE GAS EDGER...
- Page 36 Your Home For expert troubleshooting and home solutions advice: IIIIIa n@_@ www.managemyhome.com For repair - in your home - of all major brand appliances, lawn and garden equipment, or heating and cooling systems, no matter who made it, no matter who sold it! For the replacement parts, accessories owner's manuals that you need to do-it-yourself.