Asko D5893 Operating Instructions Manual
User manual use & care guide asko d5893 en
Hide thumbs
Also See for D5893:
- Operating instructions manual (52 pages) ,
- Manuel d’utilisation et d’entretien (52 pages) ,
- Use & care manual (40 pages)
Table of Contents
Advertisement
Operating Instructions
Dishwasher
Save these instructions for future reference
Dear ASKO customer!
Thank you for choosing this quality product from Scandinavia, which was made in Sweden.
We want you to feel assured that the inside of your new machine is just as good as the outside and that the
ethics and standards that went into the production of this machine are just as high as the quality and perfor-
mance that you will receive from it. We hope that this product will give you many years of pleasure.
To ensure that you get the most out of your new machine, we recommend that you read the operating instruc-
tions before using the machine. The operating instructions also contain information on how to avoid damaging
the environment.
ASKO D5893
Advertisement
Table of Contents

Related Manuals for Asko D5893


Summary of Contents for Asko D5893
-
Page 1: Operating Instructions
Dishwasher Save these instructions for future reference Dear ASKO customer! Thank you for choosing this quality product from Scandinavia, which was made in Sweden. We want you to feel assured that the inside of your new machine is just as good as the outside and that the ethics and standards that went into the production of this machine are just as high as the quality and perfor- mance that you will receive from it. -
Page 2: Table Of Contents
Contents Before doing your first wash Options Basket loaded Delayed Start Important safety instructions Temperature Child safety Drying Super rinse Parts of the dishwasher Cool touch Time saver Special settings: Technical data Language Child lock Baskets Buzzer volume Operation volume Control panel Temperatur units Specialsettings... -
Page 3: Performance Information
The dishes are not clean Stains or a film on the china The china has a whitish-blue sticky film Stains on stainless steel or silver Stains which remain after dishwashing Rattling sound during dishwashing The machine will not start Water remains in the machine Bad odour in the machine Dishes do not get sufficiently dry Door vill not close... -
Page 4: Before Doing Your First Wash
Before doing your first wash: Read through the directions for use Read through the directions for use before start- ing to use your machine, especially the Safety, Child Safety, and Basic Course sections. Take care with certain materials Read the Fragile Dishes section before washing china with unglazed decoration or other house- hold goods made of plastic, wood, or crystal requiring careful treatment. -
Page 5: Important Safety Instructions
Important safety instructions This manual does not cover all possible do not smoke or use an open flame during this time. conditions and situations that may occur. • When removing an old dishwasher from ser- Common sense and caution should always vice or discarding it, remove the door to the be used when installing, operating, and washing compartment. -
Page 6: Child Safety
Child safety! Child safety tips Dishwasher detergents and rinse aids are cor- rosive, so always keep them out of reach of children. • Should a child swallow dishwasher detergent or rinse aid, give plenty to drink immediately, i.e., one or two glasses of milk or water. Do not try to induce vomiting. -
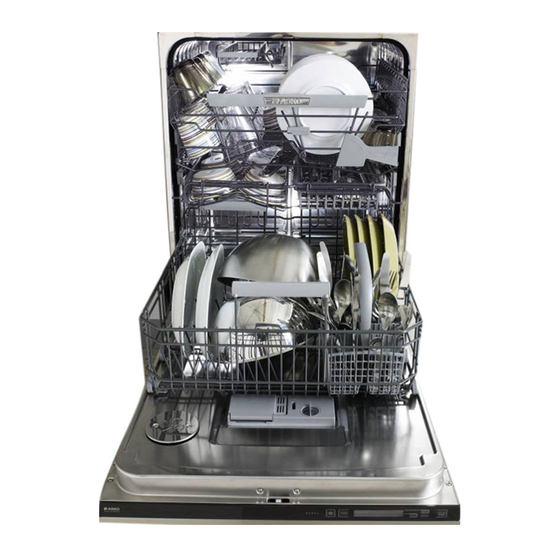
Page 7: Parts Of The Dishwasher
Parts of the dishwasher* 1. Knife basket 2. Upper basket 3. Spray arms 4. Middle basket 5. Lamp 6. Cutlery basket 7. Lower basket 8. Main power switch 9. Dishwasher detergent compartment 10. Rinse Aid Compartment 11. Filter 12. Type plate *Details may differ depending on the model and market! Technical data... -
Page 8: Baskets
The baskets* 1. Wine glass shelf Upper basket 2. Knife stop 3. Upper spray arm 4. Locking handle for upper basket 5. Catch Raising/lowering the upper basket 1. Pull out the upper basket. 2. Pull out the catches (5) on either side of the upper basket and lower the upper basket at the same time. -
Page 9: The Baskets
The baskets* Lower basket Knife basket Cutlery basket Complete basket with handle Small basket The smal cutlery basket is moveable sideways and can be attached to the other cutlery basket or upper/lower basket. *Details may differ depending on the model and market! Customer Care Center 1-800-898-1879 www.askousa.com... -
Page 10: Control Panel
Control panel The panel has touch buttons with optional sounds to confirm selections. 1. Main switch 4. Navigations buttons 2. Program selector 5. Start/stop 3. Display window Important! 1. The touch buttons must be kept clean and free from grease. Use only a dry or slightly damp cloth and never cleaning fluid as this can cause scratches. -
Page 11: Basic Course
Basic Course Below are step-by-step instructions to help you plate insert, which comes with certain models, achieve the best possible dishwashing results. can be easily removed to provide room for large plates, saucepans, and pots, or placed in three Load the baskets correctly! alternative positions. -
Page 12: Dishwashing Detergent
Cutlery basket - placed in the lower basket (ex- Do not use detergent that has been wet and is empel). clumped. Also, check the expiration date on the container. The amount of detergent needed can vary due to differences in water hardness. To determine the water hardness in your area, contact your local water utility or area water softening com- pany. -
Page 13: Switch On The Main Switch
NOTE: Do you want to load more dishes? If you use a dishwashing detergent with a rinse Carefully open the door; the machine will stops aid additive, you should not fill the rinse aid dis- automatically, put in the dishes, close the door penser. -
Page 14: Programs
Programs Select program Select a program by pressing the program selector one or more times until the required program text lights up. Press Pos. Comments/instructions The dishwasher detects how soiled the dishes are and adjusts water Auto consumption and temperature accordingly. A program suitable for daily dishes. -
Page 15: Program Description
Program Description Programview Programs Auto Daily Time Heavy Normal Combi Options 140°F Selectable 30 to 130°F 130°F 150°F 180 min Prewashes with SCS* Mainwash *** -- 140°F Max. 150°F 130°F 150°F 130°F Number of last rinse 2, last Max. 150°F 3, last 3, last 2, last... -
Page 16: Consumption Values
Program Description Programview Programs Upper/ Delicate Quick Rinse & Rinse & Lower Hold basket Options 130°F 130°F 140°F Prewashes with SCS* Mainwash *** 130°F 120°F 140°F Number of 2, last rinse 2, last 2, last 1, last 1 rinse rinses 140°F rinse rinse... -
Page 17: Options
Options Select options To select an option, press one of the option buttons. Description This option lets you set all spray arms in All baskets function and by this option you can wasch both the upper and lower baskets. If you only have cups and glasses in the Upper basket upper basket which require washing, you Basket loaded... -
Page 18: Tab
Options Description If you desire a maximum drying result, press the Normal Drying options button (Normal) and a symbol showing three wavy lines will light. (in all programs except Auto, Time, Rinse & Dry, Rinse & Hold, Plate heat). Drying Without If you want a program without Drying options, press the button again and the symbol will go out. -
Page 19: Child Lock
Specialsettings To get to the Specialsettings When you have selected the programme and any option, press the Menu button until ‘Special set- tings’ appears in the display. Description Special settings Language on the LCD can be selected. To access the language menu directly press simultaneously. -
Page 20: Eco-Dishwashing
Eco-dishwashing Only wash full loads Waiting to run the wash until the machine is full saves energy. Wash at a lower temperature If the dishes are only lightly soiled you can run a Quick wash program and reduce the tempera- ture to 86°F (30°C). -
Page 21: Fragile Dishes
Fragile dishes A number of household goods are not suit- able for machine washing. This can be due to a variety of reasons. Certain materials cannot withstand intense heat; others can be damaged by the dishwasher detergent. Fragile decoration China with decoration on top of the glaze (the goods have a rough feel) should not be machine washed. -
Page 22: Time Remaining
Time remaining When you have selected programme and op- tion, the display shows the length of time the programme took the last time it was used. When you have started the machine, the display win- dow shows how much of the programme time remains. -
Page 23: Cleaning
Cleaning The dishwasher tub is made of stainless steel and is kept clean through normal use. However, if you have hard water, limescale de- posits may form in the machine. If this happens, run a normal wash program with two tablespoons of citric acid in the dishwasher detergent compartment. -
Page 24: Drain Pump
Drain pump If the machine still does not start and a buzzing sound is heard, the overflow guard The pump can be accessed from inside the has been activated. machine. • Shut off the water. 1. Cut the power to the machine by pulling •... -
Page 25: Spray Arms
Fit the cover securely if you are not using To release the upper spray arm, the upper bas- ket must be removed. the wire basket. 1. Pull out the basket. 2. Remove the upper spray arm by unscrewing Cover it counter-clockwise from the basket and clean 3. -
Page 26: Rinse Aid
Rinse aid Adding rinse aid Select dosage The dispenser is usually set at 1= soft water. In some cases, drying can be made more effi- However, depending on the water hardness, cient by using rinse aid. you may need to change the dosage. Machines with indicator on the panel Open the rinse aid cover. -
Page 27: Fault Indications
Fault indications Type of fault Action Display Overfilling Too much water in the machine Phone for service Water inlet fault Fault in the water inlet Check that the tap is open Inlet valve Inlet valve leakage Shut off the tap and phone for leakage service Drainage fault... -
Page 28: Troubleshooting
Troubleshooting Problems Action Possible causes The dishes are not clean • The spray arms are not • Lift off the arms and clean rotating • Old dishwasher detergent. • Avoid large packs Note! Detergent is perishable • Incorrect dosage of detergent •... - Page 29 Troubleshooting Possible causes Action Problems Stains on stainless steel or • Certain food remnants such • Rinse off food residue of this silver as mustard, mayonnaise, type if you do not intend to lemon, vinegar, salt, and start the dishwasher immedi- dressings can cause stains ately on stainless steel if allowed...
-
Page 30: Possible Causes
Troubleshooting Problems Action Possible causes Water remains in the • Obstruction in the drain hose • Disconnect the drain hose machine where it is connected to the sink’s water trap. Check that no debris has become stuck. Is the cone-shaped part of the pipe cut so that the diameter is at least 16 mm? •... -
Page 31: Technical Data
Performance information Energy standard USA: Energy for label FTC, 10 CFR Part 430 Wash performance ANSI/AHAM DW-1-2005 CAN: Energy for label CSA C 373-04 Program for test: Normal program, Normal temperature (130°F main wash), Normal drying (120°F last rinse) Loading of wash performance test Upper basket with 10 place settings AHAM DW-1 Lower basket with 10 place settings AHAM DW-1 Technical data... - Page 32 Installation instructions SAFETY INSTRUCTIONS: 1. It is important that you closely follow the in- structions provided here. 2. An incorrect or defective installation can lead to higher consumption of energy, water and dishwashing detergent, which can lead to higher costs and poorer cleaning results. 3.
- Page 33 * With fill strips and without plastic feet. ** ASKO XLFI dishwashers can be installed either with or without accessory fill strips depending on the type of installation. If the dishwasher cutout has been cut to European widths of 23-5/8” (600 mm), the unit won’t require fill strips.
- Page 34 Installation and connection information WATER CONNECTION • The machine can be connected to a cold or hot water supply (maximum 140°F, 85°C). However, we recommend connection to a cold water supply. • The inlet pipe has a connector with either a 9/16”...
- Page 35 Step 1. Fitting the dishwasher in place 1. Loosen the mounting screws on the dish- washer’s two front steel feet using a 5/8 inch (16mm) open-ended wrench. Screw the mounting screws down as close to the floor as possible. 2. Adjust the height of the dishwasher by turn- ing the front steel feet with your hands.
- Page 36 Step 1. Fitting the dishwasher in place 4. Push the plastic feet into place on all three steel feet (included in document bag). Note: Do not attach the plastic feet if the installa- tion space is of minimum height. Affix the light shielding film (packed in the document bag) to the underside of the work- top above the touch buttons.
- Page 37 Fitting the dishwasher in place 7. Lift the dishwasher a little at the front and turn the front feet to lower them. 8. Check that there is a space of 1/8 inch ” mm) between the top of the dishwasher door 3 mm and the underside of the worktop.
- Page 38 Fitting the dishwasher in place 10. Place the spirit level on the dishwasher door to check that the machine is level and adjust if necessary. The door must be fully closed! Note: The dishwasher must be level! An unlevel machine can affect the amount of water taken in, the door can be difficult to close, and the baskets difficult to place securely.
- Page 39 Step 3. Adjusting the door springs The door springs are on the sides of the dish- washer. necessary, pull out the dishwasher and adjust the tension of the door springs. A good idea is to try adjusting one side only first. 1.
-
Page 40: Adjusting The Door Springs
Adjusting the door springs 4. Adjust the spring tension using one of the following methods depending on how much adjustment is needed. If you need to adjust the spring a lot, place the rear mount in another hole. Place the spring further forward to reduce the tension and further back to increase the tension. - Page 41 Step 4. Connecting electricity, water and drain 1. Connect drain hose The drain hose is routed to an inlet plug on the sink unit’s water trap. Cut the drain hose adapter to the appro pri- Clamp ate size for connection to the undersink drain or garbage disposer.
- Page 42 Step 5. Checking dishwasher function and fit Test the dishwasher with the rinse program. Check that the dishwasher takes in water and drains. Also check that none of the connections leak. Also check that adjacent drawers and cup- boards can be opened when the dishwasher door is open.
- Page 43 Step 6. Securing the dishwasher 1. Pull out the upper basket, and the center bas- ket if present, and turn the basket stop on the runner outward. 2. Remove the upper basket, and the center basket if present, by pulling the basket(s) out as far as possible.
-
Page 44: Securing The Dishwasher
Securing the dishwasher 5. Cover the screw holes on the sides with the supplied plastic plugs. Push in the plugs diago- nally to fit them in place. 6. Check that the dishwasher’s two front steel feet are solidly placed on the floor, that is, the dishwasher is not hanging in the air. - Page 45 Securing the dishwasher Also adjust the rear foot if necessary so that the dishwasher is level. 7. Tighten the mounting screws on the front feet with a 5/8 inch (16 mm) open-ended wrench. Customer Care Center 1-800-898-1879 www.askousa.com...
- Page 46 Step 7. Attaching the toe kick (if applicable) 1. Attach the supplied sound insulation material to the back of the kick. Adjust the height of the insulation material 2. Loosen the holders for the toe kick by moving the gray catches to the side. 3.
- Page 47 Attaching the toe kick (if applicable) 4. Lock the holders in place by pushing each catch into a suitable notch in the holder. 5. Hang the toe kick on the holders. 6. Check that the toe kick is in line with the sur- rounding kitchen kick, that is, at the same depth.
- Page 48 • Repair damage due to shipment, delivery, States. installation, misuse or abuse. 6. Pickup and delivery. ASKO washers are • Instruct how to use the appliance. designed to be repaired in the home. • Replace house fuses or correct house wiring.
- Page 49 For warranty service, contact our Customer Care Center at the number listed below. Before calling for service or contacting Asko Appliances Inc. regarding a warranty issue, make a note of the model, type name, and serial number. Write to us at: Asko Appliances Inc.
-
Page 50: Installation Checklist
Installation checklist ASKO - DISHWASHER Appliance Installation Checklist • Remove packaging and check for cosmetic damages. • Remove the information packets from inside the dishwasher. • Attach any accessories as required by the installation. Fill strips, wooden door panels, accessory door panels... - Page 51 Own comments Customer Care Center 1-800-898-1879 www.askousa.com...
- Page 52 Quick Guide 1. Load the baskets correctly! Thanks to the Self Cleaning System you don’t need to rinse the dishes, simply scrape large food particles and debris. 2. Dispensing dishwasher detergent The detergent compartment has a small compartment for pre-wash and one for main wash. 3.