
Related Manuals for Electrolux EN3881AOX


Summary of Contents for Electrolux EN3881AOX
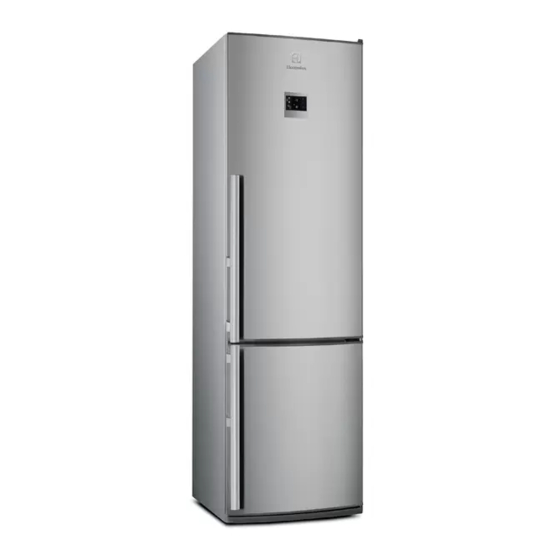
- Page 1 ..................... EN3881AOY EN FRIDGE FREEZER USER MANUAL EN3881AOX...
-
Page 2: Table Of Contents
10. TECHNICAL DATA ............26 WE’RE THINKING OF YOU Thank you for purchasing an Electrolux appliance. You’ve chosen a product that brings with it decades of professional experience and innovation. Ingenious and stylish, it has been designed with you in mind. -
Page 3: Safety Instructions
ENGLISH SAFETY INSTRUCTIONS In the interest of your safety and to ensure Keep ventilation openings, in the appli- the correct use, before installing and first ance enclosure or in the built-in structure, using the appliance, read this user manual clear of obstruction. carefully, including its hints and warnings. -
Page 4: Care And Cleaning
Power cord must not be length- • Ice lollies can cause frost burns if con- ened. sumed straight from the appliance. Make sure that the power plug is not squashed or damaged by the 1.4 Care and cleaning back of the appliance. A squashed •... -
Page 5: Product Description
ENGLISH ozone layer, in either its refrigerant 1.6 Service circuit or insulation materials. The • Any electrical work required to do the appliance shall not be discarded servicing of the appliance should be together with the urban refuse and carried out by a qualified electrician or rubbish. -
Page 6: Control Panel
Bottle shelf Rating plate Freezer baskets 3. CONTROL PANEL • E. Extra Humidity function • F. Shopping function • G. Drinks Chill function • H. Time • I. Freezer temperature indicator • J. Fast Freeze function • K. Freezer OFF mode •... -
Page 7: Temperature Regulation
ENGLISH To disconnect the appliance from the Select the fridge/freezer compart- power disconnect the mains plug ment. from the power socket. Press the Mode button until the Eco- Mode indicator flashes. 3.4 Switching off the fridge The EcoMode indicator goes off. The function switches off by se- To switch off the fridge: lecting a different set temperature. - Page 8 The function switches off by se- to cool down a mixture for a certain peri- lecting a different fridge set tem- od of time, or when a reminder is needed perature. in order not to forget the bottles placed in the freezer for fast cooling.
-
Page 9: Daily Use
ENGLISH The buzzer switches off. • flashing Alarm indicator The freezer temperature indicator • acoustic buzzer shows the highest temperature When normal conditions are restored reached for a few seconds. Then (door closed), the alarm will stop. show again the set temperature. During the alarm, the buzzer can be switched off by pressing any button. -
Page 10: Movable Shelves
10 www.electrolux.com 4.4 Movable shelves The walls of the refrigerator are equipped with a series of runners so that the shelves can be positioned as desired. 4.5 Bottle rack Place the bottles (with the opening facing front) in the pre-positioned shelf. -
Page 11: Carbon Air Filter
ENGLISH The filter purifies the air from unwanted 4.7 Carbon Air Filter odours in the fridge compartment mean- Your appliance is equipped with a carbon ing that the storage quality will be further filter behind a flap in the rear wall of the air improved. - Page 12 12 www.electrolux.com 4.10 FreshZone Mode If the compartment is not needed as Freshzone, the settings can be changed in order to have it just as a low tempera- ture drawer. To switch on the function: • Slide upward the flap as shown in the figure.
-
Page 13: Helpful Hints And Tips
ENGLISH 4.12 QuickChill of Drinks This function allows rapid cooling of drinks. To switch on the function: Remove or place upward the Fresh- zone drawer and put the bottle rack in front of the QuickChill slots as shown in the figure. Switch on the Shopping function. -
Page 14: Care And Cleaning
14 www.electrolux.com • position food so that air can circulate • wrap up the food in aluminium foil or freely around it polythene and make sure that the packages are airtight; 5.3 Hints for refrigeration • do not allow fresh, unfrozen food to... -
Page 15: Defrosting The Refrigerator
ENGLISH CAUTION! Clean the condenser (black grill) and the Unplug the appliance before car- compressor at the back of the appliance rying out any maintenance opera- with a brush. This operation will improve tion. the performance of the appliance and save electricity consumption. -
Page 16: Troubleshooting
16 www.electrolux.com compartment, driven by an automatically controlled fan. 7. TROUBLESHOOTING CAUTION! There are some sounds during Before troubleshooting, discon- normal use (compressor, refriger- nect the power supply. ant circulation). Only a qualified electrician or com- petent person must do the trou- bleshooting that is not in this man- ual. - Page 17 ENGLISH Problem Possible cause Solution The Temperature regulator Set a higher temperature. may be set incorrectly. The temperature in The door is not closed Refer to "Closing the door". the appliance is too correctly. high. The product temperature Let the product tempera- is too high.
-
Page 18: Installation
18 www.electrolux.com If necessary, adjust the door. Refer to 7.1 Replacing the lamp "Installation". The appliance is equipped with a longlife If necessary, replace the defective LED interior light. door gaskets. Contact the Service Only service is allowed to replace the Center. -
Page 19: Rear Spacers
ENGLISH 8.3 Location The appliance should be installed well away from sources of heat such as radia- tors, boilers, direct sunlight etc. Ensure that air can circulate freely around the back of the cabinet. To ensure best per- formance, if the appliance is positioned below an overhanging wall unit, the mini- mum distance between the top of the cabinet and the wall unit must be at least... -
Page 20: Electrical Connection
20 www.electrolux.com 8.6 Electrical Connection Brown: Live CAUTION! Blue: Neutral Any electrical work required to in- stall this appliance should be car- As the colours of the wires in the mains ried out by a qualified electrician lead of this appliance may not correspond or competent person. -
Page 21: Door Reversibility
ENGLISH 8.7 Door reversibility WARNING! Before carrying out any opera- tions, remove the plug from the power socket. WARNING! Make sure that the appliance is electrically not powered. To carry out the following opera- tions, we suggest that this be done with another person who will keep a firm hold on the doors of the appliance during the opera-... - Page 22 22 www.electrolux.com • Unscrew the middle hinge (B). Remove the plastic spacer (A) • Remove the spacer ( F ) and move to the other side of the hinge pivot (E). • Remove the doors. • Remove the left-hand cover pin of the middle hinge (C, D) and move to the other side.
- Page 23 ENGLISH • Take out the cable from the door end cap and place it into the upper hinge . • Re- screw the hinge (7). • Connect the cable to the socket in the front panel. (8) • Put back the top front covers on both sides (5,9).
-
Page 24: Noises
24 www.electrolux.com • Remove the covers (A). Remove the cover plugs (C). • Unscrew the handles (B)and fix them on the opposite side. Place the upper han- dle to the lower door and the lower handle to the upper door •... - Page 25 ENGLISH HISSS! BRRR! BRRR! BRRR! BLUBB! BLUBB!
-
Page 26: Technical Data
26 www.electrolux.com HISSS! HISSS! SSSRRR! SSSRRR! CRACK! CRACK! 10. TECHNICAL DATA Dimension of the recess Height 2019 mm Width 595 mm Depth 658 mm Rising Time 18 h Voltage 230 - 240 V Frequency 50 Hz... -
Page 27: Environment Concerns
ENGLISH The technical information are situated in the rating plate on the internal left side of the appliance and in the energy label. 11. ENVIRONMENT CONCERNS and electronic appliances. Do not dispose Recycle the materials with the symbol appliances marked with the symbol . - Page 28 www.electrolux.com/shop...