Table of Contents
Advertisement
Advertisement
Table of Contents

Related Manuals for ViewSonic ViewPad E100


Summary of Contents for ViewSonic ViewPad E100
-
Page 1: User Guide
ViewPad E100 User Guide Model No. VS14445/VS14445G... -
Page 2: Compliance Information
Compliance Information FCC Statement The following statement applies to all products that have received FCC approval. Applicable products bear the FCC logo, and/or an FCC ID in the format FCC ID: GSS-VS14445G on the product label.This device complies with part 15 of the FCC Rules. Operation is subject to the following two conditions: (1) This device may not cause harmful interference, and (2) This device must accept any interference received, including interference that may cause undesired operation. - Page 3 CE Conformity for European Countries The device complies with the EMC Directive 2004/108/EC and Low Voltage Directive 2006/95/EC, R&TTE Directive 1999/5/EC. Following information is only for EU-member states: The mark is in compliance with the Waste Electrical and Electronic Equipment Directive 2002/96/EC (WEEE).
- Page 4 Manufacturer’s Declaration of Conformity The ViewSonic brand Product VS14445 (Model name:E100) has been designed and manufactured in accordance with the Directive 1999/5/EC of European Parliament and the Council on Radio equipment and Telecommunication Terminal equipment. The product is in conformity with the following standards and/or other normative documents: 1. EMC...
- Page 5 3. SPECTRUM Standard Title Testing Body Report No. EN301489-1 V1.9.2 Electromagnetic compatibility and Radio Attestation of Global AGC07Z120101E1A EN301489-17 V2.1.1 spectrum Matters (ERM); Electromagnetic C omp l ia n ce C O. , EN301489-24 V1.5.1 C o m p a t i b i l i t y ( E M C ) s t a n d a r d f o r r a d i o Ltd.
- Page 6 Technology Co., office equipment Ltd. (EC) 278/2009 Eco-design requirements for no-load ASIAN POWER condition electric power consumption and DEVICES INC. average active efficiency of external power suppliers March 20, 2012 ___________________________ Sophia Wu / Compliance Manager Date ViewSonic Corporation...
-
Page 7: Declaration Of Rohs Compliance
Declaration of RoHS Compliance This product has been designed and manufactured in compliance with Directive 2002/95/EC of the European Parliament and the Council on restriction of the use of certain hazardous substances in electrical and electronic equipment (RoHS Directive) and is deemed to comply with the maximum concentration values issued by the European Technical Adaptation Committee (TAC) as shown below: Proposed Maximum... -
Page 8: Important Safety Instructions
Important Safety Instructions DO NOT place objects on top of the device, as objects may scratch the screen. DO NOT expose the device to dirty or dusty environments. DO NOT place the device on an uneven or unstable surface. DO NOT insert any foreign objects into the device. DO NOT expose the device to strong magnetic or electrical field. -
Page 9: Copyright Information
DataViz, Inc. All rights reserved. The actual included applications (apps) may differ from the illustrated screen shots. Disclaimer: ViewSonic Corporation shall not be liable for technical or editorial errors or omissions contained herein; nor for incidental or consequential damages resulting from furnishing this material, or the performance or use of this product.In the interest of continuing... -
Page 10: Product Registration
_______________________________ Product disposal at end of product life ViewSonic respects the environment and is committed to working and living green. Thank you for being part of Smarter, Greener Computing. Please visit ViewSonic website to learn more. USA & Canada: http://www.viewsonic.com/company/green/recycle-program/ Europe: http://www.viewsoniceurope.com/uk/kbase/article.php?id=639... -
Page 11: Table Of Contents
Chapter 1: Getting Started ..............1 1.1 Your Device ....................1 Front ......................1 Rear ......................1 Side ......................2 Indicator ......................3 1.2 Accessories ....................3 1.3 Installing microSD/SIM Card ..............4 To install the microSD card .................4 To remove the microSD card ..............4 To install the SIM card ( select model ) ............4 To remove the SIM card ................4 1.4 Charging Battery ..................4 1.5 Using Headsets ..................5... - Page 12 Chapter 3: Settings ................13 3.1 Install and Remove an Application ............13 Remove an application ................13 3.2 Setting Date & Time ................14 3.3 Set the System Language ..............14 3.4 Setting up Wi-Fi ..................15 To turn Wi-Fi on or off ................15 To connect to a Wi-Fi network ..............15 3.5 Configuring a Bluetooth Connection ............16 3.6 Browsing Web Pages ................16...
-
Page 13: Chapter 1: Getting Started
Chapter 1: Getting Started 1.1 Your Device Front Rear Part Name Description Touch screen Use finger to control system and application. Indicator Refer to "Indicators" on page 3 for details. Camera A built-in webcam that allows you to capture still images, record videos, and chat online. -
Page 14: Side
Side Left Right Bottom Part Name Description Volume button Press to adjust the volume (+Volume up/-Volume down). Reset When system abnormal or inoperative, insert a thin, straight object (such as a paper clip) in the manual reset hole to perform a soft reset on your device. -
Page 15: Indicator
After opening the package, carefully inspect the contents. If any of the items are missing or appear damaged, contact your dealer. The shipping carton should contain the following: • ViewPad E100 • Changeable Power Plug • Power Adaptor • Quick Start Guide •... -
Page 16: Installing Microsd/Sim Card
1.3 Installing microSD/SIM Card You need a microSD card to store photos, music, videos, and other data. ® To install the microSD card Insert the microSD card as shown. Make sure the gold contacts are facing down. To remove the microSD card 1. -
Page 17: Using Headsets
1.5 Using Headsets For listening to music, plug a headset to the headset jack. Note: • When using a headset, your ability to hear outside sounds may be limited. Do not use headset if it will endanger you. • When using a headset, do not set the volume to its maximum as it may damage your hearing. -
Page 18: Unlocking The Screen
1.7 Unlocking the Screen By default, the screen automatically locks after a period of inactivity. You can set the length of time until the screen locks. To unlock the screen 1. Press the Power button to turn on the display from Sleep mode. 2. -
Page 19: Chapter 2: Start Using Your Device
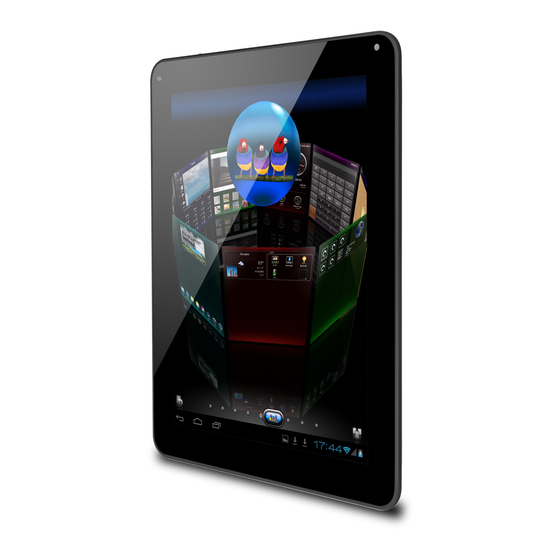
Chapter 2: Start Using Your Device 2.1 Home Screen From the Home screen, you can quickly access common features and view battery and connection status. Set screen mode Press and hold the power button for 2-3 seconds to power on your device. And then follow the on-screen instructions to complete the initial Operating system setup. - Page 20 Extended Home screen Swipe your finger to the left or right across the Home screen. The two extensions to the left and to the right of the Home screen provide more space for icons, widgets, shortcuts, and other items.
-
Page 21: Shortcut Menu
2.2 Shortcut Menu The shortcut menu allows you to easily access an application from the Home screen. To open an application, tap an icon. Customizing shortcut menu 1. Home screen: Tap you can add apps and widgets to your Home screen. 2. -
Page 22: Using Widgets
Using widgets Save time with live updates right on the Home screen and get all your personalized updates in one place. You may add and customize the Widgets on the Home screen as you like. 1. From the Home screen, tap . -
Page 23: Application Drawer
Application drawer The Application Drawer contains all applications and settings. Tap to open the menu. Tap an icon to access the application. 2.3 Setting Wallpaper Long press on empty space on desktop to change your wallpaper. -
Page 24: Configuring A 3G Network (3G Model)
Configuring a 3G Network (3G Model) Make sure the device is powered off before you install/uninstall an SIM card. From the application menu, tap Settings > Wireless Networks > More > Mobile Networks. • Data enabled: Select the check box to turn 3G on (enabled by default), then you can use 3G network. -
Page 25: Chapter 3: Settings
Chapter 3: Settings Touch the "Settings" icon to open the settings configuration from aplications menu, you can use it to setup your Wi-Fi Connection, adjust time, display settings and so on. 3.1 Install and Remove an Application Use the 1 Mobile market application to install popular applications to your device. Remove an application Touch to enter applications menu >... -
Page 26: Setting Date & Time
3.2 Setting Date & Time Touch the "Settings" icon from the applications menu, select “Date & time settings" and click to change date & time setting, You can set date, time zone, time, and so on. 3.3 Set the System Language Touch applications menu icon >... -
Page 27: Setting Up Wi-Fi
3.4 Setting up Wi-Fi You need to connect to a wireless network before surfing the Internet or using the related applications that require internet connection. To turn Wi-Fi on or off 1. From the Home screen, tap > Settings > Wi-Fi. 2. -
Page 28: Configuring A Bluetooth Connection
3.5 Configuring a Bluetooth Connection From the applications menu press , and tap Settings > Wireless & networks. • Select the Bluetooth check box to activate the Bluetooth. • A list of Bluetooth devices will appear. To pair with a device, tap the device name in the discovered Bluetooth list. -
Page 29: To Scroll The Page
To set home page 1. While viewing a web page, tap > Settings > General > Set home page. 2. Enter the URL of the page that you want to set as home page. 3. Select Current page or Default page. 4. -
Page 30: Chapter 4: Using Applications
Chapter 4: Using Applications 4.1 HDMI Output Tap the setting > Display > Switch display panel > HDMI For correct HDMI orientation output, please set the tablet to the native position as illustrated in below figure. Note: 1. The tablet display will go blank when switching to the HDMI output. 2. -
Page 31: Firmware Update
4.4 Firmware Update Ensure wireless is connected and functioning. From the application menu, tap on Updates to check if a firmware update is available. If an update version is available, you will see following message. Tap on Download Update to start downloading. The image file is over 300MB and it can take quite some time to complete the process, depending upon your connection speed. - Page 32 After download success, tap on Accept > Apply Update to install the new version on your tablet. Your device will restart automatically to apply the new software. Once the software has been successfully updated to new version, tap on OK to close the program.
-
Page 33: Chapter 5: Other Information
Chapter 5: Other Information Troubleshooting 1. Unable to power on the device. a> Ensure the device had been charged sufficiently b> To avoid pressing the “power” button and “Volume + / -“ key together c> Please insert a thin, straight object (such as a paper clip) in the manual reset hole to perform a soft reset on your device. -
Page 34: Customer Support
Renta y Datos, 29 SUR 721, COL. LA PAZ, 72160 PUEBLA, PUE. Tel: 01.222.891.55.77 CON 10 LINEAS Electroser, Av Reforma No. 403Gx39 y 41, 97000 Mérida, Yucatán. Tel: 01.999.925.19.16 Other places please refer to http://www.viewsonic.com/la/soporte/index.htm#Mexico Latin America (Peru) www.viewsonic.com/la/ T= 0800-54565 soporte@viewsonic.com... -
Page 35: Limited Warranty
How long the warranty is effective: ViewSonic ViewPad are warranted for at least 1 year for labor from the date of the first customer purchase. User is responsible for the back up of any data before returning the unit for service. - Page 36 Exclusion of damages: ViewSonic’s liability is limited to the cost of repair or replacement of the product. ViewSonic shall not be liable for: 1. Damage to other property caused by any defects in the product, damages based...