ViewSonic ViewPad 10e User Manual
One of the world’s thinnest 10” tablets with ips screen technology
Hide thumbs
Also See for ViewPad 10e:
- User manual (177 pages) ,
- Specifications (2 pages) ,
- Software manual (98 pages)
Table of Contents
Advertisement
Quick Links
Advertisement
Table of Contents

Related Manuals for ViewSonic ViewPad 10e


Summary of Contents for ViewSonic ViewPad 10e
- Page 1 ViewPad 10e User Guide Model No. VS14445...
-
Page 2: Compliance Information
Compliance Information CE Conformity for European Countries The device complies with the EMC Directive 2004/108/EC and Low Voltage Directive 2006/95/EC, R&TTE Directive 1999/5/EC. Following information is only for EU-member states: The mark is in compliance with the Waste Electrical and Electronic Equipment Directive 2002/96/EC (WEEE). -
Page 3: Declaration Of Rohs Compliance
Declaration of RoHS Compliance This product has been designed and manufactured in compliance with Directive 2002/95/EC of the European Parliament and the Council on restriction of the use of certain hazardous substances in electrical and electronic equipment (RoHS Directive) and is deemed to comply with the maximum concentration values issued by the European Technical Adaptation Committee (TAC) as shown below: Substance... -
Page 4: Important Safety Instructions
Important Safety Instructions DO NOT place objects on top of the device, as objects may scratch the screen. DO NOT expose the device to dirty or dusty environments. DO NOT place the device on an uneven or unstable surface. DO NOT insert any foreign objects into the device. DO NOT expose the device to strong magnetic or electrical field. -
Page 5: Copyright Information
® registered trademarks of DataViz, Inc. All rights reserved. Disclaimer: ViewSonic Corporation shall not be liable for technical or editorial errors or omissions contained herein; nor for incidental or consequential damages resulting from furnishing this material, or the performance or use of this product.In the interest of continuing product improvement, ViewSonic Corporation reserves the right to change product specifications without notice. -
Page 6: Product Registration
Purchase Date: Product disposal at end of product life ViewSonic respects the environment and is committed to working and living green. Thank you for being part of Smarter, Greener Computing. Please visit ViewSonic website to learn more. USA & Canada: http://www.viewsonic.com/company/green/recycle-program/ Europe: http://www.viewsoniceurope.com/uk/kbase/article.php?id=639... -
Page 7: Table Of Contents
Chapter 1: Getting Started ... 1 1.1 Your Device ...1 Chapter 2: Start Using Your Device ... 4 2.1 Home Screen ...4 Set Screen Mode ...4 Extended Home Screen ...4 2.2 ViewScene 3D ...5 Using of ViewScene 3D ...5 Customizing Home Screen ...6 3D Carousel ...7 Apps List ...8 Panels ...9... -
Page 8: Chapter 1: Getting Started
Chapter 1: Getting Started 1.1 Your Device Front ② ① ④⑤ ⑥ Part Name Description Touch screen Use finger to control system & application. Indicator Refer to "Indicators" on page 3 for details. Camera A built-in webcam that allows you to capture still images, record videos, and chat online. - Page 9 Side Left ① Part Name Description Volume button Press to adjust the volume (+Volume up/-Volume down). Power button Refer to "Indicators" on page 3 for details. Micro-SD Card slot Micro-SD memory card slot compatible up to 32GB SD and SDHC.
- Page 10 1.2 Accessories After opening the package, carefully inspect the contents. If any of the items is missing or appear damaged, contact your dealer. The shipping carton should contain the following: • ViewPad 10e • Changeable Power Plug • Power Adaptor •...
-
Page 11: Chapter 2: Start Using Your Device
Chapter 2: Start Using Your Device 2.1 Home Screen From the Home screen, you can quickly access common features and view battery and connection status. Set Screen Mode Press and hold the power button for 2-3 seconds to power on your device. And then follow the on-screen instructions to complete the initial Operating system setup. -
Page 12: Viewscene 3D
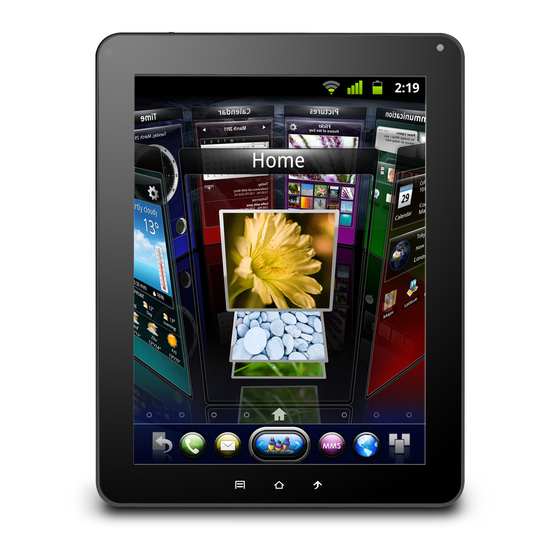
2.2 ViewScene 3D Using of ViewScene 3D It is ViewScene 3D as default when the main unit boot up, your device becomes a multiple personalized 3D Home screens that you can quickly apply to your device. The preset Home screens are preconfigured with a different collection of widgets that reflects a different moments in your life that is more suitable for business, travel, play, or social life. -
Page 13: Customizing Home Screen
Customizing Home Screen Home screen is an extended panel user interface that gives you up-to-date information at a glance, such as time, weather, calendar, upcoming appointments, next alarm, new messages, missed calls, new emails, and new voicemail. It also has a fully customizable layout where you can add your own favorite apps, folders, and widgets for one-tap access. -
Page 14: Carousel
3D Carousel The 3D Carousel shows Home screen panels bundled with all the features in a simple and intuitive 3D model. The carousel brings your entire device features at one glance. • The Tap the carousel button in Home screen to open 3D carousel. •... -
Page 15: Apps List
Apps List The apps list is accessible from the Home screen using the apps list button at the right corner of Home bar. Home button on top of applications icon indicates that the app is already on the Home screen. Tap this small Home icon to find the app location on the Home screen. Press MENU button to view the available options. -
Page 16: Panels
Panels ViewScene 3D comes with rich functioning panels such as Calendar, Weather, Picture of the Day (Flickr), Time, and more. Those panels have 3D Magic Animation feature that can be displayed when viewed in the 3D carousel. To view panel’s settings, tap the settings icon located at the top right corner of the panel. In Time panel settings you can change the current skin. -
Page 17: Chapter 3: Settings
Chapter 3: Settings Touch the "Settings" icon to open the settings configuration from aplications menu, you can use it to setup your Wi-Fi Connection, adjust time, display settings and so on. 3.1 Install and Remove an Applications Use the 1 Mobile market application to install popular applications to your device. Remove an applications Touch to enter applications menu >... -
Page 18: Setting Date & Time
3.2 Setting Date & Time Touch the “Settings” icon from the applications menu, select “Date & time settings" and click to change date & time setting, You can set date, time zone, time, and so on. 3.3 Set the System Language Touch applications menu icon >... -
Page 19: Configuring A Wi-Fi Network
3.4 Configuring a Wi-Fi Network From the Home screen, press • Select the Wi-Fi check box to turn Wi-Fi on and the detected available Wi-Fi network list will appear. • Tap the Wi-Fi network you want to connect to. If you selected an open network, you will be automatically connected to the network. -
Page 20: Configuring A Bluetooth Connection
3.5 Configuring a Bluetooth Connection From the applications menu press • Select the Bluetooth check box to activate the Bluetooth. • A list of Bluetooth devices will appear. To pair with a device, tap the device name in the discovered Bluetooth list. 3.6 Web Browsing •... -
Page 21: Chapter 4: Using Applications
Chapter 4: Using Applications 4.1 Setting up an Internet Email Account Select the Video from the applications menu. Touch the selected video thumbnail to start playing your video content. When streaming video content trough HDMI output, touching the screen will enable the video playback options. -
Page 22: Play Music
4.2 Play Music Touch the “Music” icon from the applications menu. You can search music by Artists, Albums, Playlists, or by All songs to start playing music in your device. 4.3 Gallery Gallery application provides a viewing space for your pictures and videos. Before using Gallery application, remember to install the Micro SD Card. -
Page 23: Chapter 5: Other Information
Chapter 5: Other Information Troubleshooting 1. Unable to power on the device. Ensure the device had been charged sufficiently (red light while charging, green when fully charged). 2. System force closes, crashes or fails to operate and is not recoverable or able to start after a full charge. -
Page 24: Customer Support
Renta y Datos, 29 SUR 721, COL. LA PAZ, 72160 PUEBLA, PUE. Tel: 01.222.891.55.77 CON 10 LINEAS Electroser, Av Reforma No. 403Gx39 y 41, 97000 Mérida, Yucatán. Tel: 01.999.925.19.16 Other places please refer to http://www.viewsonic.com/la/soporte/index.htm#Mexico Latin America (Peru) www.viewsonic.com/la/ Macau www.hk.viewsonic.com... -
Page 25: Limited Warranty
How long the warranty is effective: ViewSonic ViewPad are warranted for at least 1 year for labor from the date of the first customer purchase. User is responsible for the back up of any data before returning the unit for service. - Page 26 Exclusion of damages: ViewSonic’s liability is limited to the cost of repair or replacement of the product. ViewSonic shall not be liable for: 1. Damage to other property caused by any defects in the product, damages based...