PRESONUS FADERPORT User Manual
Hide thumbs
Also See for FADERPORT:
- User manual (33 pages) ,
- Owner's manual (50 pages) ,
- Owner's manual (61 pages)
Table of Contents
Advertisement
Advertisement
Table of Contents

Related Manuals for PRESONUS FADERPORT


Summary of Contents for PRESONUS FADERPORT
- Page 1 FADERPORT User’s Manual Version 1.0 © 2006...
- Page 2 PreSonus reserves the right to update any unit returned for repair. PreSonus reserves the right to change or improve the design of the product at any time without prior notice. This warranty does not cover claims for damage due to abuse, neglect, alteration or attempted repair by unauthorized personnel, and is limited to failures arising during normal use that are due to defects in material or workmanship in the product.
-
Page 3: Table Of Contents
1.6 Computer Requirements..................11 2 Setup 2.1 DAW Operation Modes ..................12 2.2 Nuendo/Cubase....................13 2.2.1 Customize your FaderPort in Nuendo/Cubase ............ 15 2.3 Apple’s Logic 7 ....................17 2.4 Digidesign Pro Tools ..................19 3 Technical Information 3.1 Specifications...................... 20 3.2 Troubleshooting.................... -
Page 4: Overview
FaderPort along with window selection, play, stop, record, and managing markers (locate points) for fast and easy recording. A foot switch jack is also included on the FaderPort for hands free punch-in/out recording. The FaderPort works with most Mac or Windows-based recording software including Pro Tools, Cubase, Nuendo, Logic, and more supported software is on the way. -
Page 5: What Is In The Box
1 OVERVIEW 1.2 WHAT IS IN THE BOX Your FaderPort package contains the following: • FADERPORT • 6’ USB cable • FaderPort Software Disc • DC Power Supply • Warranty Card... -
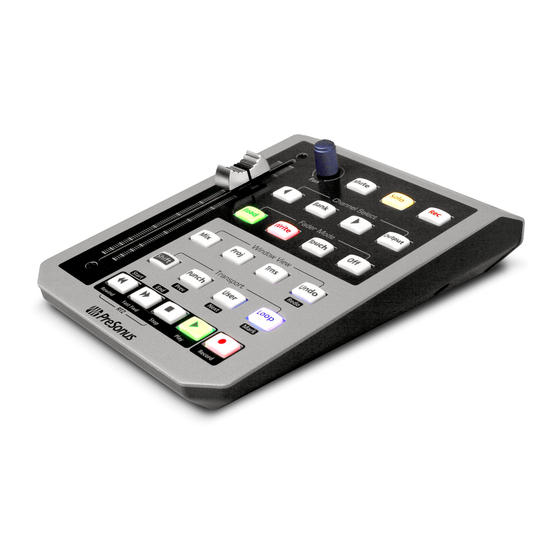
Page 6: Top / Rear Panel Layout And Operation
1 OVERVIEW 1.3 TOP / REAR PANEL LAYOUT AND OPERATION Top Panel... - Page 7 Bank one track at a time with the left and right arrow buttons, or hold the bank button to bank 8 tracks at a time (BANK + < or >). Also, the FaderPort will follow the channel selection within the DAW via keyboard or mouse.
- Page 8 1 OVERVIEW 8. Window View Open and close your DAW’s main windows, and quickly access the ‘Undo’ and ‘Redo’ (SHIFT+UNDO) functions with these controls. MIX opens the mixer window, PROJ opens the main project window, and TRNS opens the transport (stop, play, etc) window. 9.
- Page 9 1 OVERVIEW 16. SHIFT-NEXT Moves cursor to next set marker. 17. SHIFT-MARK While session is playing sets a marker. 18. SHIFT-START Moves cursor to beginning of the main selection region. 19. SHIFT-END Movers cursor to end of the main selection region. 20.
- Page 10 USB Connect the USB cable from this connector to any USB connector on your computer. d. Footswitch Connect a footswitch here to control punch ins/outs with a footswitch. The foot switch operates the same way as manually punching in/out in your DAW. e. Security Lock Used for attaching a lock system to your FaderPort.
-
Page 11: Writing Automation
1.5 INSTALLATION GUIDE PC and Mac: 1.) Connect the power supply and USB cable to your FaderPort, and the other end of the USB cable to any USB connector on your computer. 2.) Windows/OSX will automatically install the class compliant drivers for your FaderPort. -
Page 12: Computer Requirements
1 OVERVIEW 1.6 COMPUTER REQUIREMENTS Windows - OS: Microsoft Windows XP Service Pack 2 or later - Computer: Windows compatible computer with USB port (PCI or built-in). - CPU/Clock: Pentium, with 900Mhz or higher (2.4 GHz recommended) Macintosh - OS: MacOS X - Computer: Apple Macintosh series with USB port (PCI or built-in). -
Page 13: Setup
HUI Emulation Mode: Logic and Pro Tools In some DAWs, the only way to implement control for a device like the FaderPort is to use HUI emulation. The HUI standard is the most widely protocol for control surfaces, but is not programmable. -
Page 14: Nuendo/Cubase
Note: Cubase LE/SE are not supported. WINDOWS XP SET UP- NUENDO/CUBASE: 1.) Insert the FaderPort Software Disc in your computer and browse the disc to find the FaderPort.dll file, click on it once and press CTRL+C on the keyboard to copy the file. - Page 15 2.) Right-click or Ctrl-Click on the application icon. Select “Show Package Contents” 4.) Open the “contents” folder. Then open the “components” folder. Leave folder open. 6.) Insert the FaderPort Software Disc in your computer and browse the disc to find the FaderPort.bundle file, drag this file into the “components” folder.
-
Page 16: Customize Your Faderport In Nuendo/Cubase
2 SETUP 2.2.1 CUSTOMIZE YOUR FADERPORT IN NUENDO/CUBASE In Native Mode (Nuendo/Cubase) you can further customize the functions of the FaderPort. To do this in Nuendo/Cubase: 1. open Device Setup. 2. click on PreSonus FaderPort under Remote Devices. - Page 17 2 SETUP 3. In the Button column are the available customizable functions on the Faderport. 4. Select a category for a button you want to change by clicking in cell. 5. Select a command that you want the button to now perform.
-
Page 18: Apple's Logic 7
2 SETUP 2.3 LOGIC Once the FaderPort has been connected to the computer and is automatically installed, follow these instructions to set it up for use with Logic: 1.) Click on Logic Pro/Preferences/(arrow to expand menu)/Control Surfaces/Setup. 2.) Click on New, then click on Install…... - Page 19 3.) Scroll down the list to find Mackie Designs HUI, click on it, and click ADD. 4.) Change the Out Port to FaderPort. 5.) Change the Input to FaderPort. 6.) You are now ready to use the FaderPort in Logic.
-
Page 20: Digidesign Pro Tools
2 SETUP 2.4 PRO TOOLS Once the FaderPort has been connected to the computer, and is automatically installed, follow these instructions to set it up for use with Pro Tools: 1.) Go to Setups/ Peripherals. 2.) Create one HUI device under MIDI Controllers. -
Page 21: Technical Information
Weight ....................Approximately 1 lb. USB................v1.1, provides FaderPort Logic Power Fader Motor Power Supply................9VDC-1.2Amp As a commitment to constant improvement, PreSonus Audio Electronics, Inc. reserves the right to change any specification stated herein at any time in the future without notification. -
Page 22: Troubleshooting
1.) What Operating System and version (ex; Mac OSX 10.4.7) are you running? 2.) What DAW software are you using, or do you have access to use with the FaderPort? 3.) What, if any, other USB Audio Devices do you have connected to the computer. -
Page 23: Appendix 4.1 Firmware Updates
FaderPort, follow the instructions included with the Firmware Updater download. 4.2 SOFTWARE COMPATIBILITY Software version compatibility: At the time of printing this manual the FaderPort has been tested and works with the following software and versions: Cubase SL 2 and later Cubase SX 2 and later NOTE: Cubase LE and Cubase SE ver.