Kyocera KM-1510 Instruction Handbook Manual
Km/cs-1510/1810 instruction handbook rev 2c
Hide thumbs
Also See for KM-1510:
- Instruction handbook manual (65 pages) ,
- Command reference manual (410 pages) ,
- Technical reference manual (260 pages)

Related Manuals for Kyocera KM-1510


Summary of Contents for Kyocera KM-1510
- Page 1 INSTRUCTION HANDBOOK Please read the instruction handbook before using the copier. Keep it close to the copier for easy reference.
- Page 2 As an ENERGY STAR Partner, KYOCERA MITA AMERICA, INC. has determined that this product meets the ENERGY STAR guidelines for energy efficiency. * ENERGY STAR is a U.S. registered mark. In this Instruction Handbook, the 1810 is referred to as the 18 ppm (pages per minute) copier and the 1510 is referred to as the 15 ppm copier.
- Page 3 Please read the instruction handbook before using the copier. Keep it close to the copier for easy reference. The sections of this handbook and parts of the copier marked with symbols are safety warnings meant to protect the user, other individuals and surrounding objects, and ensure correct and safe usage of the copier. The symbols and their meanings are indicated below.
-
Page 4: Table Of Contents
CONTENTS CHAPTER 1 CHAPTER 6 IMPORTANT! PLEASE READ FIRST. .. 1-1 COPIER DEFAULT SETTING ....6-1 1. Default settings ........... 6-1 CAUTION LABELS ........1-1 2. How to make default settings ...... 6-7 INSTALLATION PRECAUTIONS ....1-2 PRECAUTIONS FOR USE ....... 1-3 CHAPTER 7 WHEN A PROBLEM OCCURS ..... - Page 5 MAKING FULL USE OF THE MACHINE'S ADVANCED FUNCTIONS I Making copies using the magnification Various functions for making enlarged and Making clear reproductions of reduced copies ratios preset in the copier photographs I Enlarging/reducing copies to any size <Standard zoom mode> (page 4-3) <Copy quality selection>...
-
Page 6: Important! Please Read First
CHAPTER 1 IMPORTANT! PLEASE READ FIRST. CAUTION LABELS Caution labels have been attached to the copier at the following locations for safety purposes. BE SUFFICIENTLY CAREFUL to avoid fire or electric shock when removing a paper jam or when replacing toner. Label 2 High temperature inside. -
Page 7: Installation Precautions
INSTALLATION PRECAUTIONS I Environment I Power supply/Grounding the copier CAUTION WARNING • Avoid placing the copier on or in locations which are • DO NOT use a power supply with a voltage other unstable or not level. Such locations may cause the than that specified. -
Page 8: Precautions For Use
PRECAUTIONS FOR USE I Cautions when using the copier Other precautions • DO NOT place heavy objects on the copier or cause WARNING other damage to the copier. • DO NOT place metallic objects or containers with water (flower vases, flower pots, cups, etc.) on or •... -
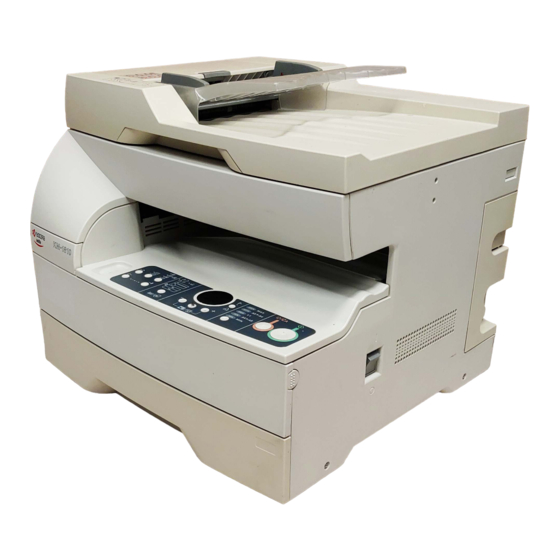
Page 9: Chapter 2 Names Of Parts
CHAPTER 2 NAMES OF PARTS (1) Main body 18 ppm copier 15 ppm copier ° ¤ ¤ fi fi fl ‹ › fl ‹ › ⁄ & ‡... - Page 10 CHAPTER 2 NAMES OF PARTS 1 DF (Document Feeder) (Open/close to set the original on the platen.) 2 Original table (Place the originals here.) 3 Original insertion guides (Adjust the guides to the width of the originals.) 4 DF open/close handle (Hold this handle when opening and closing the DF.) 5 Original eject cover (Copied originals are stored here.)
- Page 11 CHAPTER 2 NAMES OF PARTS Inch specifications ⁄ %& European metric specifications ⁄ %& Asia and Oceania metric specifications ⁄ %&...
-
Page 12: Operation Panel
CHAPTER 2 NAMES OF PARTS G Initial mode (at the end of warm-up or when the Reset key is (2) Operation panel pressed) 1 Start key (indicator) In the initial mode, the upper drawer is selected as the paper feed (Press to start copying. -
Page 13: Preparations Before Use
CHAPTER 3 PREPARATIONS BEFORE USE 1. How to load paper Paper can be loaded into the drawer and the multi-bypass. Press the drawer bottom plate down and lock it there. (1) Precautions for loading paper After unpacking the paper, ruffle it several times and then load into the tray. -
Page 14: Loading Paper Into The Multi-Bypass
CHAPTER 3 PREPARATIONS BEFORE USE * If the paper reaches the right-hand wall of the drawer, the Gently push the drawer back in. length guide is not used. Store it in the space shown in the * If you force the drawer in, the paper may come out from illustration. - Page 15 CHAPTER 3 PREPARATIONS BEFORE USE Pull out the support guide. IMPORTANT * When loading paper into the multi-bypass, make sure that the copy side is facing downward. (The copy side is the side facing upward when the package is opened.) If the leading edge of the paper is curled, straighten it out before loading the paper in the multi-bypass.
- Page 16 CHAPTER 3 PREPARATIONS BEFORE USE Select the paper size by changing the display indication Open the multi-bypass. using the Paper Select key. (Inch specifications) (Metric specifications) Pull out the support guide. The display indication can also be changed using the Number of Copies/Zoom (+) key or Number of Copies/Zoom (-) key.
-
Page 17: How To Set Originals
CHAPTER 3 PREPARATIONS BEFORE USE 2. How to set originals Setting originals (1) Setting originals into the DF Precautions for the use of DF Adjust the original insertion guides to the original size. Do not use any of the originals given below with the DF. Also do not * Before setting the originals in the DF, check that no original set originals with punch holes or tear-off strips positioned as the from the previous operation remains on the original eject... -
Page 18: Setting An Original On The Platen
CHAPTER 3 PREPARATIONS BEFORE USE G 15 ppm copier (2) Setting an original on the platen When an original is set in the DF, copying will automatically start (see When using an original that cannot be set in the DF, such as a book “DF auto start”... -
Page 19: Replacing The Toner Container And Waste Toner Tank
CHAPTER 3 PREPARATIONS BEFORE USE 3. Replacing the toner container and waste toner tank When the level of toner becomes low, the Add Toner indicator lights Open the front cover. and a toner replacement message is printed out. When the message is printed, replace the toner container and waste toner tank immediately. - Page 20 CHAPTER 3 PREPARATIONS BEFORE USE Slide the toner container to the left and then pull it out toward Install the toner container. you. * First insert the toner container into the copier as far as it will go and then slide it to the right as indicated by the marked arrows.
-
Page 21: Chapter 4 Basic Operations
CHAPTER 4 BASIC OPERATIONS 1. Basic copying procedure (English text panel) (Symbol panel) 1. Warm-up 4. Copy quality selection Turn the main switch ON (|). When warm-up ends, the Start indicator Copy quality can be selected according to the original type. Press the lights. - Page 22 CHAPTER 4 BASIC OPERATIONS (English text panel) (Symbol panel) (English text panel) (Symbol panel) 5. Copy exposure adjustment 8. Starting copying Copy exposure can be selected for all the image modes excluding the Press the Start key. Copying is possible when the indicator is lit auto exposure mode.
-
Page 23: Enlargement/Reduction
CHAPTER 4 BASIC OPERATIONS 2. Enlargement/reduction (1) Zoom copy (2) Standard zoom copy The zoom ratio can be set to any value from 50 to 200% in 1% Copying is possible using the ratios preset in the copier. increments. Available ratios (Inch specifications) 200%: 129%: 5 1/2"... -
Page 24: Energy Saver (Auto Preheat) Function
CHAPTER 4 BASIC OPERATIONS 3. Energy saver (auto preheat) function This function automatically puts the copier in the sleep mode if no * To resume copying after the energy saver (auto preheat) function copying operation is performed for a certain period of time (5 to 45 has been activated, press any of the operation section keys. -
Page 25: Chapter 5 Functions
CHAPTER 5 FUNCTIONS 1. Layout copying Two or four originals can be combined into a single copy. Setting originals The borderline of each original can also be marked with a solid line or (18 ppm copier) dotted line. Original setting location Original Platen * The 15 ppm copier requires the optional memory copy board to... - Page 26 CHAPTER 5 FUNCTIONS G 4 in 1 To change the type of the borderline, hold down the 2 in 1/4 in 1 key for 5 seconds. “F17” appears on the copy quantity Use this mode to copy four originals onto one sheet. display and then a number appears.
- Page 27 CHAPTER 5 FUNCTIONS Press the 2 in 1/4 in 1 key to light the 2 in 1 indicator or 4 in 1 When scanning of the first original ends, “1” (number of indicator. scanned originals) appears on the display. Place the next original.
-
Page 28: Sort Copying
CHAPTER 5 FUNCTIONS 2. Sort copying Copies can be sorted into the required number of sets by storing Press the Start key. original images in the memory before performing copying. * If originals are set in the DF on the 18 ppm copier, originals are scanned one by one and copied. -
Page 29: Copier Default Setting
CHAPTER 6 COPIER DEFAULT SETTING 1. Default settings The state the copier is in at the end of warm-up or when the Reset key is pressed is called the initial mode, and the function settings that are automatically set for the initial mode are called the default settings. The default settings can be changed according to how you wish to use the copier. -
Page 30: Chapter 6 Copier Default Setting
CHAPTER 6 COPIER DEFAULT SETTING Default code Setting item Setting contents Setting code Photo original exposure Adjusts the exposure for when photo original is selected 1: 1 Light adjustment for the image mode. The larger the setting code number, 2: 2 the darker the copy density. - Page 31 CHAPTER 6 COPIER DEFAULT SETTING Default code Setting item Setting contents Setting code Lower drawer paper size Sets the size of paper loaded in the lower drawer. (Inch) (optional) * This setting item will not be displayed if the optional 1: 8 1/2"...
- Page 32 CHAPTER 6 COPIER DEFAULT SETTING Default code Setting item Setting contents Setting code Layout (borderline) Selects the type of borderline for layout copying (see 1: None* page 5-1). 2: Solid line * With the 15 ppm copier, this setting item will not be 3: Dotted line displayed if the optional memory copy board is not installed.
- Page 33 CHAPTER 6 COPIER DEFAULT SETTING Default code Setting item Setting contents Setting code Preheat recovery time Selects the mode of the energy saver (auto preheat) 1: Recovery priority mode function (page 4-4) from the recovery priority mode and 2: Power save priority power save priority mode.
- Page 34 CHAPTER 6 COPIER DEFAULT SETTING Default code Setting item Setting contents Setting code Paper feed shifting adjustment Adjusts displacement of the copy image. -3.0 to 3.0 (0*) in increments (lower drawer) * This setting item will not be displayed if the optional of 0.1 drawer is not installed.
-
Page 35: How To Make Default Settings
CHAPTER 6 COPIER DEFAULT SETTING 2. How to make default settings Hold down both of the copy exposure adjustment keys for 3 When the report is printed out, the display returns to that for seconds. "F00" (default code) appears on the copy quantity step 2. - Page 36 CHAPTER 6 COPIER DEFAULT SETTING Press the Start key. The image pattern shown in the Press the Zoom Input/Enter key. The display returns to that illustration will be printed out. for step 2. To end the making of default settings, proceed to * When adjusting paper feed shifting of the multi-bypass, be step 17.
-
Page 37: When A Problem Occurs
CHAPTER 7 WHEN A PROBLEM OCCURS 1. Error and status indications When any of the indications listed in the table below appears on the operation panel, take the corrective action as instructed. Indication Action Page “A” and “100” alternate on the copy quantity Turn the main switch OFF and ON and check that the lamp under the platen ––... - Page 38 CHAPTER 7 WHEN A PROBLEM OCCURS Indication Action Page “A” and “011” alternate on the copy quantity If this indication appears, turn the main switch OFF and ON. An error message display. will automatically be printed out. The copier initializes the data to remedy the error. Make the specifications setting (F29 Inch/metric specifications setting) before using the copier again.
- Page 39 CHAPTER 7 WHEN A PROBLEM OCCURS Indication Action Page “E70” appears on the copy quantity display. While using the DF, the last of the ejected originals failed to be copied. Set that original back onto the original table and resume the copying operation. “E71”...
-
Page 40: When Paper Misfeeds
CHAPTER 7 WHEN A PROBLEM OCCURS 2. When paper misfeeds If a paper misfeed occurs, copying will stop. An indication signaling a paper misfeed appears on the operation panel and an indicator lights showing the location of a paper misfeed. Remove the misfed paper by referring to “(3) Removal procedures” on page 7-5, with the main switch in the ON (|) position. -
Page 41: Removal Procedures
CHAPTER 7 WHEN A PROBLEM OCCURS G Misfeed in multi-bypass (3) Removal procedures If the multi-bypass indicator flashes green when the multi-bypass is 1 Misfeed in paper feed section used, a misfeed has occurred in the multi-bypass. Remove the misfed G Misfeed in drawer paper using the procedure given below. - Page 42 CHAPTER 7 WHEN A PROBLEM OCCURS IMPORTANT WARNING The drum 1 is highly sensitive to light and dirt. Be careful not to High voltage is present in the charger section. Take expose it to strong light such as room lighting or to touch the drum sufficient care when working in this area, as there is a with the hands.
- Page 43 CHAPTER 7 WHEN A PROBLEM OCCURS 3 Misfeed in DF Close the ejection guide. If the DF indicator lights red, a misfeed has occurred in the DF. Remove the misfed original using the procedure given below. G 18 ppm copier Remove all the originals from the original table.
- Page 44 CHAPTER 7 WHEN A PROBLEM OCCURS G 15 ppm copier Remove the original on the original table to the right or left, whichever direction that is easier to remove the original, and open and close the DF. Place the original on the original table again and resume the copying operation.
-
Page 45: Troubleshooting
CHAPTER 7 WHEN A PROBLEM OCCURS 3. Troubleshooting If trouble occurs, carry out the applicable checks and actions given below. If the trouble persists, print out a user status report and contact your service representative. Trouble Checks Action Page Nothing lights on the Is the power plug connected to an AC Connect the plug to an AC outlet. - Page 46 CHAPTER 7 WHEN A PROBLEM OCCURS Trouble Checks Action Page Copies come out too dark. Is the copier in the auto exposure mode? To change the overall exposure, perform auto exposure adjustment. Is the copier in the Photo, Text & Photo or Adjust the exposure to the correct degree Text mode? using the copy exposure adjustment keys.
-
Page 47: Cleaning And Specifications
CHAPTER 8 CLEANING AND SPECIFICATIONS 1. Cleaning the copier IMPORTANT CAUTION 15 ppm copier For safety purposes, ALWAYS remove the power plug from Do not touch the gear near the rear left corner of the platen. If you do, the outlet when performing cleaning operations. your hands may be soiled or injury may result. -
Page 48: Specifications
CHAPTER 8 CLEANING AND SPECIFICATIONS 2. Specifications Type ................Desk-top Original table ..............Fixed type Copying system .............. Indirect electrostatic Originals ................. DF (18 ppm copier): Sheets of paper (Maximum original size: 8 1/2" x 14"/folio) DF (15 ppm copier): Sheets of paper (8 1/2" x 11", 8 1/2" x 14"/A4, folio) Platen: Sheets of paper, books, 3-dimensional objects (Maximum original size: 8 1/2"... -
Page 49: Safety Of Laser Beam
SAFETY OF LASER BEAM 1. Safety of laser beam This copier has been certified by the manufacturer to Class 1 level under the radiation performance standards established by the U.S. DHHS (Department of Health and Human Services) in 1968. This indicates that the product is safe to use during normal operation and maintenance. - Page 51 CAUTION! The power plug is the main isolation device! Other switches on the equipment are only functional switches and are not suitable for isolating the equipment from the power source. ATTENTION ! Le débranchement de la fiche secteur est le seul moyen de mettre l'appareil hors tension. Les interrupteurs sur l'appareil ne sont que des interrupteurs de fonctionnement : ils ne mettent pas l'appareil hors tension.
- Page 52 WARNING This equipment has been tested and found to comply with the limits for a Class A digital device, pursuant to Part 15 of the FCC Rules. These limits are designed to provide reasonable protection against harmful interference when the equipment is operated in a commercial environment.
- Page 54 * For best copy results and machine performance, we recommend that you use only KYOCERA MITA original supplies for your KYOCERA MITA copier.
- Page 55 Av. 16 de Septiembre #407 Col. Santa Inés, Delegación Azcapotzalco México, D.F. C.P. 02130 TEL : 3-83-27-41 FAX : 3-83-78-04 ©2000 KYOCERA MITA CORPORATION is a trademark of Kyocera Corporation 2001. 3 2A180012 C is a registered trademark of KYOCERA MITA CORPORATION...