Table of Contents
Advertisement
Quick Links
Download this manual
See also:
Service Manual
Advertisement
Table of Contents

Related Manuals for Tascam 202mkV


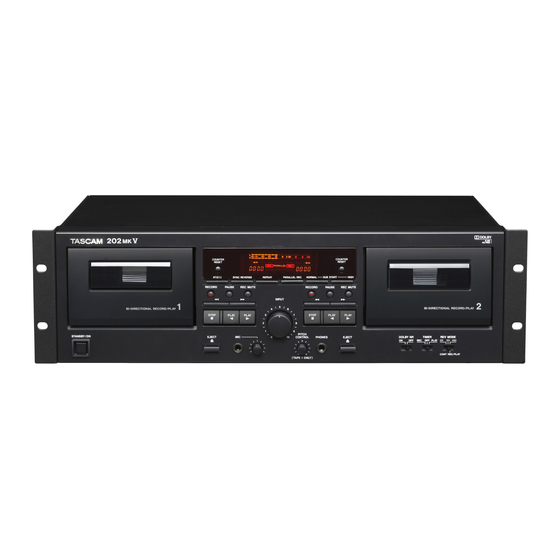
Summary of Contents for Tascam 202mkV
- Page 1 D01053920A Double Auto Reverse Cassette Deck OWNER'S MANUAL...
- Page 2 IMPORTANT SAFETY PRECAUTIONS CAUTION : TO REDUCE THE RISK OF ELECTRIC SHOCK, DO NOT REMOVE COVER (OR BACK). NO USER-SERVICEABLE PARTS INSIDE. REFER SERVICING TO QUALIFIED SERVICE PERSONNEL. The lightning flash with arrowhead symbol, within equilateral triangle, is intended to alert the user to the presence of uninsulated “dangerous volt- age”...
- Page 3 IMPORTANT SAFETY INSTRUCTIONS 1 Read these instructions. 14 Refer all servicing to qualified service per- sonnel. Servicing is required when the appa- 2 Keep these instructions. ratus has been damaged in any way, such as power-supply cord or plug is damaged, 3 Heed all warnings.
-
Page 4: Table Of Contents
IMPORTANT SAFETY PRECAUTIONS Contents 1 − Introduction ......5 Adjusting mix recording level ..19 Continuous recording ....19 Supplied accessories ....5 Parallel recording ....... 20 Rack-mounting the unit ....5 Dubbing (from TAPE 1 to About this manual ....... 5 TAPE 2) ........ -
Page 5: Introduction
IMPORTANT SAFETY INSTRUCTIONS 1 − Introduction Thank you for your purchase of the TASCAM The Dolby NR system affects both recording and V Double Auto Reverse Cassette Deck. playback quality. In playback, be sure to set the DOLBY NR switch to the same position used when Before connecting and using the unit, please take time the recording was made. -
Page 6: Precautions And Notes For Placement And Use
IMPORTANT SAFETY PRECAUTIONS 1 − Introduction Precautions and notes for placement and use The 202 V may be used in most areas, but to main- Do not open the sealed cabinet as this might result • tain top performance, and prolong operating life, in damage to the circuitry or electrical shocks. -
Page 7: Automatic Tape Type Detection Function
IMPORTANT SAFETY INSTRUCTIONS 1 − Introduction Automatic tape type detection function This cassette deck can detect what type of tape is different types of tape at the same time. being used based on the detection holes in the cassette shell. Be sure to use cassettes with detection holes. With this cassette deck, you can play back normal (Type I), chrome (Type II) and metal (Type IV) tapes. -
Page 8: Connections
IMPORTANT SAFETY PRECAUTIONS 1 − Introduction NOTE Do not make a recording or play back tape Pinch roller when the tape transport path is wet with clean- Capstan ing liquid, as this could cause the tape to jam or clog. Erase head Pinch roller Capstan... -
Page 9: Features Of The 202 Mk V
IMPORTANT SAFETY INSTRUCTIONS 2 − Features of the 202 Front panel STANDBY/ON switch TAPE 2 compartment This switches the unit power between standby and Reverse mode switch (REV MODE) This switch is used to switch between reverse modes. NOTE The apparatus draws nominal non-operating TIMER switch power from the AC outlet with its STANDBY/ON This switch is provided for use with a commercially... -
Page 10: Rear Panel
IMPORTANT SAFETY PRECAUTIONS 2 − Features of the 202 INPUT control Fast-forward/Rewind This control is used to adjust the recording level. STOP ( MIC jack and level control Stop of playback/record Insert your microphone into this jack and use the knob to adjust the level of mic input. -
Page 11: Display
IMPORTANT SAFETY INSTRUCTIONS 2 − Features of the 202 Display Peak level meter Dubbing indicator This shows recording and playback levels. NORMAL DUB lights during normal speed dubbing, and lights during high speed dubbing. HIGH DUB SYNC REV This indicator lights when the synchro reverse dub- Play indicator bing function is switched on. -
Page 12: Playback
IMPORTANT SAFETY PRECAUTIONS 3 − Playback Playback 1 (either TAPE 1 or TAPE 2) You have a choice of three settings: : One way mode Ä Set the switch to this position to playback only one side. : Two way mode Ë... -
Page 13: Playback 2 (Either Tape 1 Or Tape 2)
IMPORTANT SAFETY INSTRUCTIONS 3 − Playback Playback 2 (either TAPE 1 or TAPE 2) D. Tape counter Press the COUNTER RESET key to reset the tape counter to . You can use this func- 0000 tion for easy relocation of any desired point on the tape. -
Page 14: Continuous Playback
IMPORTANT SAFETY PRECAUTIONS 3 − Playback Continuous playback Press the PLAY ) key of the deck you ˙ ¥ want to start first. You can start continuous playback from either TAPE 1 or TAPE 2. Playback cycles through four tape sides as fol- Continuous playback can be performed between lows, and will continue as many as 5 times when TAPE 1 and TAPE 2. -
Page 15: A-B Repeat Playback
IMPORTANT SAFETY INSTRUCTIONS 3 − Playback A-B Repeat playback During playback, press the key at REPEAT the point where you want to start the repeat playback interval (A point). appears on the display when this point is set. Next, press the key at the point where REPEAT you want to end the repeat playback interval (B... -
Page 16: Recording
IMPORTANT SAFETY PRECAUTIONS 4 − Recording 4 − Recording Recording (either TAPE 1 or TAPE 2) Set the DOLBY NR switch. Set the switch to to record with Dolby Noise Reduction. Set to to record without Dolby Noise Reduc- tion. Press the key. -
Page 17: To Erase Recordings
IMPORTANT SAFETY INSTRUCTIONS 4 − Recording When everything is ready, start recording by To stop recording temporarily pressing the PAUSE key or the PLAY key whose arrow points in the same direction as the indi- cator. Press the key to stop recording temporarily. PAUSE A second press of the key resumes recording. -
Page 18: Recording Silence
IMPORTANT SAFETY PRECAUTIONS 4 − Recording Recording silence To create a blank of more than 4 When you press the REC MUTE key during recording, ª the unit records no signal for about 4 seconds and then seconds long enters the record-pause mode. To resume recording, Hold down the key for the desired length REC MUTE... -
Page 19: Adjusting Mix Recording Level
IMPORTANT SAFETY INSTRUCTIONS 4 − Recording Adjusting mix recording level To record a mix of voice and another audio source, you need to adjust the mic input level and then fine tune the overall recording level. Plug your microphone into the jack on the Audio source front panel. -
Page 20: Parallel Recording
IMPORTANT SAFETY PRECAUTIONS 4 − Recording Check the recording direction. NOTE The TAPE 2 deck always starts recording from side “A”. Start recording. If an indicator is lit which points in the direction opposite to the one desired, change the direction by pressing the opposite direction PLAY ˙... -
Page 21: Dubbing (From Tape 1 To Tape 2)
IMPORTANT SAFETY INSTRUCTIONS 4 − Recording Dubbing (from TAPE 1 to TAPE 2) Press either DUB START key to start dubbing. For normal speed dubbing, press the NORMAL key. For high-speed dubbing, press the key. HIGH NOTE High-speed dubbing makes a copy at approxi- Insert a cassette tape for playback into the mately two times the normal speed. -
Page 22: Editing During Dubbing (Only At Normal Speed)
IMPORTANT SAFETY PRECAUTIONS 4 − Recording Editing during dubbing (only at normal speed) At the desired point during dubbing, press the PAUSE key on the TAPE 2 deck. The TAPE 2 deck only enters the pause mode, allowing you to let unwanted songs go by. To create a 4-second blank between songs, press REC MUTE key on the TAPE 2 deck. -
Page 23: Timer Playback
IMPORTANT SAFETY INSTRUCTIONS 4 − Recording During dubbing, either the NORM DUB HIGH DUB NOTE indicator lights steadily on the display. Be careful not to press the PLAY (˙ or ¥) key • whose arrow points in the same direction as the During normal speed dubbing, only the following indicator. -
Page 24: Timer-Controlled Recording
IMPORTANT SAFETY PRECAUTIONS 4 − Recording Set the REV MODE switch to the required posi- ting is completed, the power to all components tion. will be switched off. To let both decks play continuously, set the When the preset start time is reached, power will switch to the (CONT PLAY) position. -
Page 25: Reference And Specifications
Set the switch to the position. REV MODE ® Ë lowing checks, contact your nearest TEAC authorized Load cassettes into both decks. ® service center or your dealer for help. Set the tape transport direction to on both decks. ®... -
Page 26: Specifications
IMPORTANT SAFETY PRECAUTIONS 5 − Reference and specifications Specifications Track System 4-track, 2-channel stereo Heads Construction Record/playback head x 1 (each deck) Erase head x 1 (each deck) Tape Speed 4.8 cm/sec 9.5 cm/sec (high-speed dubbing mode) Pitch Control Fast Winding Time approximately 160 sec (C-60 tape) Motor DC servo motor (capstan) - Page 28 7733 Telegraph Road, Montebello, California 90640, USA TEAC CANADA LTD. Phone: +1905-890-8008 Facsimile: +1905-890-9888 www.tascam.com 5939 Wallace Street, Mississauga, Ontario L4Z 1Z8, Canada TEAC MEXICO, S.A. de C.V. Phone: +52-55-5010-6000 www.teacmexico.net Río Churubusco 364, Colonia Del Carmen, Delegación Coyoacán, CP 04100, México DF, México...