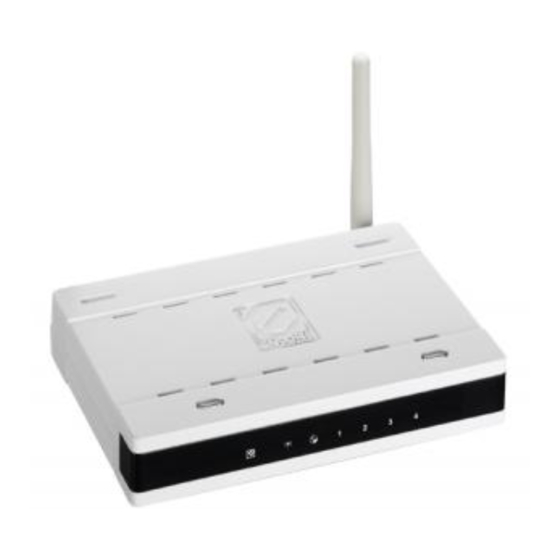
Encore ENHWI-1AN4 User Manual
Wireless n150 router
Hide thumbs
Also See for ENHWI-1AN4:
- Datasheet (2 pages) ,
- Quick installation manual (20 pages) ,
- User manual (66 pages)
Table of Contents
Advertisement
Quick Links
© 2010 Encore Electronics, Inc. All rights reserved.COVER
© 2010 Encore Electronics, Inc.
Product specifications, size, and shape are subject to change without notice, and actual product appearance may differ from that depicted herein.
All trademarks and brand names are the properties of their respective holders.
Advertisement
Table of Contents

Related Manuals for Encore ENHWI-1AN4


Summary of Contents for Encore ENHWI-1AN4
- Page 1 © 2010 Encore Electronics, Inc. All rights reserved.COVER © 2010 Encore Electronics, Inc. Product specifications, size, and shape are subject to change without notice, and actual product appearance may differ from that depicted herein. All trademarks and brand names are the properties of their respective holders.
-
Page 2: Table Of Contents
....................12 ETUP IZARD ................22 DVANCED CONFIGURATION WAN ........................22 Connection Type ..................... 22 Dynamic DNS ....................28 ......................29 IRELESS Basic ....................... 29 Security ......................30 Advanced ......................33 Wi-Fi Protected Setup ..................34 LAN ........................35 www.encore-usa.com... - Page 3 Product specifications, size, and shape are subject to change without notice, and actual product appearance may differ from that depicted herein. All trademarks and brand names are the properties of their respective holders. © 2010 Encore Electronics, Inc. All rights reserved. www.encore-usa.com...
- Page 4 (20cm) between the radiator and your body. This transmitter must not be co-located or operated in conjunction with any other antenna or transmitter. IEEE802.11b or 802.11g operation of this product in the USA is firmware-limited to channels 1 through 11. www.encore-usa.com...
-
Page 5: Revision History
Company has an on-going policy of upgrading its products and it may be possible that information in this document is not up-to-date. Please check with your local distributors for the latest information. Revision History Revision History V1.0 1st release www.encore-usa.com... -
Page 6: Introduction
Introduction The ENHWI-1AN4 Wireless N150 Router complies with IEEE 802.11n, and provides faster and farther range than 802.11g while being backward compatible with 802.11g and 802.11b mode. This router uses advanced broadband router chipset and wireless LAN chipset solution to let you enjoy high-speed Wired and Wireless connection. Simply connect this device to a Cable or DSL modem and then you can share your high-speed Internet access with multiple PCs at your home with or without wires. -
Page 7: Specifications
IEEE 802.11n: 20Mhz -68dBm ; 40Mhz -65dBm (Typical) Transmit Output Power 11b : 18±1 dBm, 11g : 15±1 dBm , 11n : 15±1 dBm Power DC 9V 0.5A Dimensions (approx.) 14.5 x 9.6 x 2.6 cm (W x L x H) Net Weight (approx.) 152.1 g www.encore-usa.com... -
Page 8: Package Contents
0°C ~ 70°C Supported OS Windows 98SE, ME, 2000, XP, Vista, Win7, Mac and Linux Regulations FCC, CE Package Contents One ENHWI-1AN4 Wireless N150 Router One 2dBi Dipole Antenna One External Power Adapter One CD-ROM with User’s Manual ... -
Page 9: Installation Instruction
Connect computer to the LAN port on the ENHWI-1AN4 Router with Ethernet cable. Connect the DSL or Cable modem to the WAN port on the ENHWI-1AN4 Router with Ethernet cable. Power on the DSL or Cable modem first, and then connect power adapter to the power jack on the rear panel of ENHWI-1AN4 Router and plug the power cable into an outlet. -
Page 10: Pc Network Tcp/Ip Setting
Once power on the ENHWI-1AN4 Router, Power LED should be on. LAN LED should be on for each active LAN connection. The WAN LED should be on when the DSL or Cable modem is connected. PC Network TCP/IP Setting The network TCP/IP settings differ based on the computer’s operating system (Win95/98/ME/NT/2000/XP/Vista) and are as follows. -
Page 11: Windows Xp / Vista / 7
“Properties.” Set both “IP address” and “DNS” to Automatic configuration. Windows XP / Vista / 7 Point the cursor and click the right button on the “My Network Place” icon. Select “properties” to enter the TCP/IP setting window. www.encore-usa.com... -
Page 12: Configuration
Set “IP address” to “Obtain an IP address automatically.” Set “DNS” to “Obtain DNS server address automatically.” Configuration First make sure that the network connections are functioning normally. This WLAN Router can be configured using web browser. www.encore-usa.com... -
Page 13: Login To The Wlan Router Through Wireless Lan
Setup wizard is provided as part of the web configuration utility. User can simply follow the step-by-step process to get the wireless Router configuration ready to run in 6 easy steps by clicking on the “Wizard” button on the function menu. The following screen will appear. www.encore-usa.com... - Page 14 Step 1: Set your new password Setting the new admin password of the WLAN Router. Please click “Next” to continue. Step 2: Choose time zone Select the time zone from the drop down list. Please click “Next” to continue. www.encore-usa.com...
- Page 15 DHCP, please click “Enable”. DHCP enabled is able to automatically assign IP addresses. Please assign the range of IP addresses in the fields of “Range start” and “Range end”. Please click “Next” to continue. Step 4: Set Internet connection The WLAN Router will attempt to auto detect your Internet Connection. www.encore-usa.com...
- Page 16 Obtain IP automatically (DHCP client): If the user has enabled DHCP server, choose "Obtain IP automatically (DHCP client)" to have the WLAN Router assign IP addresses automatically. Fixed IP Address: www.encore-usa.com...
- Page 17 If the Internet Service Provider (ISP) assigns a fixed IP address, choose this option and enter the assigned WAN IP Address, WAN Subnet Mask, WAN Gateway Address and DNS Server Addresses for the WLAN Router. PPPoE to obtain IP automatically: www.encore-usa.com...
- Page 18 If connected to the Internet using a PPPoE (Dial-up xDSL) connection, and the ISP provides a User Name and Password, then choose this option and enter the required information. PPPoE with a fixed IP address: If connected to the Internet using a PPPoE (Dial-up xDSL) connection and the ISP www.encore-usa.com...
- Page 19 User Name, Password and a Fixed IP Address, choose this option and enter the required information. PPTP: If connected to the Internet using a PPTP xDSL connection, enter your IP, Subnet Mask, Gateway, Server IP, PPTP Account and PPTP Password. L2TP: www.encore-usa.com...
- Page 20 If connected to the Internet using a L2TP (Dial-up xDSL) connection and the ISP provide a Server IP, Account and Password information, choose this option and enter the required information. www.encore-usa.com...
- Page 21 BigPond Cable (Australia): If your ISP is BigPond Cable, the ISP will provide a User Name, Password, Authentication Server and Login Server IP (Optional). Choose this option and enter the required information. www.encore-usa.com...
- Page 22 Router restarts. Please click “Restart” to reboot the WLAN Router. If user does not want to make any changes, please click “Exit” to quit without any changes. User also can go back to modify the setting by clicking “Back”. www.encore-usa.com...
-
Page 23: Advanced Configuration
Select the connection type, either DHCP client, Fixed IP, PPPoE, PPTP, L2TP or BigPond Cable from the drop-down list. DHCP Client or Fixed IP If user has enabled DHCP server, choose "Obtain IP automatically (DHCP client)" to have the router assign IP addresses automatically. www.encore-usa.com... - Page 24 0.0.0.0 in this filed, the DHCP server will provides DNS server automatically. Clone MAC Address: If your ISP requires you to enter a specific MAC address, please enter it in. The Clone MAC Address button is used to copy the MAC address of your Ethernet adapter to the Router. www.encore-usa.com...
- Page 25 Idle Time Out: Enter the idle time out for Connect on Daemon, when no Internet access during the idle time, the PPPoE connection will auto disconnect. MTU: Enter the specified MTU (Maximum Transmission Unit). The default value is 1492 bytes. www.encore-usa.com...
- Page 26 If connected to the Internet using a PPTP/L2TP (Dial-up xDSL) with dynamic IP connection, enter the your Server IP, PPTP/L2TP Account and PPTP/L2TP Password, if your ISP has provided you with a DNS IP address, enter it in the DNS field, otherwise, leave it zero. www.encore-usa.com...
- Page 27 PPTP/L2TP with Static IP If connected to the Internet using a PPTP/L2TP (Dial-up xDSL) with static IP connection, enter the your IP Address, Subnet Mask, Gateway IP address, DNS IP address, Server IP address, PPTP Account and PPTP Password. www.encore-usa.com...
- Page 28 BigPond Cable If your ISP is Big Pond Cable, the ISP will provide a User Name, Password, Authentication Server and Login Server IP (Optional). Choose this option and enter the required information. www.encore-usa.com...
-
Page 29: Dynamic Dns
This synchronizes the DDNS server with your current Public IP address when you are online. First, you need to register your preferred DNS with the DDNS provider. Then, please select the DDNS address in the Server Address and fill the related information in the below fields: Host Name, User Name and Password. www.encore-usa.com... -
Page 30: Wireless
WLAN Router’s SSID. Channel: Select a transmission channel for wireless communications. The channel of any wireless device must match the channel selected here in order for the wireless device to access the LAN and WAN via the WLAN Router. www.encore-usa.com... -
Page 31: Security
Authentication Type: The authentication type default is set to open system. There are four options: WEP, WPA, WPA2 and WPA2-Auto. WEP: Open System and Shared Key requires the user to set a WEP key to exchange data with other wireless clients that have the same WEP key. www.encore-usa.com... - Page 32 Please set the length of the encryption key and the parameters for the RADIUS server. Encryption Type: Select the encryption type for TKIP, AES or AUTO encryption. Note: TKIP is available for B or G WLAN Band only. The WLAN Band setting is under Wireless/Advanced. www.encore-usa.com...
- Page 33 Encryption Type: Select the encryption type for TKIP, AES or AUTO encryption. Note: TKIP is available for B or G WLAN Band only. The WLAN Band setting is under Wireless/Advanced. Passphrase: The length should be 8 characters at least. www.encore-usa.com...
-
Page 34: Advanced
1500 and 2346 until packet transfer rates are minimized. (NOTE: set this fragmentation threshold value may diminish system performance.) DTIM Interval: Type a DTIM (Delivery Traffic Indication Message) interval in the text box. User can specify www.encore-usa.com... -
Page 35: Wi-Fi Protected Setup
Router via WPS connection. It is only used when users want their station to join Router's network. Push Button Configuration: Clicking the Start PBC button will invoke the Push Button Configuration (PBC) method of WPS. Push the WPS button on the client side when users want their station to join Router’s network. www.encore-usa.com... -
Page 36: Lan
Host Name: Type the host name in the text box. The host name is required by some ISPs. The default host name is "Encore". IP Address: This is the IP address of the WLAN Router. The default IP address is 192.168.10.1. -
Page 37: Routing
Gateway Address: Enter the gateway IP address in the textbox. Interface: Select “LAN” or “WAN” from drop-down list. Metric: Enter the number of ‘hops’ in the textbox; normally you can set the value to ‘0’. Click the “Add” button to save the settings. www.encore-usa.com... -
Page 38: Dynamic
Dynamic routing is a technique developed to automatically adjust routing tables in the event of network failures. The most common dynamic routing protocols is RIP (Routing Information Protocol), which is very common on small networks. Routing Table This page provides a routing table. www.encore-usa.com... -
Page 39: Access Control
Filters Using filters to deny or allow the users to access to the internet. Four types of filters can be select: MAC, IP, URL/Domain Blocking, and Protocol Filters. www.encore-usa.com... - Page 40 Update: Click to update information for the user, if you have changed any of the fields. Delete: Select a user from the table at the bottom of the list and click Delete to remove the user profile. Cancel: Click Cancel to erase all fields and enter new information. www.encore-usa.com...
- Page 41 Update: Click to update information for the range if you have selected a list item and have made changes. Delete: Select a list item and click Delete to remove the item from the list. Cancel: Click the Cancel button to erase all fields and enter new information. www.encore-usa.com...
- Page 42 Also, add the specified domains in the text box. Disable: Disable the Domain/URL Blocking function. Allow: Allow users to access all domains except “Blocked Domains”. Deny: Deny users to access all domains except “Permitted Domains”. www.encore-usa.com...
- Page 43 Delete: Select a Domain/URL from the table at the bottom of the list and click Delete to remove the Domain/URL. Add: Click to Add button to add domain to the Blocked Domains. Cancel: Click the Cancel button to erase all fields and enter new information. www.encore-usa.com...
- Page 44 Enable: Click to enable or disable the IP address filter. Name: Type the name of the user to be denied access. Protocol: Select a protocol (TCP or UDP) to use for the virtual server. Port: Type the port range of the protocol. www.encore-usa.com...
-
Page 45: Virtual Server
Add: Click to add the virtual server to the table at the bottom of the screen. Update: Click to update information for the virtual server if the user has selected a listed item and has made changes. www.encore-usa.com... -
Page 46: Special Ap
Protocol: Select the protocol (TCP, UDP, or * for TCP+UDP) that can be used to access the application. Port Range: Type the port range that can be used to access the application in the text boxes. www.encore-usa.com... -
Page 47: Dmz
Enable: Click to enable or disable the DMZ. DMZ Host IP: Type a host IP address for the DMZ. The computer with this IP address acts as a DMZ host with unlimited Internet access. Apply: Click to save the settings. www.encore-usa.com... -
Page 48: Firewall Rule
● IP Range Start: Type the start IP address that the rule is applied to. ● IP Range End: Type the end IP address that the rule is applied to. ● Protocol: Select the protocol (TCP, UDP, or ICMP) of the destination. ● Port Range: Select the port range. www.encore-usa.com... - Page 49 Priority Up: Select a rule from the list and click “Priority Up” to increase the priority of the rule. Priority Down: Select a rule from the list and click “Priority Down” to decrease the priority of the rule. Update Priority: After increasing or decreasing the priority of a rule, click “Update Priority” to save the changes. www.encore-usa.com...
-
Page 50: System
The Administrator can also authorize users the ability to configure the WLAN Router. User: Type the password the User will use to log in to the system. The password must be typed again for confirmation. www.encore-usa.com... -
Page 51: Time
WLAN Router system time, and then press the Set Computer Time button to update the system time. Daylight Saving: Enables or Disable daylight saving time. When enabled, select the start and end date for daylight saving time. www.encore-usa.com... -
Page 52: Device Information
WLAN Router LAN interface. Click “DHCP Release” to release all IP addresses assigned to client stations connected to the WAN via the WLAN Router. Click “DHCP Renew” to reassign IP addresses to client stations connected to the WAN. www.encore-usa.com... -
Page 53: Log
Click “Clear Log” to delete the contents of the log and begin a new log Click “Refresh” to renew log statistics Time: Displays the time and date that the log entry was created. Message: Displays summary information about the log entry. www.encore-usa.com... -
Page 54: Log Setting
If the day is specified, the log is sent once per week, on the specified day. Select the time of day you wish the E-mail to be sent. If the log is full before the time specified to send it, it will be sent regardless. www.encore-usa.com... -
Page 55: Statistic
Notice: Displays important notices by the system administrator. Statistic This screen displays a table that shows the rate of packet transmission via the WLAN Router’s LAN, Wireless and WAN ports (in bytes per second). Click “Reset” to erase all statistics and begin logging statistics again. www.encore-usa.com... -
Page 56: Restart
Restart Click “Restart” to restart the system in the event the system is not performing correctly. www.encore-usa.com... -
Page 57: Firmware
This screen enables users to keep the WLAN Router firmware up to date. Please follow the below instructions: Download the latest firmware from the Encore’s web site, and save it to disk. Click “Browse” and go to the location of the downloaded firmware file. -
Page 58: Configuration
Load Settings: Click the “Browse” button to find your back up settings file, and then click the “Open” button. Then, click the “Load” button to restore your configuration settings on this screen. Restore Factory Default Settings: Click this button for restore to factory default settings. www.encore-usa.com... -
Page 59: Upnp
UPnP is short for Universal Plug and Play that is a networking architecture that provides compatibility among networking equipment, software, and peripherals. The WLAN Router is an UPnP-enabled Router and will only work with other UPnP devices/software. Select “Enable” if you want to use this UPnP functionality. www.encore-usa.com... -
Page 60: Ping Test
Ping Test The ping test enables users to determine whether an IP address or host is present on the Internet. Type the host name or IP address in the text box and click Ping. www.encore-usa.com... -
Page 61: Remote Management
The WLAN Router is an UPnP-enabled Router and will only work with other UPnP devices/software. If user does not want to use the UPnP functionality, select “Disabled” to disable it. www.encore-usa.com... -
Page 62: Setting The Enhwi-1An4 As An Access Point
Setting the ENHWI-1AN4 as an Access Point. 1. Connect your Ethernet cable between the ENHWI-1AN4 router and your main router which Internet connected with DHCP Server. 2. Login to the ENHWI-1AN4 web based Graphical User Interface. 3. Disable the "DHCP Server", and then click the "Apply" button. - Page 63 5. Disable "NAT", and then click the "Apply" button. 6. Wait for few second to save change. Please click the “BACK” button if router does not back to previously screen. www.encore-usa.com...
- Page 64 * Local tech-support numbers are provided in selectively countries. Service may change without prior notice. Please visit www.encore-usa.com for more details. Product specifications, size, and shape are subject to change without notice, and actual product appearance may differ from that depicted herein.