Table of Contents
Advertisement
Advertisement
Table of Contents

Related Manuals for Polaroid Spectra


Summary of Contents for Polaroid Spectra
- Page 1 S P E C T R A P R O...
- Page 2 Multiple exposure...
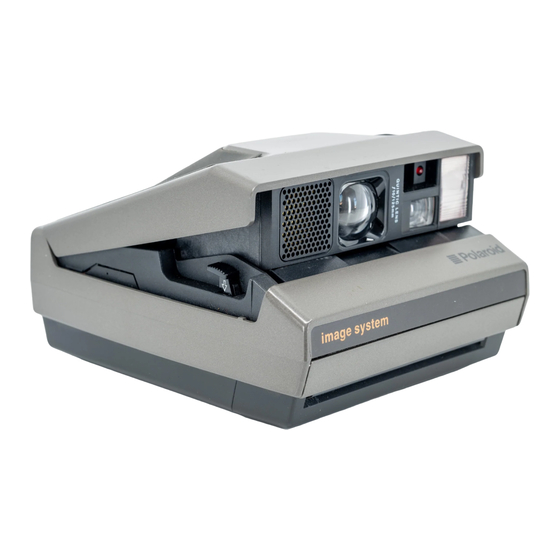
- Page 3 Camera parts...
- Page 4 Control panel...
- Page 6 Programmed time exposure - 30 seconds...
-
Page 7: Table Of Contents
Contents The camera Features Film Photographing in natural light Camera parts Manual focusing Control panel Time exposures Programmed time exposures Operating instructions Manual time exposures Open camera Backlighting Load film Sequential pictures Position subject Self-timed sequential pictures Take picture Variable sequential pictures To remove an empty film pack Multiple exposures To close camera... -
Page 8: The Camera
Film door release button The camera Shutter button Film Control panel Use only Polaroid Spectra color film. Liquid crystal display (shows picture-tak- Each film pack provides 10 color pictures ing information. The display comes on and contains a battery that powers all when there is film in the camera. -
Page 9: Operating Instructions
Indicator bar (shows that the feature above it is on) Load film Auto reset button (always returns the Use only Polaroid Spectra film. camera to fully automatic operation: Push the film door release button down. electronic flash, autofocus and audio sig- The film door will open. -
Page 10: Position Subject
4 Operating instructions Position subject When you release the button, the camera ejects the picture and the flash Indoors, your subject should be within the immediately recharges. 2 to 15 foot flash range and, for best results, near a light-colored background. Note: If you have pressed the shutter button halfway and you wish to reposition Outdoors, your subject should be at least... -
Page 11: Viewfinder Displays
Operating instructions 5 Viewfinder displays Autofocus system When you press the shutter button When you press the shutter button, sonar halfway, displays indicating distance and waves (at frequencies beyond our range of symbols for “good picture” or “caution” hearing) are sent to the central part of the appear in the viewfinder. -
Page 12: Electronic Flash
6 Operating instructions To turn off the audio signals: Electronic flash Press the button until you see only MODE The flash automatically begins to charge the audio signals symbol: every time you load film into the camera, or • press the shutter button halfway, or •... -
Page 13: Self-Timer
Operating instructions 7 In low light (at dusk, in the shade, etc.), the Two seconds before the camera takes shutter can stay open for as long as 6 the picture, the red light will stay on and seconds after the flash has fired, and camera the beeps will become a steady signal. - Page 14 8 Operating instructions To darken a picture, press the down ( To return the camera to fully automatic control button once to turn on the darken operation, press the Auto reset button. setting: Important: If the background of a flash picture is too dark but your subject is well illuminated, the background is too far away.
-
Page 15: Features
Features 9 Features Photographing in natural light Press the button once to return to MODE the full display. You can now press the To eliminate flash glare and to take shutter button to take a non-flash picture: advantage of natural light situations, you can turn off the flash when taking pictures indoors or outdoors. -
Page 16: Time Exposures
10 Features Press the up ( ) or down ( ) control When the distance you want is displayed button once to remove the indicator bar (for example, 14 feet), press the MODE and turn off the autofocus system: button once to return to the full display. You can now press the shutter button to take the picture: Press the... -
Page 17: Programmed Time Exposures
Features 11 For time exposures, the camera must be Press the up ( ) control button once to placed on a steady support, such as a turn on the programmed time exposure tripod. system: Turn the flash off for better time-exposed photographs. -
Page 18: Manual Time Exposures
12 Features When the time you want is displayed (for Manual time exposures example, 30 seconds), press the MODE You can control the time the shutter button once to return to the full display. stays open by pressing the shutter You can now press the shutter button to button down for up to 2 minutes when take the picture:... -
Page 19: Backlighting
Features 13 Press the button once to return to To use this feature: MODE the full display: Press the button until you see only MODE the backlighting symbol: Press the shutter button and keep it down to control the time the shutter Press the up ( ) or down ( ) control... -
Page 20: Sequential Pictures
14 Features Sequential pictures Press the up ( ) or down ( ) control button once to turn on the feature. The camera allows you to take a series of pictures at various time intervals from 3 You will see 12 seconds and a self-timer seconds to 19.9 minutes. -
Page 21: Variable Sequential Pictures
Features 15 Select the 12 second setting by pressing If you wish to interrupt the series, press button once again. The the self-timer button. MODE number of pictures left in the film pack To return the camera to fully automatic will start flashing: operation, press the Auto reset button. - Page 22 16 Features Press the up ( ) or down ( ) control You must now program when the button once to turn on the feature. camera will take each picture. You will see 12 seconds and a self-timer To increase the time, press the up ( symbol appear.
-
Page 23: Multiple Exposures
Features 17 If the number of pictures left in the film exposure, then place the subject to the pack is the number of pictures you want right in the viewfinder and make the to take, press the button once. If second exposure. - Page 24 fluids, disassembled, or operated if dropped or damaged. For repair information, contact a Polaroid Service Center. Note: The display disappears about every 40 seconds. Lightly press the MODE or shutter button to make it reappear.
-
Page 25: Helpful Hints For Using The Camera's Special Features
Features 19 Guide to better pictures Bright light sources Helpful hints for using the If your subject is placed in front of a window camera’s special features in daylight, the camera’s photocell measures Programmed time exposures the bright light, causing your subject to be too dark in the picture. -
Page 26: Full Lifetime Warranty
This feature allows you to be receive a new camera. If the failure occurs included in the portrait. after that period, call Polaroid at the toll-free number listed and we will ship you a Multiple exposures refurbished camera of equal or better value. -
Page 27: Accessories
Close-Up Stand The Polaroid Close-Up Stand is designed for use with all Polaroid Spectra cameras to produce close-up photographs of small objects and printed materials such as stamps, coins or jewelry. The magnification is approximately 1:1. -
Page 28: Specifications
Computerized autofocus system uses sonar waves to accurately measure the distance to Film type: your subject and set the lens. Sonar ranging Polaroid Spectra color film. time: from 10 to 50 thousandths of a second. Starts developing in seconds. Ten pictures per pack.