
Related Manuals for Teac LPR500


Summary of Contents for Teac LPR500
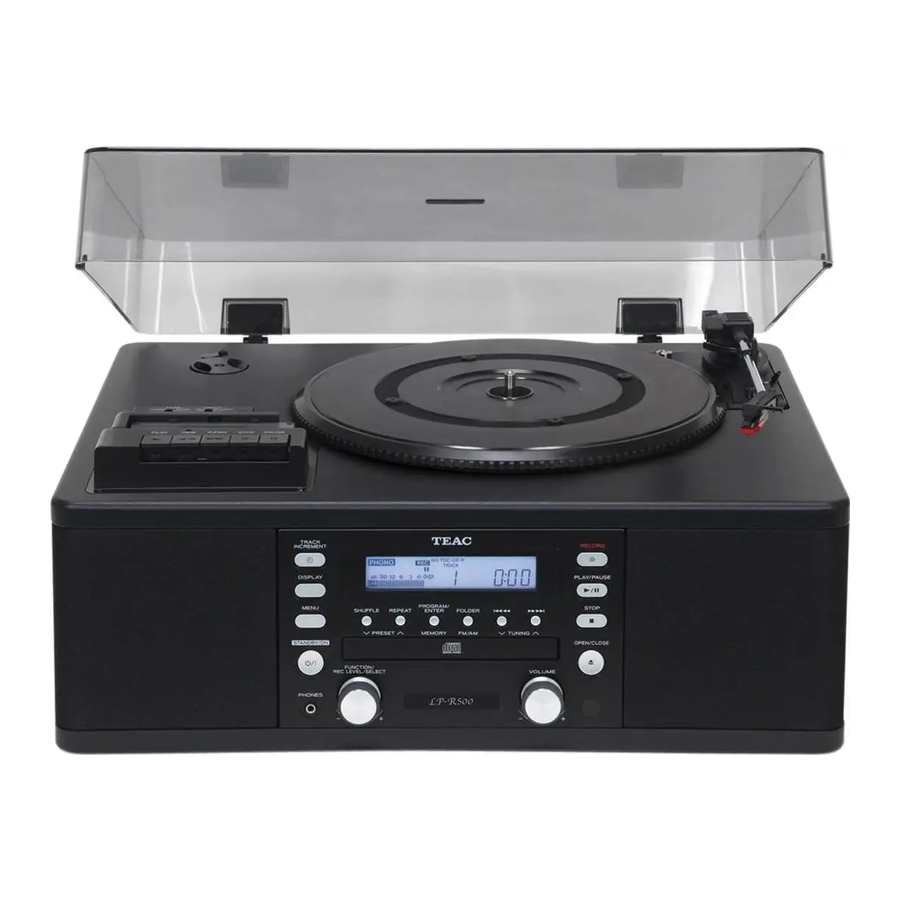
- Page 1 CEC6P10501740 LP-R500 CD recorder with turntable/cassette player OWNER’S MANUAL MANUAL DEL USUARIO...
-
Page 2: Important Safety Instructions
IMPORTANT SAFETY INSTRUCTIONS 1) Read these instructions. 2) Keep these instructions. CAUTION: TO REDUCE THE RISK OF ELECTRIC SHOCK, DO 3) Heed all warnings. NOT REMOVE COVER (OR BACK). NO USER-SERVICEABLE PARTS INSIDE. REFER SERVICING TO QUALIFIED SERVICE 4) Follow all instructions. PERSONNEL. - Page 3 AC outlet with its POWER or STANDBY/ON switch not in the ON < IF YOU ARE EXPERIENCING PROBLEMS WITH THIS PRODUCT, position. CONTACT TEAC FOR A SERVICE REFERRAL. DO NOT USE THE < The apparatus should be located close enough to the AC outlet PRODUCT UNTIL IT HAS BEEN REPAIRED.
-
Page 4: Table Of Contents
Contents Before using the unit Thank you for choosing TEAC. Read this manual carefully to Read this before attempting any operations. get the best performance from this unit. < Do not place any objects on top of the turntable cover. They may Before using the unit . -
Page 5: Handling Records
SPL-102 (includes 2, for SP records only) < Store records in an area with stable temperature and humidity. For stylus replacements, contact your dealer or TEAC listed at the back cover of this Owner’s manual. < If the record becomes dirty, gently wipe the surface i n a c i r c ula r m otion, usin g a so f t a nt i- st at i c cl ot h . -
Page 6: Discs
CD standard may not play back correctly in this player. If you use such discs in this unit, TEAC Corporation and its < Printable CD-R and CD-RW discs are not recommended, as the subsidiaries cannot be responsible for any consequences or label side might be sticky and damage the unit. -
Page 7: Turntable Cover
Turntable Cover About CD-R and CD-RW discs To attach the turntable cover 1. Slide the hinges into the hinge fittings on both sides of the rear of CD-R discs can be recorded once only. Once they have been used the turntable. for recording, they cannot be erased or re-recorded. -
Page 8: Handling Cassette Tape
Handling Cassette Tape Instructions for use Tape types < Do not open a cassette or pull out the tape. There are several types of cassette tapes. < Do not touch the tape. < Do not leave cassette tapes in a place with a lot of rubbish or dust. -
Page 9: Connection
Connection White White White White LINE OUT LINE IN Cassette Tape Deck, etc. Connect the loop antenna’s wires to the AM antenna terminals. CAUTION: < Switch off the power to all equipment before making connections. < Read the instructions of each component you intend to use with this unit. -
Page 10: Unit Functions And Remote Control
Unit Functions and Remote Control POWER Press this button to turn the unit on or off. PHONO/TAPE/AUX, CD, FM/AM Press the PHONO/TAPE/AUX button and select PHONO/TAPE to play a record. Press the PHONO/TAPE/AUX button and select PHONO/TAPE to play a tape. Press the PHONO/TAPE/AUX button and select AUX to listen to the external source connected to the AUX IN jacks. - Page 11 TRACK INCREMENT PROGRAM During recording, use this button to divide tracks. In CD mode, use this button to program tracks. Display CLEAR In CD mode, use this button to clear programmed tracks. Skip/Search (.m/,/), TUNING ( REPEAT In CD mode, use these buttons to skip tracks. Hold down these buttons to search for a part of a track.
-
Page 12: Parts Of The Turntable
Parts of the Turntable Before use, detach the stylus guard (white plastic cover) by pulling it straight off the front of the cartridge in the direction of the arrow. turntable Cassette tape operation button PLAY (y) screw fixing the turntable for transportation Use this button to play a tape. -
Page 13: Remote Control Unit
Remote Control Unit Basic Operation The provided Remote Control Unit allows the unit to be operated from a distance. When operating the remote control unit, point it towards the REMOTE SENSOR on the front panel of the unit. < Even if the remote control unit is operated within the effective range, remote control operation may be impossible if there are any obstacles between the unit and the remote control. -
Page 14: Listening To The Radio
Listening to the Radio Selecting stations which cannot be tuned automatically (manual selection) When the .m or ,/ button is pressed momentarily, the frequency changes by a fixed step. FM MODE Press the .m or ,/ button repeatedly until the station you want to listen to is found. -
Page 15: Preset Tuning
Preset Tuning You can store FM and AM stations into preset channels 1 to 9 How to select preset stations respectively. Press the FM/AM button to select a band. Tune in a station you want to listen to (see steps page 14). -
Page 16: Listening To A Record
Listening to a Record adaptor transportation screw < Before use, completely loosen the transportation screw by Put the record on the turntable. turning it clockwise with a coin and remove the stylus guard. When playing a 45 RPM large hole single record, use the included adaptor. - Page 17 When the playback has been finished, the tone arm automatically Move the tone arm gently to the edge of the record (or the returns to the tone arm holder and the rotation stops. starting point of a track). The turntable will begin to turn. To stop playback manually, slightly lift the tone arm using the cue lever and return it to the tone arm holder.
-
Page 18: Listening To A Cd
Listening to a CD Press the OPEN/CLOSE button (L) to close the tray. < Be careful not to pinch your finger. < It takes a few seconds for the unit to load the disc. No buttons will work during loading. Wait until the total number of the tracks and the total play time of the disc are displayed. - Page 19 To suspend playback temporarily (pause mode) Search for a part of a track During playback, hold down the .m or ,/ button Press the PLAY/PAUSE button (y/J) during playback. and release it when the part you want to listen to is found. Playback stops at the current position.
-
Page 20: Programmed Playback
Programmed Playback Up to 32 tracks can be programmed in the desired order. Press the PROGRAM button. < Insert a disc and select “CD” before beginning programming. < Shuffle playback does not work during programmed playback. < Programmed playback works with finalized discs only. Press the PROGRAM button in the stop mode. -
Page 21: Repeat Playback
Repeat Playback To check the programmed order In the stop mode, press the . or / button repeatedly to show the track numbers that have been stored in memory. To erase a track, press the CLEAR button when the number is displayed. -
Page 22: Shuffle Playback
Shuffle Playback Time Display The tracks can be played randomly. In the stop mode, press the Each time the DISPLAY button is pressed, the display changes as SHUFFLE button and the PLAY/PAUSE button. follows: When the shuffle playback of all the tracks has been finished, the CD/CD-R/CD-RW playback unit stops and the shuffle playback mode is not cancelled. -
Page 23: Listening To A Cassette Tape 1
Listening to a Cassette Tape 1 Press the PHONO/TAPE/AUX button to select PHONO/ Set the INPUT switch to TAPE. TAPE. Set a recorded cassette tape in the cassette holder. < Each time the PHONO/TAPE/AUX button is pressed, PHONO/ Set a cassette tape with the exposed tape in front and the side to TAPE (record or cassette tape) and AUX (external component) are play facing up. -
Page 24: Before Recording
Listening to a Cassette Tape 2 Before Recording Before you start recording, make sure that you understand the following points: < CD specifications limit the number of tracks to 99 and prevents recording of tracks shorter than 4 seconds. < Once you have recorded on a CD-R disc, the data cannot be erased from it. -
Page 25: Recording 1
Recording 1 To record a radio broadcast Select FM or AM using the FM/AM button and select the station using the .m/,/ button or PRESET button in step A station cannot be selected after you press the REC button in step Select the mode of track number assignment using the MANUAL/AUTO REC button. - Page 26 Recording 2 < AUTO REC may not work properly with analog sources that < The default setting is 0 dB. Every time the recording is finished, contain low-level noises. the setting is automatically reset to 0 dB. < The AUTO TRACK indicator lights when –20dB, –30dB or –40dB is <...
- Page 27 Press the PLAY/PAUSE button (y/J) to start recording. If AUX is selected in step , play the source to be recorded. When the playback of the source finishes, press the STOP button (H) to stop recording. When playback of a record finishes and the turntable stops rotating or playback of a cassette tape finishes, recording automatically ends.
-
Page 28: Finalize
Finalize As has been explained earlier, in order for a disc to become a Press the FINALIZE button in the stop mode. standard CD, it must have a Table of Contents (TOC) written to it. This process is known as finalizing. Once finalized, CD-R discs are truly final. -
Page 29: Erase Or Unfinalize A Cd-Rw
Erase or Unfinalize a CD-RW Erase procedures are possible only on an unfinalized CD-RW disc. Press the FINALIZE/ERASE button in the stop mode. If a CD-RW disc has been finalized, unfinalize it prior to erasure. Note that it is not possible to perform any erase or unfinalize procedures on a CD-R disc. -
Page 30: Rec Off Timer
REC OFF Timer Press the RECORD button again. “OFF” and the recording time (minutes/seconds) will be displayed. recording time Press the . m or , / button to set the end recording time. This unit can record from the radio or other equipment connected to the unit by setting the end recording time with the REC OFF timer. - Page 31 Using the audio timer Caution when using the audio timer < When a CD-R or CD-RW disc is loaded, it will take approximately This unit can start and stop recording together with the commercially available audio timer. 30 seconds after the unit turns on to read and start recording. <...
-
Page 32: Troubleshooting
Will not play. yourself before you call your dealer or a TEAC service center. e Loosen the transportation screw, and remove the stylus guard. (The stylus guard is a plastic cover that protects the stylus General during transportation. -
Page 33: Messages
Messages Specifications TRACK 0 0:00 Amplifier Section A blank CD-R/CD-RW disc is set on the tray. Output power ........3.5 W + 3.5 W Frequency response . -
Page 34: Antes De Usarse
Indice Antes de usarse E nh o r a bu e n a p or l a ad qui si ci ón d e u n T EAC. L e a Lea esto antes de la operación. detenidamente este manual a fin de obtener el mejor rendimiento de esta unidad. -
Page 35: Manejo De Discos
< Almacene los discos en un área con temperatura y humedad Para reemplazar la aguja, póngase en contacto con su distribuidor estables. o TEAC de la lista que aparece en la contraportada de este Manual de usuario. < Si se ensucia el disco, limpie suavemente la superficie en movimientos circulares, usando una tela antiestática suave. -
Page 36: Discos
Si utiliza tales discos en esta unidad, TEAC Corporation y sus como los radiadores o los aparatos eléctricos que desprendan subsidiarias no asumen ninguna responsabilidad por las posibles calor. -
Page 37: Cubierta De La Tornamesa
Cubierta de la tornamesa Acerca de los discos CD-R y CD-RW Para instalar la cubierta de la tornamesa 1. Deslice los pernos a través del soporte situado a ambos lados de Los discos CD-R pueden ser grabados sólo una vez. Una vez que la parte posterior del tocadiscos. -
Page 38: Cinta De Casete
Cinta de casete Instrucciones de uso Tipos de cinta < No abra el casete ni retire la cinta. Existen varios tipos de cintas de casete. < No toque la cinta. < No deje las cintas de casete en lugares con mucha suciedad o polvo. -
Page 39: Conexiones
Conexiones Blanco Rojo Blanco Rojo Blanco Blanco LINE OUT LINE IN Bandeja de cinta de casete, etc. Conecte los cables de la antena de cuadro a los terminales de la PRECAUCIÓN: < Apague todos los componentes antes de realizar las antena de AM. -
Page 40: Funciones Y Control Remoto
Funciones y Control Remoto POWER Presione este botón para encender o apagar la unidad. PHONO/TAPE/AUX, CD, FM/AM Presione el botón PHONO/TAPE/AUX y seleccione PHONO/TAPE para reproducir un disco. Presione el botón PHONO/TAPE/AUX y seleccione PHONO/TAPE para reproducir una cinta. Presione el botón PHONO/TAPE/AUX y seleccione AUX para escuchar la fuente externa conectada en los jacks AUX IN. - Page 41 TRACK INCREMENT PROGRAM Durante la grabación, utilice este botón para dividir las pistas. En el modo CD, utilice este botón para programar pistas. Pantalla CLEAR En el modo CD, utilice este botón para borrar las pistas programadas. Salto/Búsqueda (.m/,/), TUNING ( En el modo CD, utilice estos botones para saltar pistas.
-
Page 42: Nombres De La Tornamesa
Nombres de la tornamesa Antes de usar la tornamesa, retire la protección de la aguja (cubierta de plástico blanco) jalándola en línea recta hacia el frente del cartucho, en la dirección que marca la flecha. tornamesa Botón de operación de cinta de casete PLAY (y) Utilice este botón para reproducir una cinta. -
Page 43: Control Remoto
Control Remoto Operación básica La unidad de control remoto suministrada le permite controlar el aparato a distancia. Cuando opere con el control remoto, diríjalo hacia el SENSOR REMOTO en el panel frontal del aparato. < Aunque se utilice la unidad dentro del margen de funcionamiento efectivo, puede no ser posible operar el control a distancia si hay obstáculos entre el reproductor y el control remoto. -
Page 44: Para Escuchar El Radio
Para escuchar el radio Selección de estaciones que no pueden sintonizarse automáticamente (selección manual) Cuando se presiona el botón .m o ,/, la frecuencia FM MODE cambia en un paso fijo. Presione el botón .m o ,/ repetidamente hasta que se encuentre la estación que desea escuchar. Seleccione FM o AM utilizando el botón FM/AM. -
Page 45: Presintonías
Presintonías Puede almacenar emisoras de FM y AM en las presintonías 1 a 9. Cómo seleccionar presintonías Sintonice una emisora (pasos en página 44). Pulse el botón FM/AM para seleccionar una banda. Pulse el botón MEMORY. Pulse el botón PRESET repetidas veces hasta localizar la presintonía deseada. -
Page 46: Para Escuchar Un Disco
Para escuchar un disco adaptador tornillo de transporte < Antes de utilizar la tornamesa, afloje completamente el tornillo de Coloque el disco en la tornamesa. transporte girándolo hacia la derecha con una moneda y retirar el Cuando se reproduce un disco de 45 RPM, utilice el adaptador protector de la aguja. - Page 47 Cuando la reproducción haya terminado, el brazo de sintonización Mueva el brazo de sintonización suavemente hacia la orilla vuelve automáticamente hacia la base del brazo de sintonización y del disco (o al punto inicial de una pista). la rotación se detiene. La tornamesa comenzará...
-
Page 48: Para Escuchar Un Cd
Para escuchar un CD Presione el botón OPEN/CLOSE (L) para cerrar la bandeja. < Tenga cuidado con sus dedos. < Llevará unos cuantos segundos hasta que la unidad cargue el disco. Ningún botón funcionará durante la carga. Espere hasta que se desplieguen el número total de pistas y el tiempo total de reproducción del disco. - Page 49 Para suspender la reproducción temporalmente (modo de Para buscar una parte de una pista pausa) Durante la reproducción, mantenga presionado el botón .m o ,/ ay libérela cuando haya encontrado la Presione el botón PLAY/PAUSE (y/J) durante la reproducción. parte que desea escuchar. La reproducción se detiene en la posición actual.
-
Page 50: Reproducción Programada
Reproducción programada Se puede programar hasta 32 pistas en el orden deseado. Presione el botón PROGRAM. < Inserte un disco y seleccione “CD” antes de empezar la programación. < La reproducción aleatoria no funciona durante la reproducción programada. < La reproducción programada funciona con discos finalizados únicamente. -
Page 51: Reproducción Repetida
Reproducción Repetida Para verificar el orden programado En el modo de parada, presione el botón . o / repetidamente para mostrar los números de pista que se ha almacenado en la memoria. Para eliminar una pista, presione el botón CLEAR cuando se visualice el número. -
Page 52: Reproducción Aleatoria
Reproducción aleatoria Indicación de tiempo Las pistas pueden ser reproducidas aleatoriamente. En el modo Cada vez que se presiona el botón DISPLAY, la indicación cambia de parada, presione el botón SHUFFLE y el botón PLAY/PAUSE. conforme sigue: Cuando la reproducción aleatoria de todas las pistas ha finalizado, la unidad se detiene y el modo de reproducción se cancela. -
Page 53: Para Escuchar Una Cinta De Casete 1
Para escuchar una cinta de casete 1 Presione el botón PHONO/TAPE/AUX para seleccionar Ajuste el conmutador INPUT a TAPE. PHONO/TAPE. Inserte una cinta de casete grabada en el sujetador de < Cada vez que se pulsa el botón PHONO/TAPE/AUX, se casete. -
Page 54: Antes De Grabar
Para escuchar una cinta de casete 2 Antes de grabar Antes de iniciar la grabación, asegúrese de entender los siguientes puntos: < Las especificaciones del CD limitan el número de pistas a 99 e impide la grabación de pistas de una duración inferior a 4 segundos. -
Page 55: Grabación 1
Grabación 1 Para grabar una retransmisión de radio Seleccione FM o AM utilizando el botón FM/AM y seleccione la estación utilizando el botón .m / ,/ o el botón PRESET en el paso No se puede seleccionar una estación después de pulsar el botón REC en el paso Seleccione el modo de asignación del número de la pista utilizando el botón MANUAL/AUTO REC. - Page 56 Grabación 2 < Puede que AUTO REC no funcione bien con fuentes analógicas Ajuste del nivel de grabación. que contengan ruidos bajos. Reproduzca la fuente a ser grabada y ajuste el nivel de grabación de manera que el sonido más fuerte no exceda el indicador <...
- Page 57 Para grabar la cinta de casete Presione el botón PLAY (y). Para que no se corte la primera parte, lleve la cinta hasta el comienzo del casete, pause la grabación, inicie la grabación tal como se detalla en el paso y cancele el estado de pausa de la c i n t a .
-
Page 58: Finalización
Finalización Conforme lo explicado anteriormente, para que un disco sea un CD Presione el botón FINALIZE en el modo de parada. estándar, será necesario tener una Tabla de Contenido (TOC) escrita para eso. Este proceso es conocido como finalización. Una vez que estén finalizados, los discos CD-R estarán realmente “FINAL”... -
Page 59: Borrado O Desfinalización De Un Cd-Rw
Borrado o Desfinalización de un CD-RW Solo se puede ejecutar los procedimientos de borrado en un disco UnFINAL CD-RW desfinalizado. Seleccione esto para desfinalizar el disco. Si un disco CD-RW ha sido finalizado, desfinalicelo antes de borrarlo. Acuerdese de que no es posible ejecutar ningun procedimiento de ErASE XX (el número de la última pista grabada en el disco) borrado o desfinalizacion en un disco CD-R. -
Page 60: Temporizador Rec Off
Temporizador REC OFF Vuelva a presionar el botón RECORD. Se visualiza “OFF” y el tiempo de grabación (minutos/segundos). Tiempo de grabación Presione el botón . m o el , / botón para configurar el tiempo de grabación. Esta unidad puede grabar una radio o cualquier otro equipo Cada vez que se presiona el botón, la pantalla se desplaza hacia conectado a la unidad configurando el final del tiempo de grabación arriba (abajo) 5 minutos. - Page 61 Uso del temporizador de audio Precauciones de uso del temporizador de audio Esta unidad puede iniciar y detener la grabación con el temporizador de audio disponible en comercios. < Cuando se cargue un disco CD-R o CD-RW, la unidad tardará aproximadamente 30 segundos en leerlo y comenzar la grabación <...
-
Page 62: Detección De Problemas
No se puede reproducir. distribuidor o con el servicio técnico de TEAC. e Afloje el tornillo y desprenda la protección de la aguja. (La protección de la aguja es una cubierta de plástico gris ahumado que protege la aguja durante el transporte. -
Page 63: Mensajes
Mensajes Especificaciones TRACK 0 0:00 Sección del Amplificador Se insertó un disco CD-R/CD-RW en blanco en la bandeja. Salida de potencia ....... . .3,5 W +3,5 W Respuesta en frecuencia . - Page 64 7733 Telegraph Road, Montebello, California 90640 U.S.A. Phone: (323) 726-0303 TEAC CANADA LTD. 5939 Wallace Street, Mississauga, Ontario L4Z 1Z8, Canada Phone: (905) 890-8008 TEAC MEXICO, S.A. de C.V. Río Churubusco 364, Colonia Del Carmen, Delegació Coyoacán, CP 04100, México DF, México Phone: (5255)5010-6000 TEAC UK LIMITED Unit 19 &...