Table of Contents
Advertisement
Quick Links
Section 1: Quick Start Guide
Important: Please read this first!
Congratulations. You have a state-of-the-art flat widescreen digital LCD screen TV which
should provide you with years of viewing pleasure. Please take a few minutes to read these
quick start instructions through before installing and using the TV.
What's in the Quick Start Guide?
Section 1 contains the Quick Start Guide which provides you with enough information to setup
the TV and start viewing TV station broadcasts as quickly as possible. This is section 1.
What's in the User's Manual?
Section 2 contains the User's Manual which details the features and functions of the TV and the
remote control, describes how to connect to other devices, and provides product specifications
and troubleshooting information for your further assistance.
The User's Manual also describes how to customise the TV settings so that you can gain the best
viewing experience possible to suit your preferences and viewing environment.
1. Check package contents
Unpack the TV, and check that all the following items are included:
Remote control
(x 1)
The type of power cable supplied may differ from that illustrated, dependent upon your region.
If any item is missing or damaged, contact your place of purchase immediately and notify them
of the discrepancy. Please keep the product documentation in a safe place for later reference.
Dispose of packaging wisely:
• The cardboard carton can be recycled.
• Do not leave plastic bags within reach of young children or babies.
• Consider storing the packaging (if possible) for future transport of the TV.
• Check that you haven't left an accessory inside the packaging, before discarding.
For the primary safety of yourself and others, this LCD TV should be handled with care to avoid
damage to it or to persons which come into contact with it.
All LCD screens have a very thin layer of glass or polycarbonate surface which is liable to
marking or scratching, and cracking if struck or pressured. The liquid crystal substrate is also
liable to damage under excessive force or extreme temperatures. Please handle with care.
TV
(x 1)
AV cable
(x 1)
User's Manual
Warranty card
(x 1)
Power cable
(x 1)
AAA battery
(x 1)
(x 2)
Section 1: Quick Start Guide
1
Advertisement
Table of Contents

Related Manuals for BenQ VA261


Summary of Contents for BenQ VA261
- Page 1 Section 1: Quick Start Guide Important: Please read this first! Congratulations. You have a state-of-the-art flat widescreen digital LCD screen TV which should provide you with years of viewing pleasure. Please take a few minutes to read these quick start instructions through before installing and using the TV. What’s in the Quick Start Guide? Section 1 contains the Quick Start Guide which provides you with enough information to setup the TV and start viewing TV station broadcasts as quickly as possible.
-
Page 2: Select And Prepare The Installation Location
2. Select and prepare the installation location In order to prevent potential dangers and prolong the service life of the TV, please observe the following points when installing, operating and cleaning the TV: • Do NOT place the TV on an uneven, sloping or unstable surface where it may fall and cause damage to itself or others. -
Page 3: Connect The Power Cable
IMPROPER HANDLING OR USE CAN RESULT IN POTENTIAL ELECTRICAL SHOCK OR FIRE HAZARD. Please handle this TV with care. If damaged, turn off the power and unplug the power cable from the TV. Transport the TV to your nearest BenQ authorised service centre for repair. -
Page 4: Activate The Remote Control
5. Activate the remote control 1. Locate the remote control and batteries from the packaging, and unwrap them. • Be cautious when handling batteries. See "Warnings" on page 40. 2. Turn the remote control end up to reveal its base, and open the lid of the battery compartment by using a small coin or similarly curved object to rotate the slot 90°... -
Page 5: Test The Remote Control
Test the remote control Press Power on the remote control (as highlighted in the illustration). The TV should turn on, and the power indicator change to green. If so, progress to the next step "6. View the TV channels" below. If the TV does not turn on, first check that the power is available (the power indicator will be lit red). -
Page 6: Care And Cleaning Information
7. Using common TV operations • To alter the volume, press VOLUME + or VOLUME - on the remote control, or VOL+ or VOL- on the TV. The volume indicator will display on-screen. • To mute the sound (without adjusting the volume setting), press MUTE on the remote control. -
Page 7: Section 2: User's Manual
• Graphic source inputs include: 3 x Component Video (Y/Pb/Pr), 1 x HDMI/DVI, 1 x VGA. The VA261 model does not support DVI or HDMI. You should connect whichever TV, Video or Graphic sources you wish to view on the TV. -
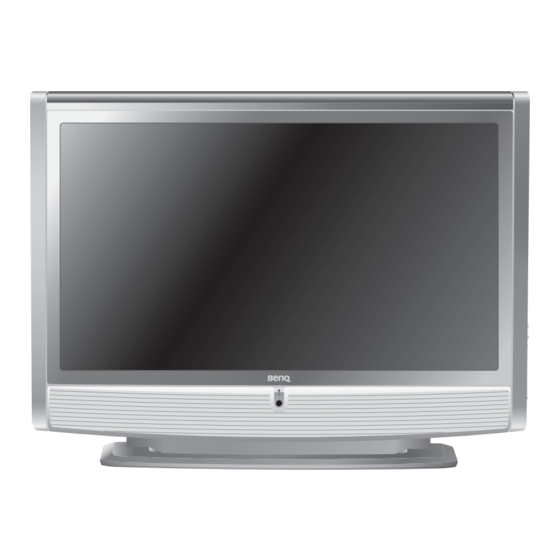
Page 8: Front View
Front view Name Description Speakers Left and right speakers for reproducing stereo audio. Power indicator • Lights up green when the TV is powered on. • Lights up red when the TV is in standby mode. • Lights up orange when the TV is in PC standby mode Remote control sensor Receives command signals from the remote control. -
Page 9: Control Panel
Control panel Name Description Toggles the TV between standby mode and on. (Performs the (Power/ same action as the Power button on the remote control.) standby) button MENU button Displays the OSD menu if not visible, or exits the current menu if displayed (performs the same action as the MENU button on the remote control.) CH (Channel) -
Page 10: Rear View
Connect to a DVI digital video or HDMI digital audio/video output of your digital source device. "Connecting the HDMI input" on page 14. Not available on the VA261 model. Be aware that HDMI input must be HDCP- compliant to be displayed. - Page 11 AV3 VIDEO Connect to the Composite Video output as appropriate for your video source device. See "Connecting the composite Video input" on page AV3 YPbPr Connect each to the Component Video (YPbPr) outputs of an appropriate video source device. "Connecting the Component video input"...
-
Page 12: Connecting Audio And Video Inputs
Connecting audio and video inputs • Before connecting any devices, please turn all equipment off. • To obtain the most benefit from the digital LCD screen, you should select the connection method which will provide you with the best possible signal. See "Input options"... -
Page 13: Connecting The S-Video Input
Connecting the S-Video input 1. Connect the S-Video output of your output equipment to the AV1 or AV2 S-VIDEO input terminal on the TV using an S-Video cable (not provided). Pay attention to the alignment of the plugs on the S-Video cable when inserting so as not to damage any pins. -
Page 14: Connecting The Vga Input
"Supported Component/HDMI input signal timing" on page 33 for timing options. Be aware that HDMI input must be HDCP- compliant to be displayed. The VA261 model does not support HDMI. HDMI cable HDVD player HDTV STB Connecting audio and video inputs... -
Page 15: Connecting The Dvi Input
When connected to a PC, select 1360 x 768 as the image resolution. See "Supported VGA/DVI input signal timing" on page 33 further information. Be aware that HDMI input must be HDCP- compliant to be displayed. The VA261 model does not support DVI. Connecting audio and video inputs... -
Page 16: Getting To Know The Remote Control
"Switching inputs" on page 3. BACKLIGHT Press this button to select your desired screen backlight level. (This function is not available with the VA261 and VA321 models.) "Adjusting the backlight" on page 4. INFO Press this button to display the screen image source information. - Page 17 11. REVEAL Press this button to display any concealed Teletext information. "Using the sleep timer" on page 12. SUBPAGE Press this button to enter the subpage of a Teletext menu. "Using the sleep timer" on page 13. TELETEXT Press this button to turn the Teletext decoder on or off. Page store won’t start until the Teletext decoder is activated.
-
Page 18: Using The Tv
• Be aware that HDMI input must be HDCP-compliant to be displayed. • The HDMI (or DVI) input option is unavailable on the VA261 model. • When you select AV1 (AV1 S-Video), AV2 (AV2 S-Video) or AV3 (AV3 YPbPr) as the input source and the image does not display, check that the signal cables are correctly connected (see "Connecting audio and video inputs"... -
Page 19: Changing Channels Sequentially
The backlight adjustment function is not available with the VA261 and VA321 models. Using the TV... -
Page 20: Using The Freeze Function
Selecting a picture mode To select a preset picture mode, press PRESET (yellow button) on the remote control. This enables you to select from the following settings: Picture mode Description Suitable for viewing in brighter environments. The colour, contrast, and Dynamic brightness of the image is increased to suit the brighter lighting condition. -
Page 21: Display Information
When you’re ready to stop viewing Closed Captions, either move to a different teletext page, or press the Teletext button to return to normal viewing. Whilst CC is activated: • the Aspect button can be used to alter the teletext caption font size. •... -
Page 22: The On-Screen Display (Osd) Menu
The On-Screen Display (OSD) menu OSD menu structure The OSD menu system displays both the main menu and sub-menus at the same time: • the main menu category items (represented by image icons) are displayed down the left side; • the sub-menus (relevant to the currently selected main menu category) list to the right. The sub-menu list will change depending upon which main menu category is chosen. -
Page 23: Navigating The Osd Menu
Navigating the OSD menu 1. Press MENU on the remote control, or MENU on the TV to display the OSD menu on-screen. 2. Press on the remote control, or CH or CH on the TV to select an item in the menu. 3. -
Page 24: Audio Menu
Audio menu Audio Treble The available menu items are dependent on the input Bass source being selected. Balance The illustration is for reference only. Sound effect [Off] Select Adjust Enter Item Function Operation Range Adjust treble tones. Press to increase treble -8 to 8 Treble tone,... -
Page 25: Picture Menu
Picture menu Picture Picture mode [Standard] The available menu items are dependent on the input Contrast source being selected. Brightness The illustration is for reference only. Colour Sharpness Colour TEMP. [Normal] Select Adjust Enter Item Function Operation Range Provides complete preferred Press •... -
Page 26: Setup Menu
Setup menu Setup Auto installation The available menu items are dependent on the input Manual installation source being selected. CH swap The illustration is for reference only. Select Adjust Enter Item Function Operation Range Clears both the TV channel list and the sequential channel list, then reloads and Auto installation searches through the designated TV frequencies for available channels, and adds any found to the sequential channel list, depending upon the selected country:... -
Page 27: Performing Manual Installation
Tuning the TV to your region If you purchased this TV for use in Australia, it is ready to operate out of the box. However, if you purchased this TV for use in a country other than Australia, you will need to perform the 'Auto-Installation' setup so that the TV can tune to the local available TV stations. - Page 28 Ordering the sequential channel list When the TV is manufactured, by default, all of the possible Australian TV channels are allocated to the sequential channel list (available through the channel up or down buttons). You will likely want to remove all of the channels from the sequential channel list which are not being used in your area, so you don’t have to cycle through the unused channel positions.
- Page 29 Adding a channel in the sequential channel list 1. From the Setup menu, press to select Manual installation and then press OK. 2. Press to select CH No, and then press OK. 3. Press or to select the sequential channel list position of the channel you wish to add, and then press OK.
-
Page 30: Option Menu
Option menu Option Language [English] The available menu items are dependent on the input Auto format [Off] source being selected. Auto power off [Off] The illustration is for reference only. Child lock Reset all [No] Select Adjust Enter Item Function Operation Range Select your desired language for... -
Page 31: Enabling Child Lock
Child lock The Child Lock function can be used to prevent access to selected channels. For example, to prevent children viewing inappropriate broadcast channels such as adult-only channels. This Child Lock only affects the TV tuner input (not AV inputs). The correct password is required whenever you wish to unlock and view the locked channels. -
Page 32: Functions And Features
• 1366 x 768 native image resolution providing true widescreen TV 16:9 aspect ratio • 500 cd/m (VA261/VA371/VA421) / 550 cd/m (VA321) brightness • 800:1 (VA261) / 1000:1 (VA321) / 1200:1 (VA371/VA421) contrast ratio • Compatible with video definition formats, including 480i/480p/576i/576p/720p/1080i • 3:2/2:2 Pull Down Recovery • Multiple preset picture modes •... -
Page 33: Supported Vga/Dvi Input Signal Timing
Supported VGA/DVI input signal timing Horizontal Vertical Dot Clock Resolution Note Frequency (Khz) Frequency (Hz) Frequency (Mhz) 720 x 400 31.467 70.082 28.32 640 x 480 31.469 59.94 25.175 640 x 480 37.861 72.819 31.5 640 x 480 37.5 31.5 800 x 600 37.9 60.317... -
Page 34: Dimensional Drawings
Dimensional drawings VA261 Unit: mm Reference... - Page 35 VA321 Unit: mm Reference...
- Page 36 VA371 Unit: mm Reference...
- Page 37 VA421 Unit: mm Reference...
-
Page 38: Troubleshooting
Troubleshooting There are many external influences and circumstances beyond the control of BenQ which may be causing problems with your TV. Some of the more common and user fixable problems are listed below for your information. Please check the following list before calling your nearest BenQ Customer Service Center, and... - Page 39 Symptoms Possible Causes • Reduce the brightness level until the black areas of the The image appears too picture appear as black. 'washed out', or the darkest • The input source device (e.g. DVD player) brightness areas of the image appear level may be set too high.
- Page 40 BenQ Corporation makes no representations or warranties, either expressed or implied, with respect to the contents of this User's Manual. BenQ Corporation reserves the right to revise this publication and to make changes from time to time in the contents thereof without obligation to notify any person of such revision or changes.