Advertisement
Quick Links
NOTE Use alkaline batteries for longer usage and consumer
INDUSTRY CANADA STATEMENT
grade lithium batteries in temperatures below freezing.
Operation is subject to the following two conditions:
(1)
this device may not cause interference, and
(2)
this device must accept any interference, including
CHANGING CHANNELS
interference that may cause undesired operation of
To change channels once channel has been assigned:
Remote Thermo-Hygro Sensor
the device.
1. Slide channel switch to desired channel.
Model: THGN132N
2. Press RESET.
USER MANUAL
IC number: 3277A-THGN132N
3. Initiate a sensor search on the main unit to start
receiving temperature / humidity data from the sensor.
EN
EU-DECLARATION OF CONFORMITY
OVERVIEW
Hereby, Oregon Scientific, declares that this Remote
RESET
Thermo-Hygro Sensor (model: THGN132N) is in compliance
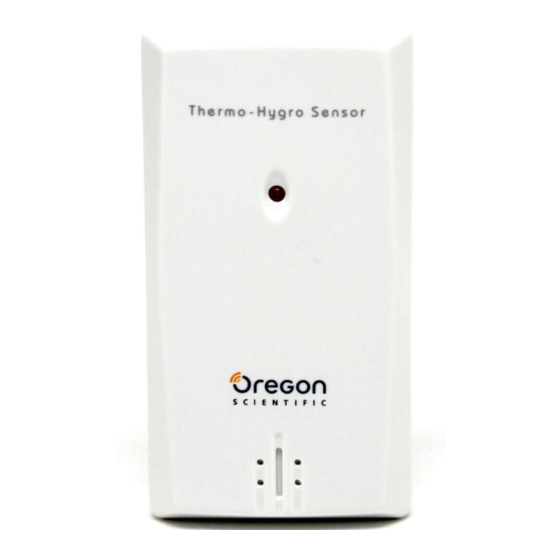
FRONT VIEW (FIG. 1)
Press RESET to return to the default settings.
with the essential requirements and other relevant
provisions of Directive 1999/5/EC. A copy of the signed and
dated Declaration of Conformity is available on request via
TROUBLE SHOOTING
our Oregon Scientific Customer Service.
PROBLEM
SYMPTOM
REMEDY
Remote
Abnormal /
1
Press RESET
sensor
strange readings
COUNTRIES RTTE APPROVED COMPLIED
Check battery
Cannot locate
remote sensor
Check location
Check sensors.
Cannot change
Only one sensor
channel
FCC STATEMENT
is working
This device complies with Part 15 of the FCC Rules.
Data does not
Initiate a manual
Operation is subject to the following two conditions: (1) This
1. LED status indicator:
blinks when transmitting a
match main unit
sensor search
device may not cause harmful interference, and (2) This
reading
device must accept any interference received, including
BACK VIEW (FIG. 2)
interference that may cause undesired operation.
PRECAUTIONS
• Do not subject the unit to excessive force, shock, dust,
temperature or humidity
WARNING
Changes or modifications not expressly
1
• Do not cover the ventilation holes with any items such s
approved by the party responsible for compliance could
newspapers, curtains etc.
void the user's authority to operate the equipment.
• Do not immerse the unit in water. If you spill liquid over
it, dry it immediately with a soft, lint-free cloth.
NOTE
This equipment has been tested and found to
3
• Do not clean the unit with abrasive or corrosive
comply with the limits for a Class B digital device, pursuant
2
4
materials.
to Part 15 of the FCC Rules. These limits are designed to
provide reasonable protection against harmful interference
• Do not tamper with the unit 's internal components. This
in a residential installation.
invalidates the warranty.
• Only use fresh batteries. Do not mix new and old
batteries.
This equipment generates, uses and can radiate radio
frequency energy and, if not installed and used in accordance
• Images shown in this manual may differ from the actual
with the instructions, may cause harmful interference to
display.
1. Wall mount hole
radio communications. However, there is no guarantee
• When disposing of this product, ensure it is collected
2. Battery compartment
that interference will not occur in a particular installation.
separately for special treatment.
If this equipment does cause harmful interference to radio
3. RESET: Reset unit to default settings
• Placement of this product on certain types of wood
or television reception, which can be determined by turning
4. Channel Switch
the equipment off and on, the user is encouraged to try to
may result in damage to its finish for which Oregon
correct the interference by one or more of the following
Scientific will not be responsible. Consult the furniture
measures:
manufacturer's care instructions for information.
GETTING STARTED
•
• The contents of this manual may not be reproduced
Reorient or relocate the receiving antenna.
without the permission of the manufacturer.
SENSOR SET UP
•
Increase the separation between the equipment and
• Do not dispose old batteries as unsorted municipal
receiver.
1. Slide open the battery door.
waste. Collection of such waste separately for special
•
Connect the equipment into an outlet on a circuit different
2. Slide channel switch to select a channel (1, 2, 3). Ensure
treatment is necessary.
from that to which the receiver is connected.
you use a different channel for each sensor.
• Please note that some units are equipped with a
•
Consult the dealer or an experienced radio / TV technician for
3. Insert the battery, matching the polarities (+ / -). See FIG
battery safety strip. Remove the strip from the battery
help.
2.
compartment before first use.
4. Press RESET after each battery change.
DECLARATION OF CONFORMITY
5. Close the battery door.
NOTE
The technical specifications for this product and the
contents of the user manual are subject to change without
The following information is not to be used as contact for
NOTE
Install battery in the remote sensor before the main
notice.
support or sales. Please call our customer service number
unit.
(listed on our website at www.oregonscientific.com), or on
6. Initiate a sensor search on the main unit to start receiving
SPECIFICATIONS
the warranty card for this product) for all inquiries instead.
temperature / humidity data from the sensor.
TYPE
DESCRIPTION
We
REMOTE UNIT
117 x 80 x 171 mm
Name:
L x W x H
(4.78 x 3.27 x 6.98 in)
Address:
Weight
241 g (8.5 oz) without battery
Temperature
-20°C to 60°C
Telephone No.:
range
(-4°F to 140°F)
Resolution
0.1°C (0.2°F)
7. Secure the sensor in the desired location using the wall
Humidity range
25% - 95%
declare that the product
mount or table stand.
Humidity
Product No.:
1%
resolution
For best results:
Signal frequency
433 MHz
Product Name:
•
Place the sensor within 30 m (100 ft) of the main unit.
Transmission
Manufacturer:
30 m (98 ft) unobstructed
range
•
Place the sensor out of direct sunlight and moisture.
Address:
No. of channels
3
•
Position the sensor so that it faces the main (indoor)
Power
1 x UM-3 (AA) 1.5 V batteries
unit, minimizing obstructions such as doors, walls and
furniture.
•
Place the sensor in a location with a clear view to the
ABOUT OREGON SCIENTIFIC
sky, away from metallic / electronic objects.
Visit our website (www.oregonscientific.com) to learn more
is in conformity with Part 15 of the FCC Rules. Operation is
•
Position the sensor close to the main unit during cold
about Oregon Scientific products. If you're in the US and
subject to the following two conditions: 1) This device may
winter months as below-freezing temperatures may
would like to contact our Customer Care department directly,
not cause harmful interference. 2) This device must accept
affect battery performance and signal transmission.
please visit: www2.oregonscientific.com/service/support
any interference received, including interference that may
OR
cause undesired operation.
TIP
The transmission range may vary depending on many
Call 1-800-853-8883.
factors. You may need to experiment with various locations
to get the best results.
For international inquiries, please visit:
www2.oregonscientific.com/about/international
THGN132N EU IM R3.indd 1
Sensore igrotermico remoto
SUGGERIMENTO Il campo di trasmissione può variare
in base a molti fattori. E possibile dover provare diverse
Modello: THGN132N
posizioni prima di ottenere i risultati migliori.
NOTA Utilizzare batterie alcaline in caso di uso prolungato
MANUALE UTENTE
e batterie al litio in ambienti con temperature inferiori allo 0.
CAMBIO DEI CANALI
IT
Per cambiare i canali dopo che un canale è stato
PANORAMICA
assegnato:
1. Posizionare
l'apposito
commutatore
PARTE ANERIORE (FIG. 1)
desiderato.
2. Premere RESET.
3. Iniziare una ricerca con il sensore nell'unità principale
per avviare il rilevamento di dati sulla temperatura/
1
umidità dal sensore.
FUNZIONE RESET
Premere RESET per ripristinare le impostazioni predefinite
dell'unità.
All EU countries, Switzerland CH
and Norway
N
1. Indicatore di stato del LED: lampeggia quando viene
RISOLUZIONE DEI PROBLEMI
trasmessa una lettura
PROBLEMA
SINTOMO
SOLUZIONE
PARTE POSTERIORE (FIG. 2)
Sensore
Letture anormali /
Premere RESET
remoto
strane
Impossibile
Controllare la batteria
1
localizzare
il sensore a
Controllare la
distanza
posizione
Controllare i sensori.
3
Impossibile
Un solo sensore è in
2
4
cambiare canale
funzionamento
I dati non
Iniziare una ricerca
corrispondono
del sensore manuale
all'unità principale
1. Foro di montaggio alla parete
PRECAUZIONI
2. Vano batteria
Per utilizzare il prodotto in modo sicuro e corretto, leggere
3. RESET:
Reimposta
nell'unità
le
impostazioni
queste avvertenze e tutto il manuale prima dell'uso.
predefinite
• Utilizzare un panno morbido, leggermente inumidito. Non
4. Commutatore canale
utilizzare prodotti di pulizia abrasivi o corrosivi, in quanto
potrebbero causare danni. Non utilizzare mai i prodotti in
acqua calda né riporli se bagnati.
UTILIZZO
• Non sottoporre il prodotto a forza eccessiva, urti, polvere,
variazioni di temperatura o a umidità. Non esporre il
IMPOSTAZIONE DEL SENSORE
prodotto a luce solare diretta per lunghi periodi. Un simile
1. Aprire il coperchio della batteria facendolo scorrere.
trattamento può comportare il malfunzionamento del
2. Utilizzare il commutatore di canale per selezionare
prodotto.
un canale (1, 2, 3). Verificare di utilizzare un canale
• Non manomettere i componenti interni. In questo modo si
diverso per ciascun sensore.
invalida la garanzia del prodotto e si possono provocare
3. Inserire la batteria facendo corrispondere i poli (+ / -).
danni. L'unità principale non contiene componenti che
Vedere la FIG 2.
possono essere riparati dall'utente.
4. Premere RESET dopo ogni sostituzione di batteria.
• Non graffiare il display LCD con oggetti duri in quanto si
potrebbero causare danni.
5. Chiudere il coperchio della batteria.
• Manipolare le batterie con attenzione.
NOTA
Installare la batteria nel sensore a distanza prima
• Togliere le batterie ogni volta che si prevede di lasciare
dell'unità principale.
inutilizzato il prodotto per un lungo periodo di tempo.
• Al momento della sostituzione delle batterie, utilizzare
batterie nuove come indicato in questo manuale per
6. Iniziare una ricerca con in sensore nell'unità principale
l'utente.
per avviare la rilevazione dei dati sulla temperatura/
• Il prodotto è uno strumento di precisione. Non tentare
umidità dal sensore.
mai di aprirlo. Contattare il proprio rivenditore o il nostro
servizio clienti se il prodotto necessita di riparazioni.
Oregon Scientific, Inc.
• Non toccare il circuito elettrico esposto, poiché questo
19861 SW 95
th
Ave.,Tualatin,
può provocare scosse elettriche.
Oregon 97062 USA
• Controllare tutte le funzioni più importanti se il prodotto
1-800-853-8883
non è stato utilizzato per un lungo periodo di tempo.
Controllare e pulire l'apparecchio regolarmente. Far
controllare l'orologio presso un centro autorizzato una
7. Verificare che il sensore sia posizionato correttamente
volta all'anno.
THGN132N
utilizzando il gancio alla parete o il supporto di
appoggio.
• Al momento dello smaltimento di questo prodotto, agire
Remote Thermo-Hygro Sensor
in conformità con i regolamenti locali sullo smaltimento
IDT Technology Limited
dei rifiuti.
Per risultati migliori:
Block C, 9/F, Kaiser Estate,
• A causa di limitazioni di stampa, le immagini di questo
•
Posizionare il sensore a una distanza inferiore a 30 m
manuale possono differire dalla realtà.
Phase 1, 41 Man Yue St.,
Hung
(100 ft) dall'unità principale.
Hom, Kowloon,
• Il contenuto di questo manuale non può essere ristampato
•
Tenere il sensore lontano dalla luce diretta del sole e
Hong Kong
senza l'autorizzazione del fabbricante.
umidità.
NOTA
Le specifiche tecniche del prodotto e il contenuto
•
Posizionare il sensore di fronte all'unità principale
del manuale per l'utente possono essere modificati senza
(interna), riducendo le interferenze quali porte, pareti e
preavviso.
mobili.
•
Posizionare il sensore in un luogo in cui sia possibile
SPECIFICHE TECNICHE
vedere il cielo, lontano da oggetti metallici/elettronici.
TIPO
DESCRIZIONE
•
Posizionare il sensore vicino all'unità principale durante
UNITA' REMOTA
i mesi invernali con temperature sotto lo zero che
117 x 80 x 171 mm
potrebbero danneggiare le prestazioni della batteria e il
Lung x Larg x Alt
(4.78 x 3.27 x 6.98 in)
segnale di trasmissione.
241 g (8.5 oz)
Peso
senza batteria
Sonde thermo-hygrométrique sans fil
ASTUCE
Intervallo
da -20°C a 60°C
de nombreux facteurs. Il peut être nécessaire d'essayer
temperatura
(da -4°F a 140°F)
Modèle : THGN132N
plusieurs
Risoluzione
0.1°C (0.2°F)
résultats.
Umidità
25% - 95%
REMARQUE
Risoluzione umidità
1%
MANUEL DE L'UTILISATEUR
grande longévité et des piles au lithium en vente aux
Frequenza segnale
433 MHz
particuliers pour des températures en dessous de 0 c.
Intervallo
30 m (98 ft) senza interferenze
trasmissione
N. di canali
3
FR
CHANGEMENT DES CANAUX
Potenza
Batterie: 1 x UM-3 (AA) 1,5 V
VUE D'ENSEMBLE
Changer les canaux une fois un canal assigné :
1. Positionnez l'interrupteur de canal sur le canal désiré.
sul
canale
FACE AVANT (FIG 1)
INFORMAZIONI SU OREGON SCIENTIFIC
2. Appuyez sur RESET.
Per avere maggiori informazioni sui nuovi prodotti
3. Lancez une recherche de sonde à partir de l'appareil
Oregon Scientific visita il nostro sito internet
www.oregonscientific.it, dove potrai trovare tutte le
informazioni di cui hai bisogno.
1
REINITIALISATION
Per ricerche di tipo internazionale puoi visitare invece il sito
Appuyer sur RESET pour revenir aux réglages par défaut.
www2.oregonscientific.com/about/international.asp.
DEPANNAGE
DICHIARAZIONE DI CONFORMITA' UE
Oregon Scientific dichiara che questo prodotto (Modello
1. Indicateur de statut par LED clignote lors de la
THGN132N) è conforme alla direttiva EMC 89/336/CE. Una
transmission d'un relevé
copia firmata e datata della Dichiarazione di Conformità
FACE ARRIERE ( FIG 2)
è disponibile, su richiesta, tramite il servizio clienti della
Oregon Scientific.
1
3
PAESI CONFORMI ALLA DIRETTIVA R&TTE
2
4
Tutti I Paesi Ue, Svizzera CH
E Norvegia
N
1. Trou de fixation murale
2. Compartiment des piles
PRECAUTIONS
3. RESET (REINITIALISER) :
Réinitialise l'appareil aux
•
réglages par défaut
4. Interrupteur de canal
•
POUR COMMENCER
•
REGLAGE DE LA SONDE
1. Ouvrez le couvercle du compartiment des piles.
•
2. Positionnez l'interrupteur de canal pour sélectionner
•
un canal (1, 2, 3). Assurez-vous d'utiliser une chaîne
différente pour chaque sonde.
•
3. Insérez la pile, en respectant les polarités (+/-). Voir FIG
2.
•
4. Appuyer sur RESET après chaque changement de
piles.
•
5. Fermez le couvercle du compartiment des piles.
•
REMARQUE
Insérez la pile de la sonde sans fil avant
celles de l'appareil principal.
6. Lancez une recherche de sonde à partir de l'appareil
•
principal pour que la sonde transmette les données
relatives à la température / à l'humidité.
•
•
produit et le contenu de ce manuel peuvent être soumis à
7. Sécurisez la sonde à l'emplacement choisi, en utilisant
modifications sans préavis.
la fixation murale ou le support de table.
Pour obtenir de meilleurs résultats :
CARACTERISTIQUES
•
Positionnez la sonde à 30 m maximum (100 pieds) de
l'appareil principal.
•
Ne placez pas la sonde directement face aux rayons du
soleil ou en contact avec des matières humides.
•
Positionnez la sonde pour qu'elle soit face à l'appareil
principal (intérieur), en minimisant les obstacles tels que
porte, murs et meubles.
•
Dirigez la sonde directement vers le ciel, éloignée des
objets métalliques / électroniques.
•
Positionnez la sonde à proximité de l'appareil
principal pendant les mois d'hiver puisque le gel
peut endommager le fonctionnement des piles et la
transmission du signal.
La portée de transmission peut varier en fonction
Thermo-Hygro-Funksendeeinheit
30 m (98 pieds) sans
Champ de transmission
obstruction
Modell: THGN132N
emplacements
pour
obtenir
les
meilleurs
Nombre de canaux
3
Alimentation
1 piles UM 3 (AA) 1,5 V
Utiliser des piles alcalines pour une plus
À PROPOS D'OREGON SCIENTIFIC
BEDIENUNGSANLEITUNG
Pour plus d'informations sur les produits Oregon Scientific
France, rendez-vous sur notre site:
DE
www.oregonscientific.fr.
ÜBERSICHT
Si vous êtes aux Etats-Unis, vous pouvez contacter notre
support consommateur directement sur le site:
VORDERANSICHT (ABB. 1)
www2.oregonscientific.com/service/support.asp
OU
principal pour que la sonde transmette les données
par téléphone au: 1-800-853-8883
relatives à la température / à l'humidité.
Pour des renseignements internationaux, rendez vous sur le
1
site: www2.oregonscientific.com/about/international.asp.
EUROPE - DECLARATION DE CONFORMITE
Par la présente Oregon Scientific déclare que l'appareil Sonde
thermo-hygrométrique sans fil (Modèle: THGN132N) est
conforme aux exigences essentielles et aux autres dispositions
1. LED-Statusindikator: blinkt bei Übertragung eines
PROBLEME
SYMPTOME
SOLUTION
pertinentes de la directive 1999/5/CE. Une copie signée et datée
Messwerts
de la déclaration de conformité est disponible sur demande
Sonde sans
Relevés anormaux
Appuyer sur
auprès de notre Service Client.
RÜCKANSICHT (ABB. 2)
fil
/ étranges
RESET
Vérifier les
Impossible de
piles
1
localiser la sonde
Vérifier
sans fil
PAYS CONCERNÉS RTT&E
l'emplacement
Tous les pays Européens, la Suisse
CH
Vérifier les
et la Norvège
N
Impossible de
sondes. Une
changer de canal
seule sonde
2
ne fonctionne
Les données ne
Lancer une
correspondent
recherche
pas à l'appareil
manuelle
principal.
1. Öffnung für Wandmontage
2. Batteriefach
3. RESET: Gerät auf Standardeinstellungen zurücksetzen
Ne pas soumettre le produit à une force excessive, au
choc, à la poussière, aux changements de température
4. Kanal-Schalter
ou à l'humidité.
Ne pas couvrir les trous de ventilation avec des
ERSTE SCHRITTE
journaux, rideaux etc.
Ne pas immerger le produit dans l'eau. Si vous renversez
DIE SENDEEINHEIT EINRICHTEN
du liquide sur l'appareil, séchez-le immédiatement avec
un tissu doux.
1. Öffnen Sie die Batteriefachabdeckung.
Ne pas nettoyer l'appareil avec des matériaux corrosifs
2. Verschieben Sie den Kanal-Schalter, um einen Kanal
ou abrasifs.
auszuwählen (1, 2, 3). Stellen Sie sicher, dass Sie für
Ne pas trafiquer les composants internes. Cela
jede Sendeeinheit einen eigenen Kanal verwenden.
invalidera votre garantie.
3. Legen Sie die Batterie ein und achten Sie auf die
N'utilisez que des piles neuves. Ne pas mélanger des
Übereinstimmung der Polaritäten (+ / -). Siehe ABB. 2.
piles neuves et usagées.
4. Nach jedem Batteriewechsel auf RESET drücken.
Les images de ce manuel peuvent dif férer de l'aspect
5. Schließen Sie die Batteriefachabdeckung.
réel du produit.
Lorsque vous désirez vous débarrasser de ce produit,
assurez-vous qu'il soit collecté séparément pour un
HINWEIS
Installieren Sie die Batterie zuerst in der
traitement adapté.
Funksendeeinheit, und anschließend in der Basiseinheit.
Le poser sur certaines surfaces en bois peut endommager
la finition du meuble, et Oregon Scientific ne peut en
6. Veranlassen
Sie
être tenu responsable. Consultez les mises en garde du
Basiseinheit, um den Empfang der Temperatur- /
fabricant du meuble pour de plus amples informations.
Luftfeuchtigkeitsdaten
Le contenu du présent manuel ne peut être reproduit
starten.
sans la permission du fabriquant.
Ne pas jeter les piles usagées dans les containers
municipaux non adaptés. Veuillez effectuer le tri de ces
ordures pour un traitement adapté si nécessaire.
Veuillez remarquer que certains appareils sont équipés
d'une bande de sécurité. Retirez la bande bande
ducompartiment des piles avant la première utilisation.
REMARQUE
Les caractéristiques techniques de ce
7. Befestigen
Sie
Wandaufhängung oder dem Tischaufsteller an der
gewünschten Stelle.
Für optimale Ergebnisse:
•
Platzieren Sie die Sendeeinheit innerhalb von 30 m von
TYPE
DESCRIPTION
der Basiseinheit entfernt.
APPAREIL A DISTANCE
•
Platzieren Sie die Sendeeinheit entfernt von direkter
117 x 80 x 171 mm
Sonnenbestrahlung und Feuchtigkeit.
L x l x H
(4,78 x 3,27 x 6,98
•
Positionieren Sie die Sendeeinheit so, dass sie auf die
pouces)
Basiseinheit (im Haus) gerichtet ist, und vermeiden Sie
241 g (8,5 onces)
Hindernisse, wie Türen, Wände und Möbel.
Poids
sans les piles
•
Platzieren Sie die Sendeeinheit an einem Standort mit
direkter Sicht zum Himmel, und stellen Sie sie nicht
Etendue de mesure de
-20°C à 60°C
in die Nähe von metallischen Gegenständen oder
la température
(-40°F à 140°F)
elektronischen Geräten.
Résolution
0,1°C (0,2°F)
•
Positionieren Sie die Sendeeinheit während der
Gamme de l'humidité
25% - 95%
kalten Wintermonate in der Nähe der Basiseinheit,
Résolution de l'humidité
1%
da
Temperaturen
Fréquence du signal
433 MHz
Batterieleistung
und
beeinträchtigen können.
TECHNISCHE DATEN
TIPP
Die Übertragungsreichweite kann von mehreren
TYP
BESCHREIBUNG
Faktoren abhängen. Sie müssen eventuell mehrere
FUNKSENDEEINHEIT
Standorte testen, um optimale Ergebnisse zu erzielen.
L x B x H
117 x 80 x 171 mm
Gewicht
241 g (ohne Batterie)
HINWEIS
Verwenden Sie Alkaline-Batterien für längere
-20 °C bis 60 °C
Temperaturbereich
Betriebsdauer sowie Lithium-Batterien für Endverbraucher
(-4 °F bis 140 °F)
bei Temperaturen unter dem Gefrierpunkt.
Auflösung
0,1 °C (0,2 °F)
Luftfeuchtigkeitsbereich
25 % - 95 %
Luftfeuchtigkeits-
1 %
KANÄLE ÄNDERN
auflösung
So ändern Sie die Kanäle, sobald ein Kanal reserviert
Signalfrequenz
433 MHz
worden ist:
Übertragungsreichweite
30 m (ohne Hindernisse)
Anzahl d. Kanäle
3
1. Verschieben
Sie
den
Kanal-Schalter
auf
den
gewünschten Kanal.
Stromversorgung
1 Batterie UM-3 (AA) 1,5 V
2. Drücken Sie auf RESET.
ÜBER OREGON SCIENTIFIC
3. Veranlassen Sie eine Sensorsuche auf der Basiseinheit,
Besuchen Sie unsere Website www.oregonscientific.de
um den Empfang der Temperatur- / Luftfeuchtigkeitsdaten
und erfahren Sie mehr über unsere Oregon Scientific-
von der Sendeeinheit zu starten.
Produkte. Auf der Website finden Sie auch Informationen,
wie Sie im Bedarfsfall unseren Kundendienst erreichen und
Daten herunterladen können. Für internationale Anfragen
RESET
besuchen Sie bitte unsere Website: www2.oregonscientific.
Drücken Sie auf RESET, um das Gerät auf die
com/about/international.
Standardeinstellungen zurückzusetzen.
EU-KONFORMITÄTSERKLÄRUNG
FEHLERSUCHE UND ABHILFE
Hiermit erklärt Oregon Scientific, dass die Thermo-
Hygro-Funksendeeinheit (Modell: THGN132N) mit den
PROBLEM
MERKMAL
ABHILFE
grundlegenden Anforderungen und anderen relevanten
Ungewöhnliche
Vorschriften der Richtlinie 1999/5/ EG übereinstimmt. Eine
RESET
Funksendeeinheit
/ seltsame
Kopie der unterschriebenen und mit Datum versehenen
drücken
Messwerte
Konformitätserklärung erhalten Sie auf Anfrage über
unseren Oregon Scientific Kundendienst.
Batterie
Kann die
überprüfen
3
Funksendeeinheit
nicht finden
Standort
4
überprüfen
Sende-
KONFORM IN FOLGENDEN LÄNDERN
einheiten
überprüfen.
Alle Länder der EU, Schweiz
Kann Kanal nicht
Nur eine
ändern
und Norwegen
Sende-
einheit
funktioniert.
Manuelle
Daten passen
Sensorsuche
nicht zur
veran-
Basiseinheit
lassen
VORSICHTSMASSNAHMEN
•
Setzen Sie das Gerät keiner extremen Gewalteinwirkung
und keinen Stößen aus, und halten Sie es von übermäßigem
Staub, Hitze oder Feuchtigkeit fern.
•
Sie dürfen die Belüftungsöffnungen nicht mit Gegenständen
abdecken, wie z.B. Zeitungen, Vorhänge, usw.
•
Tauchen Sie das Gerät niemals in Wasser. Falls Sie
eine Flüssigkeit über das Gerät verschütten, trocknen
Sie es sofort mit einem weichen, faserfreien Tuch.
•
Reinigen Sie das Gerät keinesfalls mit scheuernden
oder ätzenden Mitteln.
•
Machen Sie sich nicht an den internen Komponenten
des Geräts zu schaffen, da dies zu einem Verlust der
Garantie führen kann.
•
Verwenden Sie nur neue Batterien. Verwenden Sie
eine
Sensorsuche
auf
der
keinesfalls neue und alte Batterien gemeinsam.
von
der
Sendeeinheit
zu
•
Die in dieser Anleitung dargestellten Abbildungen
können sich vom Original unterscheiden.
•
Entsorgen Sie das Gerät ausschließlich in den dafür
vorgesehenen, kommunalen Sammelstellen, die Sie
bei Ihrer Gemeinde erfragen können.
•
Wenn dieses Produkt auf bestimmte Holzflächen gestellt
wird, kann die Oberfläche beschädigt werden. Oregon
Scientific ist nicht haftbar für solche Beschädigungen.
Entsprechende Hinweise entnehmen Sie bitte der
Pflegeanleitung Ihres Möbelherstellers.
die
Sendeeinheit
mit
der
•
Der Inhalt dieser Anleitung darf ohne Genehmigung
des Herstellers nicht vervielfältigt werden.
•
Verbrauchte Batterien gehören nicht in den Hausmüll.
Bitte geben Sie sie bei einer Sammelstelle für
Altbatterien bzw. Sondermüll ab.
•
Bitte beachten Sie, dass manche Geräte mit einem
Batterieunterbrechungsstreifen bestückt sind. Vor dem
ersten Gebrauch müssen Sie den Streifen aus dem
Batteriefach ziehen.
HINWEIS
Die technischen Daten für dieses Produkt
und der Inhalt der Bedienungsanleitung können ohne
Benachrichtigung geändert werden.
unter
dem
Gefrierpunkt
die
die
Signalübertragung
2007/8/20 2:25:41 PM
CH
N
Advertisement

Related Manuals for Oregon Scientific THGN132N


Summary of Contents for Oregon Scientific THGN132N
- Page 1 • Non sottoporre il prodotto a forza eccessiva, urti, polvere, du liquide sur l’appareil, séchez-le immédiatement avec may result in damage to its finish for which Oregon VORSICHTSMASSNAHMEN correct the interference by one or more of the following variazioni di temperatura o a umidità.
- Page 2 Oregon Visite nosso site (www.oregonscientific.com.br) para saber Bezoek onze website (www.oregonscientific.com) om...