Advertisement
Quick Links
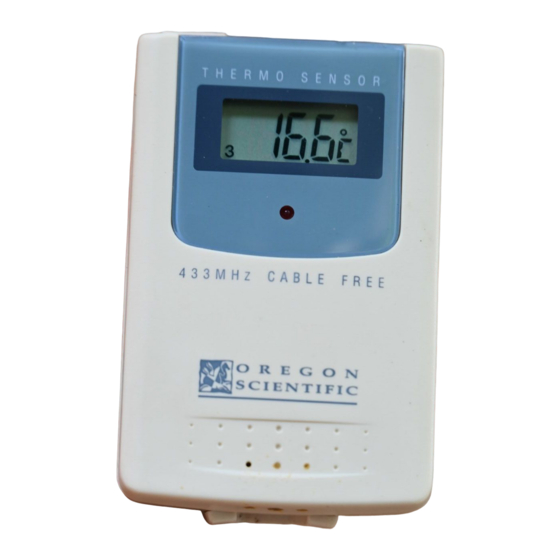
REMOTE THERMO SENSOR
WITH LCD
MODEL : THR138
USER'S MANUAL
[ FIG A ]
THR138 (Eng/Fre/SPa)30-6
1
ENGLISH
INTRODUCTION
Congratulations on your purchase of the THR138 Remote Thermo Sensor.
This Remote Thermo Sensor is for use with the 433MHz Multi-Channel In-Out
Thermometer to monitor temperature changes of outdoor sites. Operation is easy
and no wire installation is required.
COMPATIBLE UNITS:
Examples of compatible units are as follows:
EMR812A. BAR888A. RMR112A
MAIN FEATURES
A.
LCD
Displays the current temperature monitored by the remote unit
B.
LED INDICATOR
Flashes when the remote unit transmits a reading
°
°
C.
C/
F SLIDE SWITCH
Selects between Centigrade(°C) and Fahrenheit (°F)
D.
CHANNEL SLIDE SWITCH
Designates the remote unit Channel 1, Channel 2 or Channel 3
E.
RESET BUTTON
Returns all settings to default values
F.
BATTERY COMPARTMENT
Accommodates two UM-3 AA size alkaline batteries
G. BATTERY DOOR
H. WALL-MOUNT HOLDER
Supports the remote unit in wall-mounting
I.
REMOVABLE TABLE STAND
For standing the remote unit on a flat surface
BEFORE YOU BEGIN
For best operation,
To ensure proper reception between the main unit and the remote sensor, follow
these instructions carefully.
BATTERY AND CHANNEL INSTALLATION
1.
Place both units as close as possible to each other.
2.
Remove the screws on the battery door of the remote unit.
3.
Assign a different channel to each remote sensor by changing the channel
switch in the battery compartment of the remote sensor.
Select the units of measurement for the temperature display on the °C /°F
4.
slide switch.
5.
Install 2 alkaline batteries ( UM-3 OR "AA"size 1.5V ) strictly according to
the polarities shown.
6.
Insert batteries or press the reset button of the main unit. Follow the instructions
as set out in the User's manual.
7.
Replace the battery compartment door and secure its screws.
8.
Position the remote sensor and main unit within effective transmission range,
which in usual circumstances, is 30 meters.
Note: The effective range may be limited by building materials and the position of
either the main unit or remote sensors. Try various set-up arrangements for best
result.
Though the sensor is weatherproof, and is meant for use outside, it should be placed
away from direct sunlight, rain, or snow.
CHANGING CHANNELS
Once a channel is assigned to a unit, you can only change it by removing the
batteries and repeating the above procedure.
LOW-BATTERY WARNING
Replace the batteries of the sensor when the low-battery indicator of the channel
represented by the sensor lights up on the main unit.
OPERATION
Once batteries are in place, the sensor will start transmitting samplings at 30-second
intervals.
The remote sensor reading shown on the LCD depends on which remote sensor
channel has been chosen.
HOW TO RESET THE UNIT
The reset function is required only when the unit is operating in an unfavorable
way or malfunctioning.
To access:
1.
Lift open the battery compartment door.
2.
Place a blunt stylus into the hole marked RESET and press.
3.
Replace the battery compartment door.
See the user's manual of your main unit for further information.
HOW TO USE THE TABLE STAND OR WALL MOUNT
This sensor comes with a wall-mount holder and a removable stand. Use either to
hold the unit in place. (FIG A)
PRECAUTIONS
This product is engineered to give you years of satisfactory service if you handle it
carefully. Here are a few precautions.
1.
Do not immerse the unit in water.
2.
Do not clean the unit with abrasive or corrosive materials. They may scratch
the plastic parts and corrode the electronic circuit.
3.
Do not subject the unit to excessive force, shock, dust, temperature or humidity.
Which may result in malfunction, shorter electronic life span, damaged battery
and distorted parts.
4.
Do not tamper with the unit's internal components. Doing so will invalidate
the warranty on the unit and may cause unnecessary damage. The unit contains
no user-serviceable parts.
5.
Only use fresh batteries as specified in the user's manual. Do not mix new
and old batteries as the old ones may leak.
6.
Always read the user's manual thoroughly before operating the unit.
SPECIFICATIONS
Temperature Measurement
Displayed range
: -50.0°C to + 70.0°C (-58.0°F to 158.0°F)
Proposed operating range
: -20.0°C to + 60.0°C (-4.0°F to 140.0°F)
Temperature resolution
: 0.1°C (0.2°F)
RF transmission Frequen
: 433 MHz
No. of Remote unit
: Maximum of 3
RF Transmission Range
: Maximum of meters
Temperature sensing cycle
: around 30 seconds
Power
: use 2pcs UM-3 "AA"1.5v alkaline battery
Weight
: 83gm (without batteries)
Dimension
: 105 x 70 x 22.5 mm (H X W X D)
NOTE ON COMPLIANCE
This product complies to standards and specifications of BZT, FCC and article
number 334 of PTT.
Warning: Changes or modifications to this unit not expressly approved by the
party responsible for compliance could void the user's authority to operate the
equipment.
NOTE: This equipment has been tested and found to comply with the limits for a
class B digital device, pursuant to part 15 of the FCC Rules. These limits are designed
to provide reasonable protection against harmful interference in a residential
installation. This equipment generates, uses and can radiate radio frequency energy
and, if not installed and used in accordance with the instructions, may cause harmful
interference to radio communications.
However, there is no guarantee that interference will not occur in a particular
installation. If this equipment does cause harmful interference to radio or television
reception, which can be determined by turning the equipment off and on, the user
is encouraged to try to correct the interference by one or more of the following
measures:
• Reorient or relocate the receiving antenna.
• Increase the separation between the equipment and receiver.
• Connect the equipment into an outlet on a circuit different from that to which the
receiver is deeded.
• Consult the dealer of an experienced radio/TV technician for help.
CAUTION
-
The content of this manual is subject to change without further notice.
-
Due to printing limitation, the displays shown in this manual may differ
from the actual display.
-
The manufacturer and its suppliers held no responsibility to you or
any other person for any damage expenses, lost profits, or any other
claim arise by using this product.
-
The contents of this manual may not be reproduced without the
permission of the manufacturer.
ADDITIONAL RESOURCES
Visit our website (www.oregonscientific.com) to learn more about your
new product and other Oregon Scientific products such as digital cameras,
hand-held organizers, health and fitness gear, and weather stations. The
website also includes contact information for our customer service
department, in case you need to reach us.
30/6/03, 4:21 pm
FRENCH
INTRODUCTION
Nous vous félicitons pour votre achat du capteur thermique-hygrométrique à
distance THR138.
Le Capteur thermique à distance doit être utilisé avec le Thermomètre intérieur/
extérieur multicanaux 433 MHz pour surveiller les variations sur les sites
extérieures. L'appareil est simple à utiliser, et aucune installation de câbles n'est
requise.
UNITÉS COMPATIBLES
Exemples d'unités compatibles avec cet appareil :
EMR812A, BAR888A, RMR112A.
CARACTÉRISTIQUES PRINCIPALES
A.
ÉCRAN LCD
Affiche la température actuelle relevée par l'unité à distance.
B.
VOYANT DEL
Clignote lorsque l'unité à distance transmet une lecture.
°
°
C.
COMMUTATEUR
C/
F
Permet de choisir entre les degrés Celsius (°C) et Fahrenheit (°F).
D.
COMMUTATEUR DE CANAL
Désigne le Canal 1, Canal 2 ou Canal 3 du capteur à distance.
E.
BOUTON DE REINITIALISATION
Remet tous les réglages aux valeurs par défaut.
F.
COMPARTIMENT A PILES
Accueille deux piles alcaline UM-3 AA.
G. COUVERCLE DU COMPARTIMENT A PILES
H. TROU DE SUSPENSION
Pour fixer l'unité à distance sur un mur.
I.
SUPPORT AMOVIBLE
Permet de poser l'unité à distance sur une surface plane.
AVANT UTILISATION
Pour un meilleur fonctionnement,
Pour assurer une réception correcte entre l'unité principale et l'unité à distance,
respectez attentivement les instructions suivantes.
INSTALLATION DE LA PILE ET DU CANAL
1.
Placer les deux unités aussi près l'une de l'autre que possible.
2.
Retirer les vis du couvercle du compartiment à piles de l'unité à distance.
3.
Attribuer un canal différent à chaque capteur à distance en déplaçant le
commutateur de canal dans le compartiment à piles de l'unité à distance.
4.
Sélectionner les unités de mesure pour l'affichage de la température sur le
commutateur °c/°F.
5.
Insérer 2 piles alcalines (UM-3 ou « AA » de 1.5V) en respectant strictement
les polarités indiquées.
5.
Insérer les piles ou presser le bouton de réinitialisation de l'unité principale.
Suivre les instructions du manuel de l'utilisateur.
6.
Replacer le couvercle du compartiment à piles et resserrer ses vis.
7.
Placer le capteur à distance et l'unité principale dans l'intervalle de portée
efficace de transmission, qui est de 30 mètres en conditions normales.
Remarque: La portée efficace peut être limitée par les matériaux de construction
et la position de l'unité principale ou des capteurs à distance. Essayer différentes
dispositions pour obtenir le meilleur résultat.
Bien que le capteur soit imperméable et conçu pour un usage extérieur, il doit être
placé à l'abri du rayonnement direct du soleil, de la pluie et de la neige.
CHANGER LES CANAUX
Une fois qu'un canal est attribué à une unité, vous ne pouvez le changer qu'en
retirant les piles et en répétant la procédure ci-dessus.
AVERTISSEMENT DE PILES FAIBLES
Remplacer les piles lorsque l'indicateur de piles faibles du canal affiché par le
capteur clignote sur l'unité principale.
FONCTIONNEMENT
Une fois les piles en place, le capteur commencera à transmettre des mesures à 30
secondes d'intervalle.
La mesure du capteur à distance affichée sur l'écran LCD de l'unité principale
dépend du canal de capteur à distance choisi.
COMMENT RÉINITIALISER L'UNITÉ
La fonction réinitialisation ne sert que lorsque l'unité fonctionne mal ou de façon
insatisfaisante.
Pour y accéder :
1.
Ouvrir le couvercle du compartiment à piles.
2.
Placer la pointe d'un stylo à bille dans le trou marqué RESET
(« réinitialiser ») et appuyer.
3.
Replacer le couvercle du compartiment à piles.
Voir le manuel de l'utilisateur de votre unité principale pour plus d'informations.
COMMENT UTILISER LE PIED OU LA FIXATION
MURALE
Ce capteur peut être fixé sur un mur par son trou de suspension murale. Utiliser
l'un ou l'autre pour maintenir l'unité en place. [FIG.A]
Advertisement

Related Manuals for Oregon Scientific THR138


Summary of Contents for Oregon Scientific THR138
- Page 1 ENGLISH INTRODUCTION REMOTE THERMO SENSOR Congratulations on your purchase of the THR138 Remote Thermo Sensor. This Remote Thermo Sensor is for use with the 433MHz Multi-Channel In-Out WITH LCD Thermometer to monitor temperature changes of outdoor sites. Operation is easy and no wire installation is required.
- Page 2 Consultez notre site Internet (www.oregonscientific.com) pour en savoir plus sur nos nouveaux produits et les appareils Oregon Scientific tels que FUNCIONAMIENTO les appareils photo numeriques, les organiseurs, les appareils de sport et Cuando las pilas ya estén en su lugar, el sensor comenzará...