Table of Contents
Advertisement
Quick Links
Download this manual
See also:
User Manual
Advertisement
Table of Contents

Related Manuals for NEC SHIELDPRO FC-N21S


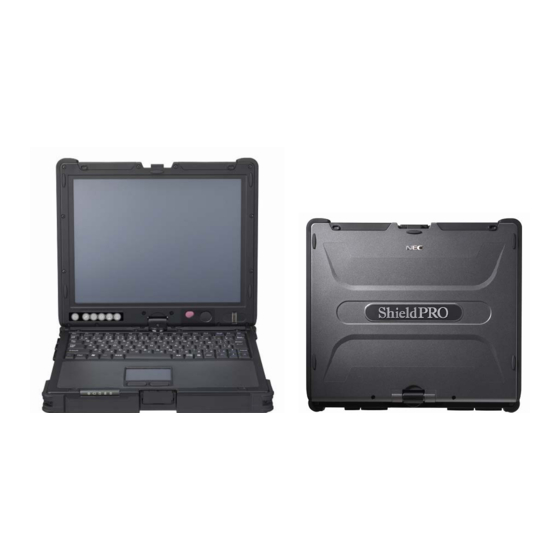
Summary of Contents for NEC SHIELDPRO FC-N21S
-
Page 1: Quick Start Guide
Quick Start Guide Ruggedised Notebook Computer... - Page 2 NEC ShieldPRO Ruggedised Notebook Quick Start Guide © NEC Australia All rights reserved by NEC Australia Pty. Ltd. No part of this manual may be reproduced in any form without the prior written permission of NEC Australia. Document: 0318-00003 Version: 2.0...
- Page 3 Introduction Dear Customer Congratulations on the purchase of your new NEC notebook Computer. We are sure it will be a useful assistant in the implementation of your professional tasks. Before using your new ShieldPRO for the first time, it is recommended that you fully charge the battery (this may take up to 3 hours).
-
Page 4: Unpacking Checklist
Unpacking Check List Once you have unpacked your NEC ShieldPRO computer, check to make sure that all of the parts have been included. ShieldPRO Computer Windows Instruction Booklet Windows XP CD Recovery CD’s (2) ShieldPRO Drivers CD ShieldPRO Documentation CD... -
Page 5: Installing The Battery
Wait for the battery charging indicator (located at the front left of the unit) to change from ‘orange’ (charging) to ‘unlit’ before powering on the ShieldPRO unit for the first time (this may take up to 3 hours). NEC ShieldPRO FC-N21S Ruggedised Notebook Computer Quick Start Guide – Page 5 of 20... - Page 6 1. Choose ‘Not this time’, when asked if you want to connect to Windows Update and click ‘Next’ 2. Select ‘Install the software automatically’ and click ‘Next’ 3. Click ‘Finish’ to complete the wizard NEC ShieldPRO FC-N21S Ruggedised Notebook Computer Quick Start Guide – Page 6 of 20...
-
Page 7: Default Settings
1. Double click the time & date in the Windows task tray 2. Select the ‘Time Zone’ tab 3. Select your time zone from the drop down list 4. Click ‘OK’ NEC ShieldPRO FC-N21S Ruggedised Notebook Computer Quick Start Guide – Page 7 of 20... - Page 8 ShieldPRO has an array of tablet buttons located on the bottom left corner of the LCD screen. (Tb) To utilise the Tablet button features: 1. Press and hold the [Tb] button 2. Press the secondary button (1-5) above NEC ShieldPRO FC-N21S Ruggedised Notebook Computer Quick Start Guide – Page 8 of 20...
- Page 9 Tb + 1 [Esc] Tb + 2 [Tab] Tb + 3 Starts the screen keyboard Tb + 4 (function not mapped) Tb + 5 (function not mapped) NEC ShieldPRO FC-N21S Ruggedised Notebook Computer Quick Start Guide – Page 9 of 20...
- Page 10 Indicators ShieldPRO has an array of indicators located on the bottom left corner of the unit. NEC ShieldPRO FC-N21S Ruggedised Notebook Computer Quick Start Guide – Page 10 of 20...
- Page 11 Green Blinking: HDD activity Access Caps Lock Green: Caps Lock ON Unlit: Caps Lock OFF Num Lock Green: Num Lock ON Unlit: Num Lock OFF 1 1 1 1 NEC ShieldPRO FC-N21S Ruggedised Notebook Computer Quick Start Guide – Page 11 of 20...
-
Page 12: Function Keys
[Fn] + [F7] = Raise [Fn] + [F8] = Lower [Fn] + [F9/F10] Adjust sound volume [Fn] + [F9] = Raise [Fn] + [F10] = Lower NEC ShieldPRO FC-N21S Ruggedised Notebook Computer Quick Start Guide – Page 12 of 20... -
Page 13: Power Lock Button
To operate the power button function, hold down the Power Lock Button (1) and press the power button (2). NEC ShieldPRO FC-N21S Ruggedised Notebook Computer Quick Start Guide – Page 13 of 20... - Page 14 Connections – Left Side Hardened USB Connector (rated to 10,000 connect/disconnect cycles) 2 x USB Connectors SD Card Slot NEC ShieldPRO FC-N21S Ruggedised Notebook Computer Quick Start Guide – Page 14 of 20...
- Page 15 Connections – Right Side LAN (1000BASE-T/100BASE-TX/10BASE-T) Modem PCMCIA Type II NEC ShieldPRO FC-N21S Ruggedised Notebook Computer Quick Start Guide – Page 15 of 20...
-
Page 16: Connections - Rear
Connections – Rear Serial Connection External VGA monitor Antitheft Lock Headphone & Microphone Power NEC ShieldPRO FC-N21S Ruggedised Notebook Computer Quick Start Guide – Page 16 of 20... -
Page 17: Battery Refresh
5. Charge the battery fully (until the battery charge lamp turns from ‘orange’ to unlit). 6. Turn on the power. If the NEC logo screen appears, press [F2] to display the BIOS Setup Menu. 7. Unplug the power cord from the AC outlet and remove the AC adapter from ShieldPRO. - Page 18 ShieldPRO Support Support for your ShieldPRO computer is provided by NEC Australia. If you are having problems with you computer, read through the User Manual as this contains a chapter on Troubleshooting, and also BIOS configuration of the computer. Further support may be found on the ShieldPRO website at www.nec.com.au/shieldpro...
- Page 19 Notes NEC ShieldPRO FC-N21S Ruggedised Notebook Computer Quick Start Guide – Page 19 of 20...