Table of Contents
Advertisement
Quick Links
Advertisement
Table of Contents

Related Manuals for NEC VERSA E6500 Series


Summary of Contents for NEC VERSA E6500 Series
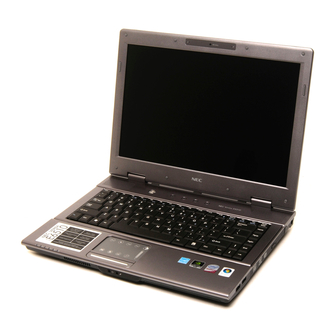
- Page 1 NEC VERSA E6500/E6510 Series Electronic User’s Guide 06/2008...
-
Page 2: Text Setup
This guide will contain more information on your system and ® Windows Visit our website at www.nec-computers-ap.com regularly to download the most up-to-date Electronic User’s Guide and print it for your reference. Note We recommend that you print this documentation. It will then be easily accessible even when your system is shut down. - Page 3 Basic Care and Handling Tips Protect the notebook from extremely low or high temperatures. Let the notebook warm (or cool) to room temperature before using it. Keep the notebook away from magnetised areas (some airline tray tables are magnetic; do not set your notebook on top of them).
-
Page 4: System Care
System Care Follow these guidelines to maintain the condition and performance of your notebook. Caution Immediately turn off and unplug the notebook under the following conditions: • The power cord has been damaged or frayed. • Liquid has spilled on or into the notebook. •... -
Page 5: Storage Requirements
Storage Requirements Store the notebook and AC adaptor in an environment that meets the following conditions: Should the temperature of the notebook suddenly rise or fall (for example, when you move the notebook from a cold place to a warm place), vapour may condense inside the notebook. Turning on the notebook under such conditions can damage the internal notebook components. -
Page 6: Introducing Your Nec Versa
Introducing Your NEC VERSA Getting to Know Your Notebook WARNING Prolonged or improper use of a computer workstation may pose a risk of serious injury. To reduce your risk of injury, set up and use your notebook in the manner described in the section on “Setting Up a Healthy Work Environment”. - Page 7 The notebook is compact with features on each side. The Front View of the Notebook Item Description Built-In Web For video conferencing or taking pictures. Camera The CyberLink YouCam webcam application can be launched by (For specific models ® double-clicking its icon from the Windows desktop.
- Page 8 Indicator (For indicate its status (refer to the section on “LED Behaviour”). specific models only) Note: This button will only function if the NEC VERSA that you purchase has the feature of instant messaging capabilities (for specific models only). Built-in Microphone Allows you to record mono sound with your computer.
- Page 9 The Back View of the Notebook Item Description Battery Bay Equipped with a rechargeable battery. Ventilator This provides ventilation, to ensure your notebook’s temperature is optimal. This slot is for fitting a security cable device for extra Security Cable Slot protection of your notebook.
- Page 10 Item Description Use this port to daisy chain up to 63 IEEE 1394 (a high-speed IEEE 1394 Port interface) devices to your notebook. IEEE 1394 devices support plug-and-play connectivity for transfer rates of up to 400 MB/s. Modem Port Use this port to connect the notebook to an analogue telephone line for access to the internet.
- Page 11 The Right Side View of the Notebook Item Description Each USB port allows you to connect USB-equipped peripheral USB Ports devices such as printers, monitors and scanners to your notebook. Optical Drive This slot houses an optical drive. The optical drive that comes with your notebook depends on the configurations of the purchased notebook.
- Page 12 The Bottom View of the Notebook Item Description Battery Security Refer to the sections on “Installing the battery” and “Removing Lock the battery” for details. Battery Bay Equipped with a rechargeable Lithium-Ion (Li-Ion) battery. Battery Release Refer to the sections on “Installing the battery” and “Removing Latch the battery”...
- Page 13 Keyboard The keyboard is equipped with many features. However the outlook of the keyboard may be slightly different from your actual unit. These include: • Function Keys (A) - function keys are available on the notebook keyboard. These keys work together with the Fn key to activate special functions. Function keys are application- driven.
- Page 14 LED Behaviour Item Description Indicates that both Wireless LAN and Wireless LAN / ® Bluetooth wireless technology are ® Bluetooth disabled. wireless ® Indicates that the Bluetooth wireless Orange technology LED technology is enabled. Indicator (For Indicates that the Wireless LAN is Blue specific models enabled.
- Page 15 Item Description Indicates that Num Lock is activated. Num Lock Blue LED Indicator Indicates that system is active. Power Button Blue LED Indicator Indicates that system is in Standby mode. Orange Indicates that the Email application is Email LED Blue open.
-
Page 16: Function Keys
Function Keys Function keys are available on the notebook keyboard. These keys work together with Fn key to activate special functions. Function keys are application-driven. The following function key combinations are pre-programmed for the notebook. Function Key Description Enables the Sleep mode. Pressing this tells the notebook to go into Fn + F1 standby, shutting down disk activity and lowers energy consumption. -
Page 17: Optional Accessories
Optional Accessories For more information on accessories, please refer to or contact to the local sales representative near you. Using the Touchpad The touchpad is an easy way to control the cursor with your finger. Lightly glide your finger across the touchpad and the cursor will replicate your movement on the screen. To use the touchpad, you can: •... - Page 18 The TnG Touchpad (For specified models only) The following tables describe the functions of each icon on the TnG Touchpad. On/Off Icon Name Function activate Tap the icon twice to activate the TnG Touchpad. Tapping it again returns you to a normal pointing device. deactivate button Multimedia...
-
Page 19: Power Sources
Touchpad Tips Follow these basic ergonomic tips while working: • Use a light touch on the touchpad surface. • Set up the notebook with your keyboard and touchpad at a comfortable height. Keep your forearms parallel to the floor. Your wrists should be relaxed and straight. •... -
Page 20: Connecting The Ac Adaptor
Connecting the AC Adaptor Connect the AC adaptor as follows: 1. Connect the AC adaptor cable into the power port on the notebook. 2. Plug one AC adaptor cable into the adaptor. 3. Connect the AC adaptor cable to grounded 100- or 240-volt, 50- or 60-Hz AC power outlet. Caution •... -
Page 21: Using The Battery
Precautions for Recharging the Battery Adhere to the following precautions when recharging the battery. • Use only the battery charger designed for your notebook battery type. Different NEC VERSA models require different batteries and battery chargers. • Charge the battery for the specified charge time only. -
Page 22: Conserving Battery Power
Conserving Battery Power The battery performance is affected by the following conditions: • when it is new and fully charged. • when no peripherals are connected to your notebook. • when you have no options installed. While on the road, it is important to be aware of the simple things you can do to extend the life of the notebook's main battery. -
Page 23: Replacing The Battery
Replacing the Battery This section describes how to remove and replace the primary battery. WARNING To prevent accidental battery ignition or explosion, strictly adhere to the following: Keep the battery away from extreme heat. Keep metal objects away from the battery terminals to prevent a short circuit. Make sure the battery is properly installed in the battery bay. - Page 24 Installing the Battery in your Notebook Insert the new battery as follows: Turn the computer over. Caution Be extra careful to avoid damage to your notebook. Make sure you unlock the battery security lock. Align the battery with the battery bay slot and connector.
-
Page 25: Handling The Battery
Review the following before handling the notebook battery. Caution Only use the type of battery specifically designed for the notebook. Using other NEC VERSA batteries, other manufacturer's batteries, or using a combination of very old and new batteries can cause battery and equipment performance to deteriorate. -
Page 26: Entering Bios Setup
Introducing Basic Input/Output System (BIOS) ® Setup for Windows Vista Your notebook comes with a hardware program called BIOS Setup that allows you to view and set system parameters. BIOS Setup also allows you to set password features that protect your notebook from unauthorised use. -
Page 27: Introducing Bios Setup For Windows
® Introducing BIOS Setup for Windows Your notebook comes with a hardware program called BIOS Setup that allows you to view and set system parameters. BIOS Setup also allows you to set password features that protect your notebook from unauthorised use. Use BIOS Setup to: •... -
Page 28: Updating The Bios
Updating the BIOS Please note that these settings are rarely changed by the common user as factory settings are usually updated, and should only be accessed or changed by an experienced user. The BIOS is the code transmitted onto your notebook's Flash ROM. As indicated in this chapter, you use the BIOS Setup utility to configure your notebook's software and hardware features. -
Page 29: Windows Vista ® Operating System Introduction
® Windows Vista Operating System Introduction ® (Only applicable to Windows Vista The operating system is the most important program that runs on a computer. Every computer must have an operating system to run other programs. Operating systems perform basic tasks, such as recognising input from the keyboard, sending output to the display screen, keeping track of files and directories on the disk, and controlling peripheral devices such as disk drives and printers. - Page 30 Dual Boot (2 languages) For Hong Kong dual boot models only ® Your notebook has already been pre-installed with 2 language versions of the Windows Vista operating system, that is, in English and Traditional Chinese. When you start your notebook for the first time, you are required to choose either one of the operating system languages you prefer (please refer to the screen illustration below).
-
Page 31: Desktop Icons
Introduction ® Windows Vista Operating System ® Windows Vista operating system features include a Desktop with room to manoeuvre, a taskbar for quick access to a variety of system functions, state-of-the-art plug and play support, powerful system utilities, enhanced entertainment features and a fully integrated Internet experience. -
Page 32: Start Menu
Start Menu ® ® The Start menu features a whole new look and feel. The Windows Internet Explorer icon ® has a prominent place now. You will also notice that Windows Vista places your frequently used programs in the white area of the Start menu. It is safe to remove an item from this list by right-clicking the icon and selecting Remove from this list, as the software program itself will not be deleted. -
Page 33: Power Plan
® Windows Vista Operating System Power Options Properties ® In Windows Vista operating system, most ACPI power management settings are controlled ® through Windows Power Options, not through the BIOS Setup utility, unless otherwise noted. ® To access Windows Power Options, go to Start button , Control Panel, select Performance and Maintenance, double click Power Options. - Page 34 Alarms Use the Alarms tab to define the point at which the battery alarm activates. Define the alarm to either sound, display a warning message, or invoke Standby, Hibernate or Shutdown. Parameter Options Description Low battery alarm Allows you to define a low 0-100% battery alarm percentage, notification, and system...
- Page 35 Please visit our “Questions and Answers” website frequently to obtain the latest information and updates regarding your notebook: http://www.nec-computers-ap.com/faq/vista.asp Lastly, when you run MDVD Creator program, a section might be hidden depending on the screen resolution. In this case, please resize the window by dragging the...
- Page 36 ® Windows XP Operating System Introduction ® (Only applicable to Windows The operating system is the most important program that runs on a computer. Every computer must have an operating system to run other programs. Operating systems perform basic tasks, such as recognizing input from the keyboard, sending output to the display screen, keeping track of files and directories on the disk, and controlling peripheral devices such as disk drives and printers.
- Page 37 ® Windows XP Operating System Setup ® For Windows XP Operating system setup © When you switch on the notebook, the message “ Microsoft Corporation” will be displayed. ® Please wait a while for the First page of set up Windows screen to be displayed.
- Page 38 Dual Boot (2 languages) For Hong Kong dual boot models only ® Your notebook has already been pre-installed with 2 language versions of the Windows operating system, that is, in English and Traditional Chinese. When you start your notebook for the first time, you are required to choose either one of the operating system languages you prefer (please refer to the screen illustration below).
-
Page 39: Windows ® Xp Operating System
Introduction ® Windows XP Operating System ® The Windows XP operating system features include a Desktop with room to manoeuvre, a taskbar for quick access to a variety of system functions, state-of-the-art plug and play support, powerful system utilities, enhanced entertainment features and a fully integrated Internet experience. - Page 40 Desktop Icons ® With Windows XP operating system, the following icons* are installed on your Desktop: • Recycle Bin - Gives you a container in which to put and discard unwanted files or allows you to restore these same files back to their original location. ®...
-
Page 41: Power Schemes
Technical Support Information ® The technical support phone numbers for your country are also quickly available in Windows XP operating system. 1. Select Start, right-click on My Computer and select Properties. 2. On the General tab, click on the Support Information button. Managing System Power ®... - Page 42 1/2/3/4/5 hours Never System Standby (plugged in) 1/2/3/5/10/15/20/25/30/45 Selects the system standby minutes timeout period for your 1/2/3/4/5 hours notebook when running under Never AC power. System Standby (running on 1/2/3/5/10/15/20/25/30/45 Selects the system standby batteries) minutes timeout period for your 1/2/3/4/5 hours notebook when running under Never...
-
Page 43: Power Meter
Power Meter The Power Meter tab displays the remaining battery power and charging status for the primary and secondary batteries (if applicable). Choose to display either a percentage progress bar or a battery icon with percentage indicator for your battery status information. Advanced The Advanced tab allows you to select the power-saving settings you want to use Parameter... - Page 44 ® Windows XP Operating System Power Management States The Advanced Configuration and Power Interface (ACPI) uses different levels or states of power management. These power management states occur automatically, based on the notebook’s default settings, or manually, when invoked. ® The Windows XP operating system ACPI power management states include: •...
- Page 45 ® Tips for Using Windows XP Operating System ® This section provides various tips that should help you get the most of your Windows operating system. Note ® ® If you are familiar with previous versions of Microsoft Windows , we advise you to check out ®...
-
Page 46: Changing The Autoplay Setting
• Debugging Mode ® ® • Start Windows Normally - normal Windows start-up. ® • Reboot - reboots the notebook, and starts Windows XP operating system. 4. If you have a dual-boot or multiple-boot system, choose the installation that you need to access using the arrow keys, and then press Enter. -
Page 47: Establishing Passwords
Establishing Passwords To set passwords, you must first set user accounts. Each user can be assigned a different password, or no password at all. 1. Click on Start, Control Panel, and User Accounts. 2. Pick the Create a new account task. 3. - Page 48 Customising the Taskbar The taskbar is locked by default, to make any changes to its size or content, you first need to unlock it. 1. Right-click on the taskbar. 2. Remove the check mark in front of the Lock the Taskbar option. You may now resize and customise the taskbar according to your wishes.
-
Page 49: Notebook Components
4. Click on OK to close the Desktop Items window, and on OK again to close the Display Properties window. Notebook Components For details of notebook components, please refer to the System Configuration label. System Configuration Label Recommended Environment Operation •... -
Page 50: Adobe Reader
® ® Adobe Reader ® ® Adobe Reader allows you to view, navigate, and print Portable Document Format (PDF) files from your local hard drive, your local network, or the Internet. Plug-Ins Several plug-ins may have been installed on your notebook to enhance your internet experience. -
Page 51: Norton Internet Security
Norton Internet Security 2007 From the moment you install it, you’re getting protection from the latest online threats. Norton Internet Security is always running in the background to detect and block spyware, viruses, worms, crimeware, and other risks. And no matter where you connect online, your security settings are optimised to give you maximum protection. -
Page 52: Mcafee ® Securitycenter
® McAfee SecurityCenter ® The McAfee SecurityCenter combines a free set of must-have security services with simplified access to McAfee's world-class managed security products. These services, including a Security Index and real-time external security alert system, assess, inform, and warn you about your notebook's security vulnerability. -
Page 53: Mcafee ® Virusscan
® ® McAfee VirusScan Proven security that protects against viruses and spyware • Protects irreplaceable files, such as family photos and personal financial documents • Identifies spyware and adware before they can run on your notebook • Cleans viruses and virus-like threats automatically •... -
Page 54: Mcafee ® Personal Firewall
® McAfee Personal Firewall Proven security that helps prevent hacker attacks • Blocks unwanted inbound and outbound Internet traffic • Reduces uncertainty about your notebook's activities • Safeguards your most valuable and irreplaceable information ® ® • Integrates seamlessly with McAfee VirusScan virus detection &... -
Page 55: Easy Media Creator
Easy Media Creator 9 • Burn music CDs & DVDs, back up fast, and copy with ease • Take your media with you - easily transfer files to iPod, PSP or other device • Music, memories, movies and more - any way you want them! Get the most out of your digital videos, music and photos. - Page 56 More Features • Integrated disc labeling for professional results. • Intelligent drag and drop takes the hassle out of burning. • Easy-to-use task based interface. • Tutorial to help you get started. • Support and product updates. • Roxio Media Center leads you to the latest update of Roxio’s new products, techniques and tips.
- Page 57 Robson Factory Settings ® Your notebook may be equipped with Intel Turbo Memory technology which supports both ® ™ ® ™ Windows ReadyBoost and Windows ReadyDrive Please take note that these features need to be enabled to function. Please refer to the following steps: 1.
- Page 58 ® Bluetooth Wireless Technology ® Bluetooth wireless technology eliminates the need for connecting cables between your computer and your local area network, facilitating mobility, minimising downtime and ® improving your productivity. Please refer to the following steps to launch the Bluetooth wireless technology software.
- Page 59 Blu-ray Your notebook may be equipped to read Blu-ray (BR) discs, an advanced type of optical disc that has a very high storage capacity (a dual-layer BR disc can store 50 GB of data), and is typically used to store high definition (HD) content such as HD movies. The CyberLink PowerDVD software has been preinstalled and can be used to play Blu-ray Disc titles (BR-DVD).
- Page 60 3. Change the region settings to the movie region accordingly on the region code tab and click on “OK” to apply settings. 4. You are now ready to play back the BR-DVD movie. Note The Blu-ray Disc titles can only be playback using the PowerDVD program. The region setting allows you to set to a maximum of 5 changes.
-
Page 61: Using Your Nec Versa
Using your NEC VERSA Removable Disk Drives Optical Drive The optical drive that comes with your notebook depends on the notebook configurations you purchase. • Release Button (A) - ejects the disc tray. Press this button when power is on to insert a CD into or remove a CD from the drive. -
Page 62: Disc Care
Disc Care When handling optical discs, keep the following guidelines in mind. • Hold optical discs by the outer edge and the inner hub to avoid damaging the surface. Avoid direct contact with the disc's surface. • Avoid scratching or soiling both sides of the disc. •... -
Page 63: Hard Disk Drive
Bays Hard Disk Drive A hard disk drive (HDD) is a non-volatile storage device which stores digitally encoded data on rapidly rotating platters with magnetic surfaces. On most systems, it is a sealed unit (except for a filtered vent hole to equalize air pressure) with fixed media. The HDD is your notebook’s primary storage device, storing all of your system files and installed programs. -
Page 64: Taking Care Of Your Notebook
Taking Care of Your Notebook Notebook Care Your notebook is a durable, dependable system built for heavy use. With protective measures and proper care, you can prevent problems and promote the successful operation and long life- span of your notebook. Protecting Your Notebook From Power Outages Fortunately, there are tools that can help when power supply is interrupted. - Page 65 • Disconnect your notebook from telephone, LAN and power lines when an electrical storm threatens. If you have a fax/modem, lightning can travel in on the phone line and can damage both the fax/modem and the system unit. Lightning can also travel in on power lines and damage your monitor and system unit.
- Page 66 Security • Basic Input/Output System (BIOS) - refer to the relevant BIOS chapter for more information on how to set Supervisor and User passwords. ® • Operating System - refer to the “Tips” section relevant to your Microsoft operating system for more information on how to set user accounts and passwords. •...
-
Page 67: Operating Environment
Operating Environment Caring for your notebook also requires taking into account the effect of temperature, humidity, and moisture on notebook components. Like any other electronic products, notebooks are vulnerable to drastic changes in temperature, and especially moisture on notebook components. Please follow the tips below regarding the recommended operating environment: •... -
Page 68: Preventive Maintenance
Preventive Maintenance The following information will help you to set up a preventive maintenance plan in order to prevent notebook problems. Depending on what your notebook is being used for, adapt them to your own needs. These suggestions are classified according to the recommended frequency. First Time Use Back up your BIOS settings: these parameters saved in the CMOS memory define how your... -
Page 69: Shipping Your Notebook
Shipping Your Notebook Use these steps to prepare your notebook for shipping: 1. Back up the files on the hard disk drive to diskettes, Zip disks, CDs or DVDs. Note Be sure to take precautions for storing and transporting Zip disks, floppy disks, CDs or DVDs so that they are not exposed to magnetic fields or electrical impulses. -
Page 70: Connecting Using A Modem
Modem The NEC VERSA may come with a modem that allows you to communicate with others via e- mail, or connect to an online service or bulletin board. (The modem port is only available on some models.) The speed of data transmission is dependent on the quality of telephone lines. Digitally terminated lines improve the speed of data transmission. -
Page 71: Preparing For Travel
Preparing for Travel The notebook makes a natural travelling companion. With a little preparation you can use the notebook anywhere you go, to prepare your business documents, confirm your travel plans, surf the Internet, or simply stay in touch with those back home! Here is what you should do before you leave home: Note Speed the trip through airport security by carrying a charged notebook. -
Page 72: Connecting / Using A Lan
Travellers are often asked, when returning to their home country, whether or not they purchased the notebook while outside the country. Sometimes, the proof of purchase such as a bill of sale, insurance policy, or purchase receipt is sufficient. Taking along the purchase receipt for your notebook may sound practical, but may not always suffice, particularly when the purchaser of the notebook is your company and the original receipt is not available to you. - Page 73 Using Peripheral Devices USB Devices Your notebook is equipped with one or several USB ports, allowing you to connect USB- equipped peripheral devices such as a digital camera, scanner, printer, CD-ROM drive, modem, mouse, keyboard, telephone, or game device to your notebook. USB devices called USB hubs can serve as connection ports for other USB peripherals.
- Page 74 Array Mic Your notebook may be equipped with an Array Mic. The Array Mic is a sensitive device and may, therefore, be susceptible to distortion when receiving loud or strong audio. To minimise the risk of distortion during voice recording or interaction, please maintain a normal tone of voice and a distance of approximately 30 cm when speaking into the Array Mic.
- Page 75 HDMI Your notebook may be equipped with High Definition Multimedia Utility (HDMI), the very latest in digital video technology. When the HDMI connector on your notebook is connected to an external High-Definition Television (HDTV), the notebook will attempt to fit the image or video output to the TV’s display.
- Page 76 ® Step 2: Select NVIDIA Control Panel. The following screen will appear. Step 3: Select the Task “Resize HDTV desktop” under Video & Television. The following screen will appear. You can manipulate the slider controls by clicking down and holding on them, then dragging them the direction you want.
-
Page 77: Using Animation Files
Audio The notebook provides entertainment-level sound quality through internal stereo speakers. Audio Controls on your Notebook • Microphone In Jack (A) - allows you to connect an external microphone. • Headphones (B) - lets you plug in stereo headphones or powered speakers. Note If you are using external speakers or an external microphone and experience sound distortion or feedback, lower the volume. -
Page 78: Setting Up A Healthy Work Environment
Setting Up a Healthy Work Environment • Arrange Your Equipment Your Chair Your Desk Your Input Devices Your Screen or Monitor • Reducing the Risk of Injuries Vary Your Workday Practice Some Stretching Exercises • Potential Medical Conditions Repetitive Strain Injury (RSI) Pre-Existing Conditions and Psychosocial Factors Epilepsy Warning... -
Page 79: Arrange Your Equipment
Arrange Your Equipment You will find below explanations on how to set up your notebook to fit your physical needs. This information is based on ergonomics - the science of making the workplace fit the needs of the worker. WARNING Prolonged or improper use of a computer workstation may pose a risk of serious injury. - Page 80 Your Desk There is no specific height recommended for your desk. This can vary between 60 and 70 cm, depending upon your size. The standard workaround is that it should be at approximately your elbow height. The desktop should be clean and organised in such a way that frequently used objects are close enough without excessive reaching.
-
Page 81: Vary Your Workday
• Clean your screen or external monitor regularly. Use a lint-free, non-abrasive cloth and a non-alcohol, neutral, non-abrasive cleaning solution or glass cleaner to minimise dust. • Adjust the screen or external monitor's brightness and contrast controls to enhance readability. •... -
Page 82: Repetitive Strain Injury (Rsi)
• Stretch the extensors - stretch your arm straight forward. Rotate your wrist 90 degrees up towards you and keep your thumb down, so that your other fingers are all pointing upwards (your hand should look like it is held out, telling someone to stop). Grab your four fingers pointing upwards with your other hand, and gently pull them towards you, while keeping your arm straightened. -
Page 83: Pre-Existing Conditions And Psychosocial Factors
Pre-Existing Conditions and Psychosocial Factors Pre-existing conditions that may cause or make some people more susceptible to musculoskeletal disorders include the following: hereditary factors, vascular disorders, obesity, nutritional deficiencies such as Vitamin B deficiency, endocrine disorders such as diabetes, hormonal imbalances, connective tissue disorders such as arthritis, prior trauma (to the hands, wrists, arms, shoulders, neck, back, or legs), prior musculoskeletal disorders, aging, fluid retention due to pregnancy, poor physical conditioning, dietary habits and other conditions. -
Page 84: Problem Checklist
Problem Checklist First check the items in the following list. If these items don't help, see the table that follows the list. • Power to the notebook is on. • The AC power outlet to which your AC adaptor is connected is working. Test the outlet by plugging in a lamp or other electrical device. -
Page 85: Startup Problems
Start-Up Problems The notebook has a built-in checking program that automatically tests its components when you turn the system power on. This diagnostic test is called the Power-On Self-Test (POST). If the notebook finds a problem during the POST, the notebook displays an error message or emits a series of beep codes when there are the following conditions: •... -
Page 86: Recovery Information For Windows Vista
Due to the wide range of reasons for which the NEC Recovery Program may be used, no guarantee can be given that all data will be retained. - Page 87 Before using the NEC Recovery Program it is recommended that you FIRST try fixing your ® computer with Windows Vista System Restore. System Restore can be used to restore your computer to a previous state when it was known to function correctly, without affecting your personal data files (such as documents, browsing history, drawings, favourites, or e-mails).
- Page 88 Starting The NEC Recovery Program For notebook, before starting the NEC Recovery Program, please make sure your computer is in AC mode. To launch the NEC Recovery Program: Press the <F8> key upon startup. Then select “Repair Your Computer” at Advanced Boot Options page.
- Page 89 Click “Next” button to continue. Select either “Partial Recovery” or “Full Recovery”. Then click “Next” button to continue. Click “OK” button to continue. Click “Start” button to start the recovery process.
- Page 90 Please wait a while for the recovery process to be completed. The NEC Recovery tools application will close automatically after the recovery is completed. Finally you have to restart your notebook by clicking the “Restart” button at System Recovery Options.
- Page 91 Management utility. Do NOT erase the partition with this utility. The NEC Recovery Program can restore your notebook to the same state as when you purchased it, while giving you an option to retain all settings and personal data for later retrieval.
- Page 92 1. Remove any additional hardware components (such as sound cards, video cards or network cards) that you may have added to your computer. 2. Reinstall the original NEC hardware components if you have removed them. 3. Make sure that your keyboard, mouse, monitor and speakers are connected properly (if applicable to your computer).
- Page 93 ® If your notebook cannot display the Windows desktop, restart your notebook. When the NEC logo appears, Press the <F11> key for a few seconds to start the Recovery Program. If your computer’s backup data has been erased or damaged, only the Complete Recovery option will be available.
- Page 94 4. After the Partial Recovery process has been completed and if you have used default ® Windows settings, you may retrieve your data in the following locations: • Your Documents and Settings: C:\documents and Settings\[Chosen User Name]\... • Applications: C:\Program Files\[Application Name]\... •...
-
Page 95: Frequently Asked Questions
Frequently Asked Questions • Technical Support Where can I find the call centre phone number? • Boot Problems The message "Operating System Not Found", or "Non-System disk or disk error" appears during boot-up. Why can't I boot from the floppy disk drive? What is the difference between a warm boot and a cold boot? Why does my notebook automatically boot up when I receive a phone call? •... -
Page 96: Technical Support
Technical Support If you are not able to resolve your problem you can contact NEC Customer Support. Please check the terms of your warranty, and have your notebook’s serial number on hand before you call us. Please write down any error message causing the problem, and have the notebook in front of you, switched on if possible. - Page 97 What is a computer virus? Computer viruses are man-made and share some of the behaviours of biological viruses. A computer virus passes from computer to computer like a biological virus passes from person to person. Similarities also exist at a deeper level: a biological virus is not a living thing and has to reproduce itself by infecting cells.
- Page 98 Some additional tips: - Always be cautious when opening email attachments, even those coming from friends, co- workers or family members. Never open email attachments from strangers, delete them right away. You should also be careful when downloading files from websites. Only use websites that are trustworthy.
- Page 99 How do search engines work? Searching the Web actually means searching intermediate databases since it is not possible to directly search the World Wide Web, which contains an estimated 1 billion documents. The Web is the totality of web pages found in computers (called "servers") worldwide. Search engines use software or robot programs (called “spiders”) to search the Net for documents and the corresponding addresses (Uniform Resource Locator).
-
Page 100: Ieee 1394 Devices
For more information on viruses, refer to the corresponding FAQs section. Digital Video and IEEE 1394 Devices ® Your NEC VERSA may feature a mini-IEEE 1394 port. The IEEE 1394 is also called FireWire ® i-link on some electronic devices. -
Page 101: Digital Video
The IEEE 1394 standard defines its interface as: • Digital - requires no conversion of digital data into analogue, implying better signal integrity. • plug - allows a device to be added and removed without turning off or rebooting the notebook. -
Page 102: Safety Notices
Safety Notices • Modem • Modifications to the Product • Radio Frequency Interference Statement • Connections and Remote Earth • Power Supply and Cables • Batteries • Laser Compliance Statement • Thunderstorm Warning • Radio-communication Regulation (if applicable) • Additional Notices •... -
Page 103: Modifications To The Product
Modem Only use a modem that has been approved by the national authority of the country in which the product is sold. Technically and in most cases, the same modem should work in all countries. Nevertheless, be advised that some countries might have strict laws which forbid the modem from being used before it is technically approved. - Page 104 Connections and Remote Earth Protected Extra Low Voltage (PELV) To ensure the extra-low voltage integrity of the equipment, only connect equipment with mains-protected, electrically-compatible circuits to the external ports. Safety Extra Low Voltage (SELV) Each input and output of this product is classified as Safety Extra Low Voltage, except the modem, which is classified as TNV-3.
-
Page 105: Power Supply And Cables
Power Supply and Cables Your notebook may come with more than one type of power cord. Please note the following identifications to ensure that you are using the right power cord in order to avoid electrical shock hazards. This power cord plug is suitable for use in Malaysia, Singapore, Hong Kong, Bangladesh and Maldives. -
Page 106: Replacing Batteries
Power Cables This equipment requires a 3-wire, grounded power cord. The cord length must not exceed 2.5 metres. To prevent electrical hazards, do not remove or disable the ground contact on the power cord. Replace the power cord if it gets damaged. Contact your dealer for an exact replacement. -
Page 107: Laser Compliance Statement
Laser Compliance Statement The optical devices are tested and certified to be compliant with the International Electro-technical Commission IEC825-1 and the European Norm EN60825-1 and the EN60825-2 regulations for Class 1 laser products. Class 1 laser products are not considered hazardous. The optical devices are designed so that there is no risk of human exposure to laser radiation above a Class 1 level during normal operation or prescribed maintenance conditions. -
Page 108: Electrostatic Discharge (Esd) And Esd Protection
Electrostatic Discharge (ESD) and ESD Protection WARNING Electrostatic Discharge (ESD) can damage disk drives, cards, memory modules and other parts. We recommend that you carry out all procedures in this guide only at an ESD-workstation. If one is not available, provide some ESD protection by wearing an antistatic wrist strap attached to any unpainted metal surface when handling parts. - Page 109 Glossary Term Definition AACS Advanced Access Content System Alternating Current ACPI Advanced Configuration and Power Interface BIOS Basic Input/Output Section Blu-ray BR-DVD Blu-ray Disc titles Compact Disc Direct Current Digital Subscriber Line Digital Video Digital Versatile Disc Economy mode Electrostatic Discharge Gigabyte (1,000,000,000 bytes) High Definition Hard Disk Drive...
- Page 110 This is a legal and binding Agreement made between you (either as an individual or as an entity) and NEC Computers Asia Pacific Sdn. Bhd. (NECCAP). This Agreement covers all software that is distributed with NECCAP’s product, for which there is no separate license agreement between you and the manufacturer or owner of the software (collectively referred to as “the Software”).
- Page 111 LIMITED WARRANTY LIMITED WARRANTY The Software is distributed and licensed “AS IS”, with no warranties whatsoever, express or implied permissible under the law. NECCAP warrants that the media containing the Software is free from defects in material and workmanship for a period of time (please refer to your warranty card/guide) from the date you receive the Software.
- Page 112 Copyright Copyright Copyright © 2008, NEC Computers Asia Pacific Sdn Bhd (418989-A) (“NECCAP”). This guide and all software described in it are copyrighted with all rights reserved. No part of this manual may be reproduced or transmitted, in any form or by any means, whether...
- Page 113 The Bluetooth word mark and logos are registered trademarks owned by Bluetooth SIG, Inc. and any use of such marks by NEC Corporation is under license. Other trademarks and trade names are those of their respective owners. HDMI, the HDMI logo and High-Definition Multimedia Interface are trademarks or registered trademarks of HDMI Licensing LLC.
- Page 114 Official Name of the Softwares used (Notation) (Official Name) ® Windows, Windows Vista Home Basic ® Windows Vista Windows Vista Home Premium ® Windows Vista Business ® Windows Vista Ultimate ® ® Windows XP, Microsoft Windows XP Home Edition Windows XP operating system Service Pack 2 Home Edition ®...