Table of Contents
Advertisement
Advertisement
Table of Contents

Related Manuals for NEC Versa Series


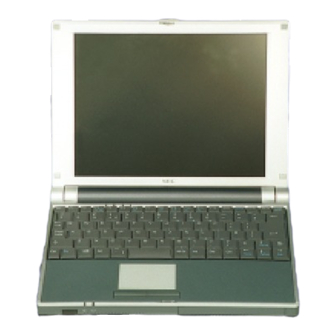
Summary of Contents for NEC Versa Series
- Page 2 NEC is a registered trademark; Versa is a U.S. registered trademark; DayLite, VersaGlide and UltraLite are trademarks; and UltraCare is a U.S. registered service mark of NEC Corporation and/or one or more of its subsidiaries. All are used under license.
-
Page 3: Table Of Contents
2 Getting Started NEC VersaGlide Touchpad... 2-2 Making VersaGlide Adjustments... 2-3 VersaGlide Tips ... 2-3 Power Sources for Your NEC Versa Notebook ... 2-3 AC Adapter ... 2-3 Connecting the AC Adapter... 2-4 Powering On Your System ... 2-6 Primary Battery Pack ... 2-6 Secondary Battery Pack ... - Page 4 5 Using the System Drives and Bays External Floppy Diskette Drive...5-2 Connecting the External Floppy Diskette Drive...5-3 Disconnecting the External Floppy Diskette Drive...5-3 External Variable-Speed CD-ROM Drive...5-3 Using the CD-ROM Drive with your NEC Versa Notebook ...5-6 Disconnecting the CD-ROM Drive...5-8 iv Contents...
- Page 5 CD Care ... 5-8 Hard Disk Drive ... 5-9 Memory Modules... 5-9 Installing a Memory Module... 5-10 6 Communicating with Your NEC Versa PC Cards ... 6-2 Type II Cards ... 6-2 Type II Extended Cards ... 6-2 Communication Cards ... 6-2 Storage Cards...
- Page 6 Video ...9-4 Using Digital Video Files...9-4 Using Animation Files ...9-5 Multimedia Applications...9-5 10 Solving System Problems Problem Checklist ...10-2 Start-Up Problems ...10-3 Post Error Messages ...10-4 Beep Codes ...10-6 If You Need Assistance...10-7 11 Getting Service and Support Service and Support Contact Information ...11-2 Web Site ...11-3 FTP Site...11-3 Support Services...11-4...
-
Page 7: Using This Guide
Using This Guide The NEC Versa need to maximize the use of your NEC Versa notebook computer. Read this guide to familiarize yourself with the NEC Versa and its features. For specific information see Chapter 1, “Introducing Your NEC Versa,” to acquaint yourself with system hardware. -
Page 8: Text Setup
Text that you must type or keys that you must press are presented in bold type. For example, type Related Documents See the NEC Versa DayLite/UltraLite Quick Setup sheet to help get your system up and running. viii Using This Guide... -
Page 9: Introducing Your Nec Versa
Introducing Your NEC Versa Before You Begin About Your NEC Versa Notebook Around the Front of the System Around the Back of the System Around the Left Side of the System Around the Right Side of the System Around the Bottom of the System... -
Page 10: Before You Begin
All information applies to both units unless otherwise specified. The coloring of your NEC Versa may vary from the units shown in this guide. The colors of the systems used in this User’s Guide are for illustrative purposes only. -
Page 11: About Your Nec Versa Notebook
Around the Front of the System The NEC Versa is compact with features on every side. First, look at the front of the NEC Versa. The following sections describe front features, beginning with the liquid crystal display (LCD) panel. -
Page 12: Lcd Panel
LCD Panel Your NEC Versa comes with a 10.4-inch color Thin Film Transistor (TFT) display that you can adjust for a comfortable viewing position. To adjust the viewing angle, gently tilt the LCD panel into position. The primary battery is located behind the display. The Versa UltraLite has an Extended Graphics Array (XGA) backlit panel. -
Page 13: Operating Status Leds
A – Hard Disk Drive B – Caps Lock — Hard Disk Drive — lights when the NEC Versa writes data to or retrieves data from the internal hard disk drive. — Caps Lock — lights when Caps Lock is on. -
Page 14: Keyboard Panel
Keyboard Panel The NEC Versa notebook’s keyboard offers the following features, which are described after the figure. A – Function Keys B – Numeric Keys C – Windows keys Function keys — Twelve function keys, Versa keyboard. These keys work together with the functions. - Page 15 How the key combination works depends on the Ctrl application you are running. , and are controls used in conjunction with other Shift ” means to hold down the Ctrl c Introducing Your NEC Versa 1-7...
-
Page 16: Front Features
Keys with blue printing on them behave differently when combined with control keys or the Front Features The front features of your NEC Versa notebook are described after the figure. A – IR Port B – Battery Charging LED Power Status LED —... -
Page 17: Around The Back Of The System
IR Port — Use this infrared (IR) port to transfer files between your NEC Versa and an IR-equipped desktop or notebook computer or to print to an IR-capable printer. Note Your NEC Versa ships with the IR port disabled. For detailed instructions on how to enable the IR port, see Chapter 6, “Communicating with Your NEC Versa.”... -
Page 18: Around The Right Side Of The System
LAN adapter cable to connect the jack to a local area network (LAN). cooling. Around the Right Side of the System The right side of the NEC Versa notebook offers the features, which are described after the figure. A – Headphone Jack/External Speakers B –... -
Page 19: Power Button
(SCSI). USB Port — The Universal Serial Bus (USB) port allows you to connect up to 127 USB-equipped peripheral devices (printers, monitors, scanners, etc.) to your NEC Versa. Kensington Lock Slot — Provides a connection for an optional Kensington Lock. -
Page 20: Around The Bottom Of The System
Around the Bottom of the System The bottom of the NEC Versa notebook offers the following features, which are described after the figure. A – Memory Module Bay B – System Feet C – Hard Drive Bay Memory Module Bay — Stores an optional memory module. -
Page 21: Getting Started
Getting Started NEC VersaGlide Touchpad Power Sources for Your NEC Versa notebook AC Adapter Primary Battery Pack Secondary Battery Pack System Batteries System Care... -
Page 22: Nec Versaglide Touchpad
NEC VersaGlide Touchpad The NEC VersaGlide is an easy way to control the cursor with your finger. Lightly glide your finger across the NEC VersaGlide and the cursor follows. The NEC VersaGlide provides standard mouse functionality, plus more. VersaGlide features... -
Page 23: Making Versaglide Adjustments
AC Adapter Use the AC adapter and power cable that came with your NEC Versa notebook to run your computer on alternating current (AC) power, or to recharge the batteries. Use the AC adapter whenever a wall outlet is nearby. -
Page 24: Connecting The Ac Adapter
Contact the local dealer to purchase the correct power cable. Connect the AC adapter as follows: Connect the AC adapter cable to the power port on the left side of your NEC Versa notebook. 2-4 Getting Started AC adapter C –... - Page 25 Do not cover or place objects on the AC adapter. Keeping the adapter clear of objects lets the adapter cool properly during use. Only use the AC adapter that comes with your NEC Versa notebook. Although other adapters look similar, using them can damage your system.
-
Page 26: Powering On Your System
The NEC Versa notebook comes with rechargeable Lithium Polymer (Li-Poly) battery behind the LCD panel. This battery is not user-replaceable. Secondary Battery Pack The NEC Versa notebook comes with a secondary rechargeable Lithium Ion (Li-Ion) battery pack that is easy to install and remove. A – Battery Connectors... -
Page 27: Determining Battery Status
Read the precautions printed on the battery. Determining Battery Status Your NEC Versa notebook system provides tools to help you keep track of the power levels of the primary and secondary batteries. If your system is configured to display the power icon on the taskbar (default setting), an electrical plug appears when the system is connected to an AC power source or a battery icon appears when the system is not connected to an AC power source. -
Page 28: Returning The Battery To Its Normal State
Leave the battery in the system and connect your NEC Versa notebook to the AC adapter and a wall outlet. If you connect the system to AC power and keep the system within standard operating temperatures, the batteries recharge in approximately 4.5 hours when off, and 8 hours when on. - Page 29 Replace the secondary battery installed in your NEC Versa notebook system as follows. Note Use the batteries in the NEC Versa notebook computer for which they are designed. Installing another manufacturer’s battery, or using a combination of very old and new batteries can deteriorate battery and equipment performance.
-
Page 30: Removing The Battery
Continue to hold the battery release latch as you slide the battery out of the system. A – Battery Bay Connectors B – Battery Bay Release Latch Insert the new battery as follows: Locate the alignment grooves on the edge of the battery. Locate the alignment grooves inside the battery bay. -
Page 31: Charging The Battery
Charging the Battery Charge the primary and secondary batteries by simply connecting your NEC Versa system to an AC power source. It takes 8 hours to fully charge the battery while the system is on, and 4.5 hours while the system is off. To monitor the charging activity, observe the battery charging LED on the front of the system. -
Page 32: Precautions For Recharging The Battery
During charging, keep the environmental temperature between 32° F and 104° F (0° C to 40° C). System Batteries Your NEC Versa notebook is equipped with a primary Lithium Polymer battery and a secondary Lithium Ion battery to help prevent data loss. Only the secondary battery is removable. -
Page 33: System Care
System Care The NEC Versa notebook is designed to be a durable, dependable system built for extensive use and travel. Follow these guidelines to maintain the condition and performance of your computer. under the following conditions: The power cord is damaged or frayed. -
Page 34: Storage Requirements
LCD screen — Carefully wipe the LCD screen with a soft cloth or a screen wipe designed for that purpose. Special screen wipes are available through your local computer dealer. System case — NEC recommends that you carefully wipe the case with a slightly damp, almost dry cloth. 2-14 Getting Started... -
Page 35: Using The Bios Setup Utility
Using the BIOS Setup Utility Introducing BIOS Setup Entering BIOS Setup Managing System Power Updating the BIOS Configuring the Switch Settings... -
Page 36: Introducing Bios Setup
Introducing BIOS Setup Your NEC Versa DayLite/UltraLite computer comes with a hardware program called BIOS Setup that allows you to view and set system parameters. BIOS Setup also allows you to set password features that protect your system from unauthorized use. -
Page 37: Bios Setup Main Menu
BIOS Setup Main Menu After you press the following. How to Use Setup The Setup utility has a Main Menu window and five top-level menus with submenus. The menu bar at the top of the Main Menu window lists the following top-level menus. Main Use the Main menu for basic system configuration. -
Page 38: Setup Key Functions
Use the keys listed in the legend bar on the bottom of the Setup menu to make the selections or exit the current menu. The following table describes the legend keys. Up or down arrow keys Left or right arrow keys F5/F6 Enter To select one of the five menus from the menu bar, use the left and right arrow keys. -
Page 39: Main Menu
Main Menu Choose the Main menu by selecting Main in the legend bar on the Main menu screen. Other Main menu options are available by selecting submenus. Use the arrow keys to select one of the Main menu options and press Enter to select a submenu. - Page 40 Menu Item Boot Display Device System Memory Extended Memory CPU Type CPU Speed BIOS Revision QuickBoot Mode 3-6 Using the BIOS Setup Utility Main Menu Items Settings (default is bold) Both, LCD, CRT Allows you to choose either display devices, or both.
- Page 41 Internal HDD Submenu Items Menu Item Type Cylinders Heads Sectors Maximum Capacity Multi-Sector Transfers Settings (default is bold) Auto, None, User When set to Auto, the values for Cylinders, Heads, Sectors, and Maximum Capacity as read only. When set to Auto, the BIOS detects what the drive is capable of, not the translation mechanism that was used to format the drive.
-
Page 42: Advanced Menu
Menu Item LBA Mode Control 32-Bit I/O Transfer Mode Ultra DMA Mode Advanced Menu Choose the Advanced menu by selecting Advanced in the legend bar on the Main menu screen. Other Advanced menu options are available by selecting submenus. Use the arrow keys to select one of the Advanced menu options and press Enter to select a submenu. - Page 43 Setting items on this menu to incorrect values can cause your system to malfunction. Menu Item BootUp Num-Lock PS/2 Mouse LCD Panel View Expansion BootUp Message Summary Screen Silent Boot I/O Device Configuration On Board Device Configuration USB Device Advanced Menu Settings (default is bold) LockOn, LockOff Selects the state for Num Lock at power on.
-
Page 44: Security Menu
Security Menu Choose the Security menu by selecting Security from the Main menu screen. Other Security menu options are available by selecting submenus. Use the arrow keys to select one of the Security menu options and press Enter to select a submenu. -
Page 45: Boot Menu
Boot Menu Choose the Boot menu by selecting Boot in the legend bar on the Main menu screen. Other Boot menu options are available by selecting submenus. Use the arrow keys to select one of the Boot menu options and press Enter to select a submenu. -
Page 46: Managing System Power
Battery Refresh Managing System Power In the Windows 2000 operating system environment, your NEC Versa manages its power resources using the Advanced Configuration and Power Interface (ACPI) while the system is powered on using AC or battery (DC) power. ACPI enables the operating system to manage the power given to each attached device and to turn off a device when not in use. -
Page 47: Windows 2000 Power Schemes
Turn off monitor — Selects the time delay before your LCD panel turns off. Turn off hard disks — Selects the time delay before your hard disk(s) power down. Power Schemes Default Setting Portable/Laptop After 15 Minutes After 5 Minutes After 30 Minutes... -
Page 48: Windows 2000 Alarms
System standby — Selects the system standby timeout period for your system when running under AC or DC power. System hibernates — Selects the system hibernate timeout period for your system when running on AC or DC power. Windows 2000 Alarms Use the Alarms screen to define the point at which the battery alarm activates. -
Page 49: Windows 2000 Advanced
Windows 2000 Advanced The Advanced window allows you to select behaviors for the taskbar icon, standby password, LCD panel, when closed, and the Power button. Parameter Always show icon on taskbar Prompt for password when computer goes off standby When I close the lid on my computer When I press the Power button on my computer... -
Page 50: Windows 2000 Power Management States
Windows 2000 Power Management States ACPI uses different levels or states of power management. The power management states occur automatically, based on the system’s default settings, or manually, when invoked. Settings are configurable to occur while on battery power or AC power. The Windows 2000 ACPI power management states include: LCD timeout —... -
Page 51: Updating The Bios
Perform the BIOS Update Obtaining the BIOS Update If you are informed that the default BIOS needs an update contact the NEC Computers Support Services at (800) 632-4525, Fax (801) 579-1552, or access the web site, www.neccomp.com to obtain a copy of the BIOS update. -
Page 52: Performing The Bios Update
A message similar to the following appears: The NEC BIOS Update Utility should not be used to modify the BIOS in a Versa system which is docked. If your Versa is docked, please exit the BIOS Update Utility, power down, and undock your Versa before running the utility. -
Page 53: Configuring The Switch Settings
Power on your computer. A CMOS Checksum message appears and prompts you to press Press to enter Setup and restore the default parameter settings. Be sure to modify any custom settings that you may have configured. Disable the BIOS flash switch. Change switch 5 back to “OFF” after completing the BIOS update. -
Page 54: Identifying The Switch Settings
The following list identifies each switch setting and its function. Switch 1 — Password override — The default setting is “OFF.” If you forget your password and cannot access the data on your NEC Versa, change the setting to “ON” and your current password is erased. - Page 55 Note The system memory expansion slot is also located here. Therefore, if you need to install/replace SO-DIMM modules, you might want to do so when the system is already disassembled. Replace the memory module bay cover and screw. Turn over the system. Follow the instructions earlier in this chapter, “Performing the BIOS Update.”...
-
Page 56: Using The Operating System And Utilities
Using the Operating System and Utilities Microsoft Windows Introduction Transmeta LongRun Utility Product Recovery CD... -
Page 57: Microsoft Windows Introduction
LAN card for network access. Your NEC Versa comes with all the software you need to get started on the most popular services available today. For a fee, online services give you access to the Internet, email, the world wide web, travel information, news reports, and more. -
Page 58: Taskbar Icons
Note Before choosing and registering for an online service, you must connect an optional modem to your system and to a working phone line. The phone line must be analog. If you are unsure what type of line you have, call your local phone company. If you are using this product outside of the United States or Canada, some online services may require a long-distance or international call. -
Page 59: Transmeta Longrun Utility
Transmeta LongRun Utility The Crusoe processor that powers your NEC Versa notebook is equipped with the LongRun power management utility. This utility automatically adjusts the clock speed and voltage of the processor based on the needs of the application. If the system is in an idle state, or doing processing that doesn’t require faster clock speeds, it automatically... -
Page 60: Product Recovery Cd
The Product Recovery CD and Utility provides you with a number of choices. Move the cursor over each selection on the NEC Product Recovery Utility screen to display a description of the selection in the window at the right side of the screen. -
Page 61: Full Disk Drive Restore
Check the Product Recovery CD title and make sure that it is the correct CD for your NEC Versa computer and operating system. Power off your system before connecting the external CD-ROM drive to your NEC Versa. Put the CD into the CD-ROM drive tray, close the drive door, and power on your system. -
Page 62: Partition Only Restore
applications installed on your system. Read the Warning screen. A warning displays indicating that your hard disk is about to be erased. Select Continue to proceed to perform a Full Disk Drive restore. If you select Back, the recovery utility returns to the prior screen which has an exit option. - Page 63 Check the Product Recovery CD title and make sure that it is the correct CD for your NEC Versa computer and operating system. Power off your system before connecting the external CD-ROM drive to your NEC Versa. Put the CD into the CD-ROM drive tray, close the drive door, and reboot your computer.
- Page 64 When the recovery process is complete, you are prompted to remove the CD from the CD-ROM drive and reboot your system. Press , click Reboot, or press Enter A series of hardware detection screens display, the system reboots, and the Windows Setup screen appears.
-
Page 65: Using The System Drives And Bays
Using the System Drives and Bays External Floppy Diskette Drive External Variable-Speed CD-ROM Drive Hard Disk Drive Memory Modules... -
Page 66: External Floppy Diskette Drive
The NEC Versa notebook ships with a standard 3.5-inch, 1.44-MB external floppy diskette drive and cable. Use the floppy diskette drive to install applications, create a BIOS update diskette, or simply copy files to and from your NEC Versa notebook computer. -
Page 67: Connecting The External Floppy Diskette Drive
Connecting the External Floppy Diskette Drive Follow these steps to connect the external floppy diskette drive to your NEC Versa system. Locate the external floppy diskette drive and cable that ships with your system. Attach the cable connector to the USB port on the NEC Versa system. - Page 68 Headphone Jack — Attach external headphones to listen to your audio CDs. (For stand-alone use, only. Do not use this headphone jack when the CD-ROM drive is connected to your NEC Versa notebook.) Volume Control — Increase or decrease the volume of your audio CDs.
- Page 69 Status LED — Lights green when powered on or connected to the NEC Versa notebook. Lights amber during data read operations. Do not eject the CD or turn off the NEC Versa notebook when the indicator lights amber. Play/Stop Button — Use this button to start or stop your compact discs.
-
Page 70: Using The Cd-Rom Drive With Your Nec Versa Notebook
Using the CD-ROM Drive with your NEC Versa Notebook Follow these steps to connect to and use the external CD-ROM drive with your NEC Versa notebook computer. Power off your NEC Versa notebook. Locate the external CD-ROM drive and cable that ship with your system. - Page 71 Slide the release latch toward the front of the CD-ROM drive to open the cover. Opening the CD-ROM drive cover A – Release Latch Put your CD, printed side up, into the circular impression in the drive. Inserting a CD Close the drive cover.
-
Page 72: Disconnecting The Cd-Rom Drive
Run the setup, installation program or other instructions provided with the software application to start or load the CD contents. Note Before recording from the external CD-ROM drive to the internal hard disk drive, disable the internal microphone. To disable the internal microphone, go to Start, Programs, Accessories, Entertainment, Volume Control. -
Page 73: Hard Disk Drive
Product Recovery CD, see Chapter 4, “Using the Operating System and Utilities.” Memory Modules Your NEC Versa computer comes standard with 64 megabytes (MB) of random access memory (RAM) on the motherboard. You can increase system memory to a maximum of 192 MB with a 128-MB memory module in the memory module bay. -
Page 74: Installing A Memory Module
Installing a Memory Module Follow these steps to install a memory module. Make sure that the system is powered off and that no peripheral devices are attached. Turn over the system and locate the memory module bay. A – Memory Module Bay Cover Remove the screw and bay cover. - Page 75 Locate the connectors and alignment notch on the SO-DIMM. Memory module features A – Connectors Locate the memory module expansion port and proceed as follows: Hold the module at a 45 degree angle and align the module contacts with the socket in the system.
- Page 76 When the edge of the module pops up and is at approximately a 60 degree angle, pull it from the socket. Removing an installed memory module Note The system switches are also located in the memory module bay. Therefore, if you need to set any system switches, you might want to do so while the system is already disassembled.
-
Page 77: Communicating With Your Nec Versa
Communicating with Your NEC Versa PC Cards Mini PCI LAN Internal Modem Internet Connections IR Port... -
Page 78: Pc Cards
40 mm deep by 9.65 mm high. This extension provides room for additional electronics as well as a location for external connectors. Communication Cards You can use both fax/modem and network PC Cards with your NEC Versa notebook. Here are some suggestions to help you get the best system performance. Note If you are using this unit outside of the United States or Canada, contact a local NEC Computers dealer for availability information. -
Page 79: Storage Cards
Storage Cards When you insert a memory or storage card in an NEC notebook computer, it appears as a unique drive as long as the system has an available interrupt for the card. Other Cards Many other kinds of PC Cards are available for notebook computers. They include the following cards: Global Positioning System (GPS) —... -
Page 80: Inserting A Pc Card
If all applications using the card are closed, services for that card are shut down. You receive a message saying that it is safe to remove the card. Press the button on the side of the PC Card in the slot. 6-4 Communicating with Your NEC Versa Inserting a PC Card... -
Page 81: Mini Pci Lan
Mini PCI LAN Your NEC Versa system may ship with an internal Mini PCI LAN that allows you to connect your system to a local area network. The internal LAN is a 10/100Base-TX interface that supports both Wake on LAN and Network Boot functions. -
Page 82: Internal Modem
Internal Modem Your NEC Versa system ships with a V.90 internal modem that allows you to connect to the Internet, send a fax, or access your email. Note When using a modem outside the U.S. and Canada, you might need an international telephone adapter, available at most electronics supply stores. -
Page 83: Internet Connections
SMTP server (for outgoing mail) IR Port The IR (infrared communication) port on the front of your system lets your NEC Versa DayLite/UltraLite computer communicate with other devices that also use infrared technology. The IR port is Infrared Data Association (IrDA) compatible. You can easily transfer files between your NEC Versa notebook and an IR-equipped desktop, or print to an IR-equipped printer without using cables. -
Page 84: Enabling/Disabling The Ir Port In Windows 2000
Enabling/Disabling the IR Port in Windows 2000 The IR port on your NEC Versa notebook ships set to Auto. An icon appears on the taskbar and provides access to the system’s infrared utility. If for any reason you want to enable (or disable) the IR port to reassign system resources, refer to the following procedure. -
Page 85: Traveling Tips
Traveling Tips Preparing for Travel Packing for Travel Using Power Connections Getting Through Customs Connecting to the Internet... -
Page 86: Preparing For Travel
AT&T’s Worldwide Calling Guide. (For more information, see the section later in this chapter, “Using Your Modem.”) Packing for Travel The following are what you should take with you when you travel with your NEC Versa. Extra fully charged batteries... -
Page 87: Using Power Connections
The United States, Canada, and most of Central and South America use 120-volt alternating current (AC). Most other countries of the world use 240-volt AC. The NEC Versa adapts to voltages ranging from 100 to 240 volts. -
Page 88: Connecting To The Internet
Connecting to the Internet Whether you are on a business trip or vacation, connecting to the Internet while you travel can be expensive and frustrating unless you are prepared. Here are some tips on how to avoid frustration and expense while on the road. Connecting Using a Modem If you have access to a standard telephone jack while you are traveling, you can probably use your modem for dial-up access to your favorite sites. - Page 89 Plug the LAN cable into your system and the LAN connector in the room or hall where you want to access the Internet. After connecting the LAN cable, connect your system to an AC power outlet (if desired) and power on your system. Try launching your browser (Microsoft Internet Explorer, or Netscape Communicator, for example): —...
-
Page 90: Using Peripheral Devices
Using Peripheral Devices External Monitor External Audio Options USB Devices... -
Page 91: External Monitor
Follow these steps to connect an external monitor to your NEC Versa notebook. Check that power to both the NEC Versa notebook and the monitor is off. Open the monitor port cover on the left side of the system. -
Page 92: External Audio Options
Connect audio jacks, like a microphone, headphones, or external speakers to the audio ports as follows. Locate the audio port that you want to use. Plug the jack into the appropriate port on the right side of the NEC Versa notebook. A – Headphone Jack... -
Page 93: Usb Devices
USB Devices Your NEC Versa system is equipped with two USB ports that increase your connectivity choices. The USB ports on your system allow you to connect up to 127 USB-equipped peripheral devices per port to your NEC Versa notebook computer. -
Page 94: Using Multimedia
Using Multimedia Audio Video Multimedia Applications... -
Page 95: Audio
CDs must be digitized before being recorded and stored on disk. You can make microphone level recordings on your NEC Versa computer using the internal microphone or an external microphone plugged into the microphone jack on the front of the system. -
Page 96: Microphone
Microphone You can capture and record sounds through the internal microphone on the NEC Versa or through an external microphone that connects to the system through the microphone port. You can record voice-overs for narration, reminders, or special instructions. See “Recording,”... -
Page 97: Using Headphones
(available at an electronics supply store) plug in through the headphone jack located on the front of the NEC Versa notebook. Adjust the volume using the function keys or through the software using the sound horn on the taskbar. -
Page 98: Using Animation Files
Using Animation Files You can create a dynamic presentation using an animation application. Animation can illustrate a concept, drive home an important point, or command attention. Graphics animation can add punch to a presentation with an animated illustration, a flashing arrow, or a flying logo. -
Page 99: Solving System Problems
Solving System Problems Problem Checklist Start-Up Problems If You Need Assistance... -
Page 100: Problem Checklist
Problem Checklist First check the items in the following list. If these items don't help, see the table that follows the list. Power is on to the computer. The electrical outlet to which your AC adapter is connected is working. Test the outlet by plugging in a lamp or other electrical device. -
Page 101: Start-Up Problems
To continue start-up procedures, press utility to set current system parameters. Note When the NEC Versa detects an error related to display devices, it cannot display on either the LCD or a CRT. The system warns you by beeping. Troubleshooting... -
Page 102: Post Error Messages
Post Error Messages The NEC Versa computer has a built-in checking program that automatically tests its components when you turn the system power on. This diagnostic test is called the Power-On Self-Test (POST). If the system finds a problem during the POST, the system displays an error message or emits a series of beep signals. - Page 103 Error in the DMA controller. Contact your NEC Computers service representative to replace the CMOS battery. DMA#1 Error Error in the first DMA channel. Contact your NEC Computers service representative for service. DMA#2 Error Error in the second DMA channel. Contact your NEC Computers service representative for service.
-
Page 104: Beep Codes
Number of Beeps 10-6 Solving System Problems Post Error Messages Resolution Parity error in an expansion slot. Contact your NEC Computers service representative to be sure that the memory module is installed correctly. The error format is: OFF BOARD PARITY ERROR ADDR(HEX) = (XXXX) XXXX is the hex address where the error occurred. -
Page 105: If You Need Assistance
NEC Computers. Note If you purchased and are using this product outside the U.S. or Canada, please contact the local NEC Computers office or their dealers for the support and service available in your country. Beep Codes Error... -
Page 106: Getting Service And Support
Getting Service and Support Service and Support Contact Information Web Site FTP Site Support Services Email/Fax to Support Services... -
Page 107: Service And Support Contact Information
Not only do these services provide information about your NEC system, they can also be used to answer your questions and help solve any problems you may have with your system, should that ever be necessary. -
Page 108: Web Site
Web Site If you have a modem or are connected to a network, you can access the NEC Computers web site. You can do this through a commercial online service or through your Internet account. The web site contains general information about NEC Computers and its products, press releases, reviews, a reseller locator, and service and support information. -
Page 109: Support Services
NEC office or dealer for the support and service available in their country.) Direct assistance is available 24 hours a day, 7 days a week. Call the NEC Computers Support Services, toll free, at support and to find out about the extended service programs available for purchase. -
Page 110: Setting Up A Healthy Work Environment
Setting Up a Healthy Work Environment Making Your Computer Work for You Arrange Your Equipment Adjust Your Chair Adjust Your Input Devices Adjust Your Screen or Monitor Vary Your Workday Pre-Existing Conditions and Psychosocial Factors... -
Page 111: Making Your Computer Work For You
Making Your Computer Work for You Computers are everywhere. More and more people sit at computers for longer periods of time. This appendix explains how to set up your computer to fit your physical needs. This information is based on ergonomics - the science of making the workplace fit the needs of the worker. -
Page 112: Arrange Your Equipment
Arrange Your Equipment Arrange your equipment so that you can work in a natural and relaxed position. Place items that you use frequently within easy reach. Adjust your workstation setup to the proper height (as described in this appendix) by lowering the table or stand that holds your computer equipment or raising the seat height of your chair. -
Page 113: Adjust Your Screen Or Monitor
If you use a mouse, position it at the same height as the keyboard and next to the keyboard. Keep your wrists straight and use your entire arm when moving a mouse. Do not grasp the mouse tightly. Grasp the mouse lightly and loosely. Adjust the keyboard height so that your elbows are near your body and your forearms are parallel to the floor, with your forearms resting on either armrests or forearm supports, in the manner described previously. -
Page 114: Vary Your Workday
Adjust the screen or external monitor's brightness and contrast controls to enhance readability. Use a document holder placed close to the screen or external monitor. Position whatever you are looking at most of the time (the screen or reference material) directly in front of you to minimize turning your head while you are typing. - Page 115 Contact a doctor if you experience pain, tenderness, swelling, burning, cramping, stiffness, throbbing, weakness, soreness, tingling and/or numbness in the hands, wrists, arms, shoulders, neck, back, and/or legs. This appendix was prepared in consultation with Dr. David Rempel of the University of California/San Francisco Ergonomics Program and Mr.
-
Page 116: Specifications
Specifications System Components Memory Map Interrupt Controllers... -
Page 117: System Components
System Components The following system component specifications are standard except where noted. Note The components that ship with the system are subject to change without notice. System Processor 600-MHz Transmeta Crusoe TM5600 microprocessor Architecture 64-bit Peripheral Component Interconnect (PCI) Random Access Memory Standard Main Memory —... - Page 118 Input/Output (I/O) Facilities Integrated industry-standard interfaces Infrared — 1 FIR VGA — 1 port, 20-pin (via CRT cable) Mono microphone — 1 port, 3-pin, Mini Pin Jack Stereo Headphones — 1 port, stereo 3-pin, Mini Pin Jack DC In — 1 port, for AC adapter cable USB ports —...
- Page 119 Keyboard Membrane 86 keys with country-specific QWERTY-key layout Function keys — 12 keys Cursor Control keys — 8 keys; arrow keys arranged in inverted T layout Numeric keypad — embedded Fn key — function key for ROM-based key functions Stroke — 2.5 mm Height —...
- Page 120 24X-Maximum/10x Minimum Variable Speed CD-ROM Drive Type — 5-inch CD-ROM Pack Average Data Transfer Rates — 1545 KB/second to 3600 KB/second Burst Transfer Rate — 16.7 MB/second, PIO mode4/DMA mode Average Access Time — 190 ms (Random) — 350 ms (Fullstroke) Interface —...
- Page 121 Battery Pack Main Battery — 9 Cell Lithium Polymer; 10.8 volts, 1800mAH Secondary Battery — 3 cell Lithium-Ion; 11.1volts, 2500 mAH Recharging Time — Approximately 8 hours when the system is on, 4.5 hours when off. Dimensions Width — 10.4 in. (264 mm) Depth —...
-
Page 122: Memory Map
Memory Map The system supports system and video shadowing, both controlled through complementary metal oxide semiconductor (CMOS). The system supports BIOS as a cacheable area with write protection. The following table shows the system's memory map. Memory Space FFFE 0000H-FFFF FFFFH FFFC 0000H-FFFD FFFFH FFFA 0000H-FFFB FFFFH FFF8 0000H-FFF9 FFFFH... -
Page 123: Interrupt Controllers
Interrupt Controllers Using interrupts, hardware can request software services. If non-Plug and Play software is being used, the interrupt may need to be moved for software application or driver compatibility. Some interrupts cannot be moved. Fifteen interrupts can be used with a cascade connection of 8259INTC x 2. -
Page 124: Frequently Asked Questions
Frequently Asked Questions External Mouse Display PC Cards Diskette Drive Booting Power Management Miscellaneous... -
Page 125: External Mouse
How can a mouse and an external keyboard be connected to the notebook at the same time? The NEC Versa DayLite/UltraLite is equipped with two USB ports that allow you to connect any combination of two USB devices, at the same time. If you purchase a USB mouse and a USB keyboard, simply plug each device into any of the USB ports on your system. -
Page 126: Pc Cards
In Setup, I disabled or reconfigured peripheral devices (like the ports or sound), yet I am unable to use the freed IRQs or I/O address resources with my PC Cards. Why? To provide a stable platform free of conflicts, NEC computers excluded some resources from PC Card use. Diskette Drive... - Page 127 Enter. What type of diskette do I use in my diskette drive? Your NEC Versa DayLite/UltraLite ships with an external 1.44-MB USB diskette drive that uses 3.5-inch high density (HD) diskettes. These diskettes are also called double-sided, high-density (DSHD) diskettes.
-
Page 128: Booting
Booting What is the difference between a warm boot and a cold boot? A warm boot restarts the system while system power is on. A warm boot is also a software reset. A warm boot clears volatile system memory and reloads the operating system. - Page 129 What is the purpose of Suspend to RAM (Standby)? You can initiate full Suspend-to-RAM by accessing Start, Shut Down, Standby. This places the system in a deeper state of “sleep” and requires that you slide the Power button forward to resume operation. Putting your system into Standby initiates the Standby power-saving mode and is a convenient way of conserving energy when you are going to be away from your system for a short period of time.
-
Page 130: Miscellaneous
What is a time-out? A time-out is the amount of time your system or a particular component is inactive. Miscellaneous How do I set the time and date? You can change the time and date in Windows 2000 as follows. Double click the time in the lower right corner of the screen. - Page 131 Why do I get a message “Insufficient memory” when I run some games? I have 64 MB of memory. The “Insufficient memory” refers to the 640 kilobytes of (DOS) base memory. Since there are drivers being loaded at power on, the amount of memory can be lower than the game requires.
- Page 132 I'm having a problem using the IR port. What can I do? Use the taskbar icon to enable the IR port. Next, enter the BIOS Setup utility to verify that the IR serial port setting contains an available COM port and IRQ setting.
-
Page 133: Glossary
Glossary AC adapter A device that connects an NEC Versa notebook computer and an AC wall outlet to provide AC power for running the system and recharging the battery. A/D conversion The process of converting an analog signal into a digital signal. - Page 134 bits per second (bps) A unit of transmission. Also called baud rate. board Printed circuit board (PCB). Board on which computer components are soldered and thin wires are printed to connect the components. boot To start up a computer. See cold boot and warm boot. An electronic circuit within a computer used for transmitting data or electrical power from one device to another.
- Page 135 CMOS Complementary Metal Oxide Semiconductor. A chip that contains nonvolatile memory in the NEC Versa notebook. CMOS is backed up by an internal battery that preserves clock/calendar data and system configuration parameters stored in CMOS. cold boot Process of starting up the computer by turning on the power. If power is already on, the process means to turn off the computer and turn it on again.
- Page 136 extended RAM The area of RAM above the first megabyte of memory in the system available for enhancing system performance. Fast Infrared, an infrared technology that sends data at 4.0 Mbit/second (4 million bits per second). FM synthesis A technique for synthesizing sound that uses a combination of modulated sine waves to produce different waveforms.
- Page 137 Technology that uses infrared waves to communicate data between the IR-equipped devices without the use of cables. The IR port on the NEC Versa is Infrared Data Association (IrDA) compatible. interface A connection that enables two devices to communicate.
- Page 138 Medium Infrared, an infrared technology that sends data at 1.152 Mbit/second (1,152,000 bits per second). mode A method of operation; for example, the NEC Versa operates in either normal or power-saving modes. modem MOdulator-DEModulator. A device that links computers over a telephone line.
- Page 139 page A type of message transmission in which a message is sent or received via modem to a paging device from a computer (with paging communications software) or telephone. parallel interface Interface that communicates multiple data bits at a time. parallel printer A printer with a parallel interface.
- Page 140 prompt A special symbol indicating the beginning of an input line. Also a message that appears on the screen indicating that the user must take a certain action. QWERTY The QWERTY keyboard, designed in the 1800s for mechanical typewriters, refers to the first six keys (QWERTY) on the top row of letters on the standard keyboard.
- Page 141 serial printer A printer with a serial interface. Serial Infrared, an infrared technology that sends data at 2.4 Mbit/second (2,400,000 bits per second). SO-DIMM Small outline dual-inline Memory Module. A small circuit board that holds memory chips. A dual in-line memory module (DIMM) has a 64-bit path. software Programs that run on a computer such as operating systems, word processors, and spreadsheets.
- Page 142 VersaGlide A small, touch-sensitive pad used as a pointing device on your NEC Versa notebook computer. With the VersaGlide, you can move your finger along the pad to move the cursor or simulate a mouse click by tapping the pad.
- Page 143 Extended Graphics Array. This high-resolution graphics standard supports 800 x 600 – 1024 x 768 pixels and up to 16 million simultaneous colors. XGA also supports non- interlaced monitors. Zoomed Video A direct high-speed connection between the video, audio, and graphics subsystems within the computer that provides the high-quality path required for smooth video playback or TV tuner transmission.
-
Page 144: Index
CD care, 5-8 CD-ROM drive, 5-3 cable, 5-5 connecting, 5-6 disconnecting, 5-8 using, 5-3, 5-6 Charging the battery, 2-11 Cleaning your NEC Versa, 2-14 Closing LCD panel, 3-15 CMOS battery, 2-12 Connecting AC adapter, 2-4 audio options, 8-3 external monitor, 8-2... - Page 145 Extending battery life, 2-8 External devices audio options, 8-3 CD-ROM drive, 5-3 floppy diskette drive, 5-2 microphone, 1-10 speakers, 9-4 FAQs booting the system, C-5 diskette drive, C-3 display panel, C-2 external mouse, C-2 miscellaneous, C-7 power management, C-5 Full restore, 4-6 Function keys, 1-6 Hard disk turning off, 3-13...
- Page 146 9-5 using external speakers, 9-4 using headphones, 9-4 using internal speakers, 9-4 VersaGlide, 1-5 NEC Computers email/fax, 11-4 FTP site, 11-3 support services, 11-4 web site, 11-3 Num lock, 1-5 Numeric keypad, 1-7 Operating status LEDs, 1-5...
- Page 147 Taskbar icon, 3-15 Technical support, 10-7 port, 1-10, 1-11, 8-4 Using AC adapter, 2-3 animation files, 9-5 main battery, 2-6 Index-4 NEC VersaGlide, 2-2 Vents, 1-12 VersaGlide adjustments, 2-3 features, 2-2 tips, 2-3 Windows 2000, 4-2 introduction, 4-2 power options, 3-12...
-
Page 148: Regulatory Statements
Regulatory Statements The following regulatory statements include the Federal Communications Commission (FCC) Radio Frequency Interference Statement, compliance statements for Canada and Europe, battery disposal and replacement information, and the Declaration of Conformity. FCC Statement for United States Only by the party responsible for compliance could void the user’s authority to operate the equipment. -
Page 149: European Community Directive Conformance Statement
Battery Replacement A lithium battery in some computers maintains system configuration information. In the event that the battery fails to maintain system configuration information, NEC Computers recommends that you replace the battery. For battery replacement information, call your NEC Computers dealer or NEC Support Services. -
Page 150: Declaration Of Conformity
NEC Computers Inc. DECLARATION OF CONFORMITY We, the Responsible Party NEC Computers Inc. 15 Business Park Way Sacramento, CA 95828 declare that the product ® ™ ™ NEC Versa DayLite /UltraLite is in conformity with part 15 of the FCC Rules.