Table of Contents
Advertisement
Quick Links
Advertisement
Table of Contents

Related Manuals for SMC Networks 2870W - annexe 1


Summary of Contents for SMC Networks 2870W - annexe 1
- Page 3 EZ Connect™ g 2.4GHz 54 Mbps Wireless Ethernet Adapter User Guide October 2003 Revision Number: 1.0 38 Tesla Irvine, CA 92618 Phone: (949) 679-8000...
- Page 4 Information furnished by SMC Networks, Inc. (SMC) is believed to be accurate and reliable. However, no responsibility is assumed by SMC for its use, nor for any infringements of patents or other rights of third parties which may result from its use. No license is granted by implication or otherwise under any patent or patent rights of SMC.
- Page 5 OMPLIANCES FCC - Class B The Federal Communication Commission Radio Frequency Interference Statement includes the following paragraph: The equipment has been tested and found to comply with the limits for a Class B Digital Device, pursuant to part 15 of the FCC Rules. These limits are designed to provide reasonable protection against harmful interference in a residential installation.
- Page 6 775 Brookfield Road, Ottawa, Ontario Canada K1A 1C1; Tel: (613) 954 -6699 / Fax:(613) 941-1734 ; e-mail: alice_mackinnon@hc-sc.gc.ca. EC Conformance Declaration - Class B SMC contact for these products in Europe is: SMC Networks Europe, Edificio Conata II, Calle Fructuós Gelabert 6-8, 2 08970 - Sant Joan Despí,...
- Page 7 OMPLIANCES Important Safety Notices • Unplug this product from the AC power before cleaning. Do not use liquid clean- ers or aerosol cleaners. Use a dry cloth for cleaning. • Route the power supply cords so that they are not likely to be walked on or pinched by items placed upon or against them.
-
Page 9: Table Of Contents
ABLE OF ONTENTS 2.4GHz 54 Mbps Wireless Ethernet Bridge..1 System Requirements ..........1 Equipment Checklist............1 Hardware Description ..... . 3 Applications. - Page 10 Maximum Distance Table ....53 Important Notice ............53 Troubleshooting......55 Technical Specification .
-
Page 11: Ghz 54 Mbps Wireless Ethernet Bridge
2.4GHz 54 Mbps Wireless Ethernet Bridge System Requirements • A web browser, such as Microsoft Internet Explorer 5.5 or above installed on one PC at your site for configuring the Wireless Ethernet Bridge • CD-ROM drive • An AC power outlet to supply power to the Wireless Ethernet Bridge •... - Page 12 Immediately inform your dealer in the event of any incorrect, missing or damaged parts. If possible, please retain the carton and original packing materials in case there is a need to return the product. Please register this product and upgrade the product warranty at SMC’s Web site: http://www.smc.com...
-
Page 13: Hardware Description
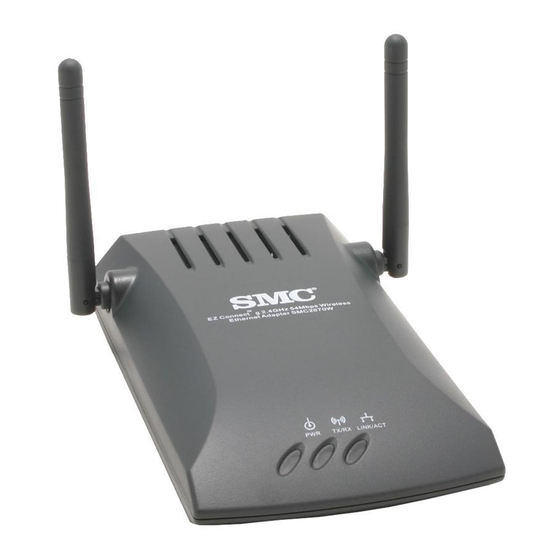
Hardware Description Hardware Description The EZ Connect™ g Wireless Ethernet Bridge supports high speed communication up to 54 Mbps. It incorporates support for PRISM Nitro which provides enhanced throughput and range. This device is fully compliant with 2.4 GHz DSSS and OFDM CSMA/CA wireless networking as defined in IEEE 802.11b and 802.11g. - Page 14 Hardware Description The EZ Connect™ g 54 Mbps Wireless Ethernet Bridge has three types of LED indicators. Please check the following picture – the front view of the Bridge and the table below, which displays the current state the specific LED signifies. Status Function Power (PWR)
- Page 15 Hardware Description Default Settings SSID Wireless SMC2870W Adapter Name IP Address 192.168.2.25 Subnet Mask 255.255.255.0 Gateway 192.168.2.1 Mode Wireless Bridge...
-
Page 16: Applications
Use this device in conjunction with SMC’s EZ Connect™ Wireless Cards to create an instant network that integrates seamlessly with Ethernet LANs. Moreover, moving or expanding your network is as easy as moving or installing additional access points –... - Page 17 Applications • Remote access to corporate network information E-mail, file transfer, and terminal emulation • Difficult-to-wire environments Historical or old buildings, asbestos installations, and open areas where wiring is difficult to employ • Frequently changing environments Retailers, manufacturers, and banks which frequently rearrange the workplace or change locations •...
-
Page 18: Understanding Wireless Security
SMC Networks’ wireless devices support the wireless security standard called Wired Equivalent Privacy (WEP) to prevent unauthorized users from accessing your network over a wireless connection. - Page 19 Understanding Wireless Security Remote Authentication Dial-In User Service (RADIUS) server, the client is allowed to join the network. If not, the client stays blocked from joining the LAN. Once the client joins the network, the authentication server distributes a TKIP encryption key to both the client and the Access Point.
-
Page 20: Hardware Installation
Hardware Installation Hardware Installation 1. Select the Site – Choose a location for your Wireless Ethernet Bridge. Usually, the best location is at the center of your wireless coverage area, if possible within line-of-sight of all wireless devices. 2. Place the Wireless Ethernet Bridge in a position that gives it maximum coverage. -
Page 21: Using The Ez Installation Wizard
Using the EZ Installation Wizard Using the EZ Installation Wizard The installation method makes the process as simple and Plug-and-Play as possible. Please be sure that you have successfully completed the steps shown in Section 6 before proceeding. 1. Insert the EZ Installation Wizard and Documentation CD. 2. - Page 22 Using the EZ Installation Wizard 3. The wizard will scan for available SMC2870W’s and then list them on the left column. Click [NEXT] to continue. 4. You will be asked to enter the password to modify the current configuration settings. By default, the username is “admin” and the password is “smcadmin”.
- Page 23 Using the EZ Installation Wizard 5. You will then be given the option to enable either “Wireless Bridge” or “Access Point” mode. If you are trying to create a new 802.11g network for your wireless clients to connect up to, please select “Access Point” and click [NEXT]. If you are trying to give an Ethernet-equipped device wireless connectivity, please select “Wireless Bridge”...
- Page 24 Using the EZ Installation Wizard 6. Wireless Bridge configuration: If you are connecting to an existing wireless network, select “Infrastructure” and enter the SSID of your network.
- Page 25 Using the EZ Installation Wizard 7. Now you will be asked to configure the Network Settings. If you are connecting to a network with a DHCP server, select “Use DHCP server” and click [NEXT]. If you do not have a DHCP server on your network, input a static IP address and click [NEXT].
- Page 26 Using the EZ Installation Wizard 8. If you have enabled Wired Equivalent Privacy (WEP) or Wi-Fi Protected Access (WPA) on your wireless network, please enter the private security key settings now. Select the drop down menus of “Security Mode” to choose between WEP and WPA.
- Page 27 Using the EZ Installation Wizard 9. Finally, please verify all the settings you have entered. If any configuration changes still need to be made, please click [BACK] and make them now. Otherwise, click [NEXT] to make the settings take effect. This will take a few seconds. Please go to Step 14.
- Page 28 Using the EZ Installation Wizard 11. Now you will be asked to configure the Network Settings. If you are connecting to a network with a DHCP server, select “Use DHCP server” and click [NEXT]. If you do not have a DHCP server on your network, input a static IP address and click [NEXT].
- Page 29 Using the EZ Installation Wizard 13. Finally, please verify all the settings you have entered. If any configuration changes still need to be made, please click [BACK] and make them now. Otherwise, click [NEXT] to make the settings take effect. 14.
-
Page 30: Configuring Your Computer
Configuring Your Computer Configuring Your Computer Using IPCONFIG 1. Click the “Start” button, click “Run” and type “command”. 2. Press “OK” and a black command prompt will appear. 3. Type “ipconfig” and press enter 4. Verify that your IP Address is 192.168.2.xxx. If so, you can now use the web interface of the SMC2870W to configure additional advanced settings. -
Page 31: Configuring Your Ip Address
Configuring Your IP Address Configuring Your IP Address Windows 98/ME Note: Some Windows 9x/ME systems will request that you insert your Windows CD in order to complete the following configuration. Please have this CD ready. 1. Click the "Start" button, choose "Settings", and then click "Control Panel". - Page 32 Configuring Your Computer 3. Select the TCP/IP that is bound to the network adapter that you are currently using to configure your SMC2870W. Click "Properties".
- Page 33 Configuring Your IP Address 4. Select the Specify an IP option and insert 192.168.2.x (where x is 2 ~ 24, 26 ~ 254). Then insert 255.255.255.0 for the subnet mask. 5. Press OK and reboot the machine when prompted to do so.
- Page 34 Configuring Your Computer Windows 2000 1. Right-click the "Network Places" icon on your desktop and click "Properties". 2. Right-click your Local Area Connection and click "Properties".
- Page 35 Configuring Your IP Address 3. Click “Internet Protocol TCP/IP” and click “Properties”. Select the "Use the following IP Address" option and insert 192.168.2.x (where x is 2 ~ 24, 25 ~254). If requested to enter a gateway and DNS, you can enter 192.168.2.1. 4.
- Page 36 Configuring Your Computer Windows XP 1. Right-click the "Network Places" icon on your desktop and click "Properties". 2. Right-click your "Local Area Connection" and click "Properties".
- Page 37 Configuring Your IP Address 3. Click “Internet Protocol TCP/IP” and click “Properties”. Select the "Use the following IP Address" option and insert 192.168.2.x (where x is 2 ~ 24, 26 ~ 254) for the IP address. If requested to enter a gateway and DNS, you can type in 192.168.2.1.
- Page 38 Configuring Your Computer 4. Click "OK" and click "Close" to continue and save the changes.
-
Page 39: Advanced Web Configuration (Wireless Bridge Mode)
Advanced Web Configuration (Wireless Bridge mode) Advanced Web Configuration (Wireless Bridge mode) Use the web management interface to define advanced system parameters, manage and control the Wireless Ethernet Bridge and its ports, or monitor network conditions. (Note: You MUST press [Save] and then [Reboot] for changes to take effect.) Browser Configuration Confirm your browser is configured for a direct connection to the Internet using the Ethernet cable that is installed in the computer. -
Page 40: Internet Explorer In Macintosh
Advanced Web Configuration (Wireless Bridge mode) 3. Click the LAN Settings button. 4. Clear all the check boxes and click OK to save these LAN settings changes. 5. Click OK again to close the Internet Options window. Internet Explorer in Macintosh 1. - Page 41 Internet Explorer in Macintosh After logging into the SMC2870W, all the System Information will be displayed. You can proceed to another configuration page using the navigational menu on the left. Note: If you know the SSID or BSSID of your desired network, you can automatically connect to it by moving your mouse over the appropriate BSSID of the network and then click the link.
- Page 42 Advanced Web Configuration (Wireless Bridge mode) Go to Wireless | Basic Settings to change the Wireless Bridge mode from Infrastructure to Adhoc, or you can also change the SSID, Channel, Transmission Rate and Wireless Mode. Note that when configured as a Wireless Bridge, changing the channel of the SMC2870W has no effect because it must connect to the network using the same channel as your Access Point.
- Page 43 Internet Explorer in Macintosh Go to Wireless | Advanced Settings in order to change the Fragmentation and RTS thresholds. (Note: It is recommended to leave these values at their default settings.) RTS Threshold: Set the RTS (Request to Send) frame length. You may configure the access point to initiate an RTS frame.
- Page 44 Advanced Web Configuration (Wireless Bridge mode) However, it is more efficient to set the fragment size larger if very little or no interference is present because it requires overhead to send multiple frames. Go to Wireless | Security to configure wireless security. If you have Wi-Fi Protected Access (WPA) security enabled on your wireless LAN, please click the [WPA enabled] checkbox and enter your pre-shared key (PSK):...
- Page 45 Internet Explorer in Macintosh Note: A passphrase can contain up to 32 alphanumeric characters. When setting up WEP without using the Passphrase function, only Hexadecimal characters (range: 0~9 and A~F) can be used. When encryption is set to 64-bit, a maximum of 10 Hex characters can be entered in the Key field.
- Page 46 Advanced Web Configuration (Wireless Bridge mode) or what it means, please review the Terminology section before continuing. Any erroneous changes made here may cause unwanted results.) In the Device Name section, you can change the name of a particular SMC2870W device. This is very useful if you have more than one SMC2870W on your network.
- Page 47 As we add functionality and future enhancements are made, firmware updates will be posted to SMC’s website. After downloading the firmware, you need to update the SMC2870W via the web interface under this Upgrade Firmware section.
-
Page 48: Advanced Web Configuration (Access Point Mode)
Advanced Web Configuration (Access Point mode) Advanced Web Configuration (Access Point mode) Use the web management interface to define advanced system parameters, manage and control the Wireless Ethernet Bridge and its ports, or monitor network conditions. Browser Configuration Confirm your browser is configured for a direct connection to the Internet using the Ethernet cable that is installed in the computer. - Page 49 Browser Configuration 4. Clear all the check boxes and click OK to save these LAN settings changes. 5. Click OK again to close the Internet Options window. Internet Explorer in Macintosh 1. Open Internet Explorer. Click Explorer/Preferences. 2. In the Internet/Explorer/Preferences window, under Network, select Proxies.
- Page 50 Advanced Web Configuration (Access Point mode) After logging into the SMC2870W, all the System Information will be displayed. You can proceed to another configuration page using the navigational menu on the left. Go to the Status | Associations page to view all the wireless clients that are connected to your SMC2870W.
- Page 51 Browser Configuration associate to the SMC2870W. The supported modes are Mixed (11b+11g), Long Range Mixed (11b+11g), 11g Only, and 11b Only.
- Page 52 Advanced Web Configuration (Access Point mode) Go to Wireless | Access List to enter specific MAC Addresses that are allowed to connect to the SMC2870W. This function gives you added security without the overhead and increased processing that WEP or WPA may require.
- Page 53 Browser Configuration Go to Wireless | Repeater to make use of the repeating functionality to extend the wireless range of your network. (Note: You need at least two SMC2870W units in order to successfully enable repeating on your wireless LAN) This function makes use of Wireless Distribution System (WDS) technology.
- Page 54 Advanced Web Configuration (Access Point mode) Go to Wireless | Advanced Settings in order to change the Fragmentation and RTS thresholds. (Note: It is recommended to leave these values at their default settings.) RTS Threshold: Set the RTS (Request to Send) frame length. You may configure the access point to initiate an RTS frame.
- Page 55 Browser Configuration Fragmentation Threshold: If the packet size is smaller than the preset Fragment size, the packet will not be segmented. Fragmentation of the PDUs (Package Data Unit) can increase the reliability of transmissions because it increases the probability of a successful transmission due to smaller frame size.
- Page 56 Advanced Web Configuration (Access Point mode) pre-shared key (PSK) if you want to enable Wi-Fi Protected Access (WPA) security on your wireless LAN. You can also set the “WPA Group Key Update Interval” value. This specifies how often the wireless encryption keys are dynamically changed and clients re-authenticate.
- Page 57 Browser Configuration If you have a RADIUS server on your network, you can configure the SMC2870W to use it for the purpose of authenticating clients to your wireless LAN. Simply click the [802.1x enabled] checkbox and enter your settings: Please click the [Enable WEP] checkbox if you want to enable Wired Equivalent Privacy (WEP) security on your wireless LAN.
- Page 58 Advanced Web Configuration (Access Point mode) Note: A passphrase can contain up to 32 alphanumeric characters. When setting up WEP without using the Passphrase function, only Hexadecimal characters (range: 0~9 and A~F) can be used. When encryption is set to 64-bit, a maximum of 10 Hex characters can be entered in the Key field.
- Page 59 Browser Configuration Go to System | IP Settings to change additional advanced settings. (Note: If you are not sure how to use a particular setting or what it means, please review the Terminology section before continuing. Any erroneous changes made here may cause unwanted results.) In the top portion, you can configure the unit with a static IP or set it up to use Dynamic Host Configuration Protocol (DHCP).
- Page 60 As we add functionality and future enhancements are made, firmware updates will be posted to SMC’s website. After downloading the firmware, you need to update the SMC2870W via the web interface under this Upgrade Firmware section.
-
Page 61: Advanced Telnet Configuration
Advanced Telnet Configuration In addition to an EZ Installation Wizard and a Web-based Management Utility, SMC Networks also gives you the ability to manage the SMC2870W via Telnet. All of the settings that are available via the Web-based Management are also made available in the Telnet session. You can use the standard Telnet or Hyperterminal programs built into Windows to manage the SMC2870W. - Page 62 Advanced Telnet Configuration 3. You will be asked to enter your Username and Password before you can log in. 4. You are now successfully logged into you SMC2870W and able to change settings. Note: Remember that any erroneous changes here can cause unwanted operation and results.
-
Page 63: Maximum Distance Table
800.SMC.4YOU. SMC Networks stands behind every product sold with a 30-day satisfaction guarantee and a limited-lifetime warranty. - Page 64 Maximum Distance Table 802.11b Wireless Distance Table Environmental Speed and Distance Ranges Condition 2 Mbps 1 Mbps Mbps Mbps Outdoors: A 220m 340m 420m 520m line-of-sightenvironment (722 ft) (1115 (1378 (1706 with nointerference or obstructionbetween the Access Pointand users. Indoors: A typical office orhome environment (164 ft) (213 ft)
-
Page 65: Troubleshooting
Troubleshooting Troubleshooting 1. My PC won’t communicate with a PC or printer connected to the EZ Connect™ g Wireless Ethernet Bridge. • Perform the following steps: a)Verify if the PC or printer connected to the Wireless Ethernet Bridge is on the same wireless network by checking the IP configuration. - Page 66 Troubleshooting c)Verify that the LINK/ACT LED is lit. If this LED is not lit, confirm you are using a crossover Ethernet cable 3. I cannot access the web based management. a)Make sure that you have a network adapter installed on the PC so you can access the web based management b)Verify that you are on the same IP network as your SMC2870W.
-
Page 67: Technical Specification
Technical Specification Technical Specification Standards: IEEE 802.11b / IEEE 802.11g Wireless Data Rates (With Automatic Fall-back): 802.11b = 1/2/5.5/11 Mbps 802.11g = 6/9/12/18/24/36/48/54 Mbps Data Modulation Techniques: 802.11b (DSSS) = BPSK, QPSK, CCK 802.11g (OFDM) = BPSK, QPSK, 16-QAM, 64-QAM Operating Range: Up to 1,700 ft Radio Signal Type:... - Page 68 Technical Specification Channel Support: US/Canada - 1-11 Europe - 1-13 Japan – 1-14 RF Output Power: 17dBm +/- 1dBm Antenna Type: Two External Dipole Dimensions: 6.3 x 1.2 x 4.7 in Compliance: USA: FCC Part 15 subpart C and Class B Europe: ETSI 300.328/301-489-17 Industry Canada IDA (Singapore)
- Page 69 Technical Specification 802.11g 10% PER@6Mbps?-88dBm 10% PER@9Mbps?-87dBm 10% PER@12Mbps?-84dBm 10% PER@18Mbps?-82dBm 10% PER@24Mbps?-79dBm 10% PER@36Mbps?-75dBm 10% PER@48Mbps?-69dBm 10% PER@54Mbps?-68dBm...
-
Page 70: Terminology
Terminology Terminology 10BaseT - Physical Layer Specification for Twisted-Pair Ethernet using Unshielded Twisted Pair wire at 10Mbps. This is the most popular type of LAN cable used today because it is very cheap and easy to install. It uses RJ-45 connectors and has a cable length span of up to 100 meters. - Page 71 192.34.45.8). A DNS server keeps a database of host computers and their respective domain names and IP addresses, so that when a domain name is requested (as in typing " www.smc.com" into your Internet browser), the user is sent to the proper IP address.
- Page 72 Terminology messages are transported between a wireless station and an 802.1X Authenticator using EAPOL. The EAP messages are sent between an 802.1X Authenticator and the Authentication Server using RADIUS. The EAP framework supports the definition of EAP-Type Authentication Methods. Today, the major EAP-Type Authentication Methods include EAP-MD5, EAP-TLS, EAP-TTLS, EAP-PEAP, and Cisco’s EAP-LEAP.
- Page 73 Terminology Fast Ethernet NIC - Network interface card that is in compliance with the IEEE 802.3u standard. This card functions at the media access control (MAC) layer, using carrier sense multiple access with collision detection (CSMA/CD). Fixed IP – (see Static IP) Full-Duplex - Transmitting and receiving data simultaneously.
- Page 74 Terminology Diskless and floppy-only workstations are sometimes used, which retrieve all software and data from the server. Increasingly, "thin client" network computers (NCs) and Windows terminals are also used. A printer can be attached locally to a workstation or to a server and be shared by network users.
- Page 75 Terminology more flexible management by allowing you to change internal IP addresses without affecting outside access to your network. NAT must be enabled to provide multi-user access to the Internet or to use the Virtual Server function. Packet Binary Convulational Code( ) (PBCC) - A modulation technique developed by Texas Instruments Inc.
- Page 76 Terminology clients and access points. Then it combines the temporal key with the client's MAC address and adds a 16-octet initialization vector to create the key that will encrypt the data. This procedure ensures that each station uses different key streams to encrypt the data.
- Page 77 FOR TECHNICAL SUPPORT, CALL: From U.S.A. and Canada (24 hours a day, 7 days a week) (800) SMC-4-YOU; Phn: (949) 679-8000; Fax: (949) 679-1481 From Europe : Contact details can be found on www.smc-europe.com o www.smc.com INTERNET E-mail addresses: techsupport@smc.com european.techsupport@smc-europe.com...