Creative SOUND BLASTER WIRELESS RECEIVER - User Manual
Wireless receiver
Hide thumbs
Also See for SOUND BLASTER WIRELESS RECEIVER -:
- Reference manual (100 pages) ,
- User manual (70 pages) ,
- Getting started manual (61 pages)
Table of Contents
Advertisement
Advertisement
Table of Contents

Related Manuals for Creative SOUND BLASTER WIRELESS RECEIVER -


Summary of Contents for Creative SOUND BLASTER WIRELESS RECEIVER -
- Page 1 ® Sound Blaster Wireless Receiver User’s Guide...
- Page 2 Congratulations! ® Your Sound Blaster Wireless Receiver complements Creative transmitters like Sound Blaster Wireless Transmitter and Sound Blaster X-Fi™ Notebook. Together, your receiver and transmitter enable you to enjoy high-quality music, wherever you are in your home, wirelessly. You can also expand your wireless system by adding on other Sound Blaster Wireless devices.
-
Page 3: About Your Receiver
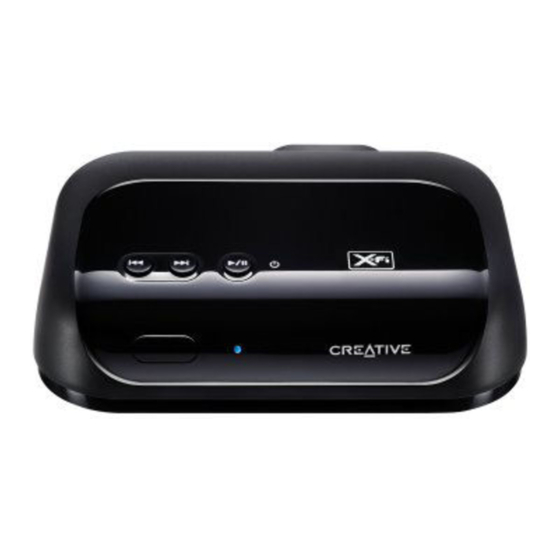
About Your Receiver 2 About Your Receiver Power/Standby and Play/Pause button Press to turn on. Press and hold to enable Standby mode. Next/Fast forward button Press and hold to Fast forward. Previous/Rewind button Press and hold to Rewind. Infrared receiver Power LED See “Understanding the Power LED”... -
Page 4: About Your Remote Control
About Your Remote Control 3 About Your Remote Control Your remote control has an operating distance of up to three meters (approximately 9.8 feet). To remove and replace the remote control’s battery, see “Replacing the remote control battery” on page 15. Power/Standby ®... -
Page 5: Setting Up Your Receiver
Setting Up Your Receiver 4 Setting Up Your Receiver Step 1: Position your receiver You can pair (connect wirelessly) your transmitter and receiver before positioning your receiver. Once paired, place your receiver up to 30 meters away from your transmitter. NOTE Signal quality between the transmitter and receiver may be affected by any object or structure (for example, multiple walls) that is... - Page 6 Follow these steps to enable the device’s wireless features: Launch Entertainment Mode. To do this, click Start -> Programs -> Creative -> Sound Blaster X-Fi Notebook -> Creative Console Launcher. Click the Wireless Music Control button. Select the Enable Wireless Music Control check box.
- Page 7 Turn on your receiver and Auto Pair 6 Step 4: Turn on your receiver and Auto Pair Your transmitter and receiver pair (connect wirelessly) automatically when turned on. The Link LED, at the back of the receiver, flashes and then lights up green when pairing is successful.
- Page 8 Play and stream music from transmitter 7 Step 5: Play and stream music from transmitter Play music on your transmitter and broadcast music to your receiver. BASS TREBLE VOLUME AUX IN Setting Up Two or More Receivers Repeat Steps 1 to 2 in “Setting Up Your Receiver” on page 4. In Step 4, turn on all your receivers.
-
Page 9: Manual Pairing
Manual Pairing 8 Manual Pairing This section shows you how to pair your transmitter manually with two to four receivers. If you wish to use zone control, you must pair your units manually. For more information about broadcasting and zone control, see “Using Your Wireless Features”... - Page 10 Press the Connect button on your first receiver 9 Step 2: Press the Connect button on your first receiver This must be done within three minutes after pressing the Connect button on the transmitter (Step 1). Once the transmitter and receiver are paired successfully, the Link LED on both units light up green and remain on.
- Page 11 Press the Connect button on your transmitter again 10 Step 3: Press the Connect button on your transmitter again The transmitter’s Link LED flashes. Refer to the diagram in Step 1. Step 4: Press the Connect button on your second receiver Refer to the diagram in Step 2.
-
Page 12: Using Your Wireless Features
Using Your Wireless Features 11 Using Your Wireless Features Use the transmitter software installed on your computer to control your receivers remotely from your transmitter. Broadcasting Broadcasting can be used on any number of paired receivers. This feature enables you to activate or deactivate all paired receivers simultaneously. Sound Blaster Wireless Transmitter... -
Page 13: Zone Control
Using Your Wireless Features 12 Zone Control Zone control is limited to the first four manually paired receivers. This feature enables you to activate or deactivate each paired receiver individually. Sound Blaster Wireless Transmitter Transmitter Receiver Sound Blaster X-Fi Notebook... - Page 14 Using Your Wireless Features 13 For Sound Blaster Wireless Transmitter In Sound Blaster Wireless Control Panel, click the Zone button, and then click the zones assigned to the receivers you want to activate or deactivate. Clicking the Zone button will put the activated zones/receivers on standby.
-
Page 15: Other Information
Other Information 14 Other Information Understanding the Power LED Behavior Status White Stable Turned on and ready for use Continuous slow flashing Not detecting any signal or signal is weak Stable In Standby mode Quick flashing (twice) Receiving remote control signals Continuous slow flashing Muted Understanding the Link LED... -
Page 16: Replacing The Remote Control Battery
Other Information 15 Press and hold the Previous/Rewind and Next/Fast forward buttons on your receiver together for five seconds. The Power LED goes off for two seconds before lighting up again. NOTE The receiver pairs with your transmitter automatically if both return to factory default settings. -
Page 17: Troubleshooting
Troubleshooting 16 Troubleshooting Here are some tips if you encounter these problems. There is no sound from the speakers that are connected to the receiver. Check the following: • The Connect LEDs are lit up. Else see the following troubleshooting tip. •... - Page 18 Troubleshooting 17 My receiver seems to be picking up extra noise, or there are intermittent pauses. The position of your Sound Blaster Wireless devices as well as signals from other wireless routers or Bluetooth equipment may affect the quality of the transmissions.
- Page 19 • In the Remote Control Settings application, ensure that the Enable control of Windows Application check box is selected. To launch this application, click Start -> All Programs -> Creative -> Remote Control Settings. • The media player that you are using must be the highlighted window for the playback functions to work.
- Page 20 Troubleshooting 19 (For Sound Blaster X-Fi Notebook only) When I switch my recording source from Mic In to Line In in Entertainment Mode, the wireless connection is lost. When the recording source is changed to Mic In, wireless music control is automatically disabled so that input from the microphone (for example, a private internet voice conversation) will not be unintentionally streamed to all paired receivers.
-
Page 21: General Specifications
General Specifications 20 General Specifications Connectivity • Audio Line Out - 3.5 mm (1/8") Stereo jack • RCA Audio Line Out jacks Power Adapter • Supply Voltage: 5V +/- 5% • Current: 1 A • Power: 5 W Radio Frequency (RF) •... -
Page 22: Safety Information
Safety Information 21 Safety Information Refer to the following information to use your product safely, and to reduce the chance of electric shock, short-circuiting, damage, fire, hearing impairment or other hazards. Improper handling may void the warranty for your product. For more information, read the warranty available with your product. - Page 23 Do not attempt to remove the embedded battery. The product must be disposed of according to local environmental regulations. To replace the battery, return your product to your regional support office. For product service information, go to www.creative.com. Removable Battery •...
- Page 24 Safety Information 23 WEEE DIRECTIVE 2002/96/EC The use of the WEEE Symbol indicates that this product may not be treated as household waste. By ensuring this product is disposed of correctly, you will help protect the environment. For more detailed information about the recycling of this product, please contact your local authority, your household waste disposal service provider or the shop where you purchased the product.
-
Page 25: Declaration Of Conformity
Declaration of Conformity 24 Declaration of Conformity According to the FCC96 208 and ET95-19 Manufacturer/Importer's Name: Creative Labs, Inc. Manufacturer/Importer's Address: 1901 McCarthy Boulevard Milpitas, CA. 95035 United States Tel: (408) 428-6600 declares under its sole responsibility that the product... -
Page 26: Regulatory Information
Regulatory Information 25 Regulatory Information Notice for the USA FCC Part 15: This equipment has been tested and found to comply with the limits for a Class B digital device, pursuant to Part 15 of the FCC Rules. These limits are designed to provide reasonable protection against harmful interference in a residential installation. -
Page 27: California Proposition 65 Statement
With Creative's products, the exposure may be below the Proposition 65 level of concern, or could even be zero. However, out of an abundance of caution, Creative has elected to place the Proposition 65 warning on its products. -
Page 28: Notice For Canada
Regulatory Information 27 Notice for Canada This Class B digital apparatus complies with Canadian ICES-003. Operation is subject to the following two conditions: This device may not cause harmful interference, and This device must accept any interference received, including interference that may cause undesired operation. -
Page 29: European Compliance
Information in this document is subject to change without notice and does not represent a commitment on the part of Creative Technology Ltd. No part of this manual may be reproduced or transmitted in any form or by any means, electronic or mechanical, including photocopying and recording, for any purpose without the writtn permission of Creative Technology Ltd.