
Related Manuals for VDO CD 4402


Summary of Contents for VDO CD 4402
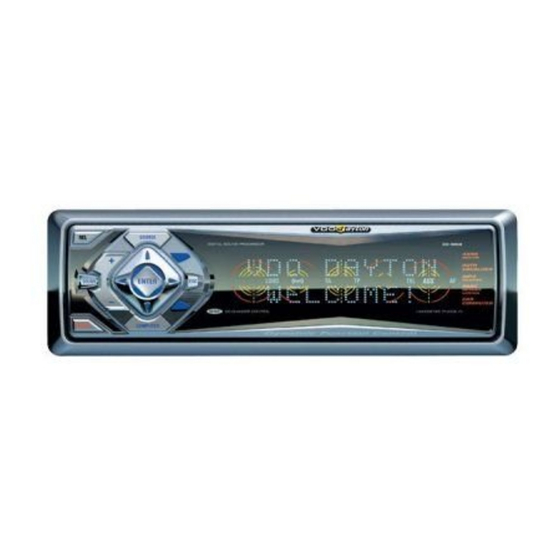
- Page 1 CD4402, CD4502 CD4802, CR4402 User manual Mode d’emploi Bedienungsanleitung Gebruiksaanwijzing Istruzioni d’uso Instrucciones de manejo Modo de emprego Bruksanvisning Betjeningsvejledning Käyttöohje www.vdodayton.com...
- Page 2 MUTE MUTE Key Mute the selected source MAIN MENU... Chimes lvl Scan Time Logic Auxiliary Warn. LED Chimes set Phone Phone lvl TA Volume Phone Vol. Nav lvl Brightness SDVC type Install SOURCE SOURCE Key SOURCE MENU... Tuner CD/Tape/MP3 Auxiliary ANNOUNCE MENU...
- Page 3 1 - POWER 6 - DISPLAY 2 - REL 7 - ENTER 3 - + / - 8 - SOUND 9 - COMPUTER 10 - MUTE 5 - SOURCE 11 - ESC...
- Page 4 SOUND SOUND Key SOUND MENU... Bass DSC Style EQ Style Treble Balance Fader Subwfr vol Sound Setup SOUND INIT Sound Reset Loud Low Loud High Treb Freq. Bass Freq. MENU... Leveller Subwoofer Sub ampli Auto EQ Customize COMPUTER COMPUTER Key CAR COMPUT Time Clock...
- Page 5 FL FL SDVC FL FL +12V Subwoofer +12V not used + Subwoofer SELECT MODE Recall RDS Program aux IN temp. sensor remote control telephone subwoofer C1' C2' C1, C2, C3, D1 and D2 connectors are accessories sold separately (see your dealer). JIN brackets are sold separately (see your dealer).
-
Page 6: Table Of Contents
Metal Sleeve ..... .4 INTRODUCTION Car Radio ......4 Equipments . -
Page 7: General Information
INSTALLATION GENERAL INFORMATION If your car is fitted with fully ISO connectors, With this VDO-DAYTON set, you have a high- you can directly install the car radio. performance car radio which can be connec- If your car's connectors comply with other ted to various accessories to empower the standards, see your dealer to obtain specific functionality of your system. - Page 8 b-Optional connections The four loudspeakers should be connected as follows: Electronic or Motorised Antenna Front Rear Connect to pin A5 the power supply for an Right (+) Grey wire B3 Blue wire B1 electronic antenna or the control wire for the Right (-) Grey/black Blue/black...
-
Page 9: Mounting
Wired Remote Control Navigation Interface Use the Pins 8 & 9 to connect remote control Use the Navigation interfaces (Pins 21 & 25) accessories. to transmit TMC data to your VDO-DAYTON Navigation system. c-Blue Connector C3 Output Subwoofer Amplifier Cable used for separately available CD chan- ger (see Fig.6). -
Page 10: Equipments
Removing the radio 2- Insert antenna connector E in the antenna socket (good reception is only possible (see Fig.14) with a good antenna) : use the antenna You can unlock the radio using the two left adapter if necessary. Use the J hook on and right U-brackets provided. -
Page 11: Security
Installing a subwoofer Replacing the front As a major element of your sound reproduc- Put the right side whole of the front into tion system, you can install a subwoofer. the socket of the set. Two main configurations are offered: Push the left side of the front into place until it clicks into position. -
Page 12: Precautions
Warning: In case, you have connec- 4- Select SPD CALIB. with the keys. ted a subwoofer to your installation, 5- Press ENTER to calibrate the set: a short deconnect this one before launching message is displayed. the calibration process. 6- After having launched this calibration, drive to 30 miles. -
Page 13: Main Functions
Note 2 2 : Some cars, mobile phones or navi- MAIN FUNCTIONS gation system can automatically interrupt the audio output if they are linked to the set. Switching On/Off c-Wake up The car radio can be used as an intermediate Press POWER to switch the set ON or OFF. -
Page 14: Selecting Chimes
3- Use the keys, to select ON (default va- 5- Use the keys to select a bleep which will be associated to the previously selec- lue) or OFF. ted chime type. 4- Press ESC to enter the value. 6- Press ESC to enter the value. Note : The set will turn OFF after 1 hour or if Setting the Message Audio Level the battery voltage becomes <... -
Page 15: Tuner
Setting a Navigation System 1- Long press MUTE. 2- Select BRIGHTNESS with the arrows. This function enables/disables the navigation 3- Use the arrows to select a value. messages detection for the car radio. 4- Press ESC to enter the value. 1- Long press MUTE. -
Page 16: Scanning Stations Or Presets
3- Select the stations memorised in the pre- This one gives you direct access to preselected sets with the keys: types of program (e.g. News, Affairs, etc). - FM 1,2,3. Manual presets FM 1- Short press ENTER. - FM memo RDS alphabetical list 2- Select PTY SEARCH with the keys. -
Page 17: Tuner Initialisation Menu
Naming a Radio Frequency Moving to the Main Menu Use this function to name a radio frequency Use this function to get the Main Menu. with a maximum of 12 letters for each title: 1- Short press ENTER. this name will be displayed during playback. 2- Select SAM with the keys. -
Page 18: Cd, Cdc Or Mp3 Player
SOURCE key to select CD. Listening to MP3 files* Note 2 2 : During playback the screen shows All VDO Dayton are ISO/DIN compliant, ma- manually entered name of the disk (see TITLE king them an easy fit in most dashboards. -
Page 19: Cd/Mp3 Menu
Displaying CD Text* The CD-MP3 supports: 1- Sampling frequency: 32 kHz, 44,1 kHz or Some discs can deliver CD text information: 48 kHz. track title and highlight scan information (disc 2- Fixed bit rate as well as variable bit rates: title only delivered for the first 20 tracks of the 32 kbit/s to 320 kbit/s. -
Page 20: Tape
Moving to the Main Menu 6- At the end of the word, select [ Use this to directly move to the Main Menu. 7- Press ENTER to confirm the name. 1- Short press ENTER. Note 1 1 : The title is attributed when all charac- 2- Select SAM with the keys. -
Page 21: Tape Menu
3- Remove the cassette and close the front. DAB* / ** Note : In eject error case, the tape is reloaded. TAPE MENU You can set the digital radio stations parame- ters after selecting the DAB source. Then by 1- Press the SOURCE key to select TAPE. either a short or long press on ENTER key, you 2- Short press ENTER to get the TAPE MENU. -
Page 22: Audio
Searching a Program Type AUDIO It is possible to search for DAB stations using PTY code (Programme TYpe), which gives you direct access to preselected types of program You can set the audio options by either a (e.g. News, Business, Sports, etc). short or long press on the SOUND key. -
Page 23: Setting The Balance (Rf Speakers)
3- Use the keys to select one predefined 3- Use the keys to adjust the setting: Rear +1 to +9, Middle, Front +1 to 9. styles: Auto EQ, Custom1, ..., Custom5. 4- Press ESC to enter the value. 4- Press ESC to enter the value. Note : In phone in and navigation in sources, Setting the Bass Level this setting is fixed and cannot be changed. -
Page 24: Sound Init Menu
Resetting the Sound Init Switching the Automatic Leveller This function allows to completely reset the This function allows an automatic levelling sound init parameters. between the different sources (including only 1- Long press SOUND. tuner, DAB, CD, CDC, and Tape ; excluding 2- Select SOUND RESET with the keys. -
Page 25: Car Computer
Customizing the Sound Reproduction 3- Use the keys to display the total driven Use this function to tune the front/rear spea- time (TOT) or the trip time (TRIP). kers to your own convenience by setting for 4- Press ESC to enter the value. each the amplitude level of the five available frequency bands. -
Page 26: Car Computer Initialisation
Moving to the CC Init Menu 3- Use the keys to choose 12 H or 24 H Use this function to move to the Init Menu. (default value). 1- Short press COMPUTER. 4- Press ESC to enter the value. 2- Select COMP. INIT with the keys. -
Page 27: Announcements
Setting the Speed Warning Starting the Speed Calibration Use this function to set the speed value for Use this function to start speed calibration. warning, if you exceed this value. 1- Long press COMPUTER. 1- Long press COMPUTER. 2- Select SPD CALIB with the keys. -
Page 28: Animations
3- Use the keys to set the function: ON ANIMATIONS (default value) or OFF. 4- Press ESC to enter the value. You can reach the Animations Menu by a long Note : You cannot open the TMC if the Traffic press on DISPLAY key (see cover pages). -
Page 29: Setting The Screen Saver Time
Setting the Screen Saver Time This function allows you to configure the time for activating the screen saver. 1- Long press DISPLAY. 2- Select TRIGGER with the keys. 3- Use the keys, to select: None (default value), 10, 30 or 60 sec. 4- Press ESC to enter the value. -
Page 30: Setting Values
SETTING VALUES Main Menu 34 arrows v arrows Select scan duration for CD tracks or radio stations 5 seconds / 10 seconds / 15 Scan time seconds Activate/deactivate ON/OFF Logic function limiting use of the On / Off Logic installation to 1 after removal of ignition key Activate/deactivate auxiliary source On / Off Auxiliary... - Page 31 Tuner Init Menu 34 arrows v arrows Select the scan type Stations / Presets Scan type Select the search level Distant / Local Search lvl Adjust the tuner to the continent USA, EURO, ASIA Tuner CD, CDC and MP3 Menu 34 arrows v arrows Activate/Deactivate the scan track...
- Page 32 Sound Init Menu 34 arrows v arrows Reset the sound parameters Reset Amplification level to be activated (LOUDNESS in low freq.) 0 / Level 1 / Level 2 / Level 3 Loud Low Amplification level to be activated (LOUDNESS in high freq.) 0 / Level 1 / Level 2 / Level 3 Loud High Select bass frequency threshold...
-
Page 33: Accessories
Animations Menu 34 arrows v arrows Activate/deactivate the display animation On / Off Animations Select a bargraph related to the first layer Fill Peak / Peak Hold / Propeller Analyser 1 / Analog / Magic Eyes / Bass Eyes / Off Select a bargraph related to the second layer Bargraph1 –... - Page 34 SYMPTOMS CAUSE/REMEDY NO POWER Verify: The radio does not function. > the set is well inserted in the dashboard (see MOUNTING). > the set is well connected (see Installation Card and INSTALLATION) The set does not function and the display >...
-
Page 35: Radio Reference
RADIO REFERENCE May be, it will happen that you cannot find an expected function. So, before calling for service, please check this table and review carefully the functions which work with your reference car radio. CD4402 CD4502 CD4802 CR4402 Source Functions Listening MP3 files Displaying CD text... - Page 36 Naming the CD ....14 Setting the balance (LR speakers) . . .18 Playback ..... . .15 Setting the balance (RF speakers) .
- Page 37 Switching the Warning LED ..9 Updating RDS Dynamic Memory ..22 Using radio when not running ..8 Using Remote Control** ...5 Using the Radio Interface .
- Page 38 Car M M ultimedia S S ystems VDO D D ayton T T he C C ar B B rand 3111 115 34291.1 06/01 fr...