Table of Contents
Advertisement
Advertisement
Table of Contents

Related Manuals for Singer 5040


Summary of Contents for Singer 5040
- Page 1 Instruction Manual...
-
Page 2: Table Of Contents
Contents For European territories Inserting a zipper Important safety instructions Zig-zag stitching Getting to know your machine Needle position selector Stitch width selector Principal parts Adjusting stitch length Accessories Pattern groups selection Flexi-stitch patterns Connecting the machine Balancing flexi-stitches Running the machine Pattern stitching Choosing and changing needles Removing and replacing pattern module... - Page 3 Dear Customer, DANGER We recommend that for future reference you To reduce the risk of electric shock: record the Serial Number of your Sewing Machine in the space provided. • The machine should never be left unattend- ed when plugged in. Always unplug the Refer to illustration for location of Serial machine from the electric outlet immediately Number on your machine.
- Page 4 WARNING continued... • Disconnect the power-line plug from the • When sewing, keep fingers away from all socket outlet or switch the machine off when moving parts. Special care is required making any adjustments in the needle area, around the sewing machine needle. such as threading needle, changing needle, changing throat plate or changing presser •...
-
Page 5: For European Territories
For European Territories: This product is suppressed for radio and tele- Neither core is to be connected to the earth vision interference with the International terminal of a three-pin plug. Electrotechnical Commission requirements of the CISPR. • Do not use outdoors Machines for Great Britain: •... -
Page 6: Getting To Know Your Machine
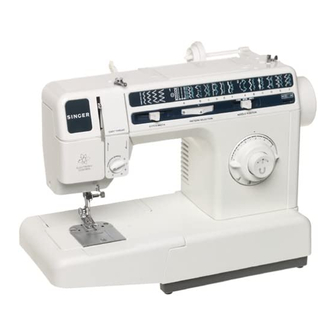
Getting to know your machine Principal parts 16. Thread guides 1. Hand wheel 17. Push button reverse 2. Bobbin winder 18. Stitch length dial/four-step buttonhole 3. Horizontal spool pin and holder 19. Stitch width lever 4. Top cover lid 20. Pattern selector dial 5. -
Page 8: Accessories
Accessories The following accessories furnished with your 5. Zipper foot (E) is used for inserting zip- sewing machine are designed to simplify your pers and stitching corded seams. sewing projects and increase the versatility of your machine. 6. Friction free spool holder is used to hold various size spools and allows thread to The letter in a circle adjacent to the illustrated unwind smoothly. -
Page 9: Connecting The Machine
Connecting the machine Push plug into the receptacle (1) at the right end of the machine. Then connect plug (2) to your socket outlet. -
Page 10: Running The Machine
Running the machine To turn on machine and sewing light, press upper portion of power switch. To turn off machine and light, press lower portion "O" of power switch. To run the machine and control speed, press the foot control with your foot. The harder you press, the faster the machine will sew. -
Page 11: Choosing And Changing Needles
Choosing and changing needles • Raise needle to its highest position. • Loosen needle clamp screw and remove needle. • With flat side of needle to the back. Insert new needle up into clamp as far as it will go •... -
Page 12: Changing Screw-On Presser Feet
Changing screw-on presser feet (H) • Raise needle and presser foot. • Loosen presser foot screw (1) and remove presser foot with shank (2), guiding it toward you and to the right. • To replace presser foot with shank, hook shank around the presser bar and tighten presser footscrew with the use of a coin. -
Page 13: Changing Snap-On Presser Feet
Changing snap-on presser feet (B), (D), (J), (L) • Raise needle to its highest position by turn- ing hand wheel toward you. • Raise presser foot using presser foot lifter at back of machine. • Push toe of presser foot (1) up, until it snaps off the shank (2). -
Page 14: Fabric, Thread And Needle Table
Fabric, thread and needle table The needle and thread you choose will depend upon the fabric being sewn. The table below is a practical guide to needle and thread selection. Always refer to it before beginning a sewing project. Be sure to use the same size and type of thread in both needle and bobbin. The fabrics below can be of any fiber: cotton, linen, silk, wool, Needles synthetic rayon, blends. -
Page 15: Inserting A Bobbin
Inserting a bobbin • Raise presser foot. • Turn hand wheel toward you until needle is in its highest position. • Open slide plate and remove empty bobbin. 1. Pull 4" (10 cm) of thread from replacement bobbin and insert bobbin into case, as shown. -
Page 16: Winding A Bobbin
Winding a bobbin Winding a bobbin is quick and easy when you follow the directions below. Always wind the bobbin before threading the machine and needle. • Push in indent (1) on hand wheel disc This will stop the needle from moving. •... -
Page 17: Threading The Machine
Threading the machine • Raise take-up lever to highest position by turning hand wheel toward you. • Raise presser foot to release thread tension. • Place spool of thread on spool pin. • Slide spool cap firmly over rim of spool to prevent thread tangling. -
Page 18: Raising The Bobbin Thread
Raising the bobbin thread 1. Hold needle thread loosely with left hand. • Turn hand wheel slowly toward you, lower- ing needle into hole in plate. 2. Continue to do this until needle rises above needle plate. • Pull gently on needle thread and bring up bobbin thread in a loop. -
Page 19: Adjusting Thread Tension
Adjusting thread tension (For straight stitching) A perfect, well balanced stitch (1), will have the needle and bobbin threads locked between the two layers of fabric with no loops on top or bottom and no puckering. Too much tension will produce a tight stitch (2) which will cause the fabric to pucker. -
Page 20: Sewing A Seam
Sewing a seam You can sew seams easily and accurately when you follow the suggestions below. Placing fabric under foot Most fabrics can be placed under the foot by raising the presser foot lifter (1) to its normal "Up" position (2), where it locks in place, When using bulky fabric, multiple fabric lay- ers, or an embroidery hoop, raise the lifter to the high rise position (3), thus increasing the... -
Page 21: Starting A Seam
Keeping seams straight To keep seams straight, use one of the guide- lines on the needle plate. • The most commonly used line (1), the 5/8 inch (1.6 cm) seam allowance, is extended onto the slide plate. Starting a seam Place fabric under presser foot 1/2 inch (12 mm) from rear of fabric Align the right edge with one of the seam guidelines on the nee-... - Page 22 Guiding and supporting fabric. • For tricot, and other similar synthetic knits, apply gentle tension by holding the fabric at the front and back of presser foot as you sew. Do not pull fabric • For elasticated fabric, stretch lace, and knits with an unusual amount of elasticity, hold the fabric firmly in front and back of the presser foot to stretch the seam as the...
-
Page 23: Straight Stitching
Straight stitching Stitch width selector Before you move the selectors to set your machine for straight stitching, turn the hand wheel toward you until needle is at its highest point. Straight stitching can be performed with pat- tern selector in any position; stitch width lever must be set at ( ) only Needle position selector Needle Position Selector positions the needle... -
Page 24: Darning
Applications with straight stitching Darning Recommended settings Stitch Selection: Straight Stitch Needle Position: Stitch Width: Stitch Length: 2-5 Foot: General Purpose (B) Needle Plate: General Purpose (A) Attach feed cover plate (F) Reverse stitch button The reverse stitch button, with the ( symbol, is located in the centre of the stitch length selector. -
Page 25: Inserting A Zipper
Inserting a zipper Preparation Pattern: Neeale position: Stitch width: Stitch length: 2-5 Foot: Zipper (E) Needle plate: General Purpose (A) Adjusting the zipper foot When the zipper teeth are to the left of the needle (A): • Slide the adjusting block (1), which slides on the pin, across to the right. -
Page 26: Zig-Zag Stitching
Zig zag stitching Before moving selector, make sure needle is fully raised. Needle position selector Most of your zig-zag stitching will be done with the needle in the centre ( ) position. Left ( ) and right ( ) settings are used for special stitch placement. -
Page 27: Pattern Groups Selection
Pattern groups selection The dial localized on the panel of your machine, lets you choose pattern groups. Raise the needle to its highest position. Adjust the stitch width selector to straight position ( ). This will see to it that the stitch pattern dial moves easier. In order to single out the desired pattern group, just turn the dial until the corresponding letter to this pattern group appears on the dial, under symbol After carrying out the embroidery selection, turn back the stitch width selector to the zig-zag... -
Page 28: Flexi-Stitch Patterns
Flexi stitch patterns Note: The pattern groups selection, needle position selection and stitch width selection are similar to zig-zag stitching. These stitch patterns are used for sewing knits and other stretch fabrics. Flexi Stitch patterns are made by the side to side movement of the needle along with the backward and forward movement of the feed. -
Page 29: Balancing Flexi-Stitches
Balancing Flexi-stitches You may need to adjust the Flexi-stitch Balance selector when using a flexi-stitch pat- tern in order to achieve the correct pattern appearance. Before you move the stitch balance dial from its neutral position. Make a test sample using two layers of scrap fabric. -
Page 30: Pattern Stitching
Pattern stitching In addition to straight stitch and zig-zag stitch, your machine can produce a variety of stitch patterns. There are two types of stitch pat- terns built into your machine: • Decorative stitch patterns are produced by side-to-side movement of the needle. •... -
Page 31: Decorative Stitch Patterns
Decorative stitch patterns Needle Stitch Stitch Needle Foot Application Pattern position width length plate Straight stitch 1 General General General setting purpose purpose sewing Zig-zag stitch General General Stretch sewing setting purpose purpose and embroidery Blind hem stitch Special for General Finishing 1.5 to 2.5... -
Page 32: Flexi-Stitch Patterns
Flexi-stitch patterns Needle Stitch Stitch Needle Foot Application Pattern position width length plate Straight stitch 1 Special General Ideal for plain purpose purpose seams that stretch Ric-rac stitch Heavy-duty Special General general purpose purpose purpose sewing Slant overedge Sweater and Special General stitch (left) -
Page 33: Attaching A Button
Attaching a button Recommended settings Stitch Selection: Zig-Zag Stitch (1 A) Needle Position: Stitch Width: To suit Button Foot: Button Sewing (H) Needle Plate: General Purpose (A) Attach Feed Cover (F) Note: Before you can attach a button, the bob bin thread must be brought up through the hole in the feed cover. -
Page 34: Free Arm Sewing
Free-arm sewing Removing the extension table To change machine for free-arm sewing, lift right edge (1) of extension table, slide it to the left and off the machine (2). To replace the extension table, slide it to the right keeping it even with the free-arm, until the tabs on the right lock into place. -
Page 35: Bar Tacks
Bar tacks • Bar tacks reinforce areas of strain and can be applied to ready made garments, as well as to those hose sewn at home. Use the free-arm surface to avoid fabric bulk around the needle when you apply bar tacks to pockets pleats and waistlines Four-step buttonhole Your machine makes buttonholes to any size... - Page 36 Buttonholes Recommended settings. Stitch Selection: Buttonhole Stitch (1A) Stitch Width: Pre-set hot: Buttonhole (L) Needle Plate: General Purpose (A) Step 1 • Raise presser foot. • Place fabric under foot. • Centre 3 red guidelines (1) of foot around beginning line of buttonhole. •...
- Page 37 Step 3 • Raise needle out of fabric • Turn buttonhole dial to the buttonhole symbol (3) for the third step. • Stitch up to point (5) Step 4 • Raise needle out of fabric. • Turn buttonhole dial to the buttonhole sym- bol (4) for the fourth step.
- Page 38 Balancing the buttonhole On some kinds of fabrics, there may be a dif- ference in the density of the stitches on the right or the left side of the buttonhole. This is easily adjusted by turning the balance knob (1), in the center of the stitch length dial to balance the density of the stitching.
-
Page 39: Twin Needle Sewing
Twin needle sewing Caution: Make sure not to use a stitch width Recommended settings greater than what is recommended Stitch Selection: Desired stitch for twin needle stitching. Needle Position: Position: Stitch Width: Stitch Length: 2-5 Foot: General Purpose (B) Needle Plate: General Purpose (A) - Page 40 Twin Needle Sewing continued... Procedure • Turn the machine off. • Insert the twin needle with the flat side of shank toward the rear of the machine. • Thread the machine as you normally would for single needle stitching, and pass thread through the left eye of the twin needle.
- Page 41 Additional Accessories Additional accessories for your sewing machine are available for purchase at your SINGER stockist. 1. Straight stitch presser foot (D) and nee- dle plate (C) are used together when straight stitching light weight fabrics or when your fabric or sewing procedure requires close control.
-
Page 42: Caring For Your Machine
Caring for your machine Removing and replacing bobbin case Caution: Before cleaning or adjusting the machine, remove plug from the socket outlet. • Raise presser foot and needle. • Open slide plate, remove bobbin and remove needle plate. To remove bobbin case •... -
Page 43: Cleaning The Machine
Remove lint and fluff from exposed parts and clean these parts with a lint brush. • Take-up lever and thread guides. • Presser and needle bars. • Bobbin case and needle plate areas. Your machine should be periodically checked by your local SINGER dealer for wear. -
Page 44: Lubricating The Machine
To determine which connections move and need lubrication, turn the handwheel slowly, by hand, while face plate is removed. When lubricating, apply only SINGER oil at the points shown. SINGER oil is specially prepared and does not contain harmful deposits hat can interfere with the smooth... -
Page 45: Changing The Light Bulb
Changing the light bulb Caution: Before changing light bulb, make sure you have removed plug from socket out- let and remove face plate which covers the light bulb. Be sure to replace the face plate which covers the light bulb before operating the machine. -
Page 46: Performance Checklist
Performance checklist When sewing difficulties occur, look back Upper thread breaks through this manual to make sure you are Is machine properly threaded? correctly following the instructions. If you still Is thread freely unwinding from spool? have a problem, the reminders below may Is proper spool cap being used? help you to correct it.