Lexmark C720 User Reference Manual
Lexmark c720: user guide
Hide thumbs
Also See for C720:
- Service manual (442 pages) ,
- Setup manual (117 pages) ,
- Parts breakdown (33 pages)
Table of Contents
Advertisement
Quick Links
Advertisement
Table of Contents

Related Manuals for Lexmark C720


Summary of Contents for Lexmark C720
- Page 1 C720 User’s Reference November 2000 www.lexmark.com...
-
Page 3: Table Of Contents
Table of contents Chapter 1: Printer overview .............. 9 Introducing your printer ..................9 Using your documentation ................. 11 Chapter 2: Using printer drivers ............ 12 Chapter 3: Changing printer settings ..........13 Understanding the operator panel ..............14 Changing menu settings ..................15 Locking the menus ..................... - Page 4 Chapter 7: Controlling printed output ...........28 Driver Settings ....................28 Halftone screens ....................30 Image Smoothing ....................31 Printing text ......................31 Chapter 8: Color correction ............32 Auto ........................32 Display ........................ 32 CMYK ......................... 32 Black and White ....................33 2-Color Draft .......................
- Page 5 Chapter 17: Supplies overview ............53 Chapter 18: Supplies ...............55 Toner cartridges ....................55 Ordering supplies ....................61 Storing supplies ....................62 Chapter 19: Replacing supply items ..........63 Replacing supplies ..................... 63 Replacing toner cartridges ..................64 Replacing the photo developer cartridge ............69 Replacing the oil bottle ..................
- Page 6 Chapter 28: Calling for customer support ........195 Chapter 29: Using the operator panel ......... 196 Printing a menu settings page ................196 Changing the Paper Type setting ..............199 Chapter 30: Using printer menus ..........200 Chapter 31: Color Menu ..............207 Chapter 32: Finishing Menu ............
- Page 7 MarkVision Professional ................... 270 MarkVision for UNIX networks ................. 271 MarkVision Messenger ..................272 TM ......................272 Lexmark MarkTrack Lexmark NetPnP ....................273 Chapter 48: Managing memory ............ 274 Printer memory ....................274 Adding memory ....................274 Flash memory ....................275 Hard disk ......................
- Page 8 viii...
-
Page 9: Chapter 1: Printer Overview
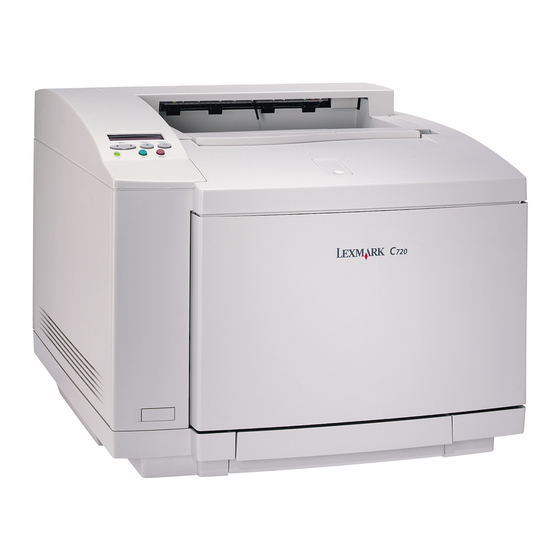
500-sheet tray Your Lexmark C720 color laser printer is the ideal printer for presentations, business graphics, line art, and text. Your printer uses laser diode electrophotographic technology to deliver remarkable quality print images and text. You can print up to 24 pages per minute (ppm) for monochrome print jobs and 6 ppm for color print jobs. -
Page 10: Print Speed
The modular design of your printer lets you perform routine printer maintenance procedures without the aid of a service technician. This includes replacing the photo developer cartridge, oil bottle, cleaning roll, fuser, waste toner bottle, and all four color print cartridges. Print speed Your printer can print at up to 24 ppm for monochrome print jobs and 6 ppm for color print jobs. -
Page 11: Using Your Documentation
250-sheet paper tray. Using your documentation Your Lexmark C720 online information provides details about color functions, media specifications, memory requirements, the operator panel, printer configuration, printer settings, troubleshooting problems, and ordering supplies. -
Page 12: Chapter 2: Using Printer Drivers
Using printer drivers Using the printer drivers supplied with your printer gives you the greatest control over the features and functions of your printer. These printer drivers are designed to work efficiently with your printer and provide you with the best possible print quality. Using and accessing these drivers from your computer is fast, easy, and convenient. -
Page 13: Chapter 3: Changing Printer Settings
Changing printer settings You can change your printer setting by using your application software, your Lexmark printer driver, the printer operator panel, or the remote operator panel available from MarkVision. Note: Printer settings selected from a software application or driver override default settings selected from the operator panel. -
Page 14: Understanding The Operator Panel
Understanding the operator panel The operator panel on the top left side of your printer has a 2-line by 16-character liquid crystal display (LCD), five buttons, and one indicator light. The operator panel can be disabled so that other users cannot access most of the menus. -
Page 15: Changing Menu Settings
Operator panel buttons Button Function Press Select Select • Select the menu shown on the second line of the display and view the available menu items. • Select the menu item shown on the second line of the display and view the available value or current user default setting for that menu item. -
Page 16: Locking The Menus
Press to scroll through the list of values. Menu> <Menu Note: Press if you need to go back to previous menus or menu items without Return changing the current setting. When the value you want is on the second line of the display, press to make the value Select the new user default setting. - Page 17 some distance from your computer, it may be more convenient to use the remote operator panel on your computer. In addition to the remote operator panel, some versions of MarkVision also provide a way to view many of the menu items for one menu on a single screen. If you need to make several changes to settings in the Paper Menu, for example, you may find it easier to make those changes when you can see all of the menu items and their available values at one time.
-
Page 18: Chapter 4: Using Print And Hold
Using Print and Hold When sending a job to the printer, you can specify in the driver that you want the printer to hold the job in memory and not print it immediately. When you are ready to print the job, you must go to the printer and use the operator panel menus to identify which held job you want to print. -
Page 19: Accessing Held Jobs From The Operator Panel
Accessing held jobs from the operator panel To access held jobs from the operator panel: – If the printer is Busy, press to display the Job Menu. Menu> – If the printer is Ready, continue with step 2. Press until either HELD JOBS or CONFIDENTIAL JOB shows on the operator Menu>... -
Page 20: Repeat Print
Repeat Print If you send a Repeat Print job, the printer prints all requested copies of the job and stores the job in memory so you can print additional copies later. You can print additional copies as long as the job remains stored in memory. -
Page 21: Enter Pin
When you select Confidential Job from the Job Menu, the following prompt appears: Enter PIN: =______ Return Select Menu Stop Enter the PIN you assigned and press to print the confidential job. -
Page 22: Chapter 5: Understanding Color
Understanding color Your printer gives you the power to communicate in color. Color attracts attention, commands respect, and adds value to your printed material or information. Using color increases readership and is read more often than the same material printed in black and white. Color can be used to motivate people and speed the analysis of complex data. -
Page 23: Primary Colors
Primary colors Notice the three primary additive colors red, green, and blue in the illustration. You can see that when all three colors are combined, you get white. However, look at the area where any two colors overlap. What you see is cyan, magenta, or yellow. Equal amounts of green and blue produce cyan. Equal amounts of blue and red produce magenta, and equal amounts of red and green produce yellow. -
Page 24: Color Difference
Color difference Most software applications today provide us with a WYSIWYG (What You See Is What You Get) environment. This helps us develop the look of our document. However, the difference between the additive and subtractive colors may sometimes cause a problem between what you see and what you get. - Page 25 document. Always print a new swatch of the colors you plan on using before you invest a lot of time creating your screen designs.
-
Page 26: Chapter 6: Managing Color
Managing color There are many color management systems on the market today. They range from simple swatchbooks to specially designed and designated color servers. A color management system (CMS) helps you match colors across a number of devices, including scanners, monitors, and printers. A CMS ensures what you see at every step of the publishing process matches the printed output. -
Page 27: Popular Color Management Systems
Popular color management systems There are many color management systems for you to choose from. The type of CMS you choose impacts the color quality of your printed output. Choose a CMS that best meets your cost and performance needs. Some popular color management systems are described here. Windows ICM Microsoft Windows 95/98/Me, Windows 2000, and Windows NT support Image Color Management (ICM). -
Page 28: Chapter 7: Controlling Printed Output
Controlling printed output Your printer driver provides you with the best quality output for various types of printing needs. However, you may want more control over how your printed document will look. You can control the screening methods, graphics effects, and fill resolution used during printing. These setting adjustments can easily be made through your printer driver, operator panel, or MarkVision remote operator panel. -
Page 29: Photo Enhance
You can change these settings through the color tab on your printer driver or the Color Menu on the operator panel. Photo Enhance When you place Photo Enhance setting On, your printer changes the method it uses to place pels on your print media. -
Page 30: Halftone Screens
Halftone screens The term halftone screen refers to the pattern of dots applied to an object on the page (text, graphics, or images). If you look at a black and white photograph in a magazine, it appears to contain many shades of gray. -
Page 31: Image Smoothing
Spot function The spot function determines the shape of the dots by controlling the order in which the pels in the halftone cell are turned on. The printer code defines the order by assigning a priority to each individual pel within the halftone cell. By turning on or printing a portion of the pels within the halftone cell and then combining the different halftone screens, your printer is able to print millions of colors. -
Page 32: Chapter 8: Color Correction
Color correction Color Correction lets you modify the color settings used to print your documents. The Color Correction settings you can choose from are: Auto, Display, CMYK, Black and White, 2-Color draft, Off, and Vivid. Auto is the default setting when the printer is shipped from the factory. It uses different color profiles for the different objects on the page (text, graphics, and images). -
Page 33: Black And White
If you use this setting without the necessary color management software or your application does not provide the correct information, your printed output may have unexpected results. Black and White The Black and White setting converts any colors in your document to solid black. This setting produces output just like any standard monochrome printer using various shades of gray. -
Page 34: Chapter 9: Avoiding Print Quality Problems
Transparencies To ensure high quality output on transparencies, we recommend using the following Lexmark transparencies. They have been designed specifically for your printer: P/N 12A5590 (letter size) P/N 12A5591 (A4 size) These transparencies have characteristics that minimize curl and optimize toner transfer in a wide range of printing environments. -
Page 35: Chapter 10: Paper Sources And Output
Paper sources and output Your printer comes with a 250-sheet paper tray. You can load paper, transparencies, labels, or envelopes in the paper tray. For additional paper capacity, you can attach an optional drawer with a 500-sheet tray. When linked, you create a single 750-sheet source (see Tray linking). - Page 36 the tray printing side up. Printed output is placed printed side down in the output bin on the top of your printer. Source Media Size supported Weight Capacity Standard tray Paper A4, letter, executive, JIS B5, 60–90 g/m 250 sheets (tray 1) A5, DL env, #9 env, #10 env, (16–24 lb)
-
Page 37: Chapter 11: Paper Sizes
Paper sizes Your printer supports a wide variety of paper sizes. See Media guidelines for illustrations of proper paper orientation. The printer determines the size paper loaded in the trays by the position of the paper guides. Make sure you adjust the guides each time you change paper sizes. The following tables list the paper and envelope sizes your printer supports. - Page 38 recognizes the DL envelope, but not the #10 envelope. Refer to the Technical Reference for more information on US and Non-US defaults. The printer determines the size of the media loaded in the trays by the position of the front paper guide.
-
Page 39: Chapter 12: Media Guidelines
Media guidelines Use recommended media (paper, transparencies, envelopes, card stock and labels) for your printer to avoid printing problems. For detailed information about media characteristics, refer to the Card Stock & Label Guide available on the drivers CD provided with your printer. Brief guidelines for choosing paper and other media follow. -
Page 40: Transparencies
Contacts for supplies information for a list of phone numbers or visit www.Lexmark.com on the World Wide web. Black and white transparencies print at approximately 4 ppm and color transparencies print at approximately 3 ppm. For transparency loading instructions, see Loading transparencies. -
Page 41: Labels
Labels Use only labels designed for laser printers. Use only label sheets that have no gaps between the labels, as shown below. Try a sample of any labels before purchasing a large quantity. Acceptable labels Unacceptable labels Labels must be able to withstand temperatures of 175°C (347°F) without melting, discoloring, offsetting, or releasing hazardous emissions. -
Page 42: Chapter 13: Storing Media
Storing media Proper storage of media helps ensure trouble-free printing. For best results: • Store media in an environment where the temperature is approximately 21°C (70°F) and the relative humidity is 40%. • Store cartons of paper on a pallet or shelf, rather than directly on the floor. •... -
Page 43: Chapter 14: Avoiding Paper Jams
Avoiding paper jams If you follow the Media guidelines, you’re well on your way to trouble-free printing. If you do experience a paper jam, see Clearing paper jams for instructions on clearing the jam. A few reminders to avoid paper jams: •... -
Page 44: Chapter 15: Loading Media
Loading media Click a topic to go directly to specific loading instructions • Loading paper, card stock, or labels • Loading transparencies • Loading envelopes The procedures for loading paper in the standard 250-sheet tray and the optional 500-sheet tray are the same. - Page 45 Loading paper, card stock, or labels Note: If you attach an optional drawer, the instructions are the same for loading paper in that tray. However, load only paper in tray 2. Pull the tray completely out of the printer. Set the tray on a flat surface. Note: If you are loading A4 or letter size paper, the tray may already be set up for the appropriate paper size.
- Page 46 Release the snap locks. The position of the paper guides inform the printer the size of the paper in the tray. If the paper guides are in the wrong position, you may experience feeding problems or incorrect formatting of pages. Squeeze the snap locks on the end of the left side paper guide.
-
Page 47: Loading Transparencies
Loading transparencies To load the tray: Pull the tray completely out of the printer. Set the tray on a flat surface. Note: If you are loading A4 or letter size paper, the tray may already be set up for the appropriate paper size. - Page 48 Release the snap locks. The position of the paper guides inform the printer the size of the transparency in the tray. If the paper guides are in the wrong position, you may experience feeding problems or incorrect formatting of transparencies. Squeeze the snap locks on the end of the left side paper guide.
-
Page 49: Loading Envelopes
Slide the tray into the printer. Maximum stack height Loading envelopes Note: Do not load envelopes in tray 2, envelopes can only be printed from tray 1. Pull the tray completely out of the printer. Set the tray on a flat surface. - Page 50 Squeeze the snap locks on the end of the front paper guide. Slide the front paper guide to align with the position of the envelope size you are loading. Release the snap locks. The position of the paper guides inform the printer of the size envelopes in the tray. If the paper guides are in the wrong position, you may experience paper feeding problems or incorrect formatting.
- Page 51 Load the envelopes with the recommended print side face up and the part of the envelope with the return address toward the rear of the printer. Do not load stamped envelopes. Do not exceed the maximum stack height indicated on the label inside the tray. Maximum stack height Slide the tray into the printer.
-
Page 52: Chapter 16: Tray Linking
Tray linking If you want to increase your printer paper capacity, add an optional drawer with a 500-sheet paper tray to your printer. If you load the same paper size and paper type in both trays, the printer automatically links the trays when one tray is empty, and feeds paper from the other tray. By linking the trays you create a single paper source that holds up to 750 sheets. -
Page 53: Chapter 17: Supplies Overview
Supplies overview Click a topic for more information about: Supply item… Replacing the… • Toner cartridges • Toner cartridges • Photo developer cartridge • Photo developer cartridge • Oil bottle • Oil bottle • Cleaning roll • Cleaning roll • Waste toner bottle •... - Page 54 The paper size affects the printer page count calculations. The printer counts an A4 or letter size sheet as one page and a legal size sheet as 1.2 pages. Therefore, if you print all your jobs on legal paper, the yield for a particular supply may appear to be lower than the yield claimed for that supply.
-
Page 55: Chapter 18: Supplies
Supplies Toner cartridges Do not touch the cartridge roller located under the cover. ARNING Cover Your printer uses four separate toner cartridges, one for each color: cyan, yellow, magenta, and black. They are located behind the front door. The stacking order from top to bottom is black, yellow, magenta, and cyan. -
Page 56: Photo Developer Cartridge
When you need to install a new toner cartridge, see Replacing toner cartridges or the installation instructions that come with the new cartridge. Photo developer cartridge The photo developer cartridge receives toner from the toner cartridges. The toner image is generated on the photo developer media. -
Page 57: Oil Bottle
Oil bottle Oil bottle The oil bottle provides oil that lubricates the fuser. The approximate yield of the oil bottle is 12,000 pages. The average yield is determined by the number of printing of A4 or letter size pages printed. Your printer monitors the life of your oil bottle. -
Page 58: Waste Toner Bottle
Press to clear the message. The Supplies message appears on the second line of the operator panel to remind you that supplies need attention. The printer continues to show Fuser Cleaner Life Warning in the Supplies Menu until you replace the cleaning roll or until the cleaning roll is exhausted. - Page 59 When you need to install a new waste toner bottle, see Replacing the waste toner bottle or the installation instructions that come with the new waste toner bottle. Fuser and air filter kit Fuser Air filter The fuser uses heat and pressure to permanently bond the toner to the print media. The air filter removes dust and other contaminants from the printer.
-
Page 60: Maintenance Kit
Maintenance kit Drum cleaner Transfer roller Paper discharger The maintenance kit consist of three components; the transfer roller, paper discharger and drum cleaner. These components work together to transfer your print image to the media you have selected. The paper discharger reduces the occurrence of paper jams at the transfer drum. The transfer roller pulls the image from the transfer drum onto the print media. -
Page 61: Ordering Supplies
12A5591 Transparencies (A4 size) For more information about the supplies available to you from Lexmark, you can visit Lexmark on the World Wide Web at www.lexmark.com. You can also get the latest information on the location and telephone numbers for Authorized Supplies Dealers in your area. -
Page 62: Storing Supplies
Contacts for supplies information (continued) Region Country Phone number Latin America Headquarters 305 447 2200 Argentina 54 1 319 8900 Brazil 55 11 820 5733 Mexico 52 5 254 2435 Asia / Pacific Australia 1300 362 192 Hong Kong 852 825 6168 Japan 81 3 3523 7077 Singapore... -
Page 63: Chapter 19: Replacing Supply Items
Replacing supply items Replacing supplies For information about replacing an individual supply item, click the headings below: Toner cartridges Waste toner bottle Photo developer cartridge Fuser and air filter kit Oil bottle Maintenance kit Fuser cleaner The printer calculates and stores information on the number of images that have been printed. When a count for a supply nears the end of the supplies life, the Supplies status message appears on the second line of the display to remind you there are supplies that need attention. -
Page 64: Replacing Toner Cartridges
The printer continues to display the Supplies status message until you replace the required supply items. After the Supplies status message appears, the printer continues to monitor the required supply items until the supply is exhausted. The printer displays Low, Empty, Item Exhausted, Item Empty, Item Full or Missing. - Page 65 Open the front door. Front door release latch Remove the appropriate toner cartridge (black K, yellow Y, magenta M, cyan C) from the printer. Note: The toner inside the toner cartridges can soil clothing. Do not clean clothing soiled with toner in hot water; this permanently adheres the toner to the clothing. Use cold water to remove toner that has soiled clothing.
- Page 66 Gently shake the new toner cartridge to distribute the toner evenly. Remove the end cover and any tape or other packing material from the toner cartridge. To remove the end cover, pull one of the ends away from the toner cartridge. Do not touch the cartridge roller, it may become scratched or damaged.
- Page 67 Slide the new toner cartridge into the printer. Repeat steps through 8 to install additional cartridges. Close the front door.
-
Page 68: Supplies Menu
Reset the toner cartridge counter. If you replace toner cartridges before the 88 <color> Toner Low message appeared, use the following steps to reset the counter for the new toner cartridge. Note: If you do not reset the counter, you may receive a false 88 <color> Toner Low message. -
Page 69: Replacing The Photo Developer Cartridge
Press until the appropriate <color> Toner appears on the second line Menu> <Menu of the display. REPLACE SUPPLIES <color> Toner Return Select Menu Stop Press to open the <color> Toner menu item. Select Press until =Replaced appears on the display. Menu>... - Page 70 If you install a new photo developer cartridge before the Photo Dev Cart Exhausted message appeared, you must manually reset the photo developer cartridge counter. For more information, see reset the photo developer cartridge counter. To replace the photo developer cartridge, use the following steps or the instruction sheet supplied with the photo developer cartridge: Slide the top door release latch toward the front of the printer.
- Page 71 Lift the left and right green photo developer cartridge locking levers. Photo developer cartridge Locking levers Lift the old photo developer cartridge from the printer.
- Page 72 Remove the new photo developer cartridge from the packing material. ARNING Do not touch or scratch the surface of the glossy green film in the photo developer cartridge. Touching the photo developer film damages it and reduces print quality. Do not leave the cartridge exposed to light for more than 5 minutes. If the cartridge will be exposed to light for longer than 5 minutes, place it in the box or cover it.
- Page 73 Lower the photo developer cartridge into the printer until it is firmly seated. Rotate the green photo developer locking levers down.
- Page 74 Close the top door. If the message Did you replace Photo Dev Cart? appears, press . Otherwise, use the following steps to reset the photo developer cartridge counter. Press until Supplies Menu appears on the second line of the display. Menu>...
- Page 75 Press until Replace Supplies appears on the second line of the display Menu> <Menu SUPPLIES MENU REPLACE SUPPLIES Return Select Menu Stop Press to open Replace Supplies. Select Press until Photo Dev Cart appears on the second line of the display. Menu>...
-
Page 76: Replacing The Oil Bottle
Replacing the oil bottle Your printer monitors the life of your oil bottle. When the oil bottle becomes low, 81 Oil Bottle Low appears. It is time for you to replace your oil bottle. Press to clear the message. The Supplies message appears on the second line of the display to remind you that supplies need attention. - Page 77 Rotate the left and right green oil bottle locking levers to unlock the oil bottle. Oil bottle Lift the oil bottle from the printer. Note: Oil may drop from the bottom of the oil bottle. You can place a piece of paper under the bottle after you lift it to prevent oil from dropping on the printer, floor, or your clothing.
- Page 78 Lower the oil bottle into the printer. Rotate the left and right oil bottle locking levers to lock the oil bottle in the printer.
-
Page 79: Replacing The Cleaning Roll
Close the top door. Replacing the cleaning roll Your printer monitors the life of your cleaning roll. When the cleaning roll becomes low, 85 Fuser Cleaner Life Warning appears. It is time for you to replace your cleaning roll. Press to clear the message. - Page 80 Lift the top door. Top door release latch CAUTION: The internal components of the printer may be hot. Allow the printer to cool before touching any internal components. Rotate the left and right green oil bottle locking levers to unlock the cleaning roll. Fuser cleaner...
- Page 81 Lift the cleaning roll from the printer. Remove the new cleaning roll from its packaging material and remove any packing material or tape from the cleaning roll. Align the new cleaning roll with the slot in the printer. Lower the cleaning roll into the printer.
- Page 82 Rotate the left and right oil bottle locking levers to lock the cleaning roll in the printer. Close the top door.
- Page 83 If the message Did you replace Fuser Cleaner? appears, press . Otherwise, use the following steps to reset the cleaning roll counter. Note: Depending on the printer warm up requirements, it could take time for this message to appear. Press until Supplies Menu appears on the second line of the display.
-
Page 84: Replacing The Waste Toner Bottle
Press until Fuser Cleaner appears on the second line of the display. Menu> <Menu Replace Supplies Fuser Cleaner Return Select Menu Stop Press to open the Fuser Cleaner menu item. Select Press until =Replaced appears on the display. Menu> <Menu Fuser Cleaner =Replaced Return... - Page 85 charger needs to be cleaned periodically to prevent streaks and voids. We recommend cleaning the developer charger when you replace the waste toner bottle. For more information, see Cleaning the developer charger. To replace the waste toner bottle, use the following steps or the instruction sheet supplied with the new waste toner bottle.
- Page 86 Carefully tilt the top of the waste toner bottle toward the front of the printer and lift it out. Place the full waste toner bottle in the plastic bag provided with the new waste toner bottle. Seal the plastic bag and discard the waste toner bottle. Remove the new waste toner bottle from its packing material.
- Page 87 Close the front door. Note: The developer charger needs to be cleaned to prevent streaks and voids. Use the following instructions to remove and clean the discharger. Cleaning the developer charger Slide the top door release latch toward the front of the printer. Lift the top door.
- Page 88 CAUTION: The internal components of the printer may be hot. Allow the printer to cool before touching any internal components. Lift the left and right green photo developer cartridge locking levers. Lift the old photo developer cartridge from the printer. Do not touch the glossy green film in the photo developer cartridge.
- Page 89 Place the photo developer cartridge on a flat level surface. Lift the green slide lever. The pad on the end of the slide should make contact with the discharge wire. Move the green slide completely across the photo developer cartridge and back again five times.
- Page 90 Lower the photo developer cartridge into the printer until it is firmly seated. Rotate the green photo developer locking levers down.
-
Page 91: Replacing The Fuser And Air Filter Kit
Close the top door. Replacing the fuser and air filter kit Your printer monitors the life of your fuser. When the fuser reaches the end of its life, the printer displays 87 Fuser Exhausted. It is time for you to replace the fuser kit. The fuser kit consists of a fuser and air filter. For best print quality, make sure you replace the air filter when you replace your fuser. - Page 92 Remove the old fuser Slide the top door release latch toward the front of the printer. Top door release latch Lift the top door. CAUTION: The internal components of the printer may be hot. Allow the printer to cool before touching any internal components.
- Page 93 Loosen the thumbscrews on each side of the fuser. Thumbscrew Thumbscrew Do not tilt the fuser when removing.The fuser contains oil that may soil clothing and ARNING damage the printer components. Use the lifting handles to lift the fuser from the printer. Note: Do not discard the old fuser at this time.
- Page 94 Install the new fuser Remove any packing material from the new fuser. Align the new fuser with the slots inside the printer. Lower the fuser into the printer. Tighten the thumbscrews on both sides of the fuser. Thumbscrew Thumbscrew...
- Page 95 Transfer the oil bottle and cleaner roll Rotate the left and right green oil bottle locking levers on the old fuser to unlock the oil bottle and cleaning roll. Lift the oil bottle from the old fuser. Note: Oil may drop from the bottom of the oil bottle. You can place a piece of paper under the bottle after you lift it to prevent oil from dropping on the printer, floor, or your clothing.
- Page 96 before printing. Without oil, your fuser does not operate properly. Insufficient lubrication causes paper jams and reduces the life of your fuser. Move the green fuser roller release levers toward the rear of the printer. It may require some force to move the levers. Roller release levers...
- Page 97 Lift the cleaning roll from the old fuser. Align the cleaning roll with the slot in the new fuser. Lower the cleaning roll into the new fuser.
- Page 98 Rotate the left and right green oil bottle locking levers to lock the oil bottle and cleaning roll in the fuser. Close the top door.
- Page 99 If the message Did you replace Fuser? appears, press . Otherwise, use the following steps to reset the fuser counter. Press until appears on the second line of the display. Menu> <Menu Supplies Menu SUPPLIES MENU Return Select Menu Stop Press to open the Supplies Menu.
- Page 100 Press until Fuser appears on the second line of the display. Menu> <Menu REPLACE SUPPLIES Fuser Return Select Menu Stop Press to open the Fuser menu item. Select Press until =Replaced appears on the display. Menu> <Menu Fuser =Replaced Return Select Menu Stop...
- Page 101 Replacing the air filter Slide the filter cover assembly to the left. Remove the filter from the cover. Remove the new filter from the packing material.
-
Page 102: Replacing The Maintenance Kit
Align the filter assembly with the slots in the cover as shown. Slide the filter cover assembly onto the printer until it locks into place. Replacing the maintenance kit Your printer monitors the life of printer components that affect your print quality. When these components reach the end of their life, the printer displays 80 Scheduled Maintenance. -
Page 103: Replacing The Transfer Roller
If you install a new maintenance kit before the 80 Scheduled Maintenance message appeared, you must manually reset the fuser counter. For more information, see reset the maintenance kit counter. To replace the maintenance kit components, use the following steps or the instruction sheet supplied with the maintenance kit: Replacing the transfer roller Pull the rear door release latch toward the rear of the printer. - Page 104 Rotate both locking levers upward until they stop. It may take some force to lift the levers. Lift the transfer roller assembly from the rear door. Remove the new transfer roller from the packaging material. Remove any other packing material or tape from the transfer roller. Align the left and right cam on the new transfer roller with the slots in the rear door.
- Page 105 Lower the transfer roller into the rear door. Rotate the locking lever downward until they snap into place. It may take some force for the locking levers to snap into place.
- Page 106 Replace the paper discharger Press down on the paper discharger and move it to the right. Lift the discharger from the rear door. Remove the new paper discharger from the packaging material. Remove any other packing material or tape from the discharger.
- Page 107 Place the flat green tab of the paper discharger into the slot on the rear door. Slot Press down and slide the discharger to the left. Release the discharger. Close the rear door. Replace the drum cleaner Slide the top door release latch toward the front of the printer.
- Page 108 Lift the top door. Top door release latch CAUTION: The internal components of the printer may be hot. Allow the printer to cool before touching any internal components. Lift the left and right green photo developer cartridge locking levers.
- Page 109 Push both drum cleaner cover latches to rear. Lift and remove the drum cleaner cover.
- Page 110 Push the drum cleaner handle toward the rear of the printer. Lift and remove the drum cleaner. Remove the new drum cleaner from the packaging material. Remove any other packing material or tape from the drum cleaner. Align the drum cleaner to the slots in the printer. The metal shield faces to the front of the printer.
- Page 111 Lower the drum cleaner into the printer. Push the handle downward until the drum cleaner snaps into place. Note: If the drum cleaner is not fully seated, you may experience poor print quality. Align the cover with the opening in the printer (back edge first).
- Page 112 Push down on the cover latches until both locks snap into place. Rotate the green photo developer cartridge levers down.
-
Page 113: Config Menu
Close the top door. If the message Did You Replace Maintenance Kit? appears, press . Otherwise, use the following steps to Reset the maintenance kit counter. Turn the printer off. Press and hold the buttons. Select Return While holding the buttons, turn the printer on. - Page 114 Press until Maintenance Kit appears. Menu> <Menu RESET COUNTERS Maintenance Kit Return Select Menu Stop Press to open the maintenance kit menu item. Select Press until =Reset appears. Menu> <Menu Maintenance Kit =Reset Return Select Menu Stop Press to reset the maintenance kit counter to zero. Select Press Return...
-
Page 115: Chapter 20: Recycling Used Supplies
If a prepaid shipping label is not available for your country, contact the place where you bought your printer for additional recycling information. Note: Lexmark does not recommend refilling used toner cartridges or purchasing refilled cartridges from a third party. Print quality and printer reliability cannot be guaranteed if you do. -
Page 116: Chapter 21: Conserving Supplies
Conserving supplies Toner Saver To get the most from your toner supply, set Toner Saver On. Toner Saver reduces all color planes to 80% saturation. This helps lower the cost of printing without greatly effecting print quality. Toner Saver can be used when color correction has been set to: Auto, 2-Color Draft, or Black and White. 2-Color Draft When you select 2-Color Draft, the printer only uses the black and cyan colors to print your document. - Page 117 Color correction setting Automatic 2 Color draft Black & white...
-
Page 118: Chapter 22: Moving Your Printer
Moving your printer Moving the printer If you’re going to move the printer, you must remove the supplies and attached options to prevent damage to the printer. Use the following steps to remove the options and supplies. Remove cables Turn the printer off. Unplug the power cord from the electrical outlet. - Page 119 Unplug the power cord from the rear of the printer. Unplug the parallel or the optional port connector. Depending on the options you have installed, additional parallel, serial, USB, or network connectors may have to be removed. Removing the supplies Whenever you move the printer, remove the oil bottle and toner cartridges to make sure you don’t drip oil or spread toner inside the printer.
- Page 120 Remove the fuser Slide the top door release latch toward the front of the printer and lift the top door. Top door release latch CAUTION: The internal components of the printer may be hot. Allow the printer to cool before touching any internal components.
- Page 121 Use the lifting handles to lift the fuser from the printer. Lifting handles Set the fuser on a flat level surface. Rotate the left and right green oil bottle locking levers on the fuser to unlock the oil bottle and cleaning roll.
- Page 122 Lift the oil bottle from the fuser. Note: Oil may drop from the bottom of the oil bottle. You can place a piece of paper under the bottle after you lift it to prevent oil from dropping on the printer, floor, or your clothing.
- Page 123 Align the fuser with the slots inside the printer. Lower the fuser into the printer. Tighten the thumbscrews on both sides of the fuser. Thumbscrew Thumbscrew Note: Do not remove the photo developer cartridge. Removing the photo developer cartridge may spread toner inside the printer.
- Page 124 Close the top cover. Remove the toner cartridges Pull the front door release latch toward the front of the printer. Open the front door. Front door release latch Note: Do not remove the waste toner bottle. Removing the waste toner bottle may spread toner inside the printer.
-
Page 125: Removing The Optional Duplex Unit
Remove the toner cartridges (black K, yellow Y, magenta M, cyan C) from the printer. Cover the end of the toner cartridge with clean paper. ARNING Do not touch or scratch the surface of the glossy green glass on the toner cartridges. Touching the glass may damage it and reduce print quality. - Page 126 Rotate the panel toward the rear of the printer until it separates (2) from the printer. Remove the left side access panel. Pull the front of the panel (1) out slightly. Rotate the panel toward the rear of the printer until it separates (2) from the printer.
- Page 127 Disconnect the black duplex unit connector from the black printer connector. Open the duplex unit top cover.
- Page 128 Loosen the thumbscrews on the duplex unit. Close the duplex unit top cover.
- Page 129 Grab the handholds on both sides of the duplex unit. Lift the duplex unit straight up, and then slide the duplex unit toward you. Handhold Handhold Removing the optional drawer Note: Removing the optional drawer is easier if you have access to the rear and sides of the printer.
- Page 130 Loosen the locking clip thumbscrew by rotating counterclockwise. Rotate the locking clip so it hangs down.
- Page 131 Remove the paper tray from the printer. Press and hold the slide lock and move the drawer slide to the left.
- Page 132 Grab the printer by the handholds and lift the printer straight up and off the optional drawer. Handholds Handholds Choosing the new location for your Lexmark C720 printer is vital to ensuring the printer provides you with the quality of service you expect. When selecting a place to set up your printer consider: •...
-
Page 133: Chapter 23: Theory Of Operation
Theory of operation By understanding how the toner cartridges, photo developer cartridge, transfer drum, transfer roller, and fuser interact you can understand why problems occur and how to correct or prevent them. Output tray Photo developer cartridge Fuser Toner cartridges Transfer roller Laser emitter Transfer drum... - Page 134 The result of these components working together is the sharp laser image you want. To get the best possible output, use the correct media thickness and type. The media recommended by Lexmark provides the best print quality.
-
Page 135: Chapter 24: Solving Printing Problems
Solving printing problems Some printer problems are very easy to solve. If your printer is not responding, first make sure: • The printer cable is securely attached to the printer and the host computer. • The power cord is plugged into the printer and a properly grounded electrical outlet. •... -
Page 136: Print Quality Problems
Print quality problems Problem Action Print is too light, or printed Make sure the front, top, and rear doors are closed completely. images or characters have voids Make sure you’re using recommended paper or other media. Use media or dropouts. from a new package. - Page 137 • Meter envelopes or use precanceled stamps. • Place envelopes in trays and deliver to the post office; do not drop envelopes into mail boxes or chutes. Quality of printed transparencies Make sure you’re using the recommended Lexmark transparencies. See is inadequate. Transparencies for more information.
- Page 138 Print quality problems (continued) Problem Action Print on the page is skewed. Make sure the width guides in the paper tray fit snugly against the media you loaded. See Loading media for more information. Quality of printed images is If you’re printing low resolution images using PostScript 3 emulation, set inadequate.
-
Page 139: Other Printing Problems
1284-compliant parallel cable. We recommend Lexmark part number 1329605 (10 ft) or 1427498 (20 ft) for the standard parallel port. If you’re using a Lexmark internal or external network adapter, verify it is set up properly and the network cable is securely connected. Refer to the documentation that came with your adapter, or the network documentation on the drivers CD for more information. - Page 140 Increase the Print Timeout value in the Setup Menu. breaks. Transparencies curl excessively. Make sure you’re using the recommended Lexmark transparencies. See Transparencies for more information. Transparencies jam. Fan transparencies before loading. Make sure you load transparencies only in tray 1. See Loading transparencies for more information.
-
Page 141: Chapter 25: Understanding Printer Messages
Understanding printer messages The printer operator panel displays messages describing the current state of the printer and indicates possible printer problems you must resolve. This topic provides a list of all printer messages, explains what they mean, and tells you how to clear the messages. Activating Menu Changes Return... - Page 142 Delete All Jobs Deleting Jobs Did you replace Fuser? Did you replace Fuser Cleaner? Did you replace Maintenance Kit? Did you replace Photo Dev Cart? Disabling Menus Enabling Menus Engine Warming Enter PIN: =___ Files will be Lost Flushing Buffer Formatting Disk Formatting Flash Held Jobs may be lost...
- Page 143 Network Card Busy Network <x> No Jobs Found. Retry? Not Ready Parallel <x> Performing Self Test Power Saver Print Jobs on Disk Printing Directory List Printing Font List Printing Job Accounting Stat Printing Menu Settings Prog System Code Program Flash Programming Disk Queuing and Deleting Jobs Queuing Jobs...
- Page 144 Tray <x> Empty Tray <x> Missing Waiting 2<xx> Paper Jam 30 <color> Toner Cart Missing 37 Insufficient Collation Area 37 Insufficient Defrag Memory 37 Insufficient Memory 38 Memory Full 39 Complex Page 51 Defective Flash 52 Flash Full 53 Unformatted Flash 54 Network <x>...
- Page 145 54 Serial Option <x> Error 54 Network <x> Software Error 54 Std Network Software Error 54 Std Par ENA Connection Lost 55 Insufficient Fax Buffer 56 Parallel Port <x> Disabled 56 Serial Port <x> Disabled 56 Std Parallel Port Disabled 58 Too Many Disks Installed 58 Too Many Flash Options 61 Defective Disk...
- Page 146 87 Fuser Missing 88 <color> Toner Empty 88 <color> Toner Low 900–999 Service <message> Activating Menu Changes What this message means: The printer is activating changes made to the printer settings. What you can do: Wait for the message to clear. Adjusting Fuser Temperature What this message means:...
-
Page 147: Clearing Job Accounting Stat
Canceling Job What this message means: The printer is processing a request to cancel the current print job. What you can do: Wait for the message to clear. Clearing Job Accounting Stat What this message means: The printer is deleting all job statistics stored on the hard disk. What you can do: Wait for the message to clear. -
Page 148: Delete All Jobs
Delete All Jobs What this message means: The printer is requesting confirmation to delete all held jobs. What you can do: • Press to continue. The printer deletes all held jobs. • Press to cancel the operation. Stop Deleting Jobs What this message means: The printer is deleting one or more held jobs. -
Page 149: Did You Replace Fuser Cleaner
Did you replace Fuser Cleaner? What this message means: When it’s time to replace the cleaning roll, the printer alerts you each time you open and close the printer top door. What you can do: Replace the cleaning roll to prevent this message from recurring. To continue printing: –... -
Page 150: Disabling Menus
What you can do: Replace the photo developer cartridge to prevent this message from recurring. To continue printing: – Press if you replaced the photo developer cartridge. – Press if you have not replaced the photo developer cartridge. Stop See also: Photo developer cartridge Disabling Menus What this message means:... -
Page 151: Files Will Be Lost
Enter PIN: =___ What this message means: The printer is waiting for you to enter your four-digit personal identification number (PIN). What you can do: Use the operator panel buttons to enter the PIN you identified in the driver when you sent the confidential job to the printer. -
Page 152: Formatting Flash
What you can do: Wait for the message to clear. Do not turn the printer off while this message is displayed. ARNING Formatting Flash What this message means: The printer is formatting the flash memory. What you can do: Wait for the message to clear. Do not turn the printer off while this message is displayed. - Page 153 What you can do: Insert the specified tray completely into the printer. Invalid Network <x> Code What this message means: The code in an internal print server is not valid. The printer cannot receive and process jobs until valid code is programmed into the internal print server. What you can do: Download valid code to the printer’s internal print server.
- Page 154 What you can do: Wait for the message to clear. Network <x> What this message means: A network interface is the active communication link. No Jobs Found. Retry? What this message means: The four-digit personal identification number (PIN) you entered is not associated with any confidential print job.
-
Page 155: Performing Self Test
Performing Self Test What this message means: The printer is running the series of start-up tests it performs after it is turned on. What you can do: Wait for the message to clear. Power Saver What this message means: The printer is ready to receive and process data. It is reducing its electricity consumption while idle. - Page 156 What you can do: Wait for the message to clear. Printing Font List What this message means: The printer is processing or printing a list of all available fonts for the specified printer language. What you can do: Wait for the message to clear. Printing Job Accounting Stat What this message means:...
- Page 157 What you can do: Wait for the message to clear and the printer to reset. Do not turn the printer off while this message is displayed. ARNING Program Flash What this message means: The printer is storing resources, such as fonts or macros, in flash memory. What you can do: Wait for the message to clear.
-
Page 158: Ready Hex
What you can do: Wait for the message to clear. Ready What this message means: The printer is ready to receive and process print jobs. What you can do: Send a job to print. Ready Hex What this message means: The printer is in Hex Trace mode and is ready to receive and process print jobs. -
Page 159: Restoring Factory Defaults
Restoring Factory Defaults What this message means: The printer is restoring the factory default printer settings. When factory default settings are restored: • All downloaded resources (fonts, macros, symbol sets) in the printer memory are deleted. • All menu settings return to the factory default setting except: –... -
Page 160: Tray
What you can do: Load paper in the tray to clear the message. Tray <x> Missing What this message means: The specified tray is either missing or not fully inserted into the printer. What you can do: Insert the tray completely into the printer. Waiting What this message means: The printer has received a page of data to print but is waiting for an End of Job command, a...Missing -
Page 161: Insufficient Collation Area
What you can do: Insert the toner cartridge completely into the printer. The printer automatically clears the message. 37 Insufficient Collation Area What this message means: The printer memory (or hard disk, if installed) does not have the free space necessary to collate the print job. -
Page 162: Memory Full
• To avoid this error in the future: – Delete fonts, macros, and other data in printer memory. – Install additional printer memory. Note: The messages 37 Insufficient Memory and Held Jobs may be lost alternate on the display. 38 Memory Full What this message means: The printer is processing data, but the memory used to store pages is full. -
Page 163: Defective Flash
51 Defective Flash What this message means: The printer detects defective flash memory. What you can do: Press to clear the message and continue printing. You must install different flash memory before you can download any resources to flash. 52 Flash Full What this message means: There is not enough free space in the flash memory to store the data you are trying to download. -
Page 164: Insufficient Fax Buffer
What this message means: The printer has detected a serial interface error on a serial port. What you can do: • Make sure the serial link is set up correctly and you are using the appropriate cable. • Press to clear the message and continue printing. The job may not print correctly. •... -
Page 165: Serial Port
What you can do: • Press to clear the message and print any fax data stored in the fax buffer. The job may not print correctly. • Increase the size of the Fax Buffer in the Fax Menu. 56 Serial Port <x>...Disabled -
Page 166: Too Many Flash Options
What you can do: Turn off and unplug the printer. Remove the excess hard disks from the printer. Plug in the printer and turn it on. See also: Setup Guide 58 Too Many Flash Options What this message means: Too many flash memory options are installed on the printer. What you can do: Turn off and unplug the printer. -
Page 167: Unformatted Disk
• Press to clear the message and continue processing. Any information not previously stored on the hard disk is deleted. • Delete fonts, macros, and other data stored on the hard disk. 63 Unformatted Disk What this message means: The printer detects an unformatted hard disk. What you can do: •... - Page 168 80 Transfer Roller Missing What this message means: The transfer roller is either missing or incorrectly installed. What you can do: Correctly install the transfer roller to clear the message. See also: Replacing the transfer roller 81 Oil Bottle Empty or Missing What this message means: The oil bottle is either empty or missing.
- Page 169 82 Photo Dev Cart Exhausted What this message means: The photo developer cartridge has reached its end of life. What you can do: • Press to clear the message and continue printing. • Replace the photo developer cartridge and reset the photo developer cartridge counter to continue printing.
- Page 170 What this message means: The transfer drum has reached its end of life. What you can do: Press Go to clear the message. Contact your local Lexmark dealer to arrange for a trained service professional to replace the transfer drum. 85 Fuser Cleaner...
-
Page 171: Fuser Cleaner Missing
85 Fuser Cleaner Missing What this message means: The fuser cleaner is either missing or incorrectly installed. What you can do: Correctly install the fuser cleaner to clear the message and continue printing. See also: Cleaning roll 86 Insert Tray 2 What this message means: Tray 2 is incorrectly inserted in the printer. - Page 172 What you can do: Correctly install the fuser to clear the message and continue printing. See also: Fuser and air filter 88 <color> Toner Empty What this message means: The printer has ceased operating because the specified toner cartridge is empty. You cannot print until you replace the specified toner cartridge.
- Page 173 900–999 Service <message> What these messages mean: Messages 900–999 relate to printer problems that may require printer service. What you can do: Turn the printer off and check all cable connections. Turn the printer back on. If the service message recurs, call for service and report the message number and description of the problem.
-
Page 174: Chapter 26: Clearing Paper Jams
Clearing paper jams Paper jam messages The following table lists the paper jam messages. The message number indicates where the paper jam occurred. Paper jam messages Message To locate the jam… For details see… Open the rear door 201 Paper jam (rear door) 201 Paper Jam Open the top door 202 Paper jam (fuser and output rollers) - Page 175 path. The illustration of the paper path may help you. For paper jams occurring in the duplex unit, see Clearing paper jams in the duplex unit. Top output bin Tray 1 Tray 2 After you have cleared all the paper, close the printer rear door and top door, and then press clear the message.
- Page 176 The following illustration identifies the printer jam number locations. 201 Paper jam (rear door) Pull the rear door release latch toward the rear of the printer. CAUTION: The inside of the printer may be hot. Allow the printer to cool before touching any internal components.
- Page 177 Lower the rear door and carefully remove any paper from the back of the printer. Rear door Close the rear door. Press on the operator panel.
- Page 178 202 Paper jam (fuser and output rollers) Note: Paper jammed in the fuser rollers must be removed from the back of the printer to avoid contaminating the fuser rollers with unfused toner. Carefully remove any jammed paper from the output rollers. Pull the rear door release latch toward the rear of the printer and lower the rear door.
- Page 179 Slide the top door release latch toward the front of the printer. Lift the top door. Top door release latch Move the green roller locking levers toward the rear of the printer. Roller locking lever Roller locking lever...
- Page 180 Remove the jammed paper from the rear of the printer. Move the green roller locking levers to center position. Roller locking lever Roller locking lever...
- Page 181 Close the top door. Close the rear door. Press on the operator panel.
- Page 182 24x Paper jam (trays 1 or 2) Pull the paper tray completely out of the printer and set it on a flat surface. Remove any wrinkled or damaged paper. Examine inside the paper tray cavity and remove any paper inside the printer.
- Page 183 Place the paper in the paper tray. Hold the paper tray with both hands and firmly slide it all the way into the printer. Pull the rear door release latch toward the rear of the printer. CAUTION: The inside of the printer may be hot. Allow the printer to cool before touching any internal components.
- Page 184 Carefully remove any paper from the back of the printer. Rear door Close the rear door. Press on the operator panel.
-
Page 185: Clearing Paper Jams In The Duplex Unit
Clearing paper jams in the duplex unit When a jam occurs in the duplex unit, the 230 or 231 Paper Jam message appears and indicates where to find the jammed paper. You must clear the paper from this area. The illustration of the duplex unit paper path may help you. - Page 186 Carefully remove any jammed paper from the top of the duplex unit. Close the top duplex door. Press on the operator panel.
- Page 187 231 Paper jam (duplex unit lower door) Open the outer lower duplex access door. Carefully remove any jammed paper from the rear of the duplex unit.
- Page 188 Lower the inner rear duplex door. Lift the inner rear duplex access panel. Carefully remove any jammed paper from inside the duplex unit.
- Page 189 Close the inner and outer rear duplex access doors. Press on the operator panel.
-
Page 190: Chapter 27: Cleaning The Photo Developer Charger
Cleaning the photo developer charger If you notice continuous vertical voids, streaks, or lines of stray toner when printing, toner dust may be accumulating on the photo developer cartridge charger. This toner may accumulate in one or more locations on the wire and interfere with the developer charger as it prepares the photo developer to accept the toner that makes up your printed image. - Page 191 Lift the left and right green photo developer cartridge locking levers. Lift the photo developer cartridge from the printer. Do not touch the glossy green film in the photo developer cartridge. Touching the ARNING photo developer film damages it and reduces print quality. Place the photo developer cartridge on a flat level surface.
- Page 192 Lift the green slide lever. The pad on the end of the slide should make contact with the charger wire. Move the green slide completely across the photo developer cartridge and back again five times. Slide lever Move the green slide to the left side of the photo developer cartridge. Place the green slide lever against the photo developer cartridge.
- Page 193 Lower the photo developer cartridge into the printer until it is firmly seated. Rotate the green photo developer locking levers down.
- Page 194 Close the top door.
-
Page 195: Chapter 28: Calling For Customer Support
Calling for customer support You can contact your local Lexmark service representative or contact the Lexmark Customer Support on the World Wide Web at www.Lexmark.com. When you contact your local service provider or customer support, be prepared to describe the problem you are experiencing or the error message on the printer operator panel. -
Page 196: Chapter 29: Using The Operator Panel
Using the operator panel Printing a menu settings page You can print a list of the current user default settings at any time. Note: Before printing the menu settings page, ensure the selected paper source holds A4 or letter size paper. From the operator panel, press to enter the menus. -
Page 197: Paper Source
Press Select Paper Source appears on the first line, and the current paper source is on the second line. If you want to select a different paper source, press and release > or < until the Menu Menu source you want appears on the second line. Paper Source = Tray 1* Return... -
Page 198: Plain Paper
Press Select The current paper source is displayed on the first line, and the current paper type is on the second line. If you want to select a different paper type, press and release > or < until the type Menu Menu you want is on the second line. -
Page 199: Changing The Paper Type Setting
Changing the Paper Type setting It is important to verify the Paper Type settings are accurate for all the installed paper sources. Refer to the menu settings page you printed. The Paper Type is listed for each of the installed paper sources. Paper Type refers to the type of media loaded in the sources: plain paper, letterhead, envelopes, and transparencies. -
Page 200: Chapter 30: Using Printer Menus
Using printer menus Select a menu from the following list for more information. Or, click a letter in the index at the bottom of the page to find a specific menu item that starts with that letter. Click here to see an overview of the menu structure. •... -
Page 201: Advanced Status
Select a menu or menu item for more details. Job Menu Paper Menu PCL Emul Menu Serial Menu Color Menu Supplies Menu Confidential Job Paper Source Font Source PCL SmartSwitch Photo Enhance <color>Toner Paper Size Reset Printer PS SmartSwitch Font Name Print Quality Tray <x>... - Page 202 Confidential Job Copies Custom Types Data Bits Defragment Flash Display Language Download Target Duplex Duplex Bind Factory Defaults Finishing Menu Font Name Font Priority Font Source Format Disk Format Flash Fuser Fuser Cleaner Held Jobs Hex Trace Honor DSR Honor Init Image Smoothing...
- Page 203 Infrared Buffer Infrared Menu Infrared Port Jam Recovery Job Acct Stat Job Accounting Job Buffer Size Job Buffering Infrared Menu LocalTalk Menu Network Menu Parallel Menu Serial Menu USB Menu Job Menu Lines per Page LocalTalk Addr LocalTalk Buffer LocalTalk Menu LocalTalk Name LocalTalk Port LocalTalk Zone...
- Page 204 Multipage View Network Buffer Network Menu Network <x> Setup NPA Hosts NPA Mode Infrared Menu LocalTalk Menu Network Menu Parallel Menu Serial Menu USB Menu Oil Bottle Orientation Page Protect Paper Loading Paper Menu Paper Size Paper Source Paper Type Paper Weight Parallel Buffer Parallel Menu...
- Page 205 Network Menu Parallel Menu Serial Menu USB Menu Photo Dev Cart Photo Enhance Pitch Point Size PostScript Menu Power Saver Print Area Print Directory Print Fonts Print Menus Print Net <x> Setup Print PS Error Print Timeout Print Quality Printer Language Protocol PS SmartSwitch Infrared Menu...
- Page 206 RS-422 Polarity RS-232/RS-422 Separator Sheets Separator Source Serial Buffer Serial Menu Serial Protocol Setup Menu Substitute Size Supplies Life Supplies Menu Symbol Set Transmit Delay Tray Renumber Tray <x> Status USB Buffer USB Menu Utilities Menu Wait Timeout Waste Bottle Window Size...
-
Page 207: Chapter 31: Color Menu
Color Menu Use the Color Menu to adjust print quality and customize color printing. Select a menu item for more details: • Print Quality • Photo Enhance • Color Correction Note: Values marked by an asterisk are the factory default settings. Print Quality Purpose: To define the number of dots printed per inch (dpi). - Page 208 Values: Uses error diffusion on photos. This works in either 600 dpi or 2400 IQ mode. Note: Photo Enhance is not supported in PCL. Does not use error diffusion. See also: Controlling your printed output Color Correction Purpose: To adjust the printed color to better match the colors of other output devices or standard color systems. Values: Auto* Applies the optimum color settings for typical business applications, where...
-
Page 209: Chapter 32: Finishing Menu
Finishing Menu Use the Finishing Menu to define how the printer delivers the printed output. Select a menu item for more details: • Blank Pages • Multipage Order • Collation • Multipage Print • Copies • Multipage View • Duplex •... - Page 210 Values: Off* Prints each page of a job the number of times specified by the Copies menu item. For example, if you set Copies to 2 and send three pages to print, the printer prints page 1, page 1, page 2, page 2, page 3, page 3. Prints entire job the number of times specified by the Copies menu item.
- Page 211 Values: Long Edge* Assumes binding along the long end of the page (left edge for portrait orientation and top edge for landscape orientation). Short Edge Assumes binding along the short edge of the page (top edge for portrait orientation and left edge for landscape orientation). See also: Duplex Multipage Border...
-
Page 212: Separator Sheets
To print multiple page images on one side of a sheet of paper. Also called n-up or Paper Saver. Values: Off* Prints 1 page image per side. 6 Up Prints 6 page images per side. 2 Up Prints 2 page images per side. 9 Up Prints 9 page images per side. -
Page 213: Separator Source
See also: Separator Source; Collation Separator Source Purpose: To specify the paper source that holds separator sheets. Values: Tray <x> (Tray 1*) Selects separator sheets from the specified tray. MP Feeder Selects separator sheets from the multipurpose feeder. (You must also set Configure MP to Cassette.) Env Feeder Inserts envelopes as separator sheets. -
Page 214: Chapter 33: Infrared Menu
Infrared Menu Use the Infrared Menu to change printer settings affecting jobs sent to the printer through an infrared port. Select a menu item for more details: • Infrared Buffer • PCL SmartSwitch • Infrared Port • PS SmartSwitch • Job Buffering •... -
Page 215: Job Buffering
Infrared Port Purpose: To activate the infrared port. Values: Disabled* Disables the infrared port and all other menu items in the Infrared Menu. IR Option <x> Activates the specified infrared port. Job Buffering Purpose: To temporarily store jobs on the printer hard disk before printing. Values: Off* Does not buffer print jobs to the hard disk. -
Page 216: Npa Mode
NPA Mode Purpose: To specify whether the printer performs the special processing required for bidirectional communication, following the conventions defined in the Network Printing Alliance (NPA) Protocol. Values: Printer performs NPA processing. If data is not in NPA format, it is rejected as bad data. Printer does not perform NPA processing. - Page 217 See also: SmartSwitch; Printer Language Transmit Delay Purpose: To define the amount of time, in seconds, the printer must wait before transmitting meaningful infrared data to the host computer, as well as the amount of time the printer requests that the host computer wait before transmitting infrared data.
-
Page 218: Chapter 34: Job Menu
Job Menu The Job Menu is only available when the printer is busy processing or printing a job, when a printer message is displayed, or when the printer is in Hex Trace mode. Press to open the Menu> <Menu Job Menu. Select a menu item for more details: •... - Page 219 Then select a value: Print All Jobs Prints all jobs associated with your PIN. Print A Job Prints the specified Confidential Job. Press to scroll through <Menu Menu> the list of confidential jobs associated with your PIN. Press to print a Select specific job.
-
Page 220: Chapter 35: Localtalk Menu
LocalTalk Menu Use the LocalTalk Menu to change printer settings affecting jobs sent to the printer through a LocalTalk port. Select a menu item for more details: • Job Buffering • LocalTalk Zone • LocalTalk Addr • NPA Hosts • LocalTalk Buffer •... - Page 221 To identify the LocalTalk Node number assigned to the printer. This menu item cannot be modified through the operator panel. LocalTalk Buffer Purpose: To configure the size of the LocalTalk input buffer. Values: Disabled Disables job buffering. Any jobs already buffered on the disk are printed before normal processing of incoming jobs resumes.
- Page 222 LocalTalk Zone Purpose: To identify the LocalTalk Zone provided by the LocalTalk network. This menu item cannot be modified through the operator panel. NPA Hosts Purpose: To specify the maximum number of NPA hosts that can register for NPA alerts. Values: 1...10 (2*) NPA Mode...
- Page 223 See also: SmartSwitch; Printer Language PS SmartSwitch Purpose: To configure the printer so it automatically switches to PostScript emulation when a print job received through the LocalTalk port requires it, regardless of the default printer language. Values: Printer examines data on the LocalTalk interface and selects PostScript emulation if the data indicates that is the required printer language.
-
Page 224: Chapter 36: Network Menu
Network Menu Use the Network Menu to change printer settings affecting jobs sent to the printer through a network port (either Standard Network or Network Opt <x>). Select a menu item for more details: • Job Buffering • Network Buffer •... -
Page 225: Network Buffer
Network Buffer Purpose: To configure the size of the network input buffer. Values: Auto* Printer automatically calculates the Network Buffer size (recommended setting). 3K to maximum User specifies the Network Buffer size. The maximum size depends on the size allowed amount of memory in your printer, the size of the other link buffers, and whether Resource Save is set to On or Off. - Page 226 PCL SmartSwitch Purpose: To configure the printer so it automatically switches to PCL emulation when a print job received through the network port requires it, regardless of the default printer language. Values: Printer examines data on the network interface and selects PCL emulation if the data indicates that is the required printer language.
- Page 227 MAC Binary PS Purpose: To let the printer receive binary PS data from a Macintosh computer and print it properly. Note: When Mac Binary PS is turned On, the printer may not properly print data from a Windows system. Values: Enables the printer to receive and print binary PS data from a Macintosh computer.
-
Page 228: Chapter 37: Paper Menu
Paper Menu Use the Paper Menu to define the paper loaded in each paper tray and the default paper source and output bin. Select a menu item for more details: • Custom Types • Paper Type • Paper Loading • Paper Weight •... -
Page 229: Paper Size
Values: First select a paper type: Card Stock Load Colored Loading Ltrhead Loading Bond Loading Labels Loading Custom <x> Loading Preprint Loading Then select a value: Duplex Notifies the printer that the specified paper type is loaded properly for duplex printing. If the printer receives a single-sided job using that paper type, the printer inserts blank pages as necessary to print the job properly on preprinted forms. -
Page 230: Paper Weight
If you loaded the same size and type of paper in two paper sources (and the Paper Size and Paper Type menu items are correctly set), the trays are automatically linked. When one paper source is empty, paper automatically feeds from the next linked source. Paper Type Purpose: To identify the type of paper installed in each paper source. -
Page 231: Substitute Size
Then select a value: Light Normal* Note: If a user-defined name is available, it is displayed instead of Custom <x> Weight. The name is truncated to 14 characters. Substitute Size Purpose: To have the printer substitute the specified paper size if the requested size is not loaded. Values: Printer prompts the user to load the requested paper size. -
Page 232: Chapter 38: Parallel Menu
Parallel Menu Use the Parallel Menu to change printer settings affecting jobs sent to the printer through a parallel port (either Std Parallel or Parallel Opt <x>). Select a menu item for more details: • Advanced Status • Parallel Mode 1 •... -
Page 233: Parallel Buffer
Printer honors hardware initialization requests from the computer. Job Buffering Purpose: To temporarily store jobs on the printer hard disk before printing. Values: Off* Does not buffer print jobs to the hard disk. Buffers print jobs to the hard disk. Auto Buffers print jobs only if the printer is busy processing data from another input port. -
Page 234: Parallel Mode 1
Values: Disabled Disables job buffering. Any jobs already buffered on the disk are printed before normal processing of incoming jobs resumes. Auto* Printer automatically calculates the Parallel Buffer size (recommended setting). 3K to maximum User specifies the Parallel Buffer size. The maximum size depends on the size allowed amount of memory in your printer, the size of the other link buffers, and whether Resource Save is set to On or Off. - Page 235 Values: Printer examines data on the parallel interface and selects PCL emulation if the data indicates that is the required printer language. Printer does not examine the incoming data. The printer uses PostScript emulation to process the job if PS SmartSwitch is On, or uses the default printer language specified in the Setup Menu if PS SmartSwitch is Off.
-
Page 236: Chapter 39: Pcl Emul Menu
PCL Emul Menu Use the PCL Emul Menu to change printer settings that only affect jobs using the PCL emulation printer language. Select a menu item for more details: • A4 Width • Orientation • Auto CR after LF • Pitch •... -
Page 237: Font Name
Values: Off* Printer does not perform a carriage return after a line feed control command. Printer performs a carriage return after a line feed control command. Auto LF after CR Purpose: To specify whether the printer automatically performs a line feed after a carriage return control command. -
Page 238: Lines Per Page
See also: Font Name Lines per Page Purpose: To determine the number of lines that print on each page. Values: 1...255 60* (country-specific) 64* (country-specific) The printer sets the amount of space between each line (vertical line spacing) based on the Lines per Page, Paper Size, and Orientation menu items. -
Page 239: Point Size
Pitch refers to the number of fixed-space characters in a horizontal inch of type. You can select a pitch from 0.08 to 100 characters per inch (cpi) in increments of 0.01 cpi. For nonscalable monospaced fonts, the pitch is displayed, but cannot be changed. Note: Pitch is only displayed for fixed, or monospaced, fonts. - Page 240 First select a paper source: Assign Tray <x> Then select a value: Off* Printer uses factory default paper source assignments. 0...199 Select a numeric value to assign a custom value to a paper source. None Paper source ignores the Select Paper Feed command. View Factory Def Displays the factory default value assigned to the specified paper source.
-
Page 241: Chapter 40: Postscript Menu
PostScript Menu Use the PostScript Menu to change printer settings that only affect jobs using the PostScript emulation printer language. Select a menu item for more details: • Font Priority • Image Smoothing • Print PS Error Note: Values marked by an asterisk are the factory default settings. Font Priority Purpose: To establish the font search order. - Page 242 Values: Off* Uses default resolution when printing all images. Enhances low resolution images, such as graphics with a resolution of 72 dpi. Note: Image Smoothing has no effect on images that are 300 dpi or higher resolution. Print PS Error Purpose: To print a page defining the PostScript emulation error when an error occurs.
-
Page 243: Chapter 41: Serial Menu
Serial Menu Use the Serial Menu to change printer settings affecting jobs sent to the printer through a serial port (either Standard Serial or Serial Opt <x> ). Select a menu item for more details: • Baud • PS SmartSwitch •... -
Page 244: Data Bits
Data Bits Purpose: To specify the number of data bits that are sent in each transmission frame. Values: See also: Technical Reference Honor DSR Purpose: To determine whether the printer uses the Data Set Ready (DSR) signal. DSR is one of the handshaking signals for most serial interface cables. - Page 245 NPA Mode Purpose: To specify whether the printer performs the special processing required for bidirectional communication, following the conventions defined in the Network Printing Alliance (NPA) Protocol. Values: Printer performs NPA processing. If data is not in NPA format, it is rejected as bad data. Printer does not perform NPA processing.
-
Page 246: Robust Xon
See also: SmartSwitch; Printer Language PS SmartSwitch Purpose: To configure the printer so it automatically switches to PostScript emulation when a print job received through the serial port requires it, regardless of the default printer language. Values: Printer examines data on the serial interface and selects PostScript emulation if the data indicates that is the required printer language. -
Page 247: Serial Protocol
RS-422 Polarity Purpose: To establish the behavior of the positive and negative signals when using RS-422 serial communication. Values: Normal* Uses default definition of one and zero. Reverse Reverses the definition of one and zero, thereby allowing a positive connection to a host computer negative terminal without changing the physical cable. - Page 248 XON/XOFF/DTRDSR Combined hardware and software handshaking. See also: Technical Reference...
-
Page 249: Chapter 42: Setup Menu
Setup Menu Use the Setup Menu to configure a variety of printer features. Select a menu item for more details: • Alarm Control • Power Saver • Auto Continue • Print Timeout • Display Language • Printer Language • Download Target •... - Page 250 To define the amount of time (in seconds) the printer waits after displaying an operator intervention error message before it resumes printing. Values: Disabled* Printer does not resume printing until someone clears the error message. 5...255 Printer waits the specified amount of time, and then automatically resumes printing. This timeout value also applies if the menus are displayed (and the printer is offline) for the specified period of time.
-
Page 251: Job Accounting
To establish whether the printer reprints jammed pages. Values: Printer reprints jammed pages. Printer does not reprint jammed pages. Auto* Printer reprints a jammed page unless the memory required to hold the page is needed for other printer tasks. Job Accounting Purpose: To store statistical information about your most recent print jobs on the hard disk. -
Page 252: Power Saver
Values: Off* Prints a partial page of data if memory is insufficient to process the entire page. Ensures that an entire page is processed before it prints. If, after selecting On, you still cannot print the page, you may also have to reduce the size and number of fonts on the page, or increase the installed printer memory. -
Page 253: Printer Language
Printer Language Purpose: To establish the default printer language used to communicate data from the computer to the printer. Values: PCL Emulation* PCL emulation, compatible with Hewlett-Packard printers. PS Emulation PostScript emulation, compatible with Adobe PostScript language. Note: Setting a printer language as the default does not prevent a software application from sending print jobs that use the other language. -
Page 254: Print Area
Print Area Purpose: To modify the logical and physical printable area. Values: Print Area Normal* Whole Page Toner Saver Purpose: To control the amount of toner used on the printed page. Values: Off* Select On to reduce the amount of toner used. Selecting On also may help reduce printing costs. -
Page 255: Chapter 43: Supplies Menu
Supplies Menu The Supplies Menu provides information about printer supplies that require attention. It is only available when a supply is low or needs replacement. Select a menu item for more details: • <color>Toner • Tray <x> Status • Fuser •... - Page 256 Values: Exhausted It’s time to replace the fuser. See also: Supplies Fuser Cleaner Purpose: To view the status of the printer fuser cleaning roll when in a maintenance state. Values: Missing The cleaning roll is missing or improperly installed. Life Warning The cleaning roll is near its end of life.
-
Page 257: Tray
Values: Missing The photo developer cartridge is either missing or improperly installed. Exhausted It’s time to replace the photo developer cartridge. See also: Supplies Tray <x> Status Purpose: To view the status of all printer paper trays when in a maintenance state. Values: Missing Tray <x>...Status -
Page 258: Supplies Life
Value: 120,000 Page Kit The Maintenance Kit needs to be replaced. See also: Supplies Replace Supplies Purpose: To reset the counters for various supply items before they enter a maintenance state. Values: <color> Toner =Not Replaced =Replaced Photo Dev Cart =Not Replaced =Replaced Fuser... - Page 259 See also: Supplies...
-
Page 260: Chapter 44: Usb Menu
USB Menu Use the USB Menu to change printer settings affecting a Universal Serial Bus (USB) port (USB Option <x>). Select a menu item for more details: • Job Buffering • NPA Mode • PCL SmartSwitch • PS SmartSwitch • USB Buffer •... - Page 261 NPA Mode Purpose: To specify whether the printer performs the special processing required for bidirectional communication, following the conventions defined in the Network Printing Alliance (NPA) Protocol. Values: Printer performs NPA processing. If data is not in NPA format, it is rejected as bad data. Printer does not perform NPA processing.
-
Page 262: Usb Buffer
See also: SmartSwitch; Printer Language USB Buffer Purpose: To configure the size of the USB input buffer. Values: Disabled Job buffering is disabled. Any jobs already buffered on the disk are printed before normal processing of incoming jobs resumes. Auto* Printer automatically calculates the USB Buffer size (recommended setting). -
Page 263: Chapter 45: Utilities Menu
Utilities Menu Use the Utilities Menu to print a variety of listings relating to available printer resources, printer settings, and print jobs. Other menu items let you set up printer hardware and troubleshoot printer problems. Select a menu item for more details: •... -
Page 264: Format Disk
Values: Restore • All menu items are returned to the factory default values except: – Display Language. – All settings in the Parallel Menu, Serial Menu, Network Menu, Infrared Menu, LocalTalk Menu, and USB Menu. • All downloaded resources (fonts, macros, and symbol sets) in printer memory (RAM) are deleted. -
Page 265: Hex Trace
Hex Trace Purpose: To help isolate the source of a print job problem. With Hex Trace selected, all data sent to the printer is printed in hexadecimal and character representation. Control codes are not executed. To exit Hex Trace, turn the printer off or reset the printer from the Job Menu. Job Acct Stat Purpose: To print a listing of all job statistics stored on the hard disk, or to clear all statistics on the disk. -
Page 266: Print Menus
Print Menus Purpose: To print a listing of the current user default values, the installed options, the amount of installed printer memory, and the status of printer supplies. Print Net <x> Setup Purpose: To print information relating to the internal print server and the network settings defined by the Network <x>... -
Page 267: Chapter 46: Printer Specifications
Printer specifications Standard features Feature Description Print method Dry electrophotographic process using a laser diode unit Print addressability 600 x 600 dpi Maximum simplex print speed 24/6 ppm (letter and A4 paper) (mono/color) Maximum duplex print speed 8/3 duplexed ppm (letter and A4 paper) (mono/color) Fonts •... - Page 268 Options Option Description Optional drawer Drawer unit with one 500-sheet tray installed underneath the printer. Optional legal tray Provides the ability to print legal size paper (8.5 x 14 in. / 215.4 x 354.8 mm). Duplex unit Provides two sided color or monochrome printing. Memory Maximum usable memory: 384MB.
- Page 269 Printer supplies Supply Description Approximate yield Waste toner bottle Collects excess toner from the photo developer. 12,000 images Maintenance kit Transfers image to media (consists of transfer roller, 120,00 pages paper discharger, and drum cleaner). Dimensions Printer configuration Height Weight Depth Printer 410 mm (16.1 in.)
-
Page 270: Chapter 47: Printer Software And Utilities
CD. The MarkVision graphical user interface provides advanced, real-time, centralized management capabilities for Lexmark printers connected locally or attached directly to a network. Network users and administrators can also use the following MarkVision features to increase productivity: •... -
Page 271: Markvision For Unix Networks
MarkVision for UNIX Networks and Intranet Servers is recommended to assist in remote printer setup for UNIX platforms. To purchase MarkVision for UNIX, contact the place where you bought your printer or visit the Lexmark Web site at www.lexmark.com. -
Page 272: Markvision Messenger
Analyze printing for the enterprise. • Plan ahead for supplies purchases, maintenance schedules, and printer replacement. For more information on MarkTrack, refer to the product information, contact the place where you bought your printer, or visit the Lexmark Web site at www.lexmark.com. -
Page 273: Lexmark Netpnp
• Lets you customize network printer installation in Windows NT environments running TCP/IP. • Automates the setup of Lexmark network printers, eliminating more than a dozen steps in the process. • Distribution of drivers with custom settings to users. -
Page 274: Chapter 48: Managing Memory
SDRAM DIMM memory cards in any memory combination to suit your needs; however, the maximum amount of memory your printer can use is 384MB. Note: Memory options designed for other Lexmark laser printers may not work with your printer. Lexmark offers three memory options for your printer: 32MB, 64MB and 128MB. For memory installation instructions, refer to the Setup Guide. -
Page 275: Flash Memory
Solving memory problems If your printer encounters a memory shortage when trying to print a job, it may post an error message (37 Insufficient Collation Area, 37 Insufficient Defrag Memory, 38 Memory Full, or , depending on the task it is trying to complete. See Understanding printer 39 Complex Page messages... -
Page 276: Hard Disk
Hard disk If you have a large number of permanent resources you’d like to download to your printer, you may want to install an optional hard disk. The hard disk works much like flash memory, but has a larger storage capacity for downloaded resources. You can also use the hard disk for job buffering, collating large jobs, and gathering job statistics. -
Page 277: Removing Memory And Network Options
• Deleting files • Moving files from one storage device to the other on the same printer or from one printer to another printer • Printing a directory listing the resources stored on a device • Read/write and write passwords to protect resources stored on flash memory or hard disk, or to protect individual files For more information about the specific resource management tools that MarkVision offers, see Introducing MarkVision... - Page 278 Unplug the power cord. Remove the two screws on the rear cover. Place the screws in a safe place so they are available when you reinstall the cover and system board. Note: You must replace the system board before you can operate the printer.
-
Page 279: Removing A Memory Card
Remove the rear cover and system board. Removing a memory card Complete the following steps if you need to remove a memory card. Otherwise, go to Removing a flash memory card, Removing an interface card, or Installing the rear cover and system board. - Page 280 Gently pull the card out of the connector. Place the card into the original packaging. If you do not have the original packaging, wrap the card in paper and store it in a box. Close both latches. Repeat step 3 through step 6 to remove additional memory cards.
- Page 281 Push the latches at each end of the connector away from the card as shown. The memory card moves out of the connector as the latches open. Gently pull the card out of the connector. Place the card into the original packaging. If you do not have the original packaging, wrap the card in paper and store it in a box.
-
Page 282: Removing An Interface Card
Removing an interface card You need a number 2 Phillips screwdriver to remove an interface card. Make sure the printer is turned off and the power cord is unplugged. Complete the steps for Removing the rear cover and system board if the rear cover and system board are still installed. - Page 283 If you are not installing another interface card in the connector, cover the opening with a blank INA cover. Covering the opening ensures proper airflow around the system board. If you do not have a cover, contact your service representative and request a blank INA cover. Installing the rear cover and system board After you have removed your options, complete the following steps to install the rear cover and system board.
- Page 284 Align the system board with the slots inside the rear of the printer. Slots Insert the system board into the printer. Align the two screws in the rear cover with the holes on the printer frame. Tighten the two screws to secure the rear cover and system board to the printer. If you installed internal options after initial printer setup, connect the printer cables and power cord, and turn the printer on.
-
Page 285: Chapter 49: Notices
International Ltd., Marketing and Services Department, Westhorpe House, Westhorpe, Marlow Bucks SL7 3RQ. Lexmark may use or distribute any of the information you supply in any way it believes appropriate without incurring any obligation to you. You can purchase additional copies of publications related to this product by calling 1-800-553-9727. -
Page 286: Trademarks
FAR provisions: Lexmark International, Inc., Lexington, KY 40550. Trademarks Lexmark, Lexmark with diamond design, MarkNet, MarkVision, and Optra are trademarks of Lexmark International, Inc., registered in the United States and/or other countries. MarkTrack, Optra Forms, and OptraImage are trademarks of Lexmark International, Inc. -
Page 287: Safety Information
Lexmark PRODUCT This Statement of Limited Warranty applies to this product if it was originally purchased for your use, and not for resale, from Lexmark or a Lexmark remarketer, referred to in this statement as “Remarketer.” Warranty Lexmark warrants that this product: •... - Page 288 Free remote technical support is provided for this product throughout its warranty period. Lexmark offers a variety of extended warranty programs that include an extension of technical support. For products no longer covered by a Lexmark warranty, technical support may only be available for a fee. Extent of warranty We do not warrant uninterrupted or error-free operation of a product.
-
Page 289: Electronic Emission Notices
Lexmark is legally liable. In no event will Lexmark be liable for any lost profits, lost savings, incidental damage, or other economic consequential damages. This is true even if you advise Lexmark or a Remarketer of the possibility of such damages. - Page 290 To assure compliance with FCC regulations on electromagnetic interference for a Class B computing device, use a properly shielded and grounded cable such as Lexmark part number 1329605 for parallel or 12A2405 for USB. Use of a substitute cable not properly shielded and grounded may result in a violation of FCC regulations.
- Page 291 To assure compliance with FCC regulations on electromagnetic interference for a Class A computing device, use a properly shielded and grounded cable such as Lexmark part number 1329605 for parallel or 12A2405 for USB. Use of a substitute cable not properly shielded and grounded may result in a violation of FCC regulations.
-
Page 292: German Acoustics Statement
This feature cuts the energy used by up to 50 percent. Lexmark is proud to be a participant in this program. As an Energy Star Partner, Lexmark International, Inc., has determined that this product meets the Energy Star guidelines for energy efficiency. -
Page 293: Index
Index media 34 Duplex (Finishing Menu) 210 primary 23 Duplex Bind (Finishing Menu) 210 A4 Width (PCL Emul Menu) 236 screens 28 adjusting settings 32 color 208 subtractive 23 Advanced Status (Parallel Menu) electronic emissions notices 289 supplies 34 empty toner cartridges 63 translation 26 Alarm Control (Setup Menu) 249 energy conservation 292... - Page 294 Format Disk (Utilities Menu) 264 transmit delay 217 buffer size 221 Format Flash (Utilities Menu) 264 window size 217 NPA hosts 222 Fuser (Supplies Menu) 255 Infrared Port (Infrared Menu) 215 NPA mode 222 Fuser Cleaner (Supplies Menu) installing the rear cover 283 PCL SmartSwitch 222 installing toner cartridges 64 PS SmartSwitch 223...
- Page 295 55 Insufficient Fax Buffer 164 Engine Warming 150 Network Buffer (Network Menu) 56 Parallel Port <x> Disabled Enter PIN 21, 151 Files will be Lost 151 Network Menu 224 56 Serial Port <x> Disabled 165 Flushing Buffer 151 Job Buffering 224 56 Std Parallel Port Disabled Formatting Disk 151 MAC Binary PS 227...
- Page 296 cartridge replacing 69 buffer size 233 cartridge supplies 256 Page Protect (Setup Menu) 251 data sampling 234 charger, cleaning 190 paper 230, 231 hardware initialization 232 Photo Enhance (Color Menu) 207 capacities 35, 52 NPA mode 233 PIN 20 custom type 228 PCL SmartSwitch 234 Pitch (PCL Emul Menu) 238 discharger 60...
- Page 297 printer memory 10 statistics printer overview 9 printing 265 safety infomration 287 color quality 10 storing screen angle 30 documentation, using 11 supplies 62 screen frequency 30 MarkVision 10 Substitute Size (Paper Menu) 231 Separator Sheets (Finishing Menu) memory 10 supplies 255 printer testing <color>...
- Page 298 unlocking menus 16 USB Buffer (USB Menu) 262 USB Menu 260 Job Buffering 260 MAC Binary PS 262 NPA Mode 261 PCL SmartSwitch 261 PS SmartSwitch 261 USB Buffer 262 USB port configuring buffer size 262 MAC Binary PS 262 NPA mode 261 PCL SmartSwitch 261 PS SmartSwitch 261...
- Page 299 Lexmark and Lexmark with diamond design are trademarks of Lexmark International, Inc., registered in the United States and/or other countries. © 2000 Lexmark International, Inc. 740 West New Circle Road Lexington, Kentucky 40550 www.lexmark.com...