Brother P-Touch PT-2100 User Manual
Brother pt-2100: users manual
Hide thumbs
Also See for P-Touch PT-2100:
- Software installation manual (47 pages) ,
- User manual (159 pages)
Table of Contents
Advertisement
Available languages
Available languages
Advertisement
Chapters
Table of Contents

Related Manuals for Brother P-Touch PT-2100


Summary of Contents for Brother P-Touch PT-2100
- Page 1 P. 11 P. 4 P. 12 P. 25 P. 49 P. 56 P. 60 P. 62 P. 68 P. 71...
- Page 2 This equipment has been tested and found to comply with the limits for a Class B digital device, pursuant to Part 15 of the FCC Rules. These limits are designed to provide reasonable protection against harmful interference in a residential installation.
- Page 3 • If you purchased a product from someone other than an authorized Brother reseller in the United States or if the product was used (including but not limited to floor models or refurbished product), prior to your purchase you are not the Original Purchaser and the product that you purchased is not covered by this warranty.
- Page 4 Product is entitled to warranty coverage. Your credit card will be charged up to the cost of a new Product only if: (i) you do not return your original Prod- uct to Brother within five (5) business days; (ii) the problems with your original Product are not covered by the limited warranty;...
- Page 5 MERCHANTABILITY AND FITNESS FOR A PARTICULAR PURPOSE, ARE HEREBY DISCLAIMED. • This Limited Warranty is the only warranty that Brother is giving for the machine. It is the final expression and the exclusive and only statement of Brother's obligations to you.
-
Page 6: Important Information
Save Time - Register On-Line! Don’t stand in line at the post office or worry about lost mail. Visit us on-line at www.registermybrother.com Your product will immediately be registered in our database and you can be on your way! -
Page 7: Table Of Contents
1. INTRODUCTION ................. 4 What You Can Do ......................4 Safety Precautions ......................6 General Precautions....................10 Symbols Used in this Guide ..................10 Quick Index ......................... 11 2. GETTING STARTED ................. 12 Unpacking Your P-touch labeler.................. 12 General Description..................... 13 LCD Display &... - Page 8 Setting Auto Fit Style .....................34 Setting Label Attributes ....................35 Framing Options .....................36 Using Auto-Format Layouts ..................37 Using Templates - Example creating an Asset Tag..........37 Using Block Layouts ....................41 Creating a Bar Code Label...................45 Setting Bar Code Parameters ................45 Entering Bar Code Data..................46 Editing and Deleting a Bar Code ................48...
- Page 9 7. TROUBLESHOOTING............... 62 What to do when......................62 Error Messages ......................65 8. APPENDIX..................68 Specifications ......................68 9. INDEX ....................71...
-
Page 10: Introduction
INTRODUCTION Thank you for purchasing the P-touch labeler PT-2100/2110. Your new P-touch labeler is an easy to operate, feature packed labeling system that makes creating professional, high quality labels a breeze. In addition to easy label creation via pre-formatted label layouts, the P-touch labeler editing software features advanced label formatting, block formats, bar codes and auto-numbering functions. - Page 11 Software Help Software Help There is two types of Editing software provided with this product. First there is the P-touch Quick Editor (simple label editing software) is ideal for creating simple labels. Than there is the P-touch Editor (full featured label editing software) that can create labels with more complex designs.
-
Page 12: Safety Precautions
INTRODUCTION Safety Precautions To prevent injury and damage, important notes are explained using various symbols. The symbols and their meanings are as follows: Tells you what to do to avoid the risk of injury. WARNING Tells you about procedures you must follow to prevent damage to CAUTION the P-touch. - Page 13 Do not use an outlet that is loose. Battery Follow these guidelines to avoid liquid leakage, heat, rupture of the battery. Do not use metallic articles, such as Do not throw into fire, heat up, or tweezers or a metallic pen, when disassemble the battery.
- Page 14 INTRODUCTION WARNING P-touch Follow these guidelines to avoid fire, damage, electric shock, and choking. Do not allow the P-touch to get wet in Do not disassemble the P-touch. For any way. inspection, adjustment, and repair of Do not touch any metal parts near the the P-touch, contact the retail outlet print head.
- Page 15 Before applying the label, check the environmental condition and the material. Memory Any data stored in memory will be lost due to failure or repair of the P-touch, or if the battery expires. When power is disconnected for more than two minutes, all text and format settings will be cleared.
-
Page 16: General Precautions
• Do not put any foreign objects into the tape exit slot, AC adapter connector, or USB port, etc. • Do not try to print labels using an empty tape cassette or without a tape cassette set in the P-touch labeler. Doing so will damage the print head. -
Page 17: Quick Index
Simply look for your task below and then go to Index Index the page indicated. If the task you are looking for is not shown here, try the Contents or Index pages. AB C AB C To enter text, symbols... -
Page 18: Getting Started
GETTING STARTED Unpacking Your P-touch labeler Check that the package contains the following before using your P-touch labeler. P-touch labeler PT-2100 TZ tape cassette (Starter Cassette) CD-ROM USB cable (Drivers, Labeling Editing Software (USB cable not included with the packages) purchase of PT-2100.) -
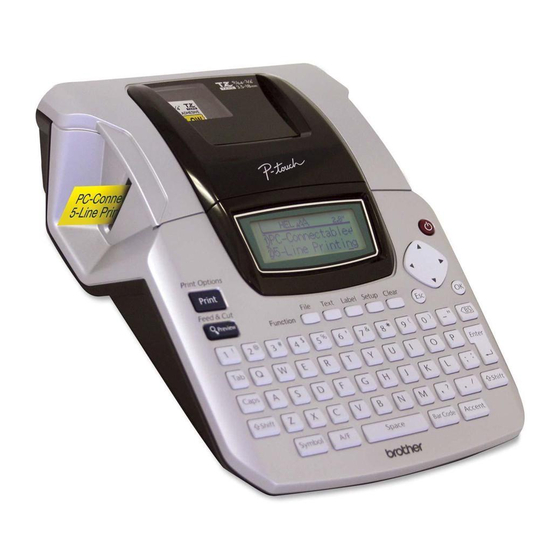
Page 19: General Description
LCD display Keyboard Tape cutter Print head Release lever When shipped from the factory, the Tape compartment cover and the LCD display are covered with a protective sheet to prevent damage. Remove this sheet before using the P-touch. Battery compartment... -
Page 20: Lcd Display & Keyboard
Indicates the approximate length of the label with the text entered presently in the machine. 10.Cursor selection Indicates that you can use the cursor keys to select the items on the screen. Use keys to select a menu item, and the keys to change the setting. -
Page 21: Key Names And Functions
• Displays a preview of the label. label attributes in the function menus. • Feeds 0.92" (23 mm) of blank tape and then automatically cuts the tape when used in combination with the key. - Page 22 GETTING STARTED (Backspace): • Opens the Text menu, where you can • Deletes the character to the left of the set character attributes for the label. cursor. • Character attributes can be set to each • Clears all text entered, or all text and...
-
Page 23: Power Supply
CAUTION If you do not intend to use the P-touch labeler for an extended period of time it is recommended that the batteries be removed. Power Supply... -
Page 24: Ac Adapter
P-touch labeler. Insert the AC adapter plug into a standard electrical outlet. Remove the batteries if you do not intend to use the P-touch for an extended period of time. • Turn the P-touch labeler off before disconnecting the AC adapter. -
Page 25: Inserting A Tape Cassette
Inserting a Tape Cassette This P-touch labeler accepts tape cassettes of 9/64", 1/4", 3/8", 1/2" or 3/4" (3.5mm, 6mm, 9mm, 12mm, or 18mm) width. • If the new tape cassette has a cardboard stopper, be sure to remove the stopper before inserting the cassette. - Page 26 Release lever • Be sure to feed tape to remove any slack in the tape and ink ribbon after inserting the tape cassette. Refer to “Feeding Tape” on page 22. • Do not pull the label coming out of the tape exit slot. Doing so will cause the ink ribbon to be discharged with the tape.
-
Page 27: Turning Power On/Off
Refer to the Auto Power-Off Time table below for details. • If the batteries are installed or the P-touch labeler is connected to an electrical outlet by the AC adapter, the previous session’s information is maintained and will displayed when the power is turned on. -
Page 28: Feeding Tape
This function will advance the tape approximately 0.92" (23 mm) and then cut the tape, resulting in a blank label. This action maybe needed when installing a new tape cassette to remove a bend in the tape and or ensure correct feeding of the tape. Hold down the key and press the key. -
Page 29: Lcd Display
LCD Contrast This function allows the user to adjust the contrast setting of the LCD display to make the screen easier to read. There are five levels from Dark (+2) to Light (-2) the factory default setting is “0”. Press the key to display the Setup menu, select “LCD Contrast”... -
Page 30: Setting Language And Unit
Press the key to return to the previous step. Unit Select the units ("inch" or "mm") for dimensions shown on the LCD display. The default setting is "inch". Press the key to display the Setup menu, select "Unit" using the key, and then press the key. -
Page 31: Editing A Label
• There is a maximum number of lines of text that can be entered for each tape width. A maximum of 5 lines can be entered for 3/4" (18mm) tape, 3 lines for 1/2" (12mm) tape, 2 lines for 3/8"... -
Page 32: Inserting Text
EDITING A LABEL Inserting Text • To insert additional text into an existing line of text, move the cursor to the character to the right of the position where you want to start inserting text and then enter the additional text. The new text is inserted to the left of the cursor. -
Page 33: Entering Symbols
The selected symbol is inserted into the line of text. • Press the key to return to the previous step. • Refer to the Symbol List table on page 28 for a complete list of symbols and symbol categories. Entering Symbols... -
Page 34: Symbol List
Arrow Unit International Number Pictograph Electrical Others The use of the CE mark is strictly governed by one or more European Council directives. Ensure that any labels you produce which use this mark conform with the relevant directives. Entering Symbols... -
Page 35: Entering Accented Characters
The selected composite character is inserted into the line of text. • Press the key to return to the previous step. • Refer to the Accented Character List table on page 30 for a complete list of all accented characters available. Entering Accented Characters... -
Page 36: Accented Character List
EDITING A LABEL Accented Character List Character Accented Characters Entering Accented Characters... -
Page 37: Setting Character Attributes
• Refer to the Setting Options table for a list of all available settings. • Small characters may be difficult to read when certain styles are applied (e.g. Shadow + Italic). Setting Character Attributes by Each Line When a label consists two or more lines of text, you can set different value of character attributes (font, size, width, style, line and alignment) for each line. -
Page 38: Font & Size Options
EDITING A LABEL Font & Size Options Attribute Value Result (Helsinki) (Brussels) Font (Florida) (Calgary) When Auto is selected, the text is Auto automatically adjusted to print in the largest size available for each tape width. 42pt 36pt 24pt Size 18pt 12pt... -
Page 39: Width & Style Options
Width & Style Options Attribute Value Result Width x2/3 x1/2 (Bold) (Outline) (Shadow) (Solid) Style (Italic) I+BLD (Italic Bold) I+OUT (Italic Outline) I+SHD (Italic Shadow) I+SLD (Italic Solid) (Vertical) Setting Character Attributes... -
Page 40: Setting Auto Fit Style
(Justify) Setting Auto Fit Style When "Size" is set to "Auto" and "Length" is set to a specific length, you can select the way of reducing the text size to fit within the label length. When "Text Size" is selected, the total text size is modified to fit within the label. -
Page 41: Setting Label Attributes
Setting Label Attributes Using the key, you can create a label with a frame around the text and specify the label length and tab length. (Cut Options which may be needed when printing a label can also be set by using the key. -
Page 42: Framing Options
EDITING A LABEL Framing Options Attribute Value Result Frame Setting Label Attributes... -
Page 43: Using Auto-Format Layouts
4.0"(100mm). The default setting is 2.0" (50mm). Using Auto-Format Layouts Using the Auto-Format function you can quickly and easily create labels for a variety of purposes, such as file tabs, equipment labels, name badges, etc. Simply select a layout from the templates or block layouts, enter the text and apply formatting as desired. - Page 44 • Select "Edit" to change the text data or style settings. • Select "Save" to store the label in a file memory. • Select "Quit" to exit the Auto-Format function.
- Page 45 Print Options menu. • If the width of the current tape cassette does not match the set width for the selected layout, an error message is displayed when you try to print the label. Press the key or any other key to clear the error message, and insert a tape cassette of the correct width.
- Page 46 Value Details Binder Spine (3/4" x 8.6" [18mm x 219mm]) File Folder Tab (1/2" x 3.2" [12 mm x 82 mm]) Divider Tab (Hanging Folder) (1/2" x 1.6" [12 mm x 42 mm]) Asset Tag (3/4" x 2.7" [18 mm x 70 mm]) Bin Box (3/4"...
-
Page 47: Using Block Layouts
Press the key. When the tape width has not changed, the last block layout selected is displayed. When the tape width has changed, the default layout for the new tape width is displayed. - Page 48 Print Options menu. • If the width of the current tape cassette does not match the set width for the selected layout, an error message is displayed when you try to print the label. Press the key or any other key to clear the error message, and insert a tape cassette of the correct width.
- Page 49 Block Layouts Attribute Value Details 2LineA 2LineB 3Line 1+2LineA Block layout (3/4" [18 mm] tape) 1+2LineB 1+3Line 1+4Line 1+5Line 2LineA 2LineB Block layout (1/2" [12 mm] tape) 3Line 1+2Line Using Auto-Format Layouts...
- Page 50 EDITING A LABEL Attribute Value Details 2LineA Block layout (3/8" [9 mm] 2LineB tape) 1+2Line Block layout (1/4" [6 mm] 1+2Line tape) Using Auto-Format Layouts...
-
Page 51: Creating A Bar Code Label
• For best results, print bar code labels in black ink on white tape. Some bar code readers may not be able to read bar code labels created using colored tape or ink. -
Page 52: Entering Bar Code Data
Press the key. The Bar Code Input screen is displayed. Up to five bar codes can be entered on a label. Type in the bar code data. Special characters can be entered in the bar code when using the CODE39, CODABAR, CODE128 or EAN128 protocols. - Page 53 Two bar code marks are displayed on the text entry screen. • Press the key to return to the previous step. • Refer to the Special Characters List table on page 47 for a list of all available settings. Special Character List CODE39 CODABAR...
-
Page 54: Editing And Deleting A Bar Code
Bar Code Setup screen. Refer to “Setting Bar Code Parameters” on page 45. • To delete a bar code from a label, position the cursor to right of the bar code marks on the data entry screen and press the key. -
Page 55: Label Printing
• Do not pull the label coming out of the tape exit slot. Doing so will cause the ink ribbon to be discharged with the tape. -
Page 56: Printing A Single Copy
• Press the key to return to the previous step. • Unless set otherwise, the tape is automatically cut after each copy is printed. Refer to “Tape Cutting Options” on page 53 to change this setting. • The figures shown on the screen during printing indicate the “count / number of copies set”. -
Page 57: Auto-Numbering Labels
Auto-numbering Labels Using the numbering function you can create a set of sequentially numbered labels from a single label format. Make sure that the appropriate tape cassette is inserted and ready for printing. Hold down the key and press the... -
Page 58: Mirror Printing
• Press the key to return to the previous step. • Unless set otherwise, the tape is automatically cut after each copy is printed. Refer to “Tape Cutting Options” on page 53 to change this setting. • The figures shown on the screen during printing indicate the “count / number of copies”. -
Page 59: Tape Cutting Options
Tape Cutting Options The tape cutting options allow you to specify how the tape is fed and cut when printing labels. In particular, the “Chain” and “No Cut” options greatly reduce the amount of wasted tape by using smaller margins and eliminating blank sections cut between labels. -
Page 60: Tape Cutting
• When using Fabric Iron-On Tapes or Extra Strength Adhesive Tapes, set “No Cut” and refer to “Feeding Tape” on page 22 to apply the appropriate setting. • The tape is not cut after the last label is printed when “Chain” or “No Cut” is set. Hold down key and press the key, and select “Feed &... -
Page 61: Adjusting The Label Length
Position the label and then press firmly from top to bottom with your finger to attach the label. • Labels may be difficult to attach to surfaces that are wet, dirty, or uneven. The labels may peel off easily from these surfaces. -
Page 62: Using The File Memory
• When the file memory is full, each time you save a file you will need to overwrite one of your stored files. -
Page 63: Opening A Stored Label File
Press the key. The file number of a stored label is displayed. The label text is also displayed to identify the label. Select a file number using the key, and then press the key to open the selected file. -
Page 64: Printing A Stored Label File
The label is printed from the machine. • Press the key to return to the previous step. • The message "No Text!" is displayed when you try to print a file with no text. Printing a Stored Label File... -
Page 65: Deleting A Stored Label File
The message “Delete?” is displayed. Press the key to delete the file. The file is deleted and the screen returns to the text entry screen. Press the key to cancel deleting the file and return to the previous screen. Deleting a Stored Label File... -
Page 66: Maintaining Your P-Touch Labeler
Release the key before releasing the other keys. All text, format settings, option settings and stored label files are cleared when you reset the P-touch labeler. Language and unit settings will also be cleared. Maintenance Your P-touch labeler should be cleaned on a regular basis to maintain its performance. -
Page 67: Cleaning The Tape Cutter
Cleaning the Tape Cutter About once every year, wipe the cutter blades using a cotton swab moistened with isopropyl alcohol (rubbing alcohol). Tape adhesive can build up on the cutter blade after repeated use, taking the edge off the blade which may result in the tape jamming in the cutter. -
Page 68: Troubleshooting
If resetting labeler does not the P-touch labeler does not solve the problem, disconnect respond normally. the AC adapter and remove the batteries for more than 10 minutes. The display remains Is the AC adapter connected... - Page 69 If not, clean the print head using a cotton swab or optional print head cleaning cassette (TZ-CL4). Is Cut Option set to Chain or When these options are set, No Cut? the tape is not fed after printing the label. Check the...
- Page 70 Cut Option setting, or hold down the key and press key to feed and cut the tape. Is Manual Cutting set to ON? When using Fabric Iron-On Tapes or Extra Strength Adhesive Tapes, please use scissors to cut the tape after printing.
-
Page 71: Error Messages
Error Messages When an error message appears on the display, follow the directions provided below. Press any key to clear the error message. Message Cause/Remedy The installed batteries are getting weak. The installed batteries are about to run out of power. Replace with new batteries or connect the AC adapter before continuing. - Page 72 Edit the text and use fewer characters. The length of the label to be printed using the text entered is longer than 39.37" (1 m). Edit the text so that the length of the label is less than 39.37" (1 m).
- Page 73 CODABAR protocol). Enter the bar code data correctly. There are already 5 bar codes entered in the text data when you try to enter a new bar code. You can only use up to five bar codes in each label. Error Messages...
-
Page 74: Appendix
Built-in automatic cutter No. of lines 3/4" (18 mm) tape: 1 - 5 lines; 1/2" (12 mm) tape: 1 - 3 lines; 3/8" (9 mm) tape: 1 - 2 lines; 1/4" (6 mm) tape: 1 - 2 lines; 9/64" (3.5 mm) tape: 1 line... - Page 75 Auto Power-off P-touch only: 5 minutes Connected PC: 60 minutes Size Dimensions 6.98"(W) x 9.14" (D) x 2.68" (H) [177.2 mm (W) x 232.1 mm (D) x 68.0 mm (H)] Weight 1.72lb (780g) (without tape cassette and batteries) Other Operating °...
- Page 76 2000 Pro, XP: 128MB or more required Windows Vista : 512MB or more Hard disk 70MB or more required Monitor SVGA High Color graphics support or higher Interface USB Port (USB specification 1.1 or later protocol) Other CD-ROM drive for installation Specifications...
-
Page 77: Index
....25 symbols ........27 lines ...........25 text ........... 25 uppercase letter ....... 25 uppercase letter ........25 Feed & Cut function ......22 width ..........31 font ........... 31 Width Options ........33 Font Options ........32 formatting character attributes ....31 label attributes ...... -
Page 78: Service Center Locations
Brother products. This system is available 24 hours a day, 7 days a week. You can use the system to send the information to any fax machine, not just the one you are calling from. - Page 79 P. 11 P. 4 P. 12 P. 25 P. 51 P. 58 P. 62 P. 64 P. 72 P. 75...
- Page 80 • Aumente la separación entre el equipo y el receptor. • Conecte el equipo a la salida de un circuito distinto al que está conectado el receptor. • Consulte a su distribuidor o a un técnico experto en radio/TV para obtener ayuda.
- Page 81 Duración del periodo de garantía: • Máquinas: un año a partir de la fecha de compra original. • Consumibles y accesorios incluidos: 90 días a partir de la fecha de compra original o la duración prevista del consumible, lo que suceda antes.
- Page 82 Brother exigirá que le proporcione el número de una tarjeta de crédito válida. Brother emitirá un cargo contra ese número de cuenta de la tarjeta de crédito hasta que reciba el producto original y determine que dicho producto original cumple con los requisitos de la cobertura de la garantía.
- Page 83 Brother firmen el mismo documento en el que (1) se haga referencia a esta máquina y la factura con la fecha de compra, (2) se describa la modificación de esta garantía y (3) se esté de acuerdo en la aplicación de esa modificación.
- Page 84 Ahorre tiempo: ¡registre su producto en línea! No haga cola en la oficina de correos ni se preocupe por cartas perdidas. Visite nuestra página web en línea en: www.registermybrother.com ¡Su producto quedará...
- Page 85 Inserción de texto....................26 Para insertar una tabulación ................. 26 Eliminación de texto....................26 Introducción de símbolos .................... 27 Introducción de símbolos con la tecla ..............27 Introducción de símbolos con la función de símbolos .......... 27 Lista de símbolos ................... 28...
- Page 86 Configuración de los atributos de etiqueta..............36 Opciones de recuadro ..................37 Utilización de diseños de formato automático..............38 Utilización de plantillas; ejemplo de creación de una Etiqueta de activos .....38 Utilización de diseños de bloque ................43 Creación de una etiqueta de código de barras ............47 Configuración de los parámetros de códigos de barras ........47...
- Page 87 7. SOLUCIÓN DE PROBLEMAS............64 Qué hay que hacer cuando..................64 Mensajes de error ....................... 68 8. APÉNDICE..................72 Especificaciones......................72 9. ÍNDICE....................75...
-
Page 88: Introducción
INTRODUCCIÓN ¡Muchas gracias por adquirir la etiquetadora P-touch PT-2100/2110. Su nueva etiquetadora P-touch es un sistema de etiquetado fácil de utilizar y con numerosas funciones que simplifica al máximo la creación de etiquetas profesionales de gran calidad. Además de la sencilla creación de etiquetas mediante diseños previamente establecidos, la etiquetadora P-touch incluye funciones de software de edición como formato avanzado de etiquetas, formatos de bloque, códigos de barras... - Page 89 Ayuda del software Ayuda del software Existen dos tipos de software de edición incluidos en este producto: P-touch Quick Editor (software de edición de etiquetas sencillas) ideal para crear etiquetas sencillas y para crear etiquetas con diseños más complejos, P-touch Editor (software de edición de etiquetas con numerosas funciones).
-
Page 90: Precauciones De Seguridad
Precauciones de seguridad Para prevenir lesiones y daños incluimos notas importantes utilizando diversos símbolos. Los símbolos y sus significados son los siguientes: Le informa sobre lo que debe hacer para evitar el riesgo de ADVERTENCIA lesiones. Le informa sobre los procedimientos que debe seguir para PRECAUCIÓN... - Page 91 No utilice una toma eléctrica que esté suelte. Baterías Siga estas pautas para evitar derrames de líquido, calor excesivo o la rotura de la batería. No utilice artículos metálicos, como No la arroje al fuego ni la caliente ni pinzas o bolígrafos metálicos, al...
- Page 92 INTRODUCCIÓN ADVERTENCIA P-touch Siga estas instrucciones para evitar incendios, daños, electrocución y asfixia. No permita que la P-touch se moje de No desarme la P-touch. Para revisar, ningua manera. ajustar y reparar la P-touch, póngase No toque las piezas metálicas cerca en contacto con la tienda donde la del cabezal de impresión.
- Page 93 última durante un período prolongado de tiempo. Baterías Siga estas pautas para evitar derrames de líquido, calor excesivo o la rotura de la batería. No use baterías viejas y nuevas al No coloque los polos positivo y mismo tiempo.
-
Page 94: Precauciones Generales
F (10° C a 35 °C). • Se recomienda utilizar el cable USB que viene con la P-touch. (El cable USB no se incluye con la compra del PT-2100.) Si se debe utilizar otro cable USB, asegúrese de que sea un cable de alta calidad. -
Page 95: Guía Rápida
Guía rápida Esta sección le permite acceder de forma rápida y sencilla a la información acerca de las tareas que los usuarios suelen utilizar con más frecuencia. Sólo hay que buscar la tarea aquí debajo y, a continuación, ir a la página indicada. Si no encuentra aquí la tarea que está... -
Page 96: Para Empezar
PARA EMPEZAR Desembalaje de la etiquetadora P-touch Compruebe que el paquete contiene los siguientes elementos antes de utilizar la etiquetadora P-touch. Etiquetadora P-touch PT-2100 Cartucho de cinta TZ (Cartucho de arranque) CD-ROM Cable USB (Controladores, paquete de software (El cable USB no se incluye con la de edición de etiquetas) -
Page 97: Descripción General
Cabezal de liberación de cinta impresión Cuando se recibe de fábrica, la tapa del compartimento de cinta y la pantalla LCD están cubiertas por una lámina para evitar daños. Quite dicha lámina antes de utilizar la etiquetadora P-touch. Tapa del compartimiento de baterías... -
Page 98: Pantalla Lcd Y Teclado
2. Cursor Indica la posición actual del cursor. Los nuevos caracteres se introducen a la izquierda del cursor, y el caracter a la izquierda del cursor se borra cuando se oprime la tecla 3. Marca de retorno Indica el final de una línea de texto. -
Page 99: Funciones Y Nombre De Las Teclas
Funciones y nombre de las teclas 9 10 11 (Encendido): Enciende y apaga la etiquetadora P-touch. • Imprime el diseño de etiqueta actual en la cinta. • Abre el menú "Print Options" (Opciones Desplaza el cursor en la dirección de la de impresión) cuando se utiliza junto... - Page 100 PARA EMPEZAR • Abre el menú "Text" (Texto), en el que se Utilice esta función para seleccionar e pueden establecer los atributos de los introducir un símbolo de la lista de caracteres que se utilizan en la etiqueta. símbolos disponibles.
-
Page 101: Alimentación Eléctrica
PRECAUCIÓN Si no va a usar el etiquetador P-touch durante un largo periodo de tiempo, es recomendable quitar las baterías. Alimentación eléctrica... -
Page 102: Adaptador De Ca
PRECAUCIÓN • Desconecte el adaptador de CA de la P-touch y de la toma eléctrica si no va a utilizar la P-touch durante un período prolongado de tiempo. • Si se desconecta el suministro eléctrico durante más de 2 minutos, se borrarán todos los ajustes de texto y formato. -
Page 103: Instalación De Un Cartucho De Cinta
• Si la cinta de tinta está suelta, haga girar con el dedo la rueda dentada en la dirección de la flecha tal y como se muestra en el cartucho de cinta. - Page 104 “Avance de la cinta” en la página 22. • No tire de la etiqueta que sale por la ranura de salida de la cinta. Si lo hace, la cinta de tinta saldrá expulsada junto con la propia cinta de etiquetas.
-
Page 105: Encendido Y Apagado
P-touch. • Su etiquetadora P-touch tiene una función de ahorro de energía con la que se apaga automáticamente si no se oprime alguna tecla durante un determinado periodo de tiempo y en determinadas condiciones de funcionamiento. Consulte abajo la tabla "Desconexión automática"... -
Page 106: Avance De La Cinta
Esta función hará avanzar la cinta a 0.92" (23 mm) aproximadamente y la cortará, produciendo una etiqueta en blanco. Esta acción puede ser necesaria al instalar un nuevo cartucho de cinta para eliminar una comba en la cinta o garantizar la correcta alimentación de cinta. -
Page 107: Pantalla Lcd
Contraste de la pantalla LCD Esta función permite al usuario ajustar el contraste de la pantalla LCD para facilitar la lectura en pantalla. Existen cinco niveles de oscuro (+2) a claro (-2) el ajuste por defecto de fábrica es “0”. -
Page 108: Ajuste Del Idioma Y Las Unidades
Oprima la tecla Oprima la tecla para regresar al paso anterior. Unidad Seleccione la unidad ("pulgadas" o "mm") con la que desea que se indiquen las medidas en la pantalla LCD. El ajuste por defecto es "pulgadas". Oprima la tecla para mostrar el menú... -
Page 109: Edición De Etiquetas
Se puede introducir un máximo de 5 líneas para la cinta de 3/4" (18 mm), 3 líneas para la cinta de 1/2" (12 mm), 2 líneas para las cintas de 3/8" (9 mm) y de 1/4" (6 mm), y 1 línea para la cinta de 9/64" (3.5 mm). -
Page 110: Inserción De Texto
EDICIÓN DE ETIQUETAS Inserción de texto • Para insertar texto adicional en una línea de texto existente, coloque el cursor a la derecha del caracter donde desea insertar el texto y, a continuación, introduzca el texto adicional. El texto nuevo se insertará a la izquierda del cursor. -
Page 111: Introducción De Símbolos
El símbolo seleccionado se insertará en la línea de texto. • Oprima la tecla para regresar al paso anterior. • Consulte la tabla de Lista de símbolos de la página 28 para obtener una lista completa de todos los grupos y símbolos disponibles. Introducción de símbolos... -
Page 112: Lista De Símbolos
Número Pictograma Electricidad Otros El uso de la marca CE está regulado rigurosamente por una o más directivas del Consejo Europeo. Compruebe si las etiquetas que usted produce y que llevan esta marca cumplen las directivas correspondientes. Introducción de símbolos... -
Page 113: Introducción De Caracteres Acentuados
El caracter compuesto seleccionado se insertará en la línea de texto. • Oprima la tecla para regresar al paso anterior. • Consulte la tabla Lista de caracteres acentuados en la página 30 para obtener una lista completa de los caracteres acentuados disponibles. Introducción de caracteres acentuados... -
Page 114: Lista De Caracteres Acentuados
EDICIÓN DE ETIQUETAS Lista de caracteres acentuados caracter Caracteres acentuados Introducción de caracteres acentuados... -
Page 115: Configuración De Los Atributos De Caracteres
(por ejemplo, Sombreado + Cursiva). Ajuste de los atributos de caracteres por cada línea Cuando una etiqueta consiste en dos o más líneas de texto, usted puede ajustar un valor diferente de atributos de caracteres (fuente, tamaño, ancho, estilo, línea y alineación) para cada línea. -
Page 116: Opciones De Fuente Y Tamaño
EDICIÓN DE ETIQUETAS Opciones de fuente y tamaño Atributo Valor Resultado (Helsinki) (Bruselas) Fuente (Florida) (Calgary) Al seleccionar Auto, el texto se ajusta automáticamente para imprimirse con el Auto mayor tamaño disponible para cada ancho de cinta. 42pt 36pt 24pt Tamaño 18pt 12pt Configuración de los atributos de caracteres... -
Page 117: Opciones De Anchura Y Estilo
Opciones de anchura y estilo Atributo Valor Resultado Ancho x2/3 x1/2 Apgdo (desactivado) Negrt (Negrita) Contr (Perfilado) Sombra (Sombreado) Sólido Cursv Estilo (Cursiva) C+Neg (Cursiva negrita) C+Con (Cursiva perfilada) C+Som (Cursiva sombreada) C+Sól (Cursiva sólida) Vertcl (Vertical) Configuración de los atributos de caracteres... - Page 118 EDICIÓN DE ETIQUETAS Atributo Valor Resultado Apgdo (desactivado) Subray Línea (Subrayado) Tachd (Tachado) Izqda. Centro Alinear (Alineación) Derch Just (Justificar) Configuración de los atributos de caracteres...
-
Page 119: Ajuste Del Estilo De Encaje Automático
Si se selecciona “Tamaño del texto”, el tamaño total del texto se modifica para encajarlo dentro de la etiqueta. Si se selecciona "Ancho del texto", el ancho del texto se reducirá al tamaño del ajuste de x1/2. (Si se desea una mayor reducción de tamaño para que el texto pueda caber en la longitud de etiqueta seleccionada, el tamaño total del texto se... -
Page 120: Configuración De Los Atributos De Etiqueta
Oprimiendo la tecla , usted puede crear una etiqueta con un marco alrededor del texto y especificar la longitud y tabulación de la etiqueta. (Las opciones de corte que pueden ser necesarias al imprimir una etiqueta también se pueden ajustar pulsando la tecla . -
Page 121: Opciones De Recuadro
Opciones de recuadro Atributo Valor Resultado Apgdo Marco Configuración de los atributos de etiqueta... -
Page 122: Utilización De Diseños De Formato Automático
La función de Formato automático le permite crear rápida y fácilmente etiquetas para diversos fines, por ejemplo, pestañas de archivos, etiquetas de equipos, placas de identificación, etc. Sólo tiene que seleccionar un diseño entre las plantillas o entre los diseños de bloque disponibles, introducir el texto y aplicar el formato deseado. - Page 123 • Seleccione "Editar" para cambiar los datos de texto o la configuración de estilo. • Seleccione "Guardar" para guardar la etiqueta en la memoria de archivos. • Seleccione "Salir" para salir de la función de formato automático.
- Page 124 "Print Options" (Opciones de impresión). • Si el ancho del cartucho de cinta actual no coincide con el ancho establecido para el diseño seleccionado, aparecerá un mensaje de error cuando intente imprimir la etiqueta.
- Page 125 Plantillas Atributo Valor Detalles Lomo de carpeta (3/4" x 8.6" [18 mm x 219 mm]) Pestaña de archivador (1/2" x 3.2" [12 mm x 82 mm]) Pestaña de divisor (1/2" x 1.6" [12 mm x 42 mm]) Etiqueta de inventario (3/4"...
- Page 126 EDICIÓN DE ETIQUETAS Atributo Valor Detalles Etiqueta 1 de nombre (3/4" x 2.8" [18 mm x 72 mm]) Etiqueta 2 de nombre (1/2" x 2.8" [12 mm x 72 mm]) Dorso caja CD 1 Nombre de la (1/4" x 4.4" [6 mm x 113 mm])
-
Page 127: Utilización De Diseños De Bloque
Oprima la tecla Si el ancho de cinta no se modifica, aparecerá el último diseño de bloque seleccionado. Si se modifica el ancho de cinta, aparecerá el diseño por defecto para el nuevo ancho de cinta. - Page 128 • Oprima la tecla para regresar al paso anterior. • Consulte la tabla Diseños de bloques en la página 45 para obtener una lista de todos los diseños disponibles. • Aparecerá el mensaje "¿Borrar todo el texto?" al pulsar la tecla .
- Page 129 Diseños de bloques Atributo Valor Detalles 2LíneasA 2LíneasB 3Líneas Diseño de 1+2LineasA bloques (cinta de 3/4" [18 mm]) 1+2LíneasB 1+3Líneas 1+4Líneas 1+5Líneas 2LíneasA Diseño de 2LíneasB bloques (cinta de 1/2" [12 mm]) 3Líneas 1+2Lineas Utilización de diseños de formato automático...
- Page 130 EDICIÓN DE ETIQUETAS Atributo Valor Detalles 2LíneasA Diseño de bloques 2LíneasB (cinta de 3/8" [9 mm]) 1+2Lineas Diseño de bloques 1+2Lineas (cinta de 1/4" [6 mm]) Utilización de diseños de formato automático...
-
Page 131: Creación De Una Etiqueta De Código De Barras
Es posible que algunos lectores de códigos de barras no puedan leer las etiquetas de código de barras si se han creado en una cinta de color o con tinta de color. • Utilice el valor “Grande” para “Ancho” siempre que sea posible. Es posible que algunos lectores de códigos de barras no puedan leer las etiquetas de código de barras si se han... -
Page 132: Introducción De Datos Del Código De Barras
Oprima la tecla o la tecla para insertar el código de barras en la etiqueta. Aparecerán dos marcas de código de barras en el texto. Creación de una etiqueta de código de barras... - Page 133 • Oprima la tecla para regresar al paso anterior. • Consulte la tabla Lista de caracteres especiales en la página 49 para obtener una lista con todos los valores disponibles. Lista de caracteres especiales CODE39 CODABAR Código Caracter especial Código...
-
Page 134: Edición Y Eliminación De Códigos De Barras
FNC1 Edición y eliminación de códigos de barras • Para editar los datos del código de barras, coloque el cursor debajo de las marcas de código de barras que hay en la pantalla de introducción de datos y, seguidamente, abra la pantalla Entrda código brrs. Consulte la sección “Introducción de datos del código de barras”... -
Page 135: Impresión De Etiquetas
• No tire de la etiqueta que sale por la ranura de salida de la cinta. Si lo hace, la cinta de tinta saldrá expulsada junto con la propia cinta de etiquetas. -
Page 136: Impresión De Una Sola Copia
Consulte la sección “Opciones de corte de cinta” en la página 55 donde se explica cómo cambiar esta configuración. • Las cifras que se muestran en la pantalla durante la impresión indican el "recuento o número de copias definidos". -
Page 137: Numeración Automática De Etiquetas
La función de numeración le permite crear un conjunto de etiquetas numeradas secuencialmente a partir de un solo formato de etiqueta. Asegúrese de que se ha introducido el cartucho correcto y de que la etiquetadora está lista para imprimir. Mantenga oprimida la tecla... -
Page 138: Impresión En Modo Espejo
...Z ...z ...A9 Los espacios (mostrados como subrayados "_" en el ejemplo siguiente) podrán utilizarse para ajustar el espacio entre caracteres o para controlar el número de dígitos que se van a imprimir..99 AA ...ZZ 2_0 ...9_9 Impresión en modo espejo La función de impresión en modo espejo le permite crear etiquetas con el texto... -
Page 139: Opciones De Corte De Cinta
La nueva configuración NO SE APLICA si usted no oprime la tecla • Oprima la tecla para regresar al paso anterior. • Consulte la tabla Corte de cinta en la página 56 para obtener una lista con todos los valores disponibles. Opciones de corte de cinta... - Page 140 “Avance de la cinta” en la página 22 para aplicar el ajuste oportuno. • La cinta no se corta después de imprimir la última etiqueta si se selecciona la opción "Cadna" (En cadena) o "Sin corte" (Sin cortar) . Mantenga pulsada la tecla y pulse la tecla , y seleccione "Aliment.&corte"...
-
Page 141: Ajuste De La Longitud De La Etiqueta
• Oprima la tecla para utilizar el valor por defecto. • Aproximadamente el 1% de la longitud total de la etiqueta se ajustará con el nivel 1. Colocación de etiquetas Si es necesario, recorte la etiqueta impresa con unas tijeras para obtener la forma y longitud deseadas, etc. -
Page 142: Utilización De La Memoria De Archivos
• En un archivo se pueden guardar hasta 200 caracteres, dependiendo del número de líneas. No obstante, en total sólo se puede guardar un máximo de 1800 caracteres en los 9 archivos que se pueden crear como máximo. Los datos de texto y de formato de diseño también se guardan en el archivo. -
Page 143: Apertura De Un Archivo De Etiqueta Almacenado
El archivo se abre y aparece en la pantalla de introducción de texto. Oprima la tecla para regresar al paso anterior. Apertura de un archivo de etiqueta almacenado... -
Page 144: Impresión De Un Archivo De Etiqueta Almacenado
La etiqueta se imprime desde la máquina. • Oprima la tecla para regresar al paso anterior. • Aparecerá el mensaje "No hay texto!" cuando intente imprimir un archivo que no contiene texto ninguno. Impresión de un archivo de etiqueta almacenado... -
Page 145: Eliminación De Un Archivo De Etiqueta Almacenado
Oprima la tecla o la tecla para eliminar el archivo. El archivo se elimina y vuelve a aparecer la pantalla de introducción de texto. Oprima la tecla para cancelar la eliminación del archivo y regresar a la pantalla anterior. Eliminación de un archivo de etiqueta almacenado... -
Page 146: Mantenimiento De Su Etiquetadora P-Touch
CA. Limpieza del exterior del etiquetador P-touch Utilice un paño seco y suave para limpiar el polvo y cualquier mancha o suciedad que haya en la unidad principal. Utilice un paño ligeramente humedecido pasándolo sobre la suciedad o las manchas difíciles de limpiar. -
Page 147: Limpieza Del Cabezal De Impresión
El uso continuado de la cortadora puede hacer que el adhesivo de la cinta se acumule en su cuchilla, lo cual puede desafilarla y provocar que la cinta se atasque en la cortadora. -
Page 148: Solución De Problemas
Causa posible Recomendación La pantalla se Consulte la sección “Restablecimiento de la etiquetadora P- touch” en la página 62 y restablezca la configuración inicial de "bloquea", o el la memoria interna. Si el problema no se soluciona tras etiquetador P-touch... - Page 149 ¿Está limpio el cabezal de Si no lo está, limpie el cabezal impresión? de impresión con un bastoncillo de algodón o con una cinta para limpiar cabezales de impresión (TZ-...
- Page 150 Problema Causa posible Recomendación La cinta de tinta está ¿Está la cinta de tinta suelta Si la cinta de tinta está rota, separada del rodillo en el cartucho de cinta o sustituya el cartucho de de tinta. usted tiró de una etiqueta cinta completo.
- Page 151 Compruebe cuál opción está seleccionada en el menú “Op. corte” o mantenga oprimida la tecla y oprima la tecla para hacer avanzar la cinta y cortarla. ¿Está activada la función de Cuando vaya a trabajar con Corte manual?
-
Page 152: Mensajes De Error
SOLUCIÓN DE PROBLEMAS Mensajes de error Si aparece un mensaje de error en pantalla, siga las instrucciones que se indican a continuación. Oprima cualquier tecla para que desaparezca el mensaje de error. Mensaje Causa/Solución Las baterías instaladas se están agotando. - Page 153 Hay más de dos líneas de texto al oprimir la tecla o la tecla al usar cinta de 3/8" o 1/4" (9 mm o 6 mm). Limite el número de líneas a dos o reemplace el cartucho de cinta con una cinta de mayor ancho.
- Page 154 La longitud de la cinta establecida en el ajuste para la longitud de la cinta es más corta que la longitud total de los márgenes izquierdo y derecho aplicados a la opción de corte “Margn grande”. Seleccione una opción de corte diferente.
- Page 155 Causa/Solución Los datos de código de barras introducidos no tienen los códigos de inicio y fin necesarios (A, B, C o D requeridos al principio y al final de los datos de código de barras para el protocolo CODABAR). Introduzca correctamente los datos de código de barras.
-
Page 156: Apéndice
Cinta de 3/4" (18 mm) : 1 - 5 líneas; cinta de 1/2" (12 mm) : Nº de líneas 1 - 3 líneas; cinta de 3/8" (9 mm) : 1 - 2 líneas; cinta de 1/4" (6 mm) : 1 - 2 líneas; cinta de 9/64" (3.5 mm) : 1 línea Dirección de impresión... - Page 157 3/8" (9 mm) : 3, 1/4" (6 mm) : 1 Contraste de pantalla 5 niveles (+2, +1, 0, -1, -2) Alimentación eléctrica Alimentación eléctrica Adaptador de CA (AD-24), seis baterías alcalinas de tamaño AA (LR6). Desconexión Solo P-touch: 5 minutos automática...
- Page 158 2000 Pro, XP: Se requieren 128MB o más Windows Vista : 512 MB o más Disco duro Se requieren 70MB o más Monitor Tarjeta gráfica SVGA con color de alta densidad, o superior Interface Puerto USB (especificación USB con protocolo 1.1 o posterior) Otros Unidad de CD-ROM para la instalación...
-
Page 159: Índice
..........31 alineación ......... 31 línea nueva ........25 ancho ..........31 lista de caracteres acentuados ..30 Avance y corte, función ....22 lista de símbolos .......28 longitud ..........36 longitud de la cinta ......14 Caps, modo ........ 14, 25 caracteres acentuados ..... 29 Cartuchos de cinta ...... - Page 160 Brother. Este sistema está disponible 24 horas al día, 7 días a la semana. Puede usar el sistema para enviar la información a cualquier número de fax, no sólo al número desde el que llama.
- Page 161 Printed in China LW1706001...