Table of Contents
Advertisement
Available languages
Available languages
Advertisement
Chapters
Table of Contents

Related Manuals for Brother P-Touch 2480


Summary of Contents for Brother P-Touch 2480
- Page 2 USER’S GUIDE...
- Page 3 Electromagnetic Compatibility Directive 89/336/EEC (as amended by 91/263/EEC and 92/31/EEC). The AC adapter also conforms with EN 60950 and follows the provisions of the Low Voltage Directive 73/23/EEC. Issued by: BROTHER INDUSTRIES, LTD. P & H company Development DIV. Declaration of Conformity...
-
Page 4: Table Of Contents
CONTENTS 1. Getting Started ...1 General Description ... 1 Top view & bottom view ...1 Keyboard & LCD display ...2 General Precautions ... 3 Batteries & Tape Cassettes ... 4 Installing batteries and a tape cassette ...4 Cleaning ... 7 Cleaning the print head, rollers and tape cutter ...7 Optional AC Adapter ... - Page 5 Specifying if the PERSONAL symbol category is continually updated ...39 Displaying version information ...39 5. Using P-touch With a Computer ...40 Installing the Software & Printer Driver ... 41 Before installation ...41 Installing the P-touch Editor 3.2 software ...42 Installing the USB printer driver ...43 Reading the User’s Guide ...
- Page 6 6. Appendix ...57 Troubleshooting ... 57 Error Message List ... 58 Machine Specifications ... 62 Hardware ...62 Software ...62 Accessories ... 63 Index ... 68...
-
Page 8: Getting Started
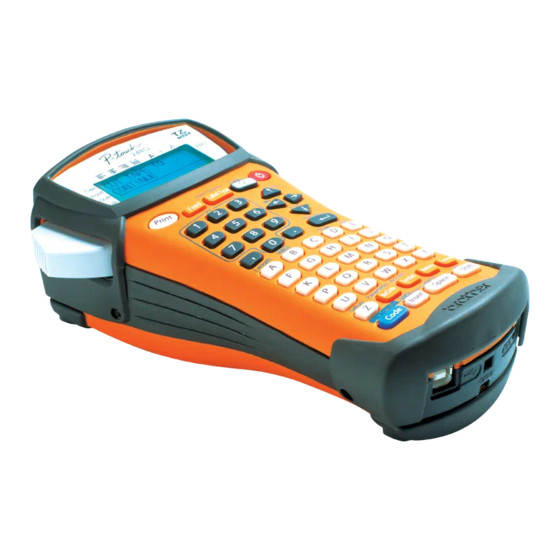
Getting Started General Description Top view & bottom view Top view Display Tape cutter button Keyboard USB port AC adapter connector Back cover Cassette release lever Battery compartment Print head Tape cassette compartment Tape exit slot Bottom view... -
Page 9: Keyboard & Lcd Display
Keyboard & LCD display 1 Left text alignment (page 28) 2 Centre text alignment (page 28) 3 Right text alignment (page 28) 4 Justified text alignment (page 28) 5 Bold text style (page 27) 6 Outline text style (page 27) 7 Italic text style (page 27) 8 Frame (page 24) 9 Low battery (page 5) -
Page 10: General Precautions
General Precautions Use only Brother TZ tapes with this machine. Do not use tapes that do not ● have the mark. Do not pull on the tape being fed from the P-touch, otherwise the tape cassette may ● be damaged. -
Page 11: Batteries & Tape Cassettes
Batteries & Tape Cassettes This machine has been designed to allow you to change the batteries and tape cassettes quickly and easily. With batteries installed, this compact and portable machine can be used anywhere. TZ tape cassettes are available for this machine in a wide variety of types, colors and sizes, enabling you to make distinctive color-coded and stylized labels. - Page 12 ☞ Make sure that the batteries are inserted so that their poles point in the correct direction. With batteries installed, the P-touch determines the remaining battery charge during printing and feeding. If a low battery charge is detected, the low battery indicator ()) comes on.
- Page 13 Strong Adhesive Tape ☞ For textured, rough, or slipping surface, we recommend using Strong Adhesive Tape. ☞ Although the instruction sheet included with the Strong Adhesive Tape cassette recommends cutting the tape with scissors, the tape cutter that this P-touch is equipped with is able to cut Strong Adhesive Tape. Flexible ID Tape ☞...
-
Page 14: Cleaning
Cleaning Occasionally, certain parts of the P-touch may need to be cleaned. Dust or dirt may become attached to the P-touch’s print head and rollers, particularly when the unit is used outdoors or in a very dusty environment. With use, the tape cutter may become covered with adhesive, making it difficult to cut the tape. -
Page 15: Optional Ac Adapter
Notes on cleaning the tape cutter ☞ If the tape cannot be cut correctly, clean the tape cutter blades. Optional AC Adapter When printing a large number of labels or labels that contain a large amount of text, it may be useful to connect the P-touch to a standard electrical outlet using the optional AC adapter. -
Page 16: Label Type Modes
Label Type Modes Selecting a Label Type Mode Pressing a allows you to select one of the two regular modes for designing and printing your own custom labels, or any of the six special modes available for printing labels pre- formatted for identifying patch panels, cables, connectors and other components. -
Page 17: Rotate Mode And Rotate & Repeat Mode
After selecting the Label Type mode NORMAL or VERTICAL, the label text can be entered, formatted, printed and cut as usual. With the Normal Label Type mode, the entered text is printed horizontally along the label. With the Vertical Label Type mode, the entered text is printed vertically along the label. -
Page 18: Flag Mode
Flag Mode Labels printed using this Label Type mode can be wrapped around cable or wire with the ends stuck together to form a flag. With the FLAG Label Type mode, each block of text is printed at both ends of separate labels. The length of the unprinted part of this label is equal to the circumference of the cable or wire. -
Page 19: Port & Panel Modes
Port & Panel Modes Labels printed using these Label Type modes can be used to identify various components or panels. With the Port Label Type mode, each block of the text is printed on a separate label, making these labels useful for identifying different components or ports that are not equally spaced. - Page 20 BL. LEN. (block length): ● FRAME: ● PRINT (print order): ● ☞ For these types of labels, we recommend using Strong Adhesive Tape. ☞ The PRINT parameter is only available with the PANEL Label Type mode. ☞ By using the Numbering function with the PANEL Label Type mode, a single label containing multiple blocks of ascending characters can easily be created, for example, to label patch panels as shown above.
-
Page 21: Basic Functions
Basic Functions Performing Basic Operations Choosing functions, parameters, settings and groups ” appears, press l to select the previous item or r to select the next If “ !" ● item. ” appears, press u to select the previous item or d to select the next If “... -
Page 22: Inputting Label Data
Inputting Label Data Entering and editing text Entering characters To type a lowercase letter, a number, a comma or a period, simply press the key for ● that character. To type an uppercase letter, press h to enter Shift mode, and then press the ●... -
Page 23: Inserting Text
Adding a new line of text To end the current line of text and start a new one, press n. “ ● end of the line. ☞ The number of text lines that can be printed depends on the width of the tape. ☞... -
Page 24: Entering An Accented Character
Deleting text To remove characters to the left of the cursor’s current position, press b until ● all of the characters that you wish to delete are removed. To delete all of the text: ● Press g, then b. Press u or d to select either TEXT ONLY (to erase just the text) or TEXT&FORMAT (to erase all of the text and return all formatting functions to their default settings). -
Page 25: Entering A Bar Code
☞ To type in an uppercase accented character, press enter Caps mode) before pressing the letter key. ☞ An accented character can also be selected by typing in the corresponding code from the table above. For example, typing “A2”, then pressing Entering a bar code The Bar Code function allows bar codes to be printed as part of labels. -
Page 26: Entering Bar Code Data
Entering bar code data Press c. Type in the new bar code data or edit the old data. Press n to add the bar code to the text. ☞ To add special characters to the bar code data (only with protocols CODE39, CODABAR, EAN128 or CODE128), position the cursor below the character immediately to the right of where you wish to add the special character, and then press s. -
Page 27: Entering A Symbol
The following special characters can only be added to bar codes created using protocols EAN128 and CODE128. Symbol Character Symbol (SPACE) ” & ’ – Entering a symbol There are 147 symbols and pictures available with the Symbol function. Press s. The last category used is displayed. Press u or d to select the desired category. - Page 28 For each additional symbol, repeat steps Press n. ☞ A symbol can also be selected by typing in the corresponding code from the table below. For example, typing “A02”, then pressing The following symbols are available. Category PUNCTUATION BUSINESS MATHEMATICS BRACKET ARROW UNIT...
- Page 29 Category 1 2 1 3 1 4 NUMBER PICTOGRAPH ELECTRICAL / ELECTRONIC PROHIBITION WARNING COMMUNICATIONS OTHERS *A maximum of 16 most recently selected symbols are PERSONAL automatically saved in the PERSONAL symbol category. CATEGORY Symbols...
-
Page 30: Formatting The Label
PERSONAL symbol category becomes full ☞ Once the overwrite older ones unless the Symbol Save function is set to OFF Specifying if the PERSONAL symbol category is continually updated Formatting the Label Specifying a label length The length of the label can be specified as follows. Press g, then A. -
Page 31: Framing The Text
Framing the text Press g, then B. Press u or d until the desired frame setting is displayed. Press n. The selected setting is applied to the entire text. The following frame styles are available. Frame Setting Frame Sample Setting Sample... -
Page 32: Specifying The Character Size
Specifying the character size The character size can be specified for all text in the label or only for the text in the line that the cursor is in. ☞ With the default character size setting AUTO, the largest possible text size is automatically selected depending on the width of the installed tape and the number of lines in the text. -
Page 33: Specifying The Character Width
Specifying the character width Formatting the width of all text Press t. Press l or r until G. WIDTH is displayed. Press u or d until the desired character width setting is displayed. Press n. The selected setting is applied to the entire text. Formatting the width of a line Move the cursor to the line of text whose character width you wish to change. -
Page 34: Specifying The Character Style
Specifying the character style Formatting the character style of all text Press t. Press l or r until G. STYLE is displayed. Press u or d until the desired character style setting is displayed. Press n. The selected setting is applied to the entire text. Formatting the character style of a line Move the cursor to the line of text whose character style you wish to change. - Page 35 Specifying the alignment for all lines in the text Press t. Press l or r until ALIGN is displayed. Press u or d until the desired setting is displayed. Press n. The selected setting is applied to the entire text. The following alignment settings are available.
-
Page 36: Using The Pre-Formatted Auto Format Templates
Using the pre-formatted Auto Format templates Various pre-formatted label templates are available, enabling you to quickly and easily create labels for a variety of applications—from identifying the contents of boxes and file folders to labelling equipment and making name badges and ID tags. After simply selecting one of the ten label templates, type text into each of its fields, and then the label is ready to be printed. -
Page 37: Printing Labels
Press u or d to display each field, and then type in the text. • To print a single copy, press p. • To print multiple copies, several copies while increasing certain characters, or a mirror image of the text, press g, then a. (For details, refer to Using special printing functions on page 31.) ☞... -
Page 38: Using Special Printing Functions
Using special printing functions Various special printing functions are available that enable you to print multiple copies of labels, print several copies while incrementing the values of certain characters, print specific sections of label text, or print label text as a mirror image. Printing multiple copies of a label The Repeat Printing function allows you to print up to 99 copies of the same text. - Page 39 Press l or r until NUMBER is displayed. Press u or d until the desired number of copies is displayed (or use the number keys to type in the desired setting). Press n. The message “START?” appears. (To specify only the character at the cursor’s current position as the numbering field, press p, and then skip to step Press u, d, l or r until the first character that you wish to include in...
- Page 40 ☞ To specify settings for additional Print Option functions, instead of continuing with step , press menu, and then press ☞ If a bar code is selected as the numbering field in step and continue with step Printing a range of text blocks The Block Printing function enables you to select the range of text blocks to print.
- Page 41 Press l or r until MIRROR is displayed. Press u or d until ON is displayed. Press n (or p). CONFIRM appears in the Print Option menu. Press n (or p) to begin printing the specified number of labels. The number of each copy is displayed while it is being printed.
-
Page 42: Storing And Recalling Files
Storing and Recalling Files Frequently used label text along with its formatting can be stored in the memory and easily recalled so that it can be edited and quickly printed. When each text file is stored, it is given a number to make recalling it easier. Up to 10 text files or approximately 2,000 characters can be stored in the memory. -
Page 43: Recalling Text That Has Been Stored
Recalling text that has been stored Press m. Press u or d until RECALL is displayed. Press n. Press u or d until the file number containing the text that you wish to recall is displayed. Press n. Any text previously entered in the display is erased and the text stored under the selected file number is recalled into the display. -
Page 44: Machine Adjustments
Machine Adjustments Various functions are available for changing and adjusting the operation of the P-touch. Selecting how tape is fed and cut The Cut function enables you to specify how the tape is fed out after it is printed. The settings of the Cut function consist of combinations of two different cut methods: cut-pause (where the machine stops printing so the label can be cut) and chain printing (where the last copy is not fed out to be cut, reducing the amount of tape that is wasted). -
Page 45: Setting The Auto Reduction Function
Press g, then Z. Press l or r until CONTRAST is displayed. Press u or d until the desired setting is displayed, and then press n. Setting the Auto Reduction function With the Auto Reduction function, you can select whether the text width (TEXT WIDTH) or the text size (TEXT SIZE) will be reduced if text that is set to the AUTO Size setting is too large for the specified label length. -
Page 46: Specifying If The Personal Symbol Category Is Continually Updated
Specifying if the PERSONAL symbol category is continually updated You can specify whether symbols continue to be added to the PERSONAL symbol category (with the older symbols deleted) when the category becomes full (ON) or symbols are no longer added after the PERSONAL symbol category becomes full (OFF). (The default setting is ON.) Press g, then Z. -
Page 47: Using P-Touch With A Computer
• User-defined character images • Label files stored in the P-touch memory ☞ The P-touch Editor software and the printer driver must be installed before the P-touch is connected to the computer or turned on. ☞ Only use the enclosed USB interface cable to connect the P-touch to the computer. -
Page 48: Installing The Software & Printer Driver
With this application, the printer driver must also be installed in order for the application to communicate with the P-touch. -
Page 49: Installing The P-Touch Editor 3.2 Software
Click “Yes”. The first Driver Setup dialog box appears, informing you that the P-touch printer driver will be installed. Continue with the procedure in Installing the USB printer driver on page 43. When installation of P-touch Editor is finished, a dialog box appears, allowing you to upgrade P-touch Editor 3.2 so that it will be compatible with Access 2000. -
Page 50: Installing The Usb Printer Driver
CD-ROM from the CD-ROM drive. ® With Windows ☞ A message appears, informing you that the printer driver has passed Brother’s own compatibility tests and that “Continue Anyway” should be pressed if a warning message appears. Click “OK”. - Page 51 CD-ROM from the computer. ☞ To uninstall the printer driver, start up the installer on the CD-ROM, click the Driver button in the dialog box that appeared, and then select the desired option and follow the instructions that appear.
-
Page 52: Reading The User's Guide
Reading the User’s Guide The P-touch Editor User’s Guide can be viewed either by inserting the CD-ROM into the drive each time you wish to refer to it or by installing it onto your computer so that it is quickly available at any time. Since the User’s Guide is an HTML document, a browser is needed to read it. -
Page 53: Using P-Touch Editor 3.2
Using P-touch Editor 3.2 P-touch Editor 3.2 makes it easy for anyone to design and print more complex labels for almost any need imaginable. Notes on creating templates Since some P-touch Editor 3.2 functions are not available with the P-touch machine, keep the following points in mind when using P-touch Editor 3.2 to create templates. -
Page 54: Starting Up P-Touch Editor 3.2
The desired Properties can be displayed by clicking the icon in the property dock. Page Properties icon Font Properties icon Layout Properties icon Page Properties ( When the P-touch is selected as the printer: Click this button to hide the Properties. Title bar Rulers Cursor ®... -
Page 55: Entering Text
Entering text ☞ Although the screens shown in the following explanations are for Windows SE and Me, the operations for Windows specifically mentioned. Click (Text button) on the draw toolbar. Text can be typed in, and the pointer changes from (I-beam pointer). -
Page 56: Transferring Data To/From A Computer
Databases Keep the following points in mind when using the database functions of P-touch Editor 3.2. ☞ For general details, refer to the User’s Guide supplied on the P-touch Editor 3.2 CD-ROM. • The database function of P-touch Editor 3.2 uses database files that are compatible with Microsoft Access 97. -
Page 57: Downloading Data To The P-Touch
Downloading data to the P-touch ☞ Although the P-touch can be connected to the computer through a USB connection, label layouts created in P-touch Editor cannot be printed directly from the application. Make sure that the P-touch is in Transfer mode. (For more details, refer to Entering Transfer mode on page 49.) •... -
Page 58: Adding A User-Defined Character Image To The Text
☞ The P-touch can only contain one database at a time. However, the database can be replaced or updated. ☞ When data is downloaded to a PF key, it replaces the preset template initially available on the P-touch. To restore the initial templates, use Transfer Manager to download the *. - Page 59 ☞ The P-touch can only contain one database at a time. However, the database can be replaced or updated. Using a template not linked to a database Using a template not linked to a database is the same as using any of the preset Auto Format templates.
-
Page 60: Using Downloaded Database Data
☞ If the Cut function is set to 1 or 3, the message “CUT TAPE TO CONTINUE” appears after each label is printed. Press the tape cutter button to cut off the label and continue printing. ☞ Be sure to cut the tape within 5 minutes from the time that the message appears. ☞... - Page 61 Using database data in a Label Type mode This function enables you to select the range of database fields to print. Press a, and then select the Label Type mode as described in chapter 2. Press g, then a. The message “CLEAR TEXT & PRINT DATABASE?” appears.
- Page 62 Searching the database While selecting a database record to be used in a template or while selecting a database record whose data is to be added to a label, the database can be searched for records containing specific characters or records with a specific number. To search the database for a record containing specific characters: Press g and e until the search screen is displayed.
-
Page 63: Backing Up/Restoring P-Touch Data
☞ To restore data to a different PF key, click “Change PF Key Mapping” on the PC → Printer tab, and then select the PF key where you wish to assign the data. ☞ Only one character image or template can be restored to a PF key. If a character image or template is already assigned to a PF key, the previous data is erased when a different character image or template is transferred. -
Page 64: Appendix
Appendix Troubleshooting Problem The display stays blank after you have turned on the machine. The machine does not print or the printed characters are blurred. The text files that you stored in the memory are no longer there. The printed characters are not formed properly. -
Page 65: Error Message List
Error Message List Error Message 1 BLOCK LIMIT! 4 DIGITS MINIMUM! 50 LINE LIMIT REACHED! 7 LINE LIMIT! BUFFER EMPTY! BUFFER FULL! CASSETTE CHANGED! Cause • This message appears if you try to use the Numbering function when multiple blocks of text have been entered with the PANEL Label Type mode selected. -
Page 66: Copy Limit
Error Message CHECK BATTERIES! CHECK SETTING IN LABEL TYPE MODE! CUTTER ERROR! EXCEEDS PRINT COPY LIMIT! IMAGE CHARACTER SIZE ERROR! INPUT ABCD AT BEGIN & END! INPUT WHOLE CODE! Cause • This message appears if a combination of new and used batteries, a combination of batteries of different types (alkaline, Ni-Cd and Ni-... -
Page 67: Memory Full
Error Message LENGTH LIMIT! On 18 mm tape: LINE LIMIT! 5 LINES MAXIMUM On 12 mm tape: LINE LIMIT! 3 LINES MAXIMUM On 9 mm and 6 mm tape: LINE LIMIT! 2 LINES MAXIMUM MEMORY FULL! NO DATABASE OR INCORRECT FORMAT NO FILES! RECORD NOT FOUND! - Page 68 Error Message SET 12mm! SET 9mm! SET 6mm! TAPE EMPTY! TEXT TOO HIGH! XX BLOCK TEXT TOO LONG! TEXT TOO LONG! XX BLOCK VALUE OUT OF RANGE! Cause • This message appears if a 12-mm-wide tape cassette is not installed when printing an Auto Format template created for 12-mm-wide tape.
-
Page 69: Machine Specifications
Machine Specifications Hardware Power supply: Six AA alkaline batteries or Six AA rechargeable batteries or AC adapter (model H/H1) Input device: Keyboard (56 keys) 48 × 132 dots LCD: + Caps and other indicators Print tape: TZ tape is available in the following five widths: 6 mm 9 mm 12 mm... -
Page 70: Accessories
Supplies Obtain tape cassettes from your nearest authorised dealer. Use only Brother TZ tapes with this machine. Brother cannot be held respon- sible for trouble caused by the use of unauthorised supplies. Do not use tapes that do not have the Stock No. - Page 71 Stock No. TZ-344 Gold characters on black adhesive TZ-145 White characters on clear adhesive TZ-345 White characters on black adhesive TZ-441 Black characters on red adhesive TZ-541 Black characters on blue adhesive TZ-641 Black characters on yellow adhesive TZ-741 Black characters on green adhesive 12-mm-wide laminated tapes TZ-131 Black characters on clear adhesive...
- Page 72 Stock No. TZ-222 Red characters on white adhesive TZ-223 Blue characters on white adhesive TZ-324 Gold characters on black adhesive TZ-325 White characters on black adhesive TZ-421 Black characters on red adhesive TZ-521 Black characters on blue adhesive TZ-621 Black characters on yellow adhesive TZ-721 Black characters on green adhesive TZ-A25...
- Page 73 Stock No. 9-mm-wide non-laminated tapes TZ-N221 Black characters on white adhesive 6-mm-wide non-laminated tapes TZ-N211 Black characters on white adhesive Strong adhesive tapes Stock No. TZ-S241 18 mm strong adhesive tape (black characters on white adhesive) TZ-S231 12 mm strong adhesive tape (black characters on white adhesive) TZ-S221 9 mm strong adhesive tape (black characters on white adhesive) TZ-S211...
- Page 74 Special tapes Stock No. TZ-CL4 Print head cleaning cassette TZ-IY41 18 mm iron-on transfer tape TZ-SE4 18 mm security tape TZ-FA3 12 mm fabric tape TZ-FX251 24 mm flexible ID tape (black characters on white adhesive) TZ-FX241 18 mm flexible ID tape (black characters on white adhesive) TZ-FX231 12 mm flexible ID tape (black characters on white adhesive) TZ-FX221...
-
Page 75: Index
Index AC adapter ... 8 Accent function... 17 alignment ... 28 arrow keys... 2, 14, 15 Auto Format function ... 29 Auto Reduction function ... 38 backspace key... 2, 14, 17 Backup Manager ... 56 bar code special characters ... 19 Bar Code function ... - Page 76 2 Shift... 2 size... 2 width... 2 Insert indicator ... 2 Insert key... 16 installing printer driver ... 43 P-touch Editor... 41 italic text style ... 27 indicator... 2 justified text alignment ... 28 indicator... 2 keyboard ... 2 label margins...
- Page 77 printing database record range ... 52 text block range... 33 problems ... 57 P-touch Editor installing... 41 starting ... 46 template ... 51 User’s Guide ... 45 recalling ... 36 Repeat Printing function ... 31 restoring ... 56 return key... 2, 14, 16 right text alignment ...
- Page 78 MODE D’EMPLOI...
- Page 79 à la directive de compatibilité électromagnétique 89/336/EEC (amendée dans les directives 91/263/EEC et 92/31/EEC). L respecte également la norme EN 60950 et suit les prescriptions de la Directive 73/23/EEC sur les basses tensions. Publié par: BROTHER INDUSTRIES, LTD. P & H company Development DIV. Déclaration de conformité...
- Page 80 SOMMAIRE 1. Préliminaires ...1 Présentation de l’appareil ... 1 Face avant et face arrière ...1 Clavier et écran à cristaux liquides ...2 Précautions importantes ... 3 Piles et cassettes de ruban ... 4 Installation des piles et d’une cassette de ruban ...4 Nettoyage ...
- Page 81 Configuration de la taille des caractères ...25 Configuration de la largeur des caractères ...26 Configuration du style des caractères ...27 Utilisation de gabarits pré-définis de mise en forme automatique ...29 Impression d’étiquettes ... 30 Aperçu de la composition de l’étiquette ...30 Avance du ruban ...30 Impression d’une étiquette ...31 Utilisation des fonctions spéciales d’impression ...31...
- Page 82 6. Annexes ...57 Détection de pannes ... 57 Liste des messages d’erreur ... 58 Spécifications de l’appareil ... 63 Matériel ...63 Logiciel ...63 Accessoires ... 64 Index ... 68...
-
Page 84: Préliminaires
Préliminaires Présentation de l’appareil Face avant et face arrière Face avant Levier du coupe-ruban Clavier Couvercle arrière Compartiment des piles Compartiment de la cassette de ruban Ecran Port USB Prise pour l’adaptateur secteur Levier de dégagement de la cassette Tête d’impression Fente de sortie du ruban Face arrière... -
Page 85: Clavier Et Écran À Cristaux Liquides
Clavier et écran à cristaux liquides 1 Alignement horizontal à gauche (page 28) 2 Alignement horizontal centré (page 28) 3 Alignement horizontal à droite (page 28) 4 Alignement horizontal justifié (page 28) 5 Style typographique gras (bold) (page 27) 6 Style typographique contour (page 27) 7 Style typographique italique (page 27) -
Page 86: Précautions Importantes
Précautions importantes N’utilisez que des rubans Brother TZ dans cet appareil. N’utilisez jamais de ● rubans ne portant pas la marque Ne tirez pas sur le ruban, vous risqueriez de l’endommager. ● N’utilisez pas votre appareil dans un endroit très poussiéreux. Protégez-le de la ●... -
Page 87: Piles Et Cassettes De Ruban
Piles et cassettes de ruban Cet appareil a été spécialement conçu pour faciliter et accélérer le changement des piles et des cassettes. Une fois les piles insérées, vous pouvez utiliser cet appareil portatif et peu encombrant n’importe où. Il existe un vaste choix de types, de couleurs et de tailles de cassettes de ruban TZ compatibles avec votre appareil. - Page 88 ☞ Insérez les piles en veillant à orienter les polarités correctement. Une fois les piles insérées, la P-touch indique le niveau de charge des piles lors de l’impression et de l’avance du ruban. Si l’appareil détecte un niveau de charge faible, l’indicateur Piles faibles ()) s’affiche.
- Page 89 Ruban à forte adhérence ☞ Nous recommandons d’utiliser du ruban à forte adhérence sur les surfaces irrégulières, rugueuses ou glissantes. ! Bien que les manuels d’utilisation fournis avec les cassettes de ruban à forte adhérence recommandent de couper le ruban avec une paire de ciseaux, le coupe-ruban dont la P-touch est équipée peut couper du ruban à...
-
Page 90: Nettoyage
Nettoyage De temps à autres, certaines parties de l’appareil doivent être nettoyées. Poussière et autres impuretés risquent d’encrasser la tête d’impression et les rouleaux, surtout si l’appareil est utilisé à l’extérieur ou dans des endroits très poussiéreux. Suite à des utilisations répétées, de l’adhésif peut s’accumuler sur le coupe-ruban, rendant la coupe difficile. -
Page 91: Adaptateur Secteur
Remarques sur le nettoyage du coupe-ruban ☞ Si le ruban ne se coupe pas correctement, nettoyez les lames du coupe-ruban. Adaptateur secteur Lorsque vous imprimez un grand nombre d’étiquettes ou des étiquettes contenant une grande quantité de texte, nous vous recommandons de connecter la P-touch au secteur en utilisant un adaptateur secteur. -
Page 92: Modes De Format D'étiquette
Modes de Format d’étiquette Choix d’un mode de Format d’étiquette En appuyant sur a vous pouvez sélectionner l’un des deux modes normaux de conception et d’impression d’étiquettes personnalisées ou l’un des six modes spéciaux permettant d’imprimer des étiquettes préalablement mises en page, pour l’identification de panneaux de répartition, de câbles, de connecteurs et d’autres composants. -
Page 93: Mode Rotation Et Mode Rotation Et Répétition
Après avoir sélectionné le mode du Format d’étiquette NORMAL ou VERT, le texte de l’étiquette peut être saisi, mis en page, imprimé et coupé normalement. Si le mode sélectionné est Normal, le texte saisi s’imprime horizontalement sur l’étiquette. Si le mode sélectionné... -
Page 94: Mode Drapeau
Mode Drapeau Les étiquettes imprimées avec ce mode peuvent être enroulées autour d’un câble; leurs extrémités se colleront pour former un drapeau. Avec le mode DRAPEAU, chaque bloc de texte s’imprime aux extrémités de l’étiquette. La longueur de la partie non imprimée de l’étiquette correspond à... -
Page 95: Modes Port & Panel (Panneau)
Modes Port & Panel (panneau) Les étiquettes imprimées avec ces modes peuvent être utilisées pour identifier divers composants ou panneaux. Avec le mode Port, chaque bloc de texte est imprimé sur une étiquette séparée, ce qui permet d’identifier divers composants ou ports qui ne sont pas espacés régulièrement. - Page 96 B.LONG. (longueur du bloc):Pour le mode PORT: ● CADRE: ● IMPRIMER: ● ☞ Pour ces formats d’étiquette, nous recommandons d’utiliser du ruban à forte adhérence. ☞ Le paramètre IMPRIMER n’est disponible qu’avec le mode PANEL. ☞ L'utilisation de la fonction Numérotation avec le mode de format d'étiquette PANEL permet la création aisée d'une seule étiquette contenant plusieurs blocs de caractères croissants, par exemple pour étiqueter des panneaux de répartition, comme illustré...
-
Page 97: Fonctions De Base
Fonctions de base Opérations élémentaires Choix de fonctions, de paramètres, de configurations et de groupes ” s’affiche, appuyez sur l pour sélectionner l’élément précédent ou sur Si “ !" ● r pour sélectionner l’élément suivant. ” s’affiche, appuyez sur u pour sélectionner l’élément précédent Si “... -
Page 98: Saisie De Données
Saisie de données Saisie et modification de texte Saisie de caractères Pour saisir une minuscule, un nombre, une virgule ou un point, appuyez ● simplement sur la touche de ce caractère. Pour saisir une majuscule, appuyez sur h pour passer en mode Shift, puis ●... - Page 99 Ajout d’une nouvelle ligne de texte Pour terminer la ligne de texte en cours et en commencer une nouvelle, appuyez ● sur n. “ ” s’affiche au bout de la ligne. ☞ Le nombre de lignes de texte qu’il est possible d’imprimer dépend de la largeur du ruban. Largeur du ruban ☞...
-
Page 100: Saisie D'un Caractère Accentué
Suppression de texte Pour supprimer des caractères à gauche du curseur, appuyez sur b jusqu’à ce ● que tous les caractères à supprimer soient effacés. Pour supprimer l’intégralité du texte: ● Appuyez sur g, puis sur b. Appuyez sur u ou sur d pour sélectionner TEXT UNIQU, pour n’effacer que le texte, ou sur TEXT&FORMAT pour effacer tout le texte et réinitialiser la valeur par défaut de toutes les fonctions de mise en forme. -
Page 101: Saisie D'un Code Barres
☞ Pour entrer une majuscule accentuée, appuyez sur pour passer en mode Maj) avant d’appuyer sur la touche de la lettre. ☞ Vous pouvez également sélectionner un caractère accentué en saisissant le code correspondant, indiqué dans le tableau ci-dessus. Par exemple, en saisissant puis en appuyant sur Saisie d’un code barres La fonction Code barres permet d’imprimer des codes barres sur les étiquettes. - Page 102 Saisie des données du code barres Appuyez sur c. Saisissez les nouvelles données du code barres ou modifiez les données existantes. Appuyez sur n pour ajouter le code barres au texte. Pour ajouter des caractères spéciaux aux données du code barres (uniquement avec ☞...
-
Page 103: Saisie D'un Symbole
Les caractères spéciaux ci-dessous peuvent être ajoutés aux codes barres de protocole EAN128 et CODE128 uniquement. Symbole Caractère Symbole (ESPACE) ” & ’ – Saisie d’un symbole La fonction Symbole met à votre disposition 147 symboles et images. Appuyez sur s. La dernière catégorie utilisée s’affiche. Appuyez sur u ou sur d pour sélectionner la catégorie souhaitée. - Page 104 Pour chaque symbole supplémentaire, répétez les étapes Appuyez sur n. ☞ Vous pouvez également sélectionner un symbole en saisissant le code correspondant, indiqué dans le tableau ci-dessous. Par exemple, en saisissant “A02”, puis en appuyant sur , vous ajoutez le symbole “?” au texte. Les symboles ci-dessous sont disponibles.
- Page 105 1 2 1 3 1 4 *Les 16 symboles sélectionnés en dernier sont enregistrés automatiquement dans la catégorie personnelle de symboles.
-
Page 106: Mise En Forme De L'étiquette
catégorie personnelle de symboles est pleine ☞ Lorsque la sélectionnés effacent les anciens, sauf si la fonction Enregistrement de symbole est définie sur NON (Reportez-vous à la section personnelle de symboles Mise en forme de l’étiquette Configuration de la longueur d’une étiquette La longueur d’une étiquette peut être définie comme suit. -
Page 107: Encadrement De Texte
Encadrement de texte Appuyez sur g, puis sur B. Appuyez sur u ou sur d jusqu’à ce que la configuration du cadre souhaitée s’affiche. Appuyez sur n. La configuration sélectionnée est appliquée à l’ensemble du texte. Les styles d’encadrement ci-dessous sont disponibles. Configu- ration de Exemple... -
Page 108: Configuration De La Taille Des Caractères
Configuration de la taille des caractères La taille des caractères peut être configurée pour l’ensemble du texte de l’étiquette ou seulement pour le texte de la ligne où se trouve le curseur. Mise en forme de la taille des caractères de l’ensemble du texte Appuyez sur t. -
Page 109: Configuration De La Largeur Des Caractères
Configuration de la largeur des caractères Mise en forme de la largeur de l’ensemble du texte Appuyez sur t. Appuyez sur l ou sur r jusqu’à ce que L.GLOBAL s’affiche. Appuyez sur u ou sur d jusqu’à ce que la largeur des caractères souhaitée s’affiche. Appuyez sur n. -
Page 110: Configuration Du Style Des Caractères
Configuration du style des caractères Mise en forme du style des caractères dans l’ensemble du texte Appuyez sur t. Appuyez sur l ou sur r jusqu’à ce que S.GLOBAL s’affiche. Appuyez sur u ou sur d jusqu’à ce que le style de caractère souhaité s’affiche. - Page 111 Configuration de l’alignement pour toutes les lignes d’un texte Appuyez sur t. Appuyez sur l ou sur r jusqu’à ce que ALI H. s’affiche. Appuyez sur u ou sur d jusqu’à ce que l’alignement souhaité s’affiche. Appuyez sur n. L’alignement sélectionné est appliqué à l’ensemble du texte. Les alignements ci-dessous sont disponibles.
-
Page 112: Utilisation De Gabarits Pré-Définis De Mise En Forme Automatique
Utilisation de gabarits pré-définis de mise en forme automatique Divers gabarits d’étiquette déjà mises en forme sont disponibles, permettant de créer rapidement et facilement des étiquettes pour de nombreuses applications, depuis l’identification du contenu de boîtes et de dossiers jusqu’à l’étiquetage d’équipements, la création de badges et d’étiquettes d’identification. -
Page 113: Impression D'étiquettes
Appuyez sur u ou sur d pour afficher chaque champ, puis saisissez le texte. • Pour imprimer une seule étiquette, appuyez sur p. • Pour imprimer plusieurs copies, pour les imprimer en incrémentant certains caractères ou pour imprimer une image miroir du texte, appuyez sur g, puis sur a. -
Page 114: Impression D'une Étiquette
Impression d’une étiquette Pour imprimer une étiquette, appuyez sur p. Le message “ATTENDRE SVP”, ● puis “COPIES” s’affiche, suivi du numéro de l’étiquette en cours d’impression. Utilisation des fonctions spéciales d’impression Des fonctions spéciales d’impression permettent d’imprimer plusieurs copies d’étiquettes, de les imprimer en incrémentant certains caractères, d’imprimer des sections données du texte de l’étiquette ou d’imprimer le texte de l’étiquette sous la forme d’une image miroir. - Page 115 Impression de plusieurs copies avec incrémentation de caractères La fonction Numérotation peut être utilisée pour imprimer plusieurs copies du même texte, tout en augmentant la valeur de certains caractères (lettre, nombre ou donnée de code barres) après l’impression de chaque étiquette. Ce type d’incrémentation automatique est très utile pour imprimer des numéros de série, des étiquettes de contrôle de production ou d’autres étiquettes nécessitant un code croissant.
- Page 116 ☞ Un seul champ de numérotation peut être sélectionné par texte. ☞ Un champ de numérotation doit être entièrement compris dans une ligne de texte d’un seul bloc. ☞ Un champ de numérotation peut compter au maximum cinq caractères. ☞ Si vous insérez, dans le champ de numérotation, un caractère non alphanumérique, tel qu’un symbole, seuls les lettres et le nombre inscrits dans le champ de numérotation seront incrémentés lors de l’impression des étiquettes;...
- Page 117 Impression d’étiquettes miroirs Cette fonction imprime l’étiquette pour que le texte soit lisible du côté adhésif du ruban. Si l’étiquette doit être apposée sur une vitre ou tout autre matériau transparent, elle pourra être correctement lue de l’autre côté de ce matériau. Appuyez sur g, puis sur a.
-
Page 118: Stockage Et Rappel De Fichiers
Stockage et rappel de fichiers Un texte fréquemment utilisé et sa mise en forme peuvent être stockés en mémoire et rappelés facilement pour être modifiés et imprimés rapidement. Lorsque chaque fichier texte est stocké, un numéro lui est attribué pour faciliter son rappel. La mémoire peut contenir jusqu’à... -
Page 119: Rappel D'un Texte Stocké
Rappel d’un texte stocké Appuyez sur m. Appuyez sur u ou sur d jusqu’à ce que RAPPEL s’affiche. Appuyez sur n. Appuyez sur u ou sur d jusqu’à ce que le numéro du fichier contenant le texte à rappeler s’affiche. Appuyez sur n. -
Page 120: Réglages De L'appareil
Réglages de l’appareil Vous pouvez utiliser plusieurs fonctions pour modifier et régler le fonctionnement de l’appareil. Sélection des paramètres d’avance et de coupure du ruban La fonction Coupure vous permet de déterminer l’emplacement de la coupure sur l’étiquette, lorsqu’elle s’imprime. Il est possible de définir deux méthodes de coupure différentes: Pause coupure (l’impression s’arrête pour permettre de couper l’étiquette) et Impression en série (le dernier exemplaire n’avance pas pour être coupé, évitant ainsi... -
Page 121: Réglage Du Contraste De L'écran
Réglage du contraste de l’écran Vous pouvez éclaircir ou assombrir l’affichage de l’écran en sélectionnant une valeur située entre -2 et +2. La valeur par défaut est 0. augmenter le contraste (assombrir l’écran). Sélectionnez une valeur inférieure pour diminuer le contraste (éclaircir l’écran). Appuyez sur g, puis sur Z. -
Page 122: Calibrage De La Longueur De L'étiquette
Calibrage de la longueur de l’étiquette Si la longueur d’une étiquette imprimée ne correspond pas à celle spécifiée avec la fonction Longueur, la longueur de l’étiquette imprimée peut être ajustée à l’aide de la fonction d’ajustement de longueur en sélectionnant une valeur située entre -1 et +3. (La valeur par défaut est 0.) Appuyez sur g, puis sur Z. -
Page 123: Utilisation De La P-Touch Avec Un Ordinateur
Utilisation de la P-touch avec un ordinateur La P-touch est équipée d’un port USB, ce qui vous permet de la connecter à un ordinateur fonctionnant sous Microsoft CD-ROM fourni doit être installé conjointement au pilote d’imprimante, à Transfer Manager et à Backup Manager. P-touch Editor 3.2 est un logiciel de création d’étiquettes qui vous offre des ●... -
Page 124: Installation Du Logiciel Et Du Pilote D'imprimante
Installation du logiciel et du pilote d’imprimante Le logiciel P-touch Editor 3.2 du CD-ROM offre une variété de fonctions complexes pour l’impression de codes barres et d’images, qui permettent ainsi la création de toutes sortes d’étiquettes. Le pilote d’imprimante doit également être installé avec cette application, afin qu’elle puisse communiquer avec la P-touch. -
Page 125: Installation Du Logiciel P-Touch Editor 3.2
Installation du logiciel P-touch Editor 3.2 ! Ne connectez pas la P-touch à l’ordinateur tant que vous n’y êtes pas invité. ! Il est fortement recommandé de fermer toutes les applications Windows avant d’installer ce logiciel. Insérez le CD-ROM fourni dans le lecteur de l’ordinateur. Une boîte de dialogue vous permettant de choisir la langue du programme d’installation s’affiche. -
Page 126: Installation Du Pilote D'imprimante Usb
Sous Windows ☞ Un message, vous informant que le pilote d’imprimante a réussi les tests de compatibilité de Brother et que vous devez cliquer sur “Continuer quand même” si un message d’avertissement apparaît, s’affiche. Cliquez sur “OK”. Lorsque la boîte de dialogue vous informant que le pilote d’imprimante de la P-touch va être installé... - Page 127 Connectez la P-touch à l’ordinateur à l’aide du câble d’interface USB fourni, puis maintenez la touche g enfoncée et appuyez sur o pour faire passer la P-touch en mode Transfert. La première boîte de dialogue “Assistant de matériel détecté” s’affiche. Sélectionnez “Installer le logiciel automatiquement (recommandé)”, puis cliquez sur “Suivant”.
-
Page 128: Mode D'emploi
Mode d’emploi Vous pouvez visionner le mode d’emploi de P-touch Editor en insérant le CD-ROM dans le lecteur chaque fois que vous souhaitez le consulter ou en l’installant sur votre ordinateur, afin qu’il soit rapidement accessible à tout moment. Le mode d’emploi étant un document HTML, vous avez besoin d’un navigateur pour le consulter. -
Page 129: Utilisation Du Logiciel P-Touch Editor 3.2
Utilisation du logiciel P-touch Editor 3.2 Le logiciel P-touch Editor 3.2 permet à tout utilisateur de créer et d’imprimer des étiquettes plus complexes et ce, quels que soient leurs besoins. Remarques concernant la création de gabarits Certaines fonctions de P-touch Editor 3.2 n’étant pas disponibles avec la P-touch, tenez compte des éléments suivants lorsque vous utilisez P-touch Editor 3.2 pour créer des gabarits. -
Page 130: Démarrage Du Logiciel P-Touch Editor 3.2
Démarrage du logiciel P-touch Editor 3.2 Cliquez sur “Démarrer” dans la barre des tâches pour afficher le menu correspondant. Sélectionnez “Programmes”. Sélectionnez “P-touch Editor 3.2”. Cliquez sur “P-touch Editor 3.2”. Lors du démarrage de P-touch Editor, la fenêtre suivante s’affiche. Barre de menus Barre d’outils standard Barre des propriétés... -
Page 131: Saisie De Texte
Saisie de texte ☞ Bien que les fenêtres présentées ci-dessous apparaissent sous Windows Me, les opérations effectuées sous Windows indication contraire. Cliquez sur (bouton Texte) dans la barre d’outils de dessin. Vous pouvez saisir le texte; le curseur passe de (curseur en I). -
Page 132: Transfert Des Données Vers/Depuis Un Ordinateur
Bases de données Tenez compte des éléments suivants lors de l’utilisation des bases de données de P-touch Editor 3.2. ☞ Pour obtenir des informations complémentaires, reportez-vous au mode d’emploi figurant sur le CD-ROM de P-touch Editor 3.2. • La fonction de base de données du logiciel P-touch Editor 3.2 utilise des fichiers de base de données compatibles avec Microsoft Access 97. -
Page 133: Téléchargement Des Données Vers La P-Touch
Téléchargement des données vers la P-touch ! Bien que la P-touch puisse être reliée à un ordinateur à l’aide d’une connexion USB, les étiquettes élaborées sous P-touch Editor ne peuvent être imprimées directement à partir de l’application. Assurez-vous que la P-touch est en mode Transfert. (Pour plus d’informations, reportez-vous à... -
Page 134: Ajout D'une Image De Caractère Programmable Au Texte
☞ La P-touch ne peut contenir qu’une base de données à la fois. Cependant, cette base de données peut être remplacée et mise à jour. ☞ Lorsque les données sont transférées sur une touche PF, elles remplacent les gabarits initialement disponibles sur la P-touch. Pour restaurer le gabarit initial, utilisez Transfer Manager pour télécharger les fichiers *. - Page 135 ☞ La P-touch ne peut contenir qu’une base de données à la fois. Cependant, cette base de données peut être remplacée et mise à jour. Utilisation d’un gabarit non relié à une base de données Un gabarit non relié à une base de donnée s’utilise de la même manière qu’un gabarit de mise en page automatique.
-
Page 136: Utilisation De Données D'une Base De Données Téléchargée
☞ Si la fonction Coupure est définie sur 1 ou sur 3, le message “COUP. RUBAN/ CONT” s’affiche après l’impression de chaque étiquette. Appuyez sur le levier du coupe-ruban pour séparer l’étiquette et continuer l’impression. ☞ Veillez à couper le ruban dans les 5 minutes qui suivent l’affichage du message. ☞... - Page 137 Utilisation de données d’une base de données dans un mode de Format d’étiquette Cette fonction vous permet de sélectionner l’ensemble des champs des bases de données à imprimer. Appuyez sur a, puis sélectionnez le mode de Format d’étiquette, comme décrit dans le chapitre 2. Appuyez sur g, puis sur a.
- Page 138 Recherche dans la base de données Lorsque vous sélectionnez un enregistrement de base de données pour l’utiliser dans un gabarit ou lorsque vous sélectionnez un enregistrement de base de données dont les données doivent être ajoutées à l’étiquette, vous pouvez parcourir la base de données pour rechercher les enregistrements spécifiques ou contenant des caractères spéciaux.
-
Page 139: Sauvegarde/Restauration Des Données De La P-Touch
Sauvegarde/Restauration des données de la P-touch Backup Manager est installé avec le logiciel P-touch Editor 3.2; il vous permet de sauvegarder les types de données suivants, de la P-touch vers votre ordinateur, au cas où des données de la P-touch seraient effacées. En outre, les données enregistrées sur votre ordinateur peuvent être restaurées sur la P-touch. -
Page 140: Annexes
Annexes Détection de pannes Problème L’écran reste vierge après la mise sous tension de l’appareil. L’appareil n’imprime pas ou les caractères imprimés ne sont pas nets. Les fichiers de texte que vous avez stockés en mémoire se sont effacés. Les caractères imprimés sont mal formés. -
Page 141: Liste Des Messages D'erreur
Liste des messages d’erreur Message d’erreur 1 BLOC MAXI! 4 DIGITS MINIMUM! CASSETTE CHANGEE! CODE INCOMPLET! ENREGISTREMENT NON TROUVE! ENTRER ABCD AU DEBUT & FIN! ERREUR COUPE! ERREUR TAILLE CARACTIMAGE! Cause • Ce message apparaît si vous essayez d’utiliser la fonction Numérotation lorsque plusieurs blocs de texte ont été... - Page 142 Message d’erreur FIXE A 6mm! FIXE A 9mm! FIXE A 12mm! FIXE A 18mm! FIXE A 24mm! LONGUEUR LIMITE! MAX. 7 LIGNES! MAX. 50 BLOCS! Cause • Ce message apparaît si une cassette de ruban de 6 mm de large n’est pas installée lors de l’impression d’un gabarit de Format automatique créé...
- Page 143 Message d’erreur MEMOIRE PLEINE! MEMOIRE PLEINE! MEMOIRE VIDE! PAS DE DATABASE OU FORMAT INCO.! PAS DE FICHIER! PAS DE RUBAN! Pour un ruban de 18 mm: TROP DE LIGNES! MAX. 5 LIGNES Pour un ruban de 12 mm: TROP DE LIGNES! MAX.
- Page 144 Message d’erreur • Ce message s’affiche si vous TROP D’IMP. LIMITE COPIE! • Notez que le nombre de • Ce message s’affiche si la TROP HAUT! XX BLOC • Ce message s’affiche si le TROP LONG! • Ce message s’affiche lors de TROP LONG! XX BLOC •...
- Page 145 Message d’erreur VERIF. BATTERIES! VERIF. PARA. TYPE LABEL! Cause • Ce message apparaît si vous avez associé des piles neuves et usagées ou si vous avez mélangé des piles de types (alcaline, Ni- Cd et Ni-MH), de fabricants ou de modèles différents, ou si vous avez installé...
-
Page 146: Spécifications De L'appareil
Spécifications de l’appareil Matériel Alimentation: Six piles alcalines AA ou Six piles rechargeables AA ou Un adaptateur secteur (modèle H/H1) Système d’entrée: Clavier (56 touches) 48 × 132 points Ecran à cristaux liquides: + Maj et autres indicateurs Ruban d’étiquettes: Le ruban TZ est disponible dans les 5 largeurs suivantes: Tête d’impression: 18,1 mm (hauteur)/180 PPP (résolution) Coupe-ruban:... -
Page 147: Accessoires
Vous pouvez vous procurer des cassettes de ruban chez votre revendeur agréé le plus proche. N’utilisez que des rubans Brother TZ dans cet appareil. Brother ne peut être tenu pour responsable des dommages causés par l’utilisation de fournitures non-agréées. N’utilisez jamais de rubans ne portant pas la marque disponibilité... - Page 148 N° de stock TZ-242 Caractères rouges sur fond blanc TZ-243 Caractères bleus sur fond blanc TZ-344 Caractères or sur fond noir TZ-145 Caractères blancs sur fond transparent TZ-345 Caractères blancs sur fond noir TZ-441 Caractères noirs sur fond rouge TZ-541 Caractères noirs sur fond bleu TZ-641 Caractères noirs sur fond jaune...
- Page 149 N° de stock TZ-123 Caractères bleus sur fond transparent TZ-221 Caractères noirs sur fond blanc TZ-222 Caractères rouges sur fond blanc TZ-223 Caractères bleus sur fond blanc TZ-324 Caractères or sur fond noir TZ-325 Caractères blancs sur fond noir TZ-421 Caractères noirs sur fond rouge TZ-521 Caractères noirs sur fond bleu...
- Page 150 N° de stock TZ-N731 Caractères noirs sur fond vert TZ-NF31 Caractères noirs sur fond violet Rubans non laminés de 9 mm TZ-N221 Caractères noirs sur fond blanc Rubans non laminés de 6 mm TZ-N211 Caractères noirs sur fond blanc Rubans de forte adhérence N°...
- Page 151 Rubans spéciaux N° de stock TZ-CL4 Cassette de nettoyage de la tête d’impression TZ-IY41 Ruban transfert de 18 mm TZ-SE4 Ruban à adhérence spéciale de 18 mm TZ-FA3 Ruban en tissu de 12 mm TZ-FX251 Ruban flexible d’identification de 24 mm (caractères noirs sur fond blanc) TZ-FX241 Ruban flexible d’identification de 18 mm (caractères noirs sur...
-
Page 152: Index
Index Adaptateur secteur ... 8 Alignement... 28 Alignement à droite ... 28 Alignement à gauche... 28 Alignement centré ... 28 Alignement horizontal à droite Indicateur ... 2 Alignement horizontal à gauche Indicateur ... 2 Alignement horizontal centré Indicateur ... 2 Alignement horizontal justifié... - Page 153 Gabarits Format automatique ... 29 P-touch Editor... 51 Image de caractère programmable ... 51 Impression Ensemble d’enregistrements de bases de données... 52 Ensemble de blocs de texte... 33 Impression en série... 37 Impression miroir ... 34 Indicateur Code... 2 Indicateur d’encadrement... 2 Indicateur du paramètre Format d’étiquette ...
- Page 154 Nettoyage Coupe-ruban ... 7 Rouleaux ... 7 Tête d’impression ... 7 Nombre de blocs... 2 Nombres ... 15 Pause coupure... 37 Piles ... 4 Pilote d’imprimante Installation... 43 Problèmes ... 57 P-touch Editor Démarrage ... 46 Gabarit ... 51 Installation... 41 Mode d'emploi ...
- Page 155 KÄYTTÖOPAS...
- Page 156 P-touch-tarratulostimen laatu ja suorituskyky tekevät siitä käytännöllisen apuvälineen tehtaisiin, toimistoihin tai kenttätyöhön. Vaikka P-touch on helppokäyttöinen, on suositeltavaa lukea tämä käyttöopas ennen laitteen käyttöä ja säilyttää opasta käden ulottuvilla. BROTHER INDUSTRIES, LTD. 1-1-1, Kawagishi, Mizuho-ku, Nagoya 467-8562, Japani ilmoitamme, että tarratulostusjärjestelmä PT-2480 on seuraavien...
- Page 157 SISÄLTÖ 1. Aloittaminen ...1 Yleiskuvaus ... 1 Yläpuoli ja alapuoli ...1 Näppäimistö ja nestekidenäyttö ...2 Yleisiä varotoimia ... 3 Paristot ja teippikasetit ... 4 Paristojen ja teippikasetin asentaminen ...4 Puhdistaminen ... 7 Kirjoituspään, rullien ja tarraleikkurin puhdistaminen ...7 Verkkolaite ... 8 Verkkolaitteen kytkeminen ...8 Virran katkaiseminen / kytkeminen ...
- Page 158 Tekstin koon asetus ...25 Tekstin leveyden asetus ...26 Tekstityylin valinta ...27 Valmiiden tarramallien käyttö ...29 Tarrojen tulostaminen ... 30 Tarran esikatselu ...30 Teipin syöttö ...30 Tarran tulostaminen ...30 Tulostuksen erikoistoiminnot ...31 Tiedostojen tallentaminen ja haku ... 35 Tarratekstin tallentaminen ...35 Tallennetun tiedoston haku muistista ...36 Tallennetun tiedoston poistaminen ...36 4.
- Page 159 6. Liite ...57 Vianetsintä ... 57 Virheilmoitukset ... 58 Tekniset tiedot ... 62 Laitteisto ...62 Ohjelmisto ...62 Tarvikkeet ... 63 Hakemisto ... 68...
-
Page 161: Aloittaminen
Aloittaminen Yleiskuvaus Yläpuoli ja alapuoli Yläpuoli Näyttö Tarraleikkurin painike Näppäimistö USB-portti Verkkolaitteen liitäntä Takakansi Teippikasetin vapautinvipu Paristokotelo Kirjoituspää Teippikotelo Teipin ulostuloaukko Alapuoli... -
Page 162: Näppäimistö Ja Nestekidenäyttö
Näppäimistö ja nestekidenäyttö 1 Tekstin tasaus vasemmalle (sivu 28) 2 Tekstin keskitys (sivu 28) 3 Tekstin tasaus oikealle (sivu 28) 4 Tekstin molempien reunojen tasaus(sivu 28) 5 Lihavoitu (sivu 27) 6 Ääriviiva (sivu 27) 7 Kursiivi (sivu 27) 8 Kehys (sivu 24) 9 Paristokuvake (sivu 5) 0 Tekstilohkon numero (sivu 16) A Tarratyypin asetus (sivu 9) -
Page 163: Yleisiä Varotoimia
Yleisiä varotoimia Käytä laitteessa vain Brother TZ -tarrateippiä. Älä käytä teippejä, joissa ei ● merkintää. Älä vedä P-touchista ulostulevaa teippiä. Se voi vahingoittaa teippikasettia. ● Älä käytä laitetta hyvin pölyisissä tiloissa. Suojaa se sateelta ja suoralta ● auringonpaisteelta. Älä säilytä laitetta hyvin kuumassa tai kosteassa. Älä koskaan jätä sitä auton ●... -
Page 164: Paristot Ja Teippikasetit
Paristot ja teippikasetit Laitteen paristot ja teippikasetit on helppo vaihtaa nopeasti. Kun laitteeseen on asennettu paristot, tätä pientä kannettavaa laitetta voi käyttää missä tahansa. TZ-teippikasetteja on saatavana useita eri tyyppejä, värejä ja kokoja, ja niiden avulla voit luoda näyttäviä värikoodattuja ja tyyliteltyjä tarroja. Paristojen ja teippikasetin asentaminen Huomautuksia paristoista ! Tässä... - Page 165 ☞ Varmista, että paristot on asennettu laitteeseen oikein päin. Kun paristot on asennettu, P-touch tarkistaa paristojen jäljellä olevan varauksen tulostuksen ja tekstin syötön aikana. Kun paristoissa on vähän varausta jäljellä, paristokuvakkeen merkkivalo ()) syttyy. Kun näin käy, vaihda paristot uusiin. Paristojen vähäisen varauksen merkkivalo ei ehkä...
- Page 166 Vahva tarrateippi ☞ On suositeltavaa käyttää vahvaa tarrateippiä karkealle, epätasaiselle tai liukkaalle pinnalle. ! Vaikka vahvan tarrateipin ohjeissa suositellaan teipin katkaisemista saksilla, P-touchin tarraleikkuri pystyy katkaisemaan myös vahvan tarrateipin. Joustava ID-teippi ☞ Kun tarvitaan joustavia tarroja esimerkiksi teräviin kulmiin tai pyöreisiin kohteisiin, on suositeltavaa käyttää...
-
Page 167: Puhdistaminen
Puhdistaminen Ajoittain P-touch-tarratulostimen tietyt osat pitää puhdistaa. P-touchin kirjoituspäähän ja rulliin voi tarttua pölyä tai likaa, jos laitetta käytetään ulkona tai hyvin pölyisessä ympäristössä. Tarraleikkuriin voi takertua liimaa ja teippiä voi olla vaikea katkaista. Kirjoituspään, rullien ja tarraleikkurin puhdistaminen ☞ Ennen kuin puhdistat kirjoituspään ja rullat, katkaise P-touchista virta painamalla -näppäintä, poista paristot ja irrota verkkolaite. -
Page 168: Verkkolaite
Huomautuksia tarraleikkurin puhdistamisesta ☞ Jos teippi ei katkea kunnolla, puhdista leikkuuterät. Verkkolaite Kun tulostat suuren määrän tarroja tai tarroissa on paljon tekstiä, P-touch on hyvä kytkeä sähköverkkoon verkkolaitteen avulla. Verkkolaitteen kytkeminen Huomautuksia verkkolaitteesta ☞ Käytä vain tälle laitteelle tarkoitettua verkkolaitetta. ☞... -
Page 169: Tarratyypit
Tarratyypit Tarratyypin valinta a-näppäimellä voit valita kaksi vakiotyyppiä omien tarrojen suunnitteluun ja tulostamiseen sekä kuusi erikoistyyppiä , joilla voi tulostaa valmiita porttien, kaapelien, liitinten ja muiden komponenttien tunnistamiseen sopivia tarroja. Paina a. Paina u tai d (tai jatka painamalla a), kunnes haluamasi tarratyyppi on näkyvissä. -
Page 170: Tekstin Kääntäminen Ja Tekstin Kääntäminen Ja Toisto
Kun olet valinnut tarratyypiksi NORMAL tai VERTICAL, tarrateksti voidaan kirjoittaa, muotoilla, tulostaa ja leikata normaalisti. Kun tarratyypiksi on valittu Normal, kirjoitettu teksti tulostetaan tarraan vaakasuuntaan. Kun tarratyypiksi on valittu Vertical, kirjoitettu teksti tulostetaan tarraan pystysuuntaan. Tekstin kääntäminen ja tekstin kääntäminen ja toisto Kun käytetään näitä... -
Page 171: Lipputarra
Lipputarra Kun käytät tätä tarratyyppiä, tarra voidaan kiinnittää kaapelin tai johdon ympäri siten, että tarran tekstipäät kiinnitetään yhteen lipputarraksi. FLAG-tarratyypissä tekstilohko tulostetaan kahden tarran kumpaankin päähän. Tarran tulostumattoman osan pituus on sama kuin kaapelin tai johdon ympärysmitta. Teksti voidaan tulostaa myös vaakasuuntaan tai kääntää... -
Page 172: Portti- Ja Paneelitarrat
Portti- ja paneelitarrat Näitä tarratyyppejä voidaan käyttää komponenttien tai käyttöpaneelien osien tunnistamiseen. Kun on valittu Port-tarratyyppi, kukin tekstilohko tulostetaan erilliselle tarralle, jolloin tarroja voidaan käyttää eri etäisyydellä olevien komponenttien tai porttien tunnistamiseen. Kun on valittu Panel-tarratyyppi, tekstilohkot tulostetaan tasaisin välein yhdelle tarralle, jolloin tarroja voidaan käyttää... - Page 173 BL. LEN. (lohkon pituus): * PORT-tarratyypille: ● FRAME: ● PRINT (tulostusjärjestys): IN ORDER, REVERSE ● ☞ On suositeltavaa käyttää tämän tyyppisissä tarroissa vahvaa tarrateippiä. ☞ PRINT-toiminto on käytössä vain PANEL-tarratyypille. ☞ Kun käytät numerointia (Numbering) PANEL-tarratoiminnolla, voit luoda helposti tarran, joka sisältää useita tekstilohkoja aakkos- tai numerojärjestyksessä ja joita on kätevä...
-
Page 174: Perustoiminnot
Perustoiminnot Perustoimintojen käyttö Toimintojen, arvojen, asetusten ja ryhmien valinta Kun näytössä näkyy “ ● toiminto painamalla r. Kun näytössä näkyy “ ● seuraava toiminto painamalla d. Oletusasetuksen valinta Kun haluat käyttää toiminnon oletusasetusta, paina e. ● Valinnan vahvistaminen Kun haluat valita toiminnon luettelosta, ottaa valitun asetuksen käyttöön tai vastata ●... -
Page 175: Tarrojen Luominen
Tarrojen luominen Tekstin kirjoittaminen ja muokkaaminen Merkkien kirjoittaminen Kun haluat kirjoittaa pienen kirjaimen, numeron, pilkun tai pisteen, paina kyseisen ● merkin mukaista näppäintä. Kun haluat kirjoittaa ison kirjaimen, siirry vaihtotoimintoon painamalla h ja ● paina kyseisen merkin näppäintä. Jos haluat kirjoittaa isoja kirjaimia perätysten, paina g ja sen jälkeen h. ●... - Page 176 Uuden tekstirivin lisääminen Lopeta nykyinen tekstirivi ja aloita uusi painamalla n. Rivin lopussa näkyy “ ● ☞ Tulostettavien tekstirivien määrä riippuu teipin leveydestä. ☞ Näytössä näkyvä rivin numero tarkoittaa tekstilohkon rivin numeroa. Uuden tekstilohkon lisääminen Kun haluat luoda uuden tekstilohkon, jonka rivien määrä poikkeaa aiemman ●...
-
Page 177: Aksenttimerkkien Kirjoittaminen
Tekstin poistaminen Kun haluat poistaa merkkejä kohdistimen vasemmalta puolelta, paina b, ● kunnes kaikki haluamasi merkit on poistettu. Näytön tyhjentäminen: ● Paina g ja sen jälkeen b. Paina u tai d ja valitse joko TEXT ONLY (vain teksti poistetaan) tai TEXT&FORMAT (teksti poistetaan ja sen lisäksi kaikki muotoiluasetukset palautetaan oletusasetuksiin). -
Page 178: Viivakoodin Lisääminen
☞ Jos haluat kirjoittaa ison aksentilla varustetun kirjaimen, paina kirjaimiin painamalla ☞ Aksenttimerkki voidaan lisätä myös kirjoittamalla merkkiä vastaava koodi. Koodit on esitetty edellisen sivun taulukossa. Esimerkiksi kun kirjoitat “A2” ja painat tekstiin lisätään “ ”. À Viivakoodin lisääminen Viivakoodi-toiminnolla voit tulostaa tarran osaksi viivakoodin. ☞... - Page 179 Viivakooditietojen lisääminen Paina c. Kirjoita uudet tiedot tai muokkaa jo kirjoitettuja tietoja. Lisää viivakoodi tekstiin painamalla n. ☞ Kun haluat lisätä erikoismerkin viivakoodiin (vain viivakoodityypit CODE39, CODABAR, EAN128 tai CODE128), siirrä kohdistin sen merkin oikealle puolelle, johon haluat lisätä merkin ja paina s. Paina u tai d , kunnes näytössä näkyy haluamasi erikoismerkki ja lisää...
-
Page 180: Symbolien Lisääminen
Voit lisätä seuraavat erikoismerkit vain viivakoodityypeillä EAN128 ja CODE128 luotuihin viivakoodeihin. Symboli Merkki Symboli (SPACE) ” & ’ – Symbolien lisääminen Symbolitoiminnolla voidaan valita 147 erilaista symbolia ja kuvaa. Paina s. Edellisellä kerralla käytetty symboliluokka tulee näkyviin. Valitse haluamasi luokka painamalla u tai d-näppäintä. Paina l tai r, kunnes haluamasi symboli on näkyvissä. - Page 181 Lisää muut symbolit toistamalla vaiheet Paina n. ☞ Symboli voidaan lisätä myös kirjoittamalla merkkiä vastaava koodi. Koodit on esitetty edellisen sivun taulukossa. Kun kirjoitat “A02” ja painat sen jälkeen n , tekstiin lisätään “?”. Käytettävissä ovat seuraavat symbolit. –...
- Page 182 *Enintään 16 viimeksi valittua symbolia tallennetaan automaattisesti PERSONAL-symboliluokkaan.
-
Page 183: Tarran Muotoilu
PERSONAL symboliluokka täyttyy ☞ Kun vanhemmat symbolit, jos symbolien tallennustoiminto ei ole OFF PERSONAL symboliluokan päivitys Tarran muotoilu Tarran pituuden asetus Tarran pituus asetetaan seuraavasti. Paina g ja sen jälkeen A. Paina l tai r, kunnes näytössä näkyy LENGTH. Paina u tai d, kunnes näytössä on haluamasi tarran pituus (tai syötä... -
Page 184: Tekstin Kehystäminen
Tekstin kehystäminen Paina g ja sen jälkeen B. Paina u tai d, kunnes haluamasi asetus tulee näkyviin. Paina n. Valitsemasi asetus valitaan koko tarraan. Käytettävissä ovat seuraavat kehystyylit. Kehys Malli Kehys Malli... -
Page 185: Tekstin Koon Asetus
Tekstin koon asetus Merkkien koko voidaan asettaa koko tarralle tai tekstiriville (jossa kohdistin on). Koko tarran merkkien koon asetus Paina t. Paina l tai r, kunnes näytössä näkyy G. SIZE. Paina u tai d, kunnes näytössä näkyy haluamasi merkkikoko. Paina n. Valitsemasi asetus valitaan koko tarraan. Tekstirivin merkkien koon asetus Siirrä... -
Page 186: Tekstin Leveyden Asetus
Tekstin leveyden asetus Koko tekstin leveyden asetus Paina t. Paina l tai r, kunnes näytössä näkyy G. WIDTH. Paina u tai d, kunnes näytössä näkyy haluamasi leveys. Paina n. Valitsemasi asetus valitaan koko tarraan. Rivin leveyden asetus Siirrä kohdistin riville, jonka merkkien leveyttä haluat muuttaa. Paina g ja sen jälkeen E. -
Page 187: Tekstityylin Valinta
Tekstityylin valinta Koko tarran kirjasintyylin asetus Paina t. Paina l tai r, kunnes näytössä näkyy G. STYLE. Paina u tai d, kunnes näytössä näkyy haluamasi tyyliasetus. Paina n. Valitsemasi asetus valitaan koko tarraan. Tekstirivin kirjasintyylin asetus Siirrä kohdistin riville, jonka kirjasintyyliä haluat muuttaa. Paina g ja sen jälkeen D. - Page 188 Tekstin tasaus Paina t. Paina l tai r, kunnes näytössä näkyy ALIGN. Paina u tai d, kunnes haluamasi asetus tulee näkyviin. Paina n. Valitsemasi asetus valitaan koko tarraan. Käytettävissä ovat seuraavat tasausasetukset. LEFT (tasaus vasemmalle) CENTRE RIGHT (tasaus (keskitys) oikealle) JUSTIFY (molempien reunojen tasaus)
-
Page 189: Valmiiden Tarramallien Käyttö
Valmiiden tarramallien käyttö Käytössä on useita valmiita tarramalleja, joiden avulla voit luoda helposti ja nopeasti tarroja useisiin eri käyttötarkoituksiin -voit tehdä tarroja laatikoiden ja kansioiden sisällön tunnistamiseen, hinnoitella tuotteet ja tehdä nimi- ja tunnistelappuja. Kun olet valinnut yhden kymmenestä tarramallista, kirjoita teksti valmiisiin kenttiin ja tulosta tarra. -
Page 190: Tarrojen Tulostaminen
Paina u tai d, niin saat muut kentät näkyviin ja kirjoita teksti. • Jos haluat tulostaa yhden tarran, paina p. • Jos haluat tulostaa useita kopioita, joissa tiettyjen merkkien arvo kasvaa, tai haluat tulostaa tekstin peilikuvana, paina g ja sen jälkeen a. (Katso lisätietoja kohdasta Tulostuksen erikoistoiminnot sivulla 31.) ☞... -
Page 191: Tulostuksen Erikoistoiminnot
Tulostuksen erikoistoiminnot Käytettävissä on useita tulostuksen erikoistoimintoja. Voit tulostaa tarroista useita kopioita, tulostaa useita kopioita tiettyjen merkkien arvon kasvaessa, tulostaa tiettyjä osia tarratekstistä tai tulostaa tekstin peilikuvana. Useiden kopioiden tulostaminen Voit tulostaa samasta tekstistä enintään 99 kopiota. Paina g ja sen jälkeen a. Paina l tai r, kunnes näytössä... - Page 192 Paina l tai r, kunnes näytössä näkyy NUMBER. Paina u tai d, kunnes näytössä on haluamasi kopioiden lukumäärä (tai valitse numeronäppäimillä haluamasi arvo). Paina n. Esiin tulee viesti “START?”. (Jos haluat numerointikentäksi kohdistimen nykyisen sijainnin, paina p ja siirry vaiheeseen Paina u, d, l tai r, kunnes ensimmäinen merkki, jonka haluat mukaan numerointikenttään, vilkkuu.
- Page 193 ☞ Kun haluat määrittää lisää tulostusasetuksia, älä jatka vaiheesta , kunnes Print Option (Tulostusasetukset) –valikossa näkyy CONTINUE ja paina ☞ Jos viivakoodi on valittu numerointikentäksi vaiheessa ja jatka vaiheesta Tekstilohkojen tulostus Tekstilohkojen tulostus -toiminnolla voit valita tulostettavat tekstilohkot. Paina g ja sen jälkeen a. Paina l tai r, kunnes tekstilohkon ensimmäinen numero BLOCK NO.
- Page 194 Paina l tai r, kunnes näytössä näkyy MIRROR. Paina u tai d, kunnes näytössä näkyy ON. Paina n (tai p). Print Option (Tulostusasetukset) -valikossa näkyy CONFIRM. Käynnistä tulostus painamalla n (tai p). Kopion numero näkyy näytössä, kun se tulostetaan. ☞ Kun käytät peilikuvatulostusta, teksti pitää tulostaa läpinäkyvälle tarralle. ☞...
-
Page 195: Tiedostojen Tallentaminen Ja Haku
Tiedostojen tallentaminen ja haku Usein käytettyjä tarroja muotoiluasetuksineen voidaan tallentaa laitteen muistiin, josta ne voi hakea nopeasti muokkausta ja tulostusta varten. Kun tekstitiedosto tallennetaan, se numeroidaan haun helpottamiseksi. Muistiin voidaan tallentaa enintään 10 tekstitiedostoa tai noin 2000 merkkiä. Koska tekstitiedostosta haetaan näyttöön kopio, kun Recall (Hae) -toimintoa käytetään, tekstiä... -
Page 196: Tallennetun Tiedoston Haku Muistista
Tallennetun tiedoston haku muistista Paina m. Paina u tai d, kunnes näytössä näkyy RECALL. Paina n. Paina u tai d, kunnes näytössä näkyy tiedostonumero, johon tarrateksti on tallennettu. Paina n. Näytössä näkyvä teksti poistetaan ja valitulla tiedostonumerolla muistista haettu teksti tulee näyttöön. ☞... -
Page 197: Laitteen Säädöt
Laitteen säädöt P-touch-tarratulostimen toimintoja voidaan säätää monin eri tavoin. Teipin syöttö- ja katkaisutavan valinta Katkaisutoiminnolla voit määrittää, kuinka teippi syötetään laitteesta tulostuksen jälkeen. Katkaisutoimintoja on kaksi erilaista: Leikkaa ja odota (laite keskeyttää tulostuksen niin, että tarra voidaan katkaista) ja ketjutulostus (viimeistä kopiota ei syötetä katkaisua varten. Näin tarrateippiä säästyy). Ketjutulostus on taloudellinen toiminto, jonka tarkoitus on vähentää... -
Page 198: Automaattinen Pienennystoiminto
Paina g ja Z. Paina l tai r, kunnes näytössä näkyy CONTRAST. Paina u tai d, kunnes haluamasi asetus tulee näkyviin, ja paina n. Automaattinen pienennystoiminto Automaattisella pienennystoiminnolla voit valita, pienennetäänkö tekstin leveyttä (TEXT WIDTH) vai tekstin kokoa (TEXT SIZE), jos tekstin asetus on AUTO eikä teksti mahdu asetetulle tarralle. -
Page 199: Personal Symboliluokan Päivitys
PERSONAL symboliluokan päivitys Voit valita, lisätäänkö uusia symboleja PERSONAL symboliluokkaan (jolloin vanhemmat symbolit poistetaan), kun luokka täyttyy (ON) vai lopetetaanko symbolien lisäys, kun PERSONAL luokka täyttyy (OFF). (Oletusasetus on ON.) Paina g ja Z. Paina l tai r, kunnes näytössä näkyy SYMBOL UPDATE. Paina u tai d, kunnes haluamasi asetus tulee näkyviin ja paina n. -
Page 200: P-Touch-Tarratulostimen Käyttö Tietokoneen Kanssa
P-touch-tarratulostimen käyttö tietokoneen kanssa Tässä P-touch-tarratulostimessa on USB-liitäntä, jonka avulla voit kytkeä sen tietokoneeseen, jossa on Microsoft CD-ROM-levyllä on P-touch Editor 3.2, joka asennetaan tulostinohjaimen sekä Transfer Manager- ja Backup Manager –ohjelmien kanssa. P-touch Editor 3.2 on tarrojen suunnitteluohjelma, jossa on runsaasti kuvia ja ●... -
Page 201: Ohjelmien Ja Tulostinohjaimen Asennus
Ohjelmien ja tulostinohjaimen asennus CD-ROM-levyllä toimitetussa P-touch Editor 3.2 –ohjelmassa on lukuisia monipuolisia toimintoja viivakoodien ja kuvien tulostamiseen ja ohjelmaa käyttäen voit suunnitella lähes millaisen tarran haluat. Tulostinohjain pitää asentaa, ennen kuin ohjelma voi kommunikoida P-touchin kanssa. ! Vaikka P-touch voidaan kytkeä tietokoneeseen USB-liitännällä, P-touch Editor –ohjelmalla luotuja tarroja ei voida tulostaa suoraan sovelluksesta. -
Page 202: P-Touch Editor 3.2 -Ohjelman Asennus
P-touch Editor 3.2 –ohjelman asennus ! Älä kytke P-touch-tarratulostinta tietokoneeseen, ennen kuin niin neuvotaan tekemään. ! Sulje kaikki Windows-sovellukset ennen ohjelmien asentamista. Laita laitteen mukana toimitettu CD-ROM-levy tietokoneen CD-ROM-asemaan. Esiin tulee valintaikkuna, jossa voit valita asennusohjelman kielen. ® ☞ Jos InstallShield Wizard ei käynnisty automaattisesti: Kaksoisnapsauta ensin työpöydän “My Computer”... -
Page 203: Usb-Tulostinohjaimen Asennus
☞ Jos esiin tulee asennuksen valmistumisesta kertova valintaikkuna ja tietokone kehotetaan käynnistämään uudelleen, käynnistä tietokone uudelleen napsauttamalla “Finish” (Valmis) ja poista CD-ROM-levy CD-ROM-asemasta. ☞ Jos haluat poistaa P-touch Editor 3.2 -ohjelman, kaksoisnapsauta Ohjauspaneelin ikkunassa “Add/Remove Programs” (Lisää tai poista sovellus) (myös Windows ja noudata esiin tulevia ohjeita. - Page 204 Kytke P-touch tietokoneeseen mukana toimitetulla USB-kaapelilla, aseta P-touch tiedonsiirtotilaan pitämällä alaspainettuna näppäintä g ja painamalla o. Esiin tulee “Found New Hardware Wizard” (Windows on löytänyt uuden laitteen) -valintaikkuna. Valitse “Install the software automatically (Recommended)” (Asenna ohjelmisto automaattisesti (Suositus)) ja napsauta “Next” (Seuraava).
-
Page 205: Käyttöoppaan Lukeminen
Käyttöoppaan lukeminen P-touch Editor –ohjelman käyttöopasta voi lukea joko CD-ROM-levyltä tai se voidaan asentaa tietokoneen kiintolevylle, josta sen saa nopeasti esiin aina tarvittaessa. Koska käyttöopas on HTML-muodossa, sen lukemiseen tarvitaan selainohjelma. Käyttöoppaan lukeminen CD-ROM-levyltä: Käynnistä Windows Valitse CD-ROM-asema. Kaksoisnapsauta Ptouch-kansiota. Kaksoisnapsauta Manual-kansiota. -
Page 206: P-Touch Editor 3.2 -Ohjelman Käyttö
P-touch Editor 3.2 -ohjelman käyttö P-touch Editor 3.2 –ohjelmalla on helppo suunnitella ja tulostaa hyvin monipuolisia tarroja. Mallien luomiseen liittyviä huomautuksia Koska kaikki P-touch Editor 3.2 –toiminnot eivät ole käytössä P-touch-tarratulostimessa, muista seuraavat seikat, kun luot malleja P-touch Editor 3.2 -ohjelmassa. ☞... -
Page 207: P-Touch Editor 3.2 -Ohjelman Käynnistäminen
P-touch Editor 3.2 –ohjelman käynnistäminen Napsauta tehtäväpalkin “Start” (Käynnistä) -painiketta. Valitse “Programs” (Ohjelmat). Valitse “P-touch Editor 3.2”. Napsauta “P-touch Editor 3.2”. Kun P-touch Editor käynnistyy, esiin tulee seuraava ikkuna. Valikkorivi Työkalurivi Tarrojen ominaisuudet Asettelualue Tulostusalue Piirtotyökalut Objektirivi Tilarivi Ominaisuuksien näyttäminen ☞... -
Page 208: Tekstin Kirjoittaminen
Tekstin kirjoittaminen ☞ Vaikka seuraavassa on kuvattu Windows näkyvät ikkunat, Windows jos ei erikseen muuta mainita. Napsauta piirtotyökalurivin Voit kirjoittaa tekstin ja kohdistin muuttuu (I-palkiksi). Siirrä I-palkki asettelualueella kohtaan, johon haluat kirjoittaa tekstin ja napsauta hiiren ykköspainiketta (vasemmanpuoleinen painike). Kohdistin vilkkuu asettelualueella, ja voit ryhtyä... -
Page 209: Tietojen Siirtäminen Tietokoneelle / Tietokoneelta
Tietokannat Ota huomioon seuraavat seikat, kun käytät P-touch Editor 3.2 -ohjelman tietokantatoimintoja. ☞ Katso lisätietoja CD-ROM-levyllä olevasta P-touch Editor 3.2 –ohjelman käyttöoppaasta. • P-touch Editor 3.2 –ohjelman tietokantatoiminnon tiedostot ovat yhteensopivia Microsoft Access 97 –ohjelman kanssa. Kun päivität P-touch Editor 3.2 – ohjelman CD-ROM-levyllä... -
Page 210: Tietojen Siirto P-Touch-Tarratulostimeen
Tietojen siirto P-touch-tarratulostimeen ! Vaikka P-touch voidaan kytkeä tietokoneeseen USB-liitännällä, P-touch Editor –ohjelmalla luotuja tarroja ei voida tulostaa suoraan sovelluksesta. Varmista, että P-touch on tiedonsiirtotilassa. (Katso lisätietoja kohdasta Tietojen siirtäminen sivulla 49.) • Kun haluat siirtää mallin tai tietokannan P-touchiin, käynnistä P-touch Editor 3.2. ja avaa malli- (ja tietokanta-) tiedosto. -
Page 211: Käyttäjän Määrittämän Kuvan Lisääminen Tekstiin
☞ P-touch-tarratulostimessa voi olla vain yksi tietokanta kerrallaan. Tietokannan voi kuitenkin korvata toisella tai sen voi päivittää. ☞ Kun tiedot siirretään PF-näppäimeen, se korvaa P-touchissa olevan valmiin mallin. Jos haluat palauttaa alkuperäiset mallit, siirrä P-touch Editor -ohjelman kansiosta \etc\Transfer *. pd3-tiedostot Transfer Manager -ohjelmalla P-touchiin. ☞... - Page 212 ☞ P-touch-tarratulostimessa voi olla vain yksi tietokanta kerrallaan. Tietokannan voi kuitenkin korvata toisella tai sen voi päivittää. Malli, jota ei ole linkitetty tietokantaan Mallia, jota ei ole linkitetty tietokantaan, voidaan käyttää samalla tavoin kuin mitä tahansa automaattisen muotoilutoiminnon (Auto Format) valmiita malleja. Katso lisätietoja automaattisesta muotoilusta kohdasta Valmiiden tarramallien käyttö...
-
Page 213: Tietokoneelta Siirretyn Tietokannan Käyttö
☞ Jos Cut (Leikkaa) –toiminnon asetus on 1 tai 3, esiin tulee viesti “CUT TAPE TO CONTINUE” aina, kun tarra on tulostettu. Katkaise tarra painamalla tarraleikkurin painiketta, niin tulostus jatkuu. ☞ Muista katkaista teippi 5 minuutin kuluessa viestin ilmestymisestä. ☞ Katso lisätietoja tarraleikkurin asetuksista kohdasta valinta sivulla 37. - Page 214 Tietokannan käyttö tarratyyppien kanssa Toiminnolla voit valita tulostettavaksi useita tietokannan kenttiä. Paina a ja valitse tarratyyppi kuten luvussa 2 on kuvattu. Paina g ja sen jälkeen a. Esiin tulee viesti “CLEAR TEXT & PRINT DATABASE?”. Paina n. Paina l tai r, kunnes näytössä näkyy RECORD NO. ja määritä haluamasi tietueet.
- Page 215 Tietokannan tietojen haku Kun valitset tietokannan tietoja käytettäväksi mallissa tai kun valitset tietokannan tietoja lisättäväksi tarraan, voit hakea tietokannasta tietueita, joissa on tiettyjä merkkejä tai tiettyjä numeroita. Tiettyjä merkkejä sisältävien tietueiden haku tietokannasta: Paina g ja e, kunnes näytössä näkyy hakuikkuna. Kirjoita merkkijono, jota haet.
-
Page 216: P-Touchin Tietojen Varmuuskopiointi Ja Palautus
☞ Jos haluat valita kaikki tiedostot, napsauta “Select All” (Valitse kaikki). ☞ Jos haluat keskeyttää siirron, napsauta siirron aikana näytössä näkyvästä ikkunasta “Cancel” (Peruuta). ☞ Jos haluat palauttaa tiedot eri PF-näppäimeen, napsauta PC → Printer –välilehdeltä “Change PF Key Mapping” (Vaihda PF-näppäintä) ja valitse mihin PF-näppäimeen haluat lisätä tiedot. -
Page 217: Liite
Liite Vianetsintä Ongelma Näyttö on tyhjä, vaikka laitteeseen on kytketty virta. Laite ei tulosta tai tulostetut merkit ovat epäselviä. Muistiin tallentamasi tekstitiedostot ovat kadonneet. Tulostetut merkit ovat väärän muotoisia. Tulostetussa tarrassa näkyy vaakasuora valkoinen viiva. Tarrat ovat raidallisia. P-touch on “lukossa” (se ei reagoi esimerkiksi näppäinten painalluksiin). -
Page 218: Virheilmoitukset
Virheilmoitukset Virheilmoitus 1 BLOCK LIMIT! 4 DIGITS MINIMUM! 50 LINE LIMIT REACHED! 7 LINE LIMIT! BUFFER EMPTY! BUFFER FULL! CASSETTE CHANGED! Aiheuttaja • Ilmoitus tulee näkyviin, jos yrität käyttää numerointitoimintoa ja useita tekstilohkoja on valittu PANEL-tarratoiminnolla. • Viesti tulee näkyviin, jos viivakoodissa on alle neljä... - Page 219 Virheilmoitus CHECK BATTERIES! CHECK SETTING IN LABEL TYPE MODE! CUTTER ERROR! EXCEEDS PRINT COPY LIMIT! IMAGE CHARACTER SIZE ERROR! INPUT ABCD AT BEGIN & END! INPUT WHOLE CODE! Aiheuttaja • Ilmoitus tulee näkyviin, jos laitteeseen on asennettu sekaisin uusia ja vanhoja paristoja, eri tyyppisiä...
- Page 220 Virheilmoitus LENGTH LIMIT! 18 mm teipillä: LINE LIMIT! 5 LINES MAXIMUM 12 mm teipillä: LINE LIMIT! 3 LINES MAXIMUM 9 mm ja 6 mm teipillä: LINE LIMIT! 2 LINES MAXIMUM MEMORY FULL! NO DATABASE OR INCORRECT FORMAT NO FILES! RECORD NOT FOUND! SET 24mm! SET 18mm!
- Page 221 Virheilmoitus • Ilmoitus tulee näkyviin, jos SET 9mm! • Ilmoitus tulee näkyviin, jos SET 6mm! • Ilmoitus tulee näkyviin, jos TAPE EMPTY! • Ilmoitus tulee näkyviin, jos TEXT TOO HIGH! XX BLOCK • Ilmoitus tulee näkyviin, jos TEXT TOO LONG! •...
-
Page 222: Tekniset Tiedot
Tekniset tiedot Laitteisto Virtalähde: Kuusi AA-alkaliparistoa tai kuusi ladattavaa AA-paristoa Verkkolaite (malli H/H1) Syöttölaite: Näppäimistö (56 näppäintä) 48 × 132 pistettä Nestekidenäyttö: + Caps ja muita ilmaisimia Tulostusteippi: TZ-teippiä on saatavana 5 eri leveyttä: Kirjoituspää: 18,1 mm (korkeus)/180 dpi (tarkkuus) Tarraleikkuri: Manuaalinen Mitat:... -
Page 223: Tarvikkeet
Tarvikkeet ● Varusteet Voit ostaa teippikasetteja lähimmältä valtuutetulta jälleenmyyjältä. Käytä laitteessa vain Brother TZ -tarrateippiä. Brother ei vastaa vahingoista, joita muiden kuin alkuperäisten tarvikkeiden käyttö voi aiheuttaa. Älä käytä teippejä, jossa ei ole Tuote 24 mm:n laminoidut teipit TZ-151 Musta teksti läpinäkyvällä pohjalla TZ-M51 Musta teksti läpinäkyvällä... - Page 224 Tuote TZ-344 Kullanvärinen teksti mustalla pohjalla TZ-145 Valkoinen teksti läpinäkyvällä pohjalla TZ-345 Valkoinen teksti mustalla pohjalla TZ-441 Musta teksti punaisella pohjalla TZ-541 Musta teksti sinisellä pohjalla TZ-641 Musta teksti keltaisella pohjalla TZ-741 Musta teksti vihreällä pohjalla 12 mm:n laminoidut teipit TZ-131 Musta teksti läpinäkyvällä...
- Page 225 Tuote TZ-222 Punainen teksti valkoisella pohjalla TZ-223 Sininen teksti valkoisella pohjalla TZ-324 Kullanvärinen teksti mustalla pohjalla TZ-325 Valkoinen teksti mustalla pohjalla TZ-421 Musta teksti punaisella pohjalla TZ-521 Musta teksti sinisellä pohjalla TZ-621 Musta teksti keltaisella pohjalla TZ-721 Musta teksti vihreällä pohjalla TZ-A25 Musta teksti harmaalla pohjalla TZ-M21...
- Page 226 Tuote 9 mm:n laminoimattomat teipit TZ-N221 Musta teksti valkoisella pohjalla 6 mm:n laminoimattomat teipit TZ-N211 Musta teksti valkoisella pohjalla Vahvat tarrateipit Tuote TZ-S241 18 mm vahva tarrateippi (musta teksti valkoisella pohjalla) TZ-S231 12 mm vahva tarrateippi (musta teksti valkoisella pohjalla) TZ-S221 9 mm vahva tarrateippi (musta teksti valkoisella pohjalla) TZ-S211...
- Page 227 Erikoisteipit Tuote TZ-CL4 Kirjoituspään puhdistuskasetti TZ-IY41 18 mm silitettävä siirtokuvateippi TZ-SE4 18 mm turvateippi TZ-FA3 12 mm kangasteippi TZ-FX251 24 mm joustava ID teippi (musta teksti valkoisella pohjalla) TZ-FX241 18 mm joustava ID teippi (musta teksti valkoisella pohjalla) TZ-FX231 12 mm joustava ID teippi (musta teksti valkoisella pohjalla) TZ-FX221 9 mm joustava ID teippi (musta teksti valkoisella pohjalla) TZ-FX211...
-
Page 228: Hakemisto
Hakemisto ääriviiva ... 27 ilmaisin ... 2 Aksenttitoiminto ... 17 asennus P-touch Editor... 41 tulostinohjain ... 43 Asetusnäppäin... 37 Automaattinen muotoilu... 29 Automaattinen pienennys (Auto Reduction) ... 38 Backup Manager ... 56 esikatselu ... 30 haku... 36, 55 ilmaisimet ... 2 ääriviiva ... - Page 229 leveys ... 26 ilmaisin ... 2 lihavoitu... 27 ilmaisin ... 2 Lipputarra... 11 lohko... 33 lukossa ... 57 mallit Automaattinen muotoilu... 29 P-touch Editor... 51 merkki koko ... 25 leveys ... 26 tyyli ... 27 Muistinäppäin ... 35 muotoilu ... 25, 26, 27 Muotoilunäppäin...
- Page 230 Tarratyypit... 9 tietokannat ... 54 tarrojen reunukset ... 23 tasaus ... 28 Teipinsyöttönäppäin... 2, 30 teippi kasetit... 4 leikkuri ... 7 teksti koko ... 25 koon säätö... 38 leveyden säätö... 38 leveys ... 26 tasaus ... 28 tyyli ... 27 tekstilohkon numero...